-
Install and open QGis
Click here to download and choose the option relevant to your operating system.
-
Open the Digital Connector output in QGis by following these steps:
-
Click on Layer -> Add Layer -> Add Vector Layer -> Browse (Choose the output file) -> Open
Now your screen should look something like this.

-
Change the Projection to the British National Grid by clicking the button next to Render at the bottom of QGIS.

In the Filter box type 27700 and choose British National Grid.

Click OK, and now your screen should look something like this.

-
On left side under Layers Panel, Right Click on your filename layer which in this tutorial is “qgis_tutorial OGRGeoJSON Polygon” and choose Properties. This page will allow you to style the map.

Change the default settings as described:
From top where it says “Single Symbol” choose “Categorized”. In Column choose “BicycleFraction”. In Color ramp choose “Blues” and then click on “Classify” Button and on the pop up click “OK” and now your window should look something like this.

Click OK and Now your map should look something like this.

-
To add the background map layer click on Plugins -> Manage and Install Plugins

Plugin windows should appear. In case option “All” is not click and select it. Search for QuickMapServices and then click on Install Plugin. Once the plugin is installed click Close.

Now you should have “Globe” like icon on your toolbar. Click the Globe with + and Choose OSM -> OSM Standard.

Now your map should look like this.

-
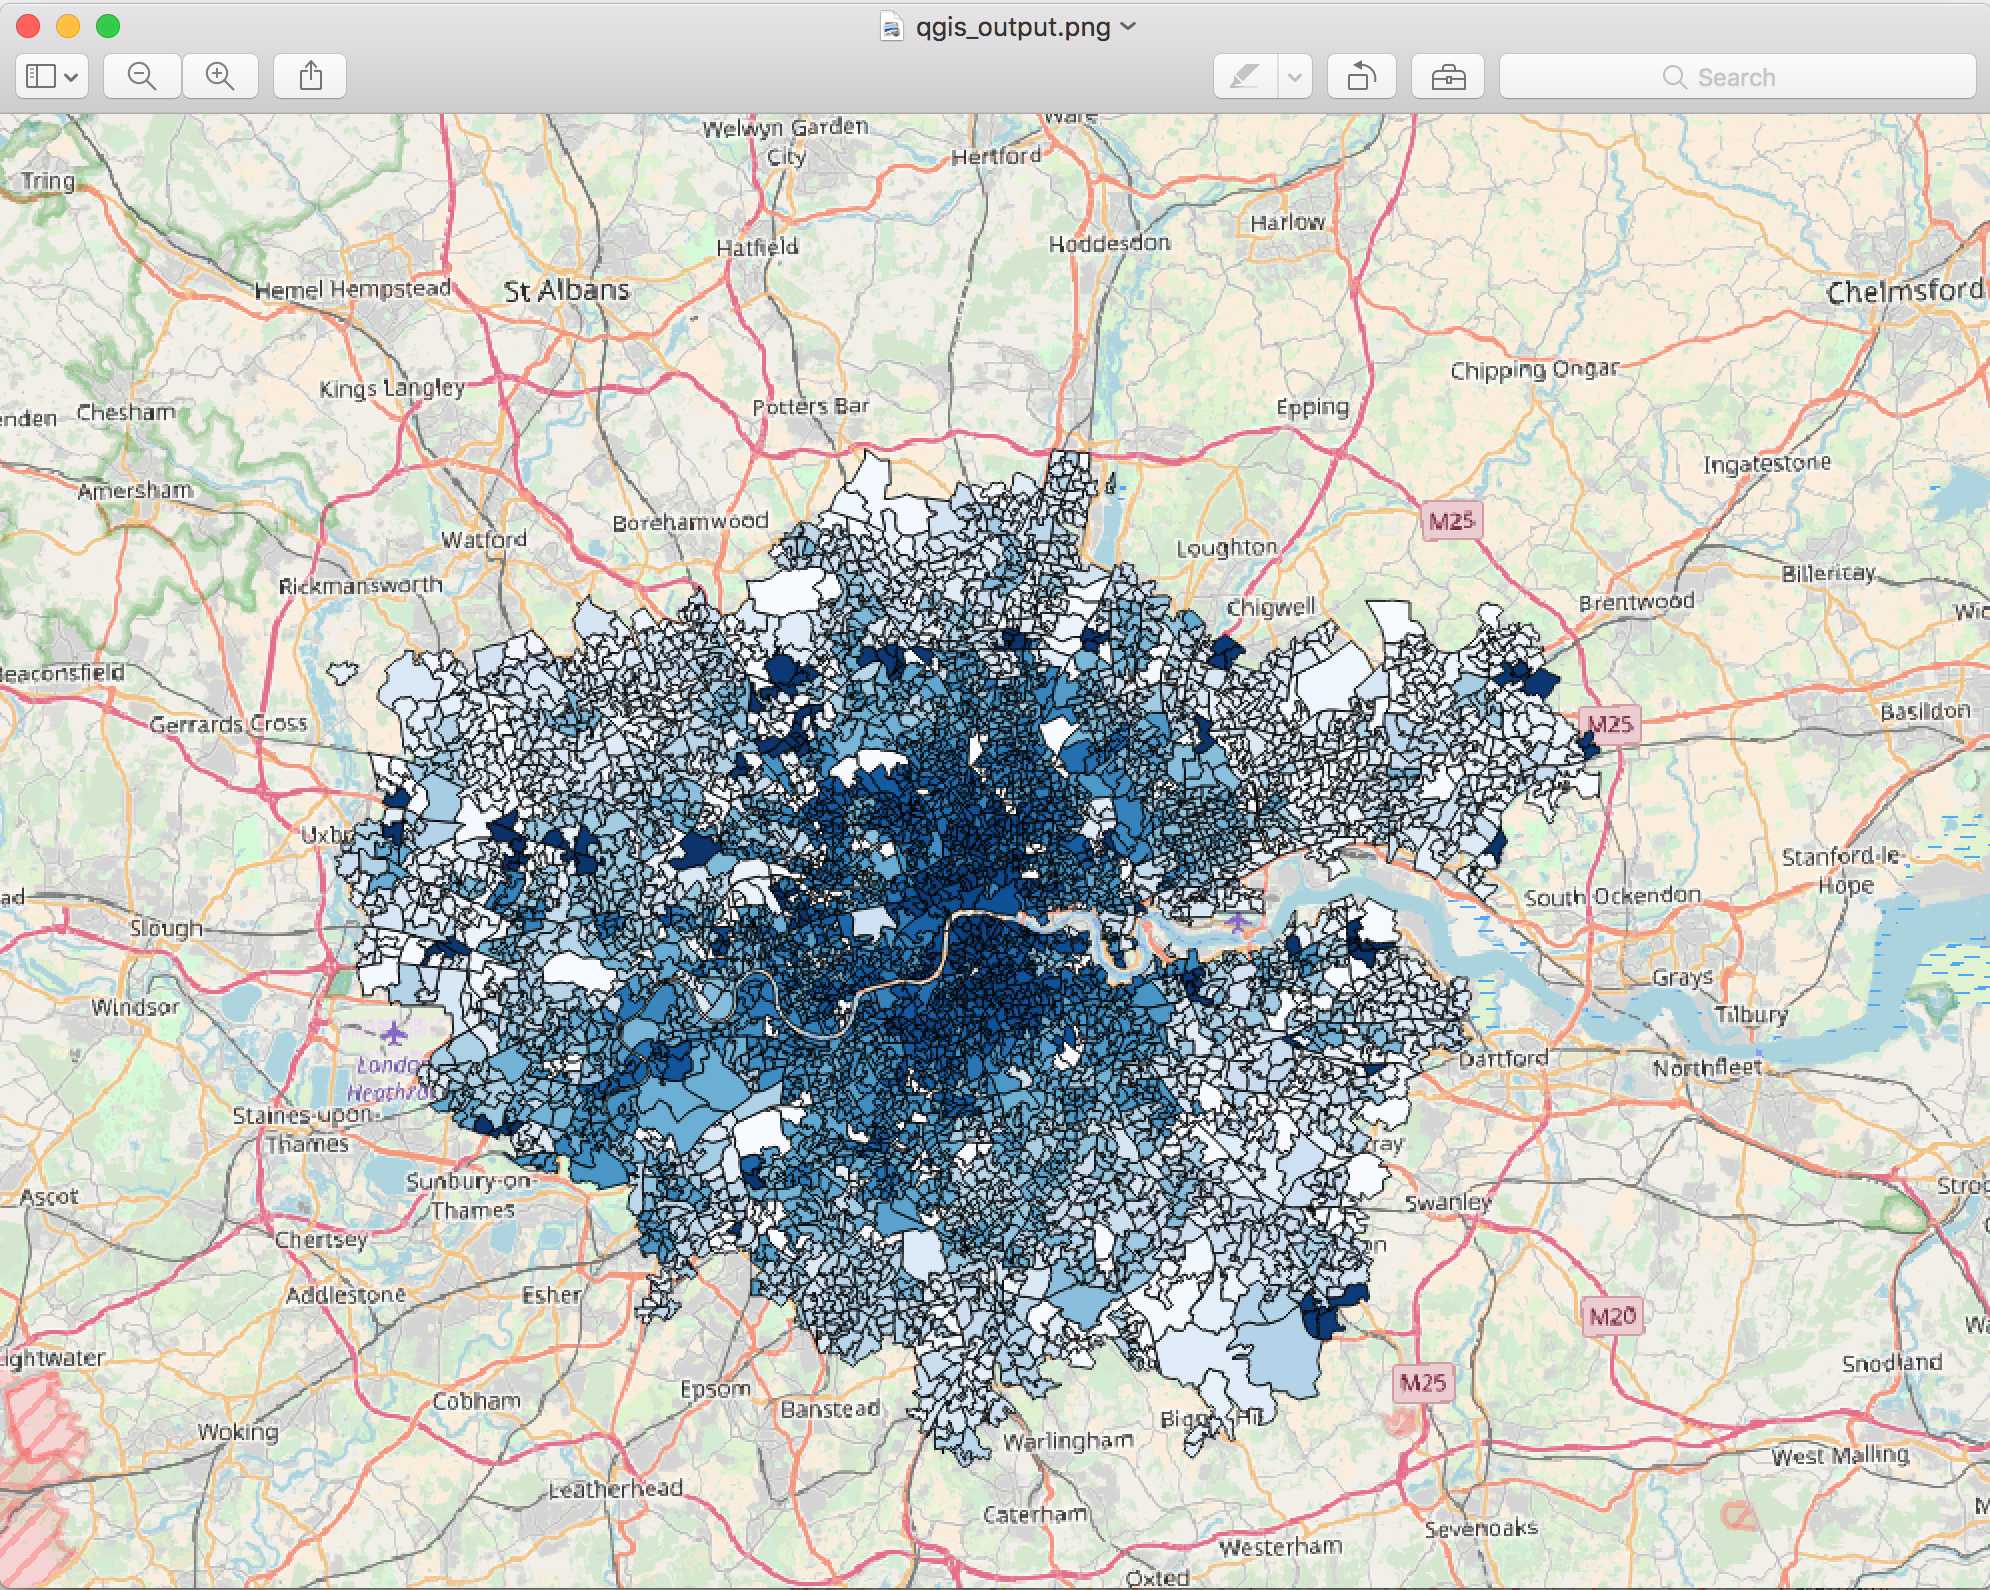
Now to save as an image Go to Project -> Save as Image. Give it a name of your choice and save it in your preferred directory. The file you just saved should look like this.
-