As engineers, we want to have a codebase we can change, extend, and refactor as required. Tests ensure our program works as intended and that changes to the codebase do not break existing functionality.
In this article, we'll look into testing Web Components with Karma, Mocha & Chai.
-
Karma is essentially a tool which spawns a web server that executes source code against test code for each of the browsers connected. The results of each test against each browser are examined and displayed via the command line to the developer such that they can see which browsers and tests passed or failed.
-
Mocha is a feature-rich javascript testing framework running on Node.js and in the browser, making asynchronous testing simple and fun. Mocha tests run serially, allowing for flexible and accurate reporting while mapping uncaught exceptions to the correct test cases.
-
Chai is a BDD / TDD assertion library that can be delightfully paired with any javascript testing framework. Assertion libraries are tools to verify that things are correct. This makes it a lot easier to test your code, so you don't have to write if statements.
I have created a project using Open-WC and written a simple web component MyElement.js.
//MyElement.js
import { LitElement, html, css } from 'lit-element';

export class MyElement extends LitElement {
  static get properties() {
    return {
      title: { type: String },
    };
  }

  constructor() {
    super();
    this.title = '';
  }
}

customElements.define('my-element', MyElement);
Download the starter code so everyone can have the same starting point to test web components.
Install the required devDependencies:
npm i @open-wc/testing --save-dev
npm i @open-wc/testing-karma deepmerge karma --save-dev
npm i mocha chai --save-dev
npm i karma-mocha karma-chai --save-dev
By default, Mocha looks for the test folder so create one & it will contain a file say MyElement.test.js where the tests have to be written. Let's start by writing some tests:
-
a test to check if
<my-element>is an instance ofMyElementor not. -
a test to check if
<my-element>has by default an empty string as title.
//MyElement.test.js
import {MyElement} from '../src/MyElement';
import {fixture, html, expect} from '@open-wc/testing';

describe('My Element', () => {

    it('<my-element> is an instance of MyElement', async () => {
        const element = document.createElement('my-element');
        assert.instanceOf(element, MyElement);
    });

    it('has by default an empty string as title', async () => {
        const el = await fixture(html`<my-element></my-element>`);
        assert.equal(el.title, '');
    });

});
Let's walk through the above code. At the top, we have imported our MyElement.js file. Then, we have describe & it functions of Mocha to create the test.
describeis simply a way to group our tests. We can nest our tests in groups as deep as we deem necessary. It takes two arguments, the first is the name of the test group, and the second is a callback function.
describe('string name', function(){
  // can nest more describe()'s here, or tests go here
});
itis used for an individual test case. It takes two arguments, a string explaining what the test should do, and a callback function which contains our actual test.
it('should blah blah blah', function(){
  // Test case goes here
});
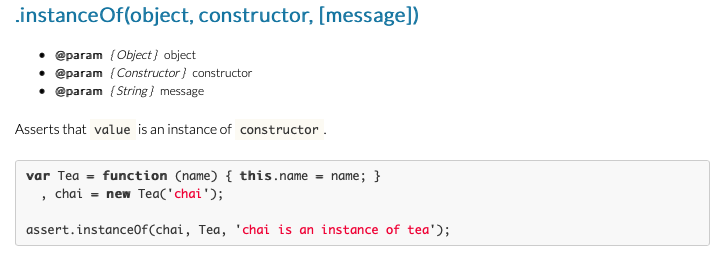
Now, to write the actual test case we are using Chai's assert module. There are a number of different assertion tests included with assert. In the above tests, we have used assert.instanceOf() & assert.equal().
Karma executes tests in real and headless browsers. In order to serve us well, it needs to know about our project in order to test it and this is done via a configuration file. Let's create a karma.conf.js file:
const {createDefaultConfig} = require('@open-wc/testing-karma');
const merge = require('deepmerge');

module.exports = config => {
    config.set(
        merge(createDefaultConfig(config), {
            frameworks: ['mocha', 'chai'],
            client: {
                mocha: {ui: 'bdd'}
            },
            files: [
                {
                    pattern: config.grep ? config.grep : 'test/**/*.test.js',
                    type: 'module'
                },
            ],
            esm: {
                // if you are using 'bare module imports' you will need this option
                nodeResolve: true,
            },
        }),
    );
    return config;
}
Within the configuration file, the configuration code is put together by setting module.exports to point to a function which accepts one argument: the configuration object. Karma also needs to know which testing framework is being used like Jasmine, Mocha, etc. Using frameworks configuration option, we tell Karma we're using Mocha & Chai to write the tests. Then, we have files configuration option which uses the minimatch library to facilitate flexible but concise file expressions so you can easily list all of the files you want to include and exclude. For example in the above code, test/**/*.test.js will include all files with a ".test.js" extension in the test folder.
We also need to write the test command in our package.json file in order to use npm test:
"scripts": {
    "start": "web-dev-server",
    "test": "karma start karma.conf.js"
  },
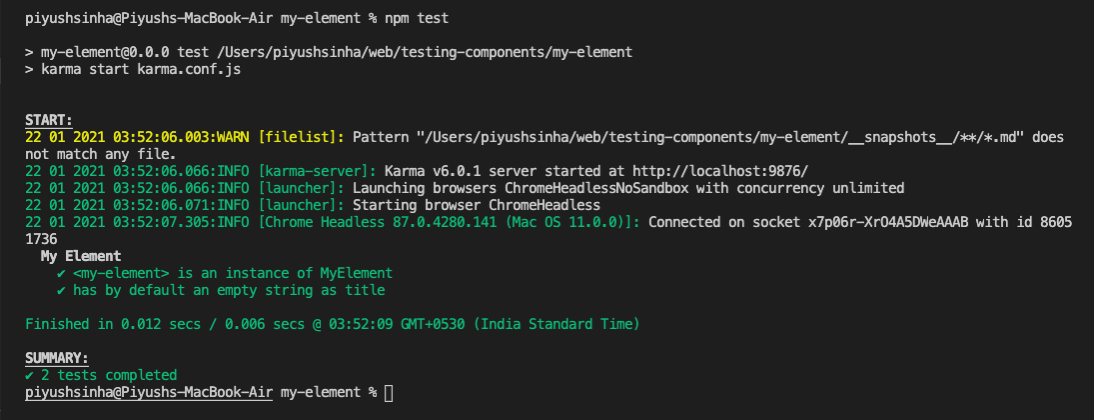
Let's see if everything works correctly by running npm test:
It worked!
Our test environment is now set up. Go ahead & add lots of tests for your front-end code. Karma, Mocha & Chai have lots of functionalities. In this article, we just scratched the surface. Be sure to read the documentation to explore the possibilities.


