How to & Screenshots

| Name | Location | Description |
|---|---|---|
| Home Button |  |
Returns to the initial zoom |
| Back Button |  |
Returns to the previous zoom |
| Forward Button |  |
Returns to the next zoom |
| Pan Tool |  |
Left-click and drag pans the pattern/Right-click and drag zooms the pattern |
| Zoom Tool |  |
Left-click and drag makes zoom-in box/Right-click and drag makes zoom-out box |
| Configure subplots Button |  |
Adjust the space on the outside of the figure axes Button |
| Save |  |
Saves the figure(.pdf(vector) and .png(raster) work well, .emf doesn't work) |
| Name | Location | Description |
|---|---|---|
| Mark Rings Tool |  |
Click 3-ponts on a ring to measure the d-spacing and mark the center |
| Mark Spots Tool |  |
Click 2-points to measure the distance in d-space |
| Profile Button |  |
Opens the profile screen with the calculated pattern profile |
| Undo Button |  |
Removes marks made on the figure one by one |
| Location | Description |
|---|---|
| Pattern -> Open | Opens a diffraction pattern image or .dm3 file |
| Pattern -> Exit | Exits the program and closes all profile and ring figure windows |
| Edit -> Undo | Removes marks made on the figure one by one |
| Edit -> Preferences | Used to set the Accelerating Voltage, Camera length and Resolution of the pattern |
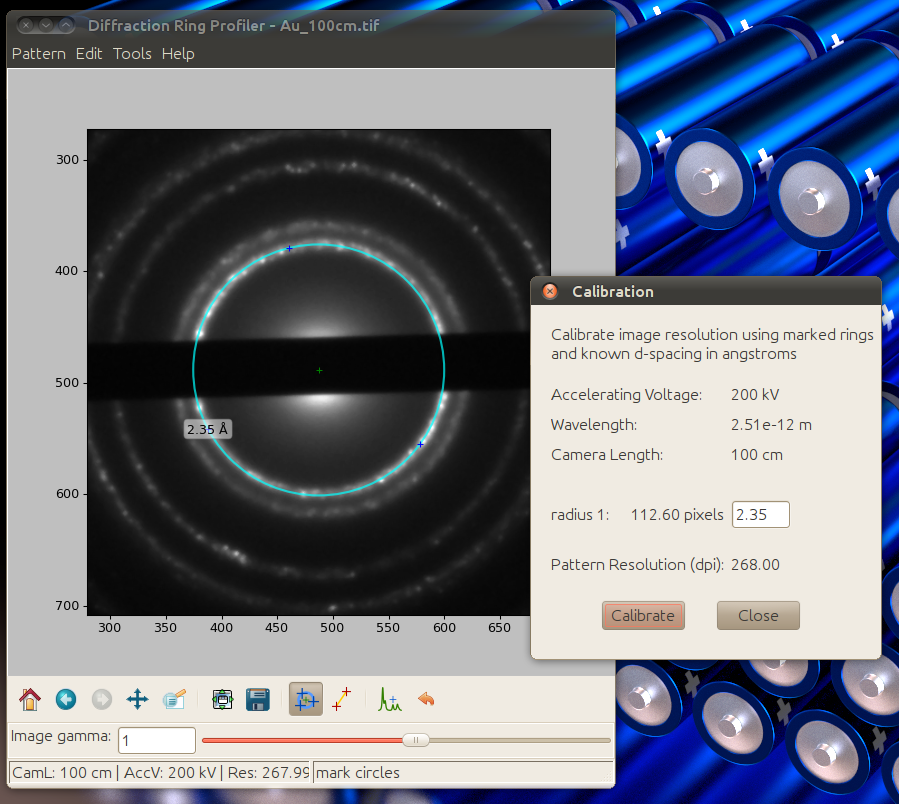
| Tools -> Calibrate | Calculation the resolution of the pattern by comparing up to 4 marked ring with know d-spacings. The default d-spacings are for Au. |
| Tools -> Profile | Opens the profile screen with the calculated pattern profile |
| Help -> About | Show the About box |
Open a TEM ring pattern using Pattern -> Open. Almost any image file or .dm3 file is compatible. Use the Zoom tool to make the rings larger:

Use the Mark Rings tool and click 3 points on a ring to mark it. You must mark at least one ring to make a profile or calibrate your detector. The gamma slider at the bottom can help when marking dim rings:

Set your accelerating voltage, camera length and resolution of your TEM in the Edit -> Preferences dialogue. If you don't know your resolution of your detector, Mark a few rings and open the Tools -> Calibration dialogue. Input the known d-spacings(the defaults are for gold) for the rings you marked and click calibrate and then close the dialogue:
Click the Profile button or select Tools -> Profile to get the profile of the ring pattern in the Profile Screen:

| Name | Location | Description |
|---|---|---|
| Label Peaks Tool | |
Click on a peak to mark and measure the maxima |
| Clear Profiles Button | |
Clears the profile visualizations and peak labels |
| Undo Button | |
Goes back to the previous profile |
| Location | Description |
|---|---|
| Profile -> Import Crystal File(CIF) | Uses cctbx to open a .cif file and simulate the peaks and profile of the crystal diffraction |
| Profile -> Import GDIS Simulation | Overlays a GDIS powder diffraction simulation with a wavelength of 0.5 and U,V,W set to 0. This makes shows peak centers and intensities |
| Profile -> Import GDIS Profile Sim | Overlays a GDIS powder diffraction simulation with a wavelength of 0.5, U,V,W set to 0.8 and pseudo-viogt mixing to 0.8. This makes shows a profile simulation that has broadening. |
| Edit -> Undo Profile | Goes back to the previous profile |
| Edit -> Simulation Labels | A dialogue that allows the peaks to be labeled with hkl indexes. It also set the colour as well as the legend label and relative intensity. You can have up to 3 peak simulations |
| Edit -> Profile Preferences | A dialogue to change the scatting vector limit(x-max) and Polar Pattern background image preferences |
| Edit -> Clear Profiles | Clears the profile visualizations and peak labels |
| Edit -> Remove Simulation | Removes the last peak simulation |
| Tools -> Background Subtract | Fits a 3-points point power law to the main beam falloff by selecting 3-point that lie on the falloff. The fit curve is then subtracted from the profile. The background subtraction is lost when subsequently performing a polar pattern or recenter |
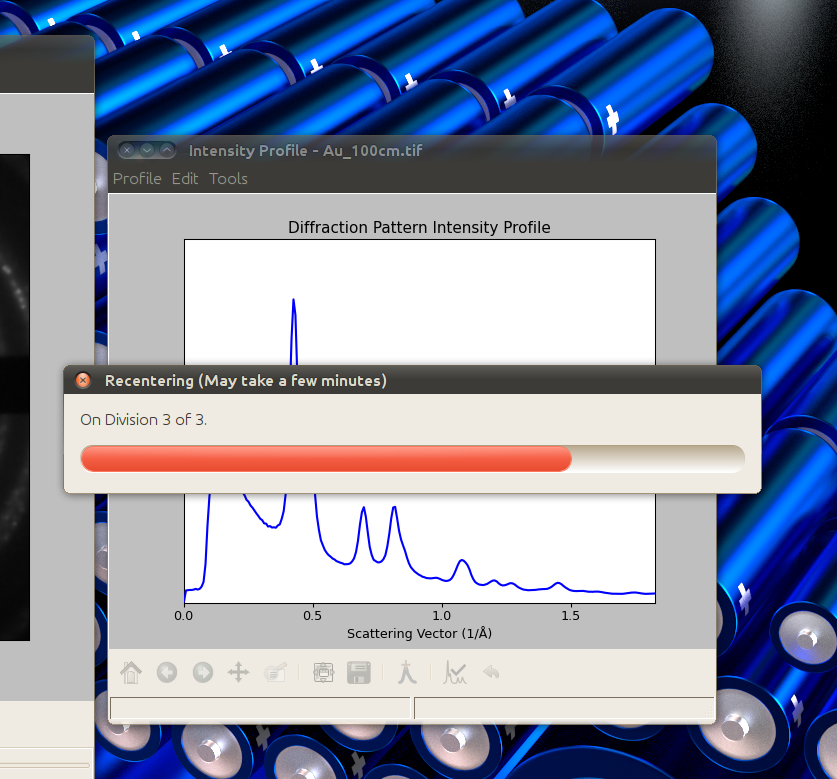
| Tools -> Recenter(Sharpen Peaks) | This tool to refines the center of the ring pattern by finding the center where the peak at your first marked ring(on the main screen) is the sharpest. Polar pattern must be redone after re-centering the pattern. |
| Tools -> Polar Pattern | Makes an interpolated polar transformed image of the ring pattern resulting in straight vertical lines. A new profile is made based on the average of that image. |
| Tools -> Beam Stop Correction | Implements polar pattern profile that has outliers removed. This is designed to remove the affect of the beam stop on the intensity |
| Tools -> Remove Spots | Implements polar pattern with the median instead of the mean. This removes single crystal peaks from the profile. |
| Tools -> Make Ring Figure | Open the ring figure screen. |
Use the Tools -> Recenter(Sharpen Peaks) tool to refine the center of the rings by finding the center where the peak at your first marked ring is the sharpest:
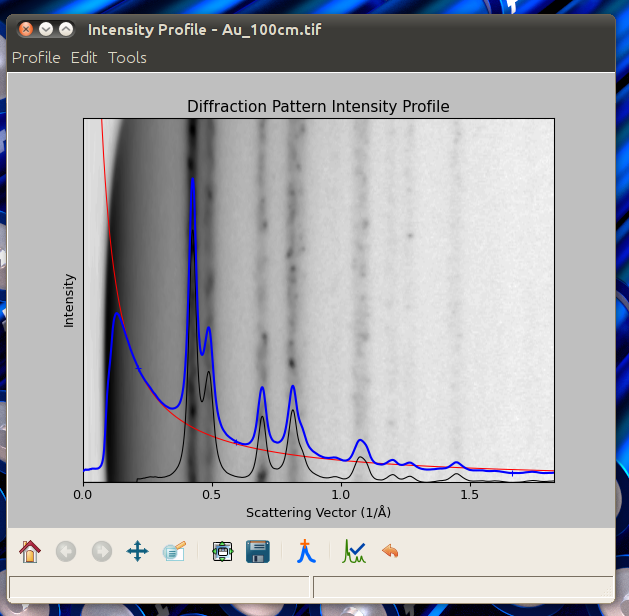
Use the visualization to confirm the result(the thick black line is the sharpest) and then clear the visualization by clicking the Clear Profiles button:

Use Tools -> Polar Pattern to make a linearized ring pattern and an interpolated profile(use clear profiles to remove previous profiles):

Select Tools -> Background Subtract and click 5-points on the main beam falloff (try picking three points near the beam and 2 on the tail) to fit a curve and subtract it from the profile(use clear profiles to remove previous profiles):
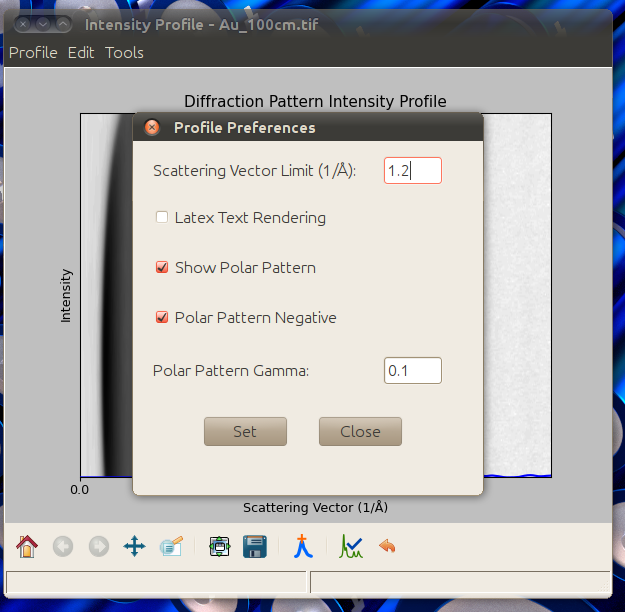
Open the Profile Preferences dialogue by selecting Edit -> Profiles Preferences. Set the Scattering Vector Limit to 1.2 to change the x scale maximum of the graph (latex rendering only from source):
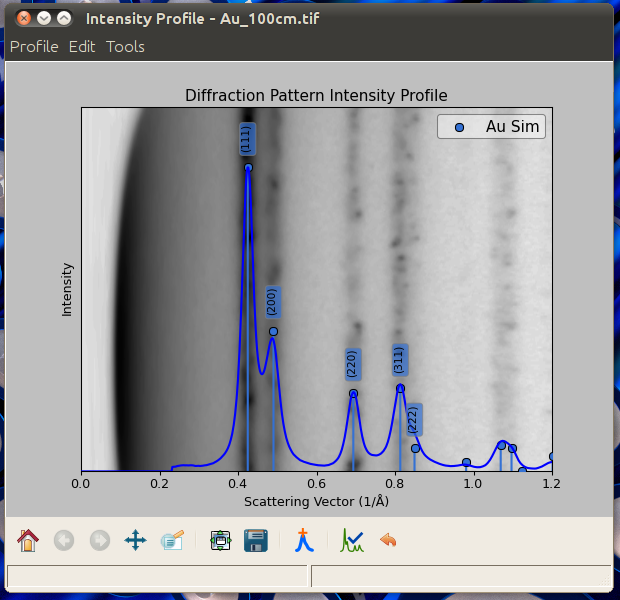
Open the included GDIS peak simulation au_peak.txt by selecting Profile -> Open GDIS Simulation. The GDIS must be set to electron and wavelength of 0.5 without peak broadening:

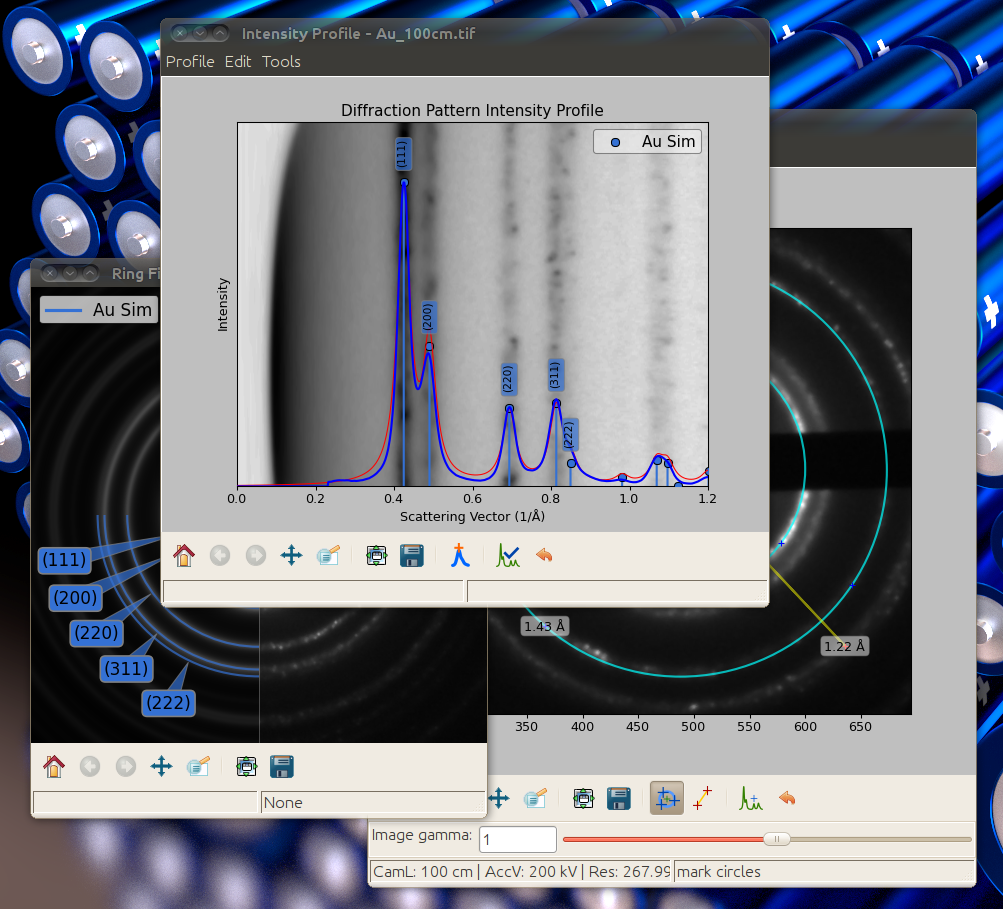
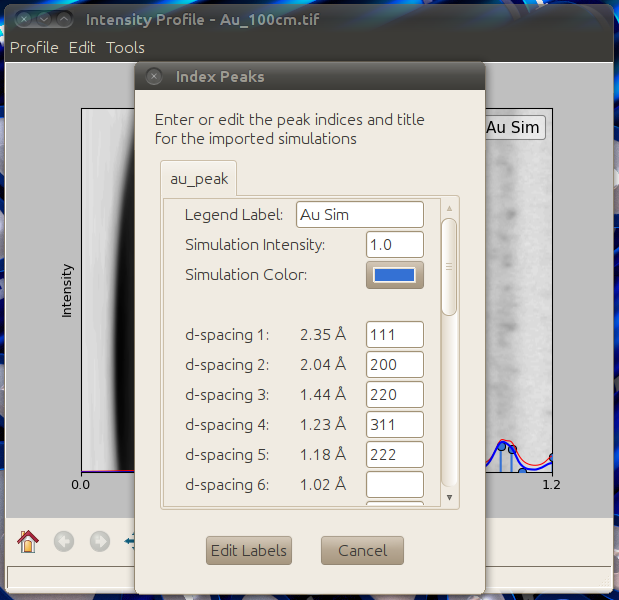
Open the Simulation Label dialogue by selecting Edit -> Simulation Label. You can have up to 3 peak simulations.
The labels are displayed on the simulations:
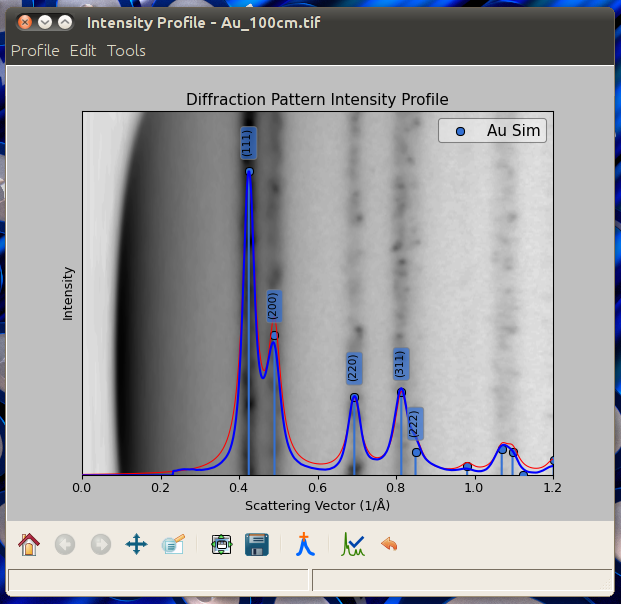
Open the included GDIS profile simulation au_pro.txt by selecting Profile -> Open GDIS Profile Sim. The GDIS must be set to electron and wavelength of 0.5 with peak broadening around 0.6:
Make a Ring Figure with Tools -> Make a Ring Figure. If you subtracted you background from your profile, the background will be subtracted from your original pattern. Drag the labels to reposition: