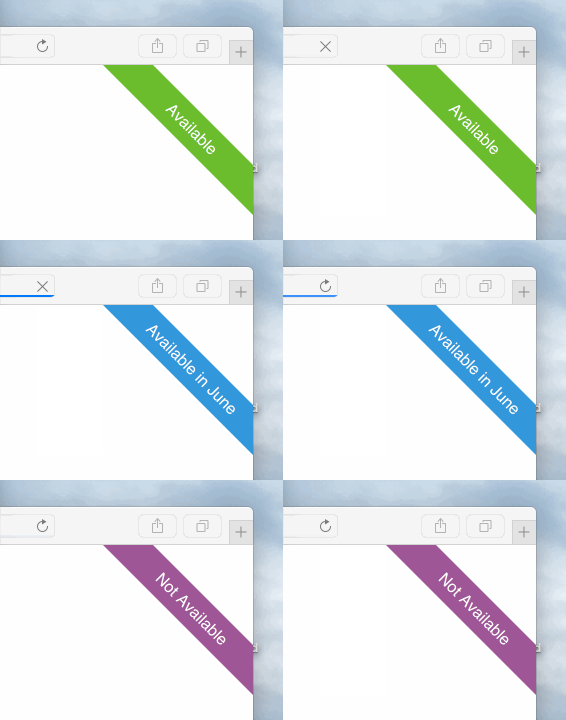
The Availability Badge allows Cushion users to display their availability on their own website. The badge is tied directly to the availability data in Cushion, so it will automatically update when the user’s status changes.
Include the following code in your HTML, and replace $YOUR_USER_ID with your user ID, which can be found in the Availability Badge’s add-on page.
<link href="//static.cushionapp.com/availability.css" rel="stylesheet">
<script src="//static.cushionapp.com/availability.js" data-user="$YOUR_USER_ID"></script>Include the same code from the ribbon example above, but add an data-availability-badge attribute to the element you’d like the badge to be displayed within.
<link href="//static.cushionapp.com/availability.css" rel="stylesheet">
<script src="//static.cushionapp.com/availability.js" data-user="$YOUR_USER_ID"></script>

<p>I'm currently <span data-availability-badge></span>.</p>The appearance of both the badge and ribbon can be modified using CSS. Simply include your CSS after the code that loads the Availability Badge stylesheet and use availability.css as a reference for class names:
<style>
  .availability-ribbon__text {
    font-weight: bold;
  }

  .availability-ribbon.unavailable .availability-ribbon__banner {
    fill: red;
  }
</style>If CSS is too limiting, you can also define your own function to assemble custom HTML, draw with canvas, or even play a silly video.
To start, include only the Availability Badge’s JavaScript file in your HTML:
<script src="//static.cushionapp.com/availability.js"></script>Then, use the Availabilty.custom function to define your user ID and render function:
Availability.custom({ user: '$YOUR_USER_ID', render: function() {} })Inside the render function, this is bound to an Availabilty object. The function should handle all logic on its own, and no return value is required.
Note: To make sure everything has loaded before executing your code, place it before the closing
</body>tag, or within aDOMContentLoadedlistener ($(document).readyin jQuery).
Here’s an example of a simple GIF badge:
function renderGIF () {
  var img = document.querySelector('.image')
  if (this.isAvailable())   img.src = 'http://i.giphy.com/urhcoANPxB3K8.gif'
  if (this.isUnavailable()) img.src = 'http://i.giphy.com/O4caHIyGGVTW.gif'
  if (this.isSoon())        img.src = 'http://i.giphy.com/ErLimaUL0blbW.gif'
}

Availability.custom({ user: '$YOUR_USER_ID', render: renderGIF })The Availability object is bound to this within a render function and has the following attributes:
this.availability: A string with a value ofavailable,soon,unavailableorprivatethis.date: A date object, or null if the above isunavailableorprivatethis.hours: A number ≥ 0, representing the number of hours of availabilitythis.user: Basic user info, includingnickname,color, andreferral_code
There are also some helper functions:
Returns the month name of this.date.
Returns the month name of this.date shortened to 3–5 characters.
Returns users referral link.
Takes an options hash and display's a badge.
options.user: A user IDoptions.container: An element to appended the badge toooptions.href: Optional, if set the badge will link to this url, defaults to your referral url (to unset usenull)
Takes an options hash and display's a ribbon.
options.user: A user IDoptions.container: Optional, an element to appended the ribbon too,document.bodyby defaultoptions.href: Optional, if set the badge will link to this url, defaults to your referral url (to unset usenull)
Takes an options hash and runs the given render function.
options.user: A user IDoptions.render: A render function
Availability data is heavily cached, so if your availability changes, the badge will reflect the change within an hour.


