This template provisions a single VM and Azure Databricks workspace, installation of Kafka service is a manual step. Major components to deploy include:
- 1 Vnet with 3 subnets (2 for Databricks, 1 for Kafka VM)
- 1 Azure VM (to host Kafka and Zookeeper services), with port 9092 exposed to other devices in same VNet (allowed by default NSG rules).
- 1 VNet injected Azure Databricks Workspace
- NSGs for Databricks and Kafka subnets
.
├── main.tf
├── outputs.tf
├── data.tf
├── providers.tf
├── variables.tf
├── vnet.tf
├── workspace.tf
├── terraform.tfvars
├── images
├── modules
    ├── general_vm
        ├── main.tf
        ├── outputs.tf
        ├── providers.tf
        ├── variables.tf
terraform.tfvars is provided as reference variable values, you should change it based on your need.
Step 1: Preparation
Clone this repo to your local, and run az login to interactively login thus get authenticated with azurerm provider.
Step 2: Deploy resources
Change the terraform.tfvars to your need (you can also leave as default values as a random string will be generated in prefix), then run:
terraform init
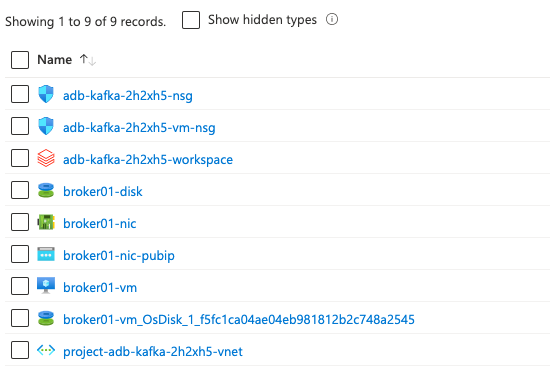
terraform applyThis will deploy all resources wrapped in a new resource group to your the default subscription of your az login profile; you will see the public ip address of the VM after the deployment is done. After deployment, you will get below resources:
Step 3: Configure your VM to run Kafka and Zookeeper services
At this moment, you have a vanilla VM without any bootstraping performed. We are to manually log into the VM and install Kafka and Zookeeper services.
The VM's private key has been generated for you in local folder; replace the public ip accordingly. SSH into VM by (azureuser is the hardcoded username for VMs in this template):
ssh -i <private_key_local_path> azureuser@<public_ip>Now you should follow this guide from DigitalOcean to install Kafka on the VM. Note that a few commands need to be updated:
- When downloading the kafka binary, go to https://kafka.apache.org/downloads.html and copy the latest binary link and replace it here:
curl "https://downloads.apache.org/kafka/3.3.2/kafka_2.12-3.3.2.tgz" -o ~/Downloads/kafka.tgz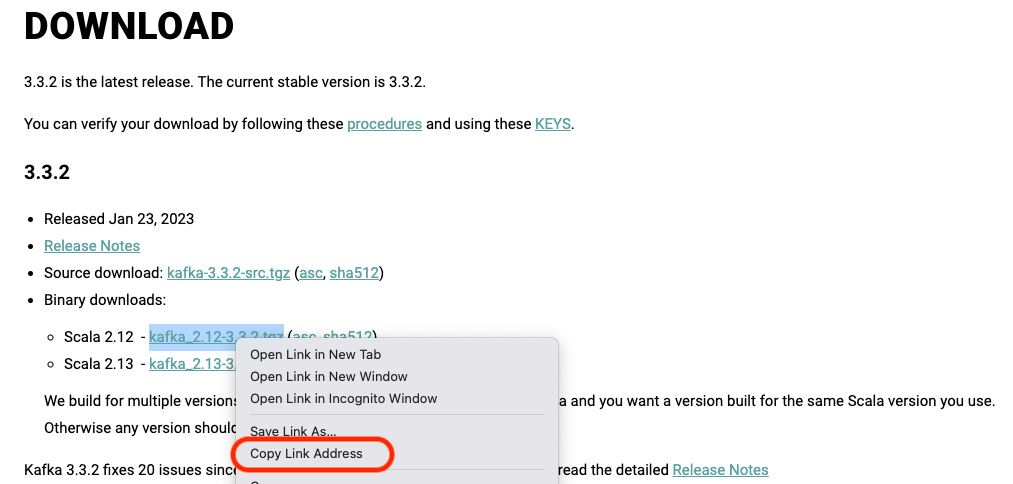
- When testing your Kafka installation, --zookeeper is deprecated, use --bootstrap-server instead:
~/kafka/bin/kafka-topics.sh --create --bootstrap-server localhost:9092 --replication-factor 1 --partitions 1 --topic TutorialTopicAt the end of the guide, you should have a running Kafka service on your VM. You can test it by running the following command:
sudo systemctl status kafka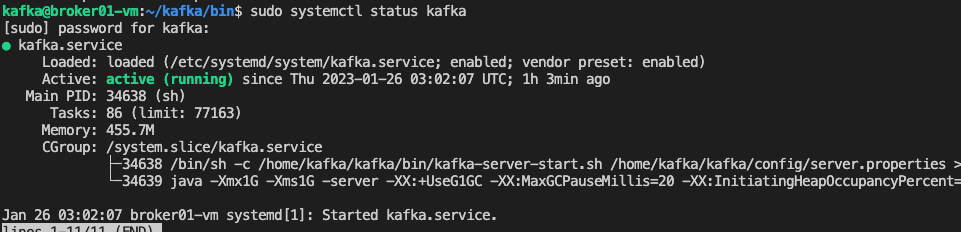
Step 4: Integration with Azure Databricks
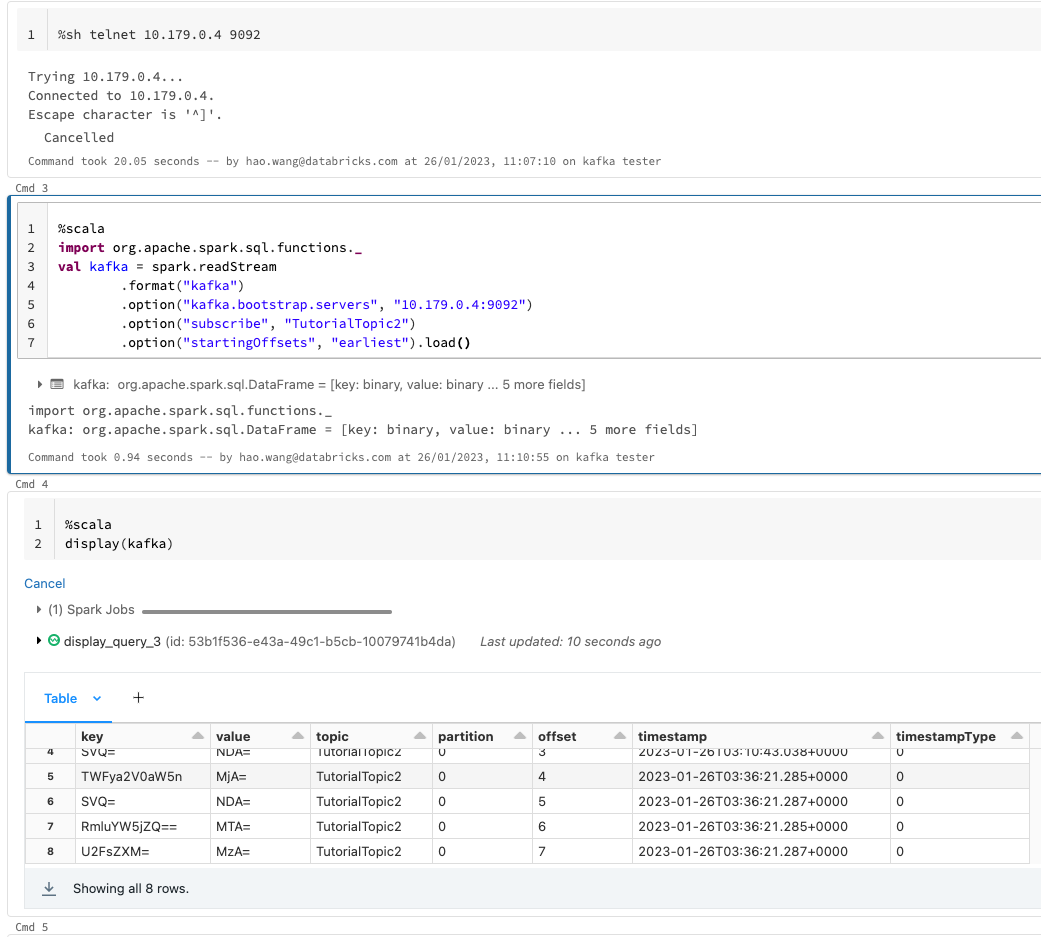
Now your Kafka Broker is running; let's connect to it in Databricks.
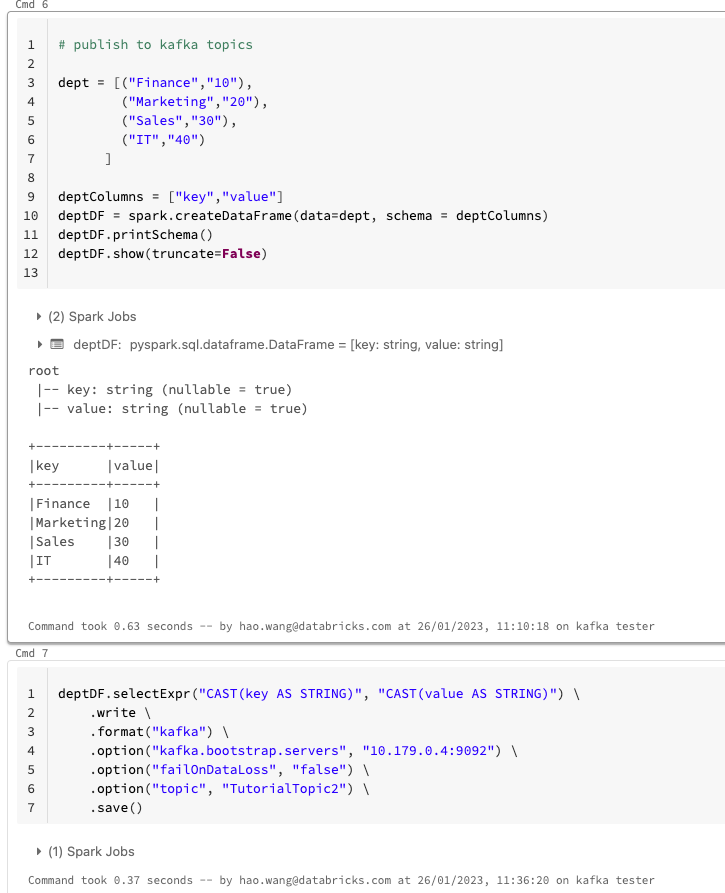
We first create a topic TutorialTopic2 in Kafka via your VM's Command Line:
~/kafka/bin/kafka-topics.sh --create --bootstrap-server localhost:9092 --replication-factor 1 --partitions 1 --topic TutorialTopic2Then we can write from Spark DataFrame to this topic; you can also test the connection by telnet vm-private-ip 9092 first.
Read from this topic in another stream job: