In this tutorial, we'll be using the Johnny-Five Javascript Robotics Programming Framework and Ardunio Lilypad. You can use other hardware.
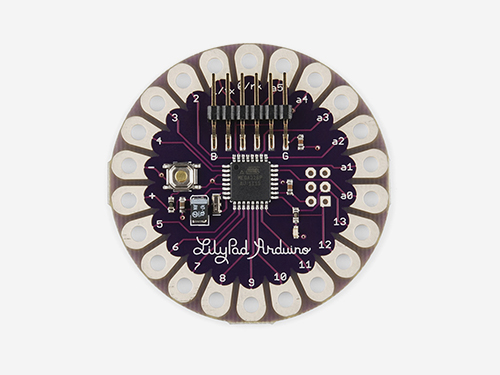
- Arduino Lilypad ATmega168
- Conductive threads
- LED lights
- USB cable
Using a needle conductive thread, sew through the LED lights with their corresponding pin as noted on the microcontroller. Keep track of where the pins are located for future reference.
Make sure that the threads don't touch each other.
You can also sew in other components and sensors as offered by the Arduino Lilypad.
Download the Arduino IDE online. Follow the instructions listed on Node-ARDX to set up NodeJS, NPM, and any other requirements.
Connect the Lilypad Arduino via USB. The settings that I have within the IDE are:
- Board: Lilypad Arduino USB
- Port: The port should reference a USB. If not, make sure that it's being recognized.
- Programmer: AVR ISP
The Programmer settings may differ for you. The Arduino IDE recognized another board ('Lilypad Arduino') as a default which prompted a avrdude stk500_getsync() not in sync resp=0x30 error message.
Make sure to install Johnny-Five
npm install johnny-five
You can then try running one of the code examples located within node-/ardx/code/
node code/CIRC01-code-led-b-pulse.js
And that is how you can get started! Have a look at the other folders for further examples.
I am looking into using another Arduino board with a wifi/GSM shield and implementing more interactivity.