Pioneer DDJ 200
- Manufacturer's Product Page
- Manufacturer's User Manual
- Manufacturer's Firmware Update
- Midi Mappings
- Hardware Diagram
- Mapping Git Fork
- Simple Mapping Git Repository
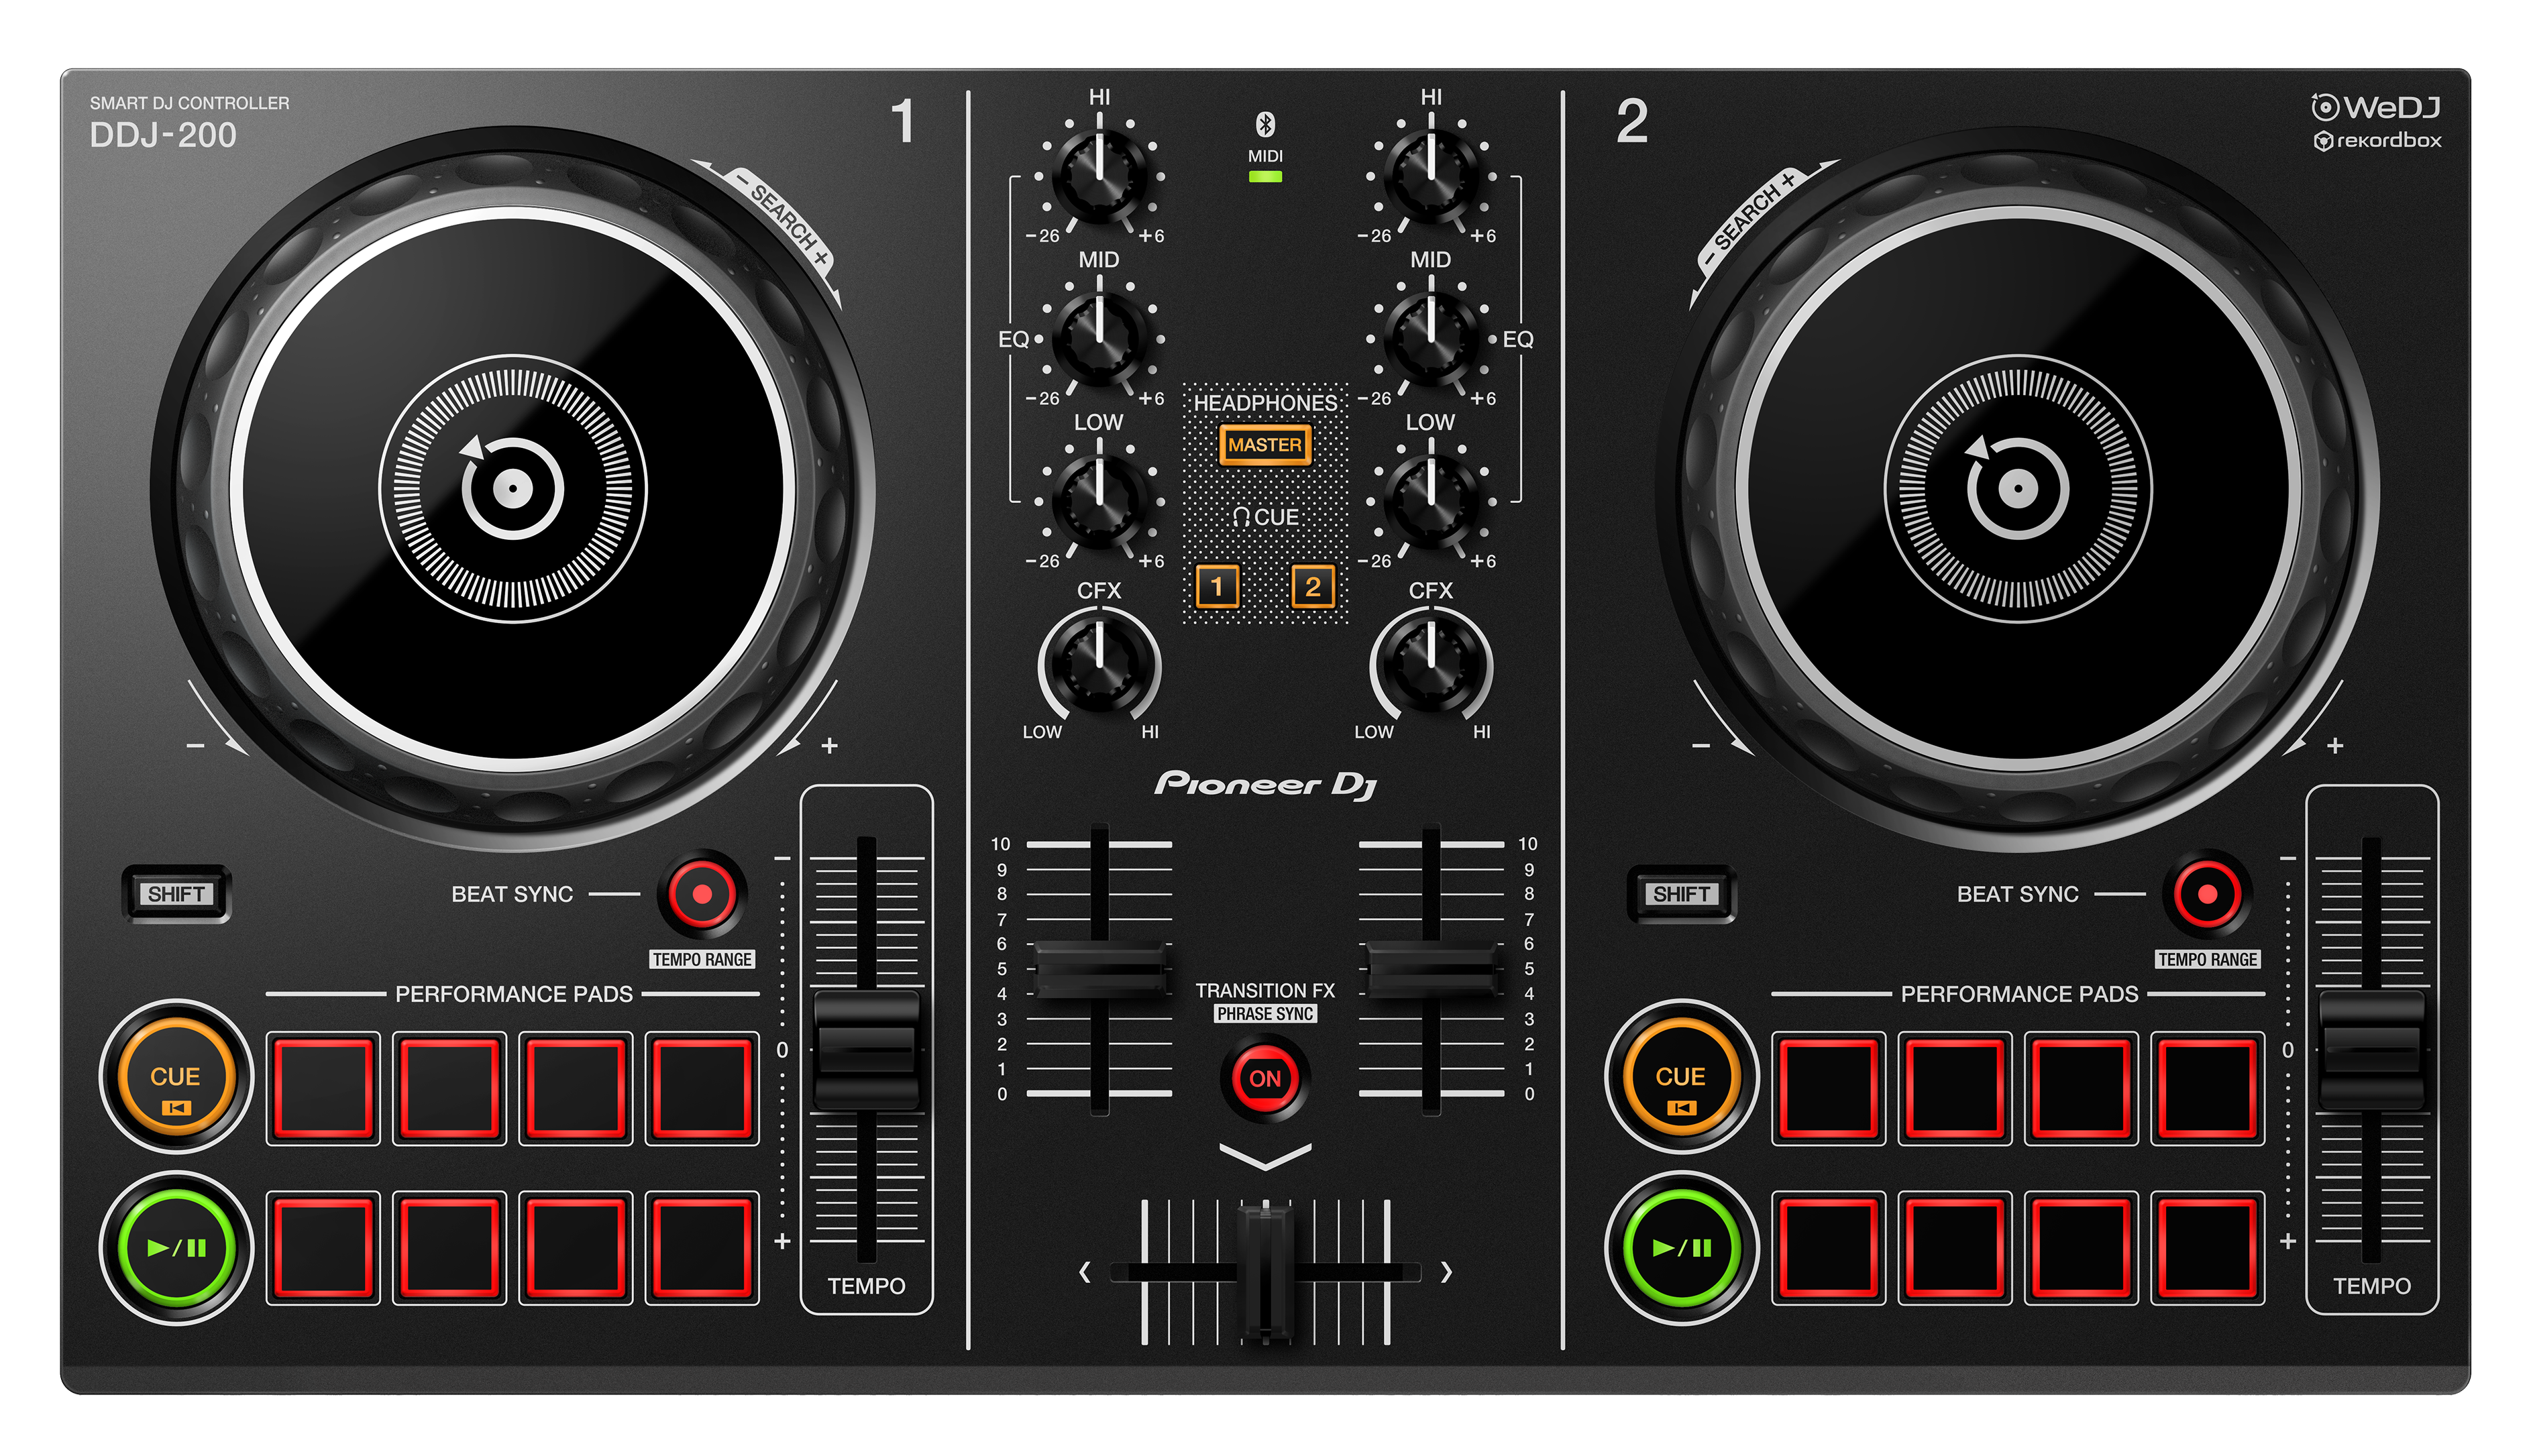
The Pioneer DDJ-200 is a simple 2 deck USB DJ controller designed for WeDJ, djay, edjing Mix and rekordboxDJ.
A mapping is in the process of being added to Mixxx
A schematic drawing with the control numbers that are used here can be found on the specified page in the User Manual in the Links section.
| Browser section (p. 6) | ||
|---|---|---|
| No. | Control | Function |
| 1 | [LOAD] buttons | loads the selected tracks to the respective decks |
| 1 | [LOAD] buttons pressed twice | Not yet mapped. (instant double / Clone from deck) |
| 1 | [SHIFT] + [LOAD] button (left) | Not yet mapped. (Sort library by criteria) |
| 1 | [SHIFT] + [LOAD] button (right) | Not yet mapped. (enlarge / shrink library view) |
| 2 | Rotary Selector | Turn to move track list cursor up/down. |
| 2 | Rotary Selector Press / [SHIFT] + press | cycle focus between folder view an track list |
| 2 | [SHIFT] + Rotary Selector | Turn to zoom in or out the Waveform on the Deck which Shift button is pressed |
| Deck section (p. 6 - 7) | ||
| No. | Control | Function |
| 1 | [BEAT SYNC] button | Match tempo and phase of other deck. Long press to enable Master Sync. |
| 1 | [SHIFT] + [BEAT SYNC] button | Cycle tempo fader ranges between 6%, 10%, 16% and 25% |
| 2 | [CUE/LOOP CALL >] button | Selects and calls out a cue point or loop point in the Track; while playing a loop doubles the loop length |
| 2 | [SHIFT] + [CUE/LOOP CALL >] button | Not yet mapped. (saves cue point while not playing, when playing a loop it saves the loop) |
| 3 | [CUE/LOOP CALL <] button | Selects and calls out a cue point or loop point in the Track; while playing a loop halves the loop length |
| 3 | [SHIFT] + [CUE/LOOP CALL <] button | Not yet mapped. (deletes a cue or loop point) |
| 4 | [RELOOP/EXIT] button | resume the previously set loop or while playing a loop: cancels the loop playback |
| 4 | [SHIFT] + [RELOOP/EXIT] button | jump to the beginning of the loop and stop playing |
| 5 | [OUT] button | sets the Loop Out point and the loop begins |
| 5 | [OUT] button (hold) + [JOG WHEEL] | while holding down the button when a loop is playing, adjust the position of the Loop Out point using the jogwheel |
| 6 | [IN/4BEAT] button | sets the Loop in Point |
| 6 | [IN/4BEAT] button (hold) + [JOG WHEEL] | while holding down the button when a loop is playing, adjust the position of the Loop In point using the jogwheel; while not playing a loop enable a 4 Beat loop |
| 7 | [JOG WHEEL] (top) | When Vinyl Mode is enabled activates the scratch mode when touched; When Vinyl Mode disabled pitch bend |
| 7 | [JOG WHEEL] (outer) | pitch bend |
| 7 | [SHIFT] + [JOG WHEEL] (top) | move Play position with higher speed in the direction the Wheel is turned |
| 8 | [HOT CUE] button | Sets the Performance Pads to hot cue mode see Performance Pad section |
| 8 | [SHIFT] + [HOT CUE] button | Sets the Performance Pads to key board mode see Performance Pad section |
| 9 | [BEAT LOOP] button | Sets the Performance Pads to beat loop mode see Performance Pad section |
| 9 | [SHIFT] + [BEAT LOOP] button | Sets the Performance Pads to PAD FX 1 mode see Performance Pad section |
| 10 | [BEAT JUMP] button | Sets the Performance Pads to beat jump mode see Performance Pad section |
| 10 | [SHIFT] + [BEAT JUMP] button | Sets the Performance Pads to PAD FX 2 mode see Performance Pad section |
| 11 | [SAMPLER] button | Sets the Performance Pads to Sampler mode see Performance Pad section |
| 11 | [SHIFT] + [SAMPLER] button | Sets the Performance Pads to Key shift mode see Performance Pad section |
| 12 | [TEMPO] slider | Adjust the track playing speed (can be adjusted via [SHIFT] + [BEAT SYNC] |
| 13 | [PAD] button | see Performance pad section |
| 14 | [PLAY/PAUSE] button | Plays/pauses a track in the respective Deck |
| 15 | [CUE] button | depends on the cue mode set in the Mixxx preferences |
| 15 | [SHIFT] + [CUE] button | Return to beginning of the track |
| 16 | [SHIFT] button | change the function of another control |
| Mixer section (p. 8) | ||
|---|---|---|
| No. | Control | Function |
| 1 | [TRIM] knobs | Adjust the volume. |
| 2 | [MASTER LEVEL] knob | Adjusts the master output level. |
| 3 | [HEADPHONE CUE (MASTER)] button | Activates Master output on Headphones |
| 3 | [SHIFT] + [HEADPHONE CUE (MASTER)] button | Not yet mapped. (Toggle Views in Software) |
| 4 | [HI], [MID], [LOW] knobs | Adjust the high/mid/low-frequency regions of the song. |
| 5 | Channel Level indicator | Indicate the output level of each channel and master. |
| 6 | [HEADPHONES MIXING] knob | Fades between PFL and master output. |
| 7 | [FILTER] knobs | Applies high-pass/low-pass filter of the song. |
| 8 | [HEADPHONES LEVEL] knob | Adjusts the Headphone output level. |
| 9 | [HEADPHONE CUE (CH)] button | Toggle PFL for the Channel |
| 9 | [SHIFT] + [HEADPHONE CUE (CH)] button | Beat Tap BPM of the channel (repeatedly press to adjust BPM of the track) |
| 10 | Channel faders | Adjust the output level for each channel. |
| 11 | Cross fader | Fades between left and right deck. |
| Effect section (p. 9) | ||
|---|---|---|
| No. | Control | Function |
| 1 | [BEAT <] button | Select the Effectslot of FX3 to the left |
| 1 | [SHIFT] + [BEAT <] button | // Not yet mapped.// |
| 2 | [BEAT >] button | Select the Effectslot of FX3 to the right |
| 2 | [SHIFT] + [BEAT >] button | // Not yet mapped.// |
| 3 | [BEAT FX SELECT] button | Changes the Effect in the selected EffectSlot of FX3 (down) |
| 3 | [SHIFT] + [BEAT FX SELECT] button | Changes the Effect in the selected EffectSlot of FX3 (up) |
| 4 | [BEAT FX CH SELECT] switch | Changes the Channel the Effect in the selected EffectSlot of FX3 is added |
| 5 | [BEAT FX LEVEL/DEPTH] knob | Changes the Effect level when Effect is not enabled and Meta of Effect when enabled |
| 6 | [BEAT FX ON/OFF] button | Turn selected EffectSlot of FX3 on or off |
| 6 | [SHIFT] + [BEAT FX ON/OFF] button | Turn selected EffectSlot of FX3 off (Release Effect not yet implemented) |
You can use the Pad Mode Select buttons to select a mode for the performance pads. Most pad modes are similar to those found when used with Rekordbox.
| Mode | Control | Function |
|---|---|---|
| [HOT CUE] Mode | [PAD 1 - 8] | Set (if empty) or Play Hot Cue Point / Loop*1 |
| [HOT CUE] Mode | [SHIFT] + [PAD 1 - 8] | Unset/Delete Hot Cue Point / Loop |
| [BEAT LOOP] Mode | [PAD 1 - 8] | Enable / Disable Beat Loop (1/4, 1/2, 1, 2, 4, 8, 16, 32) |
| [BEAT JUMP] Mode | [PAD 1 & 2] | Beat Jump 1 * Multiplier beat left / right |
| [BEAT JUMP] Mode | [PAD 3 & 4] | Beat Jump 2 * Multiplier beats left / right |
| [BEAT JUMP] Mode | [PAD 5 & 6] | Beat Jump 4 * Multiplier beats left / right |
| [BEAT JUMP] Mode | [PAD 7 & 8] | Beat Jump 8 * Multiplier beats left / right |
| [BEAT JUMP] Mode | [SHIFT] + [PAD 7 & 8] | Change Beat Jump Multiplier -1 / +1 |
| [SAMPLER] Mode | [PAD 1 - 8] | Play assigned Sample Slot 1-8 |
| [SAMPLER] Mode | [SHIFT] + [PAD 1 - 8] | Play assigned Sample Slot 9-16 |
| [KEYBOARD] Mode | [SHIFT] + [HOT CUE] | Enable Keyboard Mode; Choose Hot Cue / Loop Point for Keyboard Mode (needs to be set) |
| [KEYBOARD] Mode | [PAD 1] | Play selected Hot Cue / Loop Point with +4 Semitone; stop on release |
| [KEYBOARD] Mode | [PAD 2] | Play selected Hot Cue / Loop Point with +5 Semitone; stop on release |
| [KEYBOARD] Mode | [PAD 3] | Play selected Hot Cue / Loop Point with +6 Semitone; stop on release |
| [KEYBOARD] Mode | [PAD 4] | Play selected Hot Cue / Loop Point with +7 Semitone; stop on release |
| [KEYBOARD] Mode | [PAD 5] | Reset Semitone to 0 |
| [KEYBOARD] Mode | [PAD 6] | Play selected Hot Cue / Loop Point with +1 Semitone; stop on release |
| [KEYBOARD] Mode | [PAD 7] | Play selected Hot Cue / Loop Point with +2 Semitone; stop on release |
| [KEYBOARD] Mode | [PAD 8] | Play selected Hot Cue / Loop Point with +3 Semitone; stop on release |
| [KEYBOARD] Mode | [SHIFT] + [PAD 1 - 6] | Delete selected Hot Cue / Loop Point |
| [KEYBOARD] Mode | [SHIFT] + [PAD 7] | Play selected Hot Cue / Loop Point with increased Semitone; stop on release |
| [KEYBOARD] Mode | [SHIFT] + [PAD 8] | Play selected Hot Cue / Loop Point with decreased Semitone; stop on release |
| [PAD FX 1-2] Mode | [PAD 1 - 8] | Enable / Disable Effect for Channel |
| [PAD FX 1-2] Mode | [SHIFT] + [PAD 1 - 8] | // Not yet implemented.// (Enable / Disable Effect for Channel) |
| [KEYSHIFT] Mode | [PAD 1] | Permanently increase Semitone of the Track by +4 |
| [KEYSHIFT] Mode | [PAD 2] | Permanently increase Semitone of the Track by +5 |
| [KEYSHIFT] Mode | [PAD 3] | Permanently increase Semitone of the Track by +6 |
| [KEYSHIFT] Mode | [PAD 4] | Permanently increase Semitone of the Track by +7 |
| [KEYSHIFT] Mode | [PAD 5] | Reset Semitone to 0 |
| [KEYSHIFT] Mode | [PAD 6] | Permanently increase Semitone of the Track by +1 |
| [KEYSHIFT] Mode | [PAD 7] | Permanently increase Semitone of the Track by +2 |
| [KEYSHIFT] Mode | [PAD 8] | Permanently increase Semitone of the Track by +3 |
| [KEYSHIFT] Mode | [SHIFT] + [PAD 7] | Permanently increase Semitone of the Track |
| [KEYSHIFT] Mode | [SHIFT] + [PAD 8] | Permanently decrease Semitone of the Track |
 This is the Mixxx Wiki -
 Mixxx is a free and open-source DJ software.
Manual
Hardware Compatibility
Reporting Bugs
Getting Involved
Contribution Guidelines
Coding Guidelines
Using Git
Developer Guide
Creating Skins
Contributing Mappings
Mixxx Controls
MIDI Scripting
Components JS
HID Scripting