The standard development environment for this course is Ubuntu 17.10 Artful. We have created a packaged version of this that you will need to import as an "appliance" through VirtualBox (instructions below).
In order to install and use our environment follow these steps on your laptop:
VirtualBox is software that allows you to create and work on virtual devices as separate instances within your machine. You can download it here: https://www.virtualbox.org/. Note you may need to set special permissions to allow it to load.
Make sure to download the 64 bit version! (large file, so expect it to take a while): https://www.osboxes.org/ubuntu/ (1GB)
After downloading, decompress the archive "Ubuntu_17.10-VB-64bit.7z" to create a file called "Ubuntu 17.10 Artful (64bit).vdi"
On mac, you will need to unpack the .7z archive using The Unarchiver.
After extracting, move the Ubuntu image file to a new directory where you will want to keep it this semester.
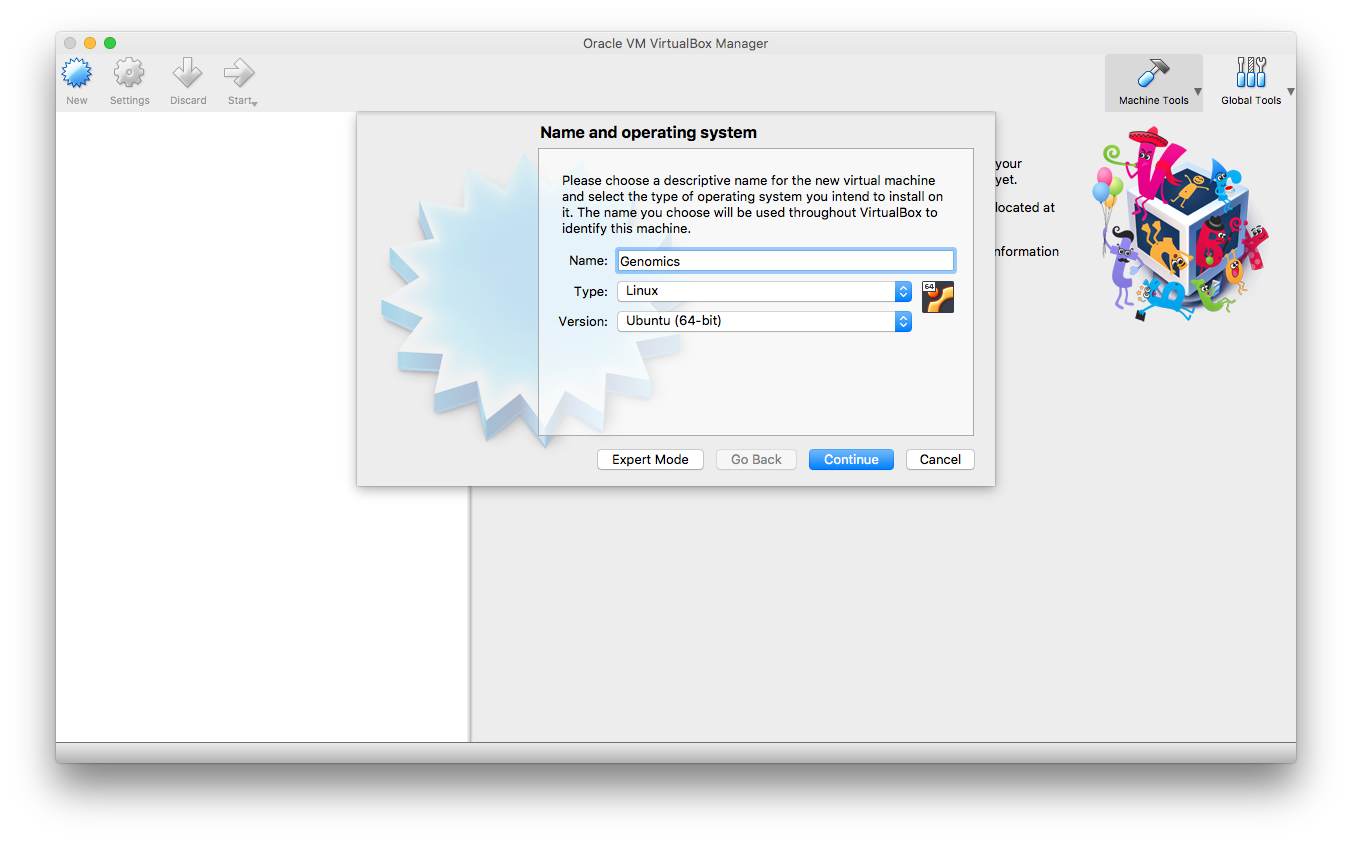
From within VirutalBox, click "New" to create a new virtual machine.
Then (1) Name your Virtual Machine and Select the Operating System as 64 bit Ubuntu
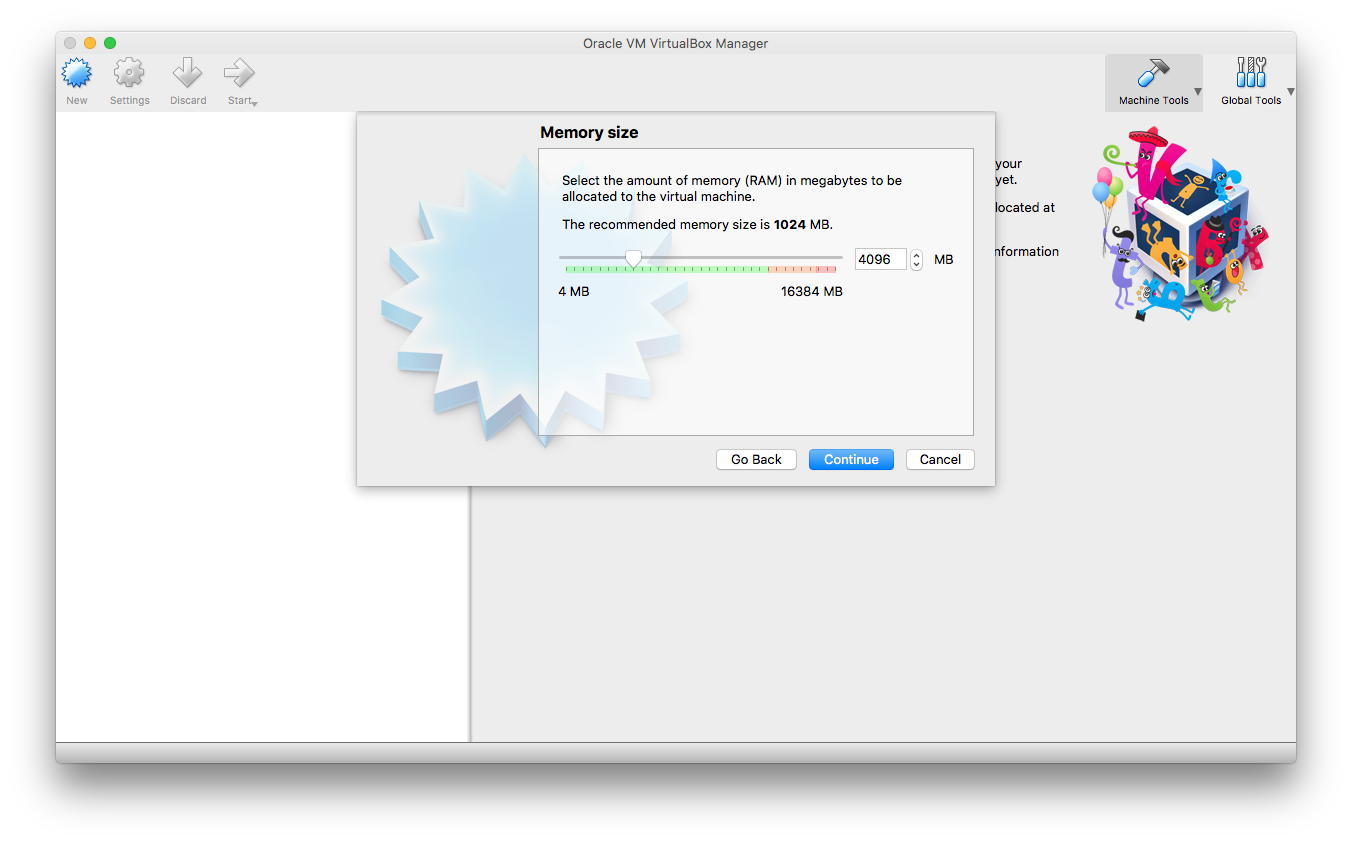
(2) Set the memory size to 4GB (or as much RAM as is available)
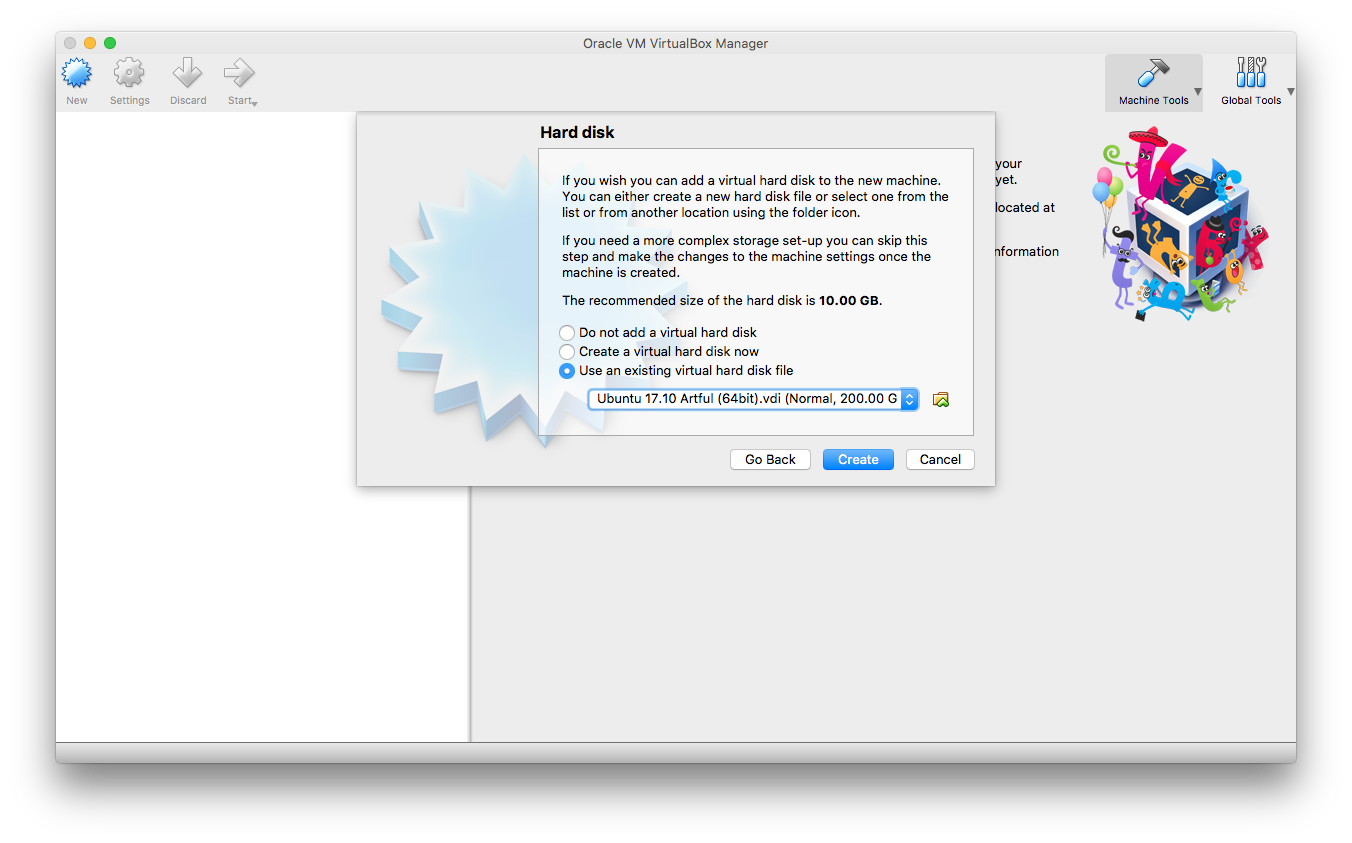
(3) Select the Ubuntu image as your virtual hard disk
When the install finishes, you will have a virtual machine called "Genomics" showing in the left menu of your VirtualBox device manager. Double-click on this virtual machine to start it up (or single-click and then hit the "start" icon). If you get an error message, read the details and follow the instructions to update as necessary. (For example, you might have to install the Oracle VM Extension Pack from https://www.virtualbox.org/wiki/Downloads to get the USB controller to work.)
The default username is "osboxes.org" and the default password is "osboxes.org"; feel free to create a new username or change the password
Click on the left bottom start button. Keep in mind that the files in your virtual environment can only be accessed from within that virtual environment, not from your usual laptop software. So Ubuntu has a web browser, office-like apps, accessories, etc. The terminal can be accessed using the Terminal application on the second page of applications.
You will want to install guest additions to get cool features like access to shared folders and shared clipboard, native screen resolutions, etc. Please follow the linked documentation for how to install those extensions. These tools will make it easier to switch back and forth between your virtual box machine and your native laptop.
While the virtual machine is running, from the VirtualBox Devices menu, click "Insert Guest Additions CD Image..."
Then it should ask to install the software.
If there are any problems, you can also launch it by hand at the terminal:
$ sudo /media/osboxes/VBox_GAs_5.2.6/VBoxLinuxAdditions.run
Once the software is installed, you should reboot using the menu or the command line:
$ /sbin/shutdown -r now
After booting the virtual machine, it will ask you to update a number of installed packages. You should accept all of these installations.
Once that is done, you should install the essential build tools via the command line (just accept the defaults when prompted):
$ sudo apt-get update
Note, after this you will be updated to the latest builds of everything. You can also run this using the "Software Update" tool in the Applications Menu.
We will be using the bioconda package manager to simplify installing different software packages. Just follow the defaults to install Miniconda:
$ wget https://repo.continuum.io/miniconda/Miniconda3-latest-Linux-x86_64.sh
$ sh Miniconda3-latest-Linux-x86_64.sh
When prompted, just use the default paths and settings (agree to everything)
Now configure conda:
$ conda config --add channels r
$ conda config --add channels defaults
$ conda config --add channels conda-forge
$ conda config --add channels bioconda
Now install some bioinformatics packages
$ conda install bwa bowtie samtools bedtools spades jellyfish fastqc mummer
In case you boot up the appliance and get some weird-looking graphics instead of a nice login screen: Hit "Host+F1" once, then "Host+F7" once and everything should be good. In VirtualBox the "Host" key is "Right Ctrl" (on Windows/Linux) or "Left Command" on OS X. (If you're using a Mac, you may also have to push some funky key called "fn" (bottom left corner of your keyboard) to get F1/F7 to behave as they should. And if you have a Mac without function keys, well, you should figure out for yourself where those keys are now...)
Always use the "power button" in the arrow menu in the top right corner of your Ubuntu desktop to shut down your machine safely - do not simply exit the window or VirtualBox. Running Ubuntu through VirtualBox can be a bit of a power drain on your laptop, so be prepared with a power cord.
Note that updated versions of this appliance may be posted at a later date. Hence it's probably a Bad Idea (tm) if you keep source code you're working on only in your virtual machine instance. We highly recommend using a service such as Dropbox to maintain your files in. (Start->Internet->Dropbox to install.) This also helps in case your laptop catches fire or some other mishap occurs.
Edit /etc/gdm3/custom.conf and uncomment this line: #WaylandEnable=false
More info is available here: https://forums.virtualbox.org/viewtopic.php?f=8&t=85110


