Installing CUDA using PyTorch in Conda for Windows can be a bit challenging, but with the right steps, it can be done easily. Here’s a detailed guide on how to install CUDA using PyTorch in Conda for Windows:
Table of Content: \1. Install Nvidia driver \2. Install Anaconda \3. Create a new Conda environment \4. Install PyTorch \5. Install Cuda \6. Download and Extract Cudnn (for Deep Learning) \7. Verifying Cuda with PyTorch via Console \8. Verifying Cuda with PyTorch via PyCharm IDE
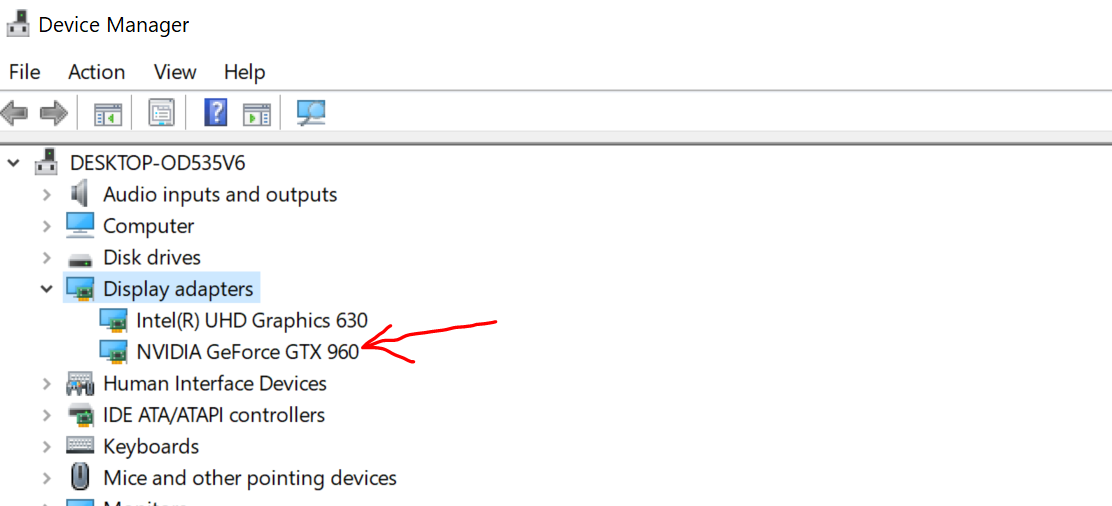
1. Install Nvidia driver: First we need to figure out what driver do we need to get access to GPU card. Search Device Manager and under Display Adapter we are able to see it.
In my case it is NVIDIA GetForce GTX 960, in yours case it might be different. now lets visit to download the specific driver.
Upon giving the right information, click on search and we will be redirected to download page. Download and install it.
2. Install Anaconda: First, you’ll need to install Anaconda, a free and open-source distribution of Python. You can download the latest version of Anaconda from their official website (https://www.anaconda.com/) and install it on your Windows machine.
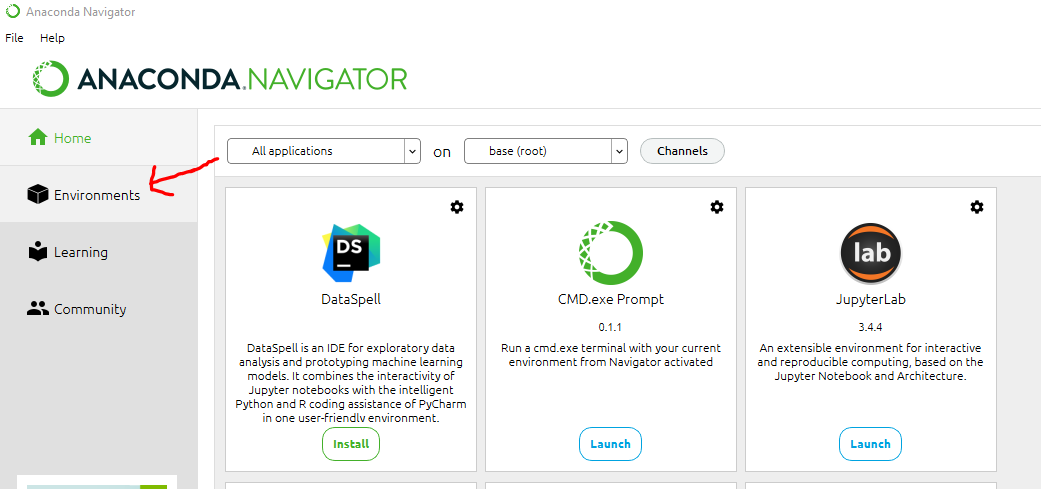
3. Create a new Conda environment: After installing Anaconda, open the Anaconda Navigator and click on the “Environments” tab. From there, click on the “Create” button to create a new Conda environment. Name it “cudatest” or any other name you prefer.
Anaconda Navigator
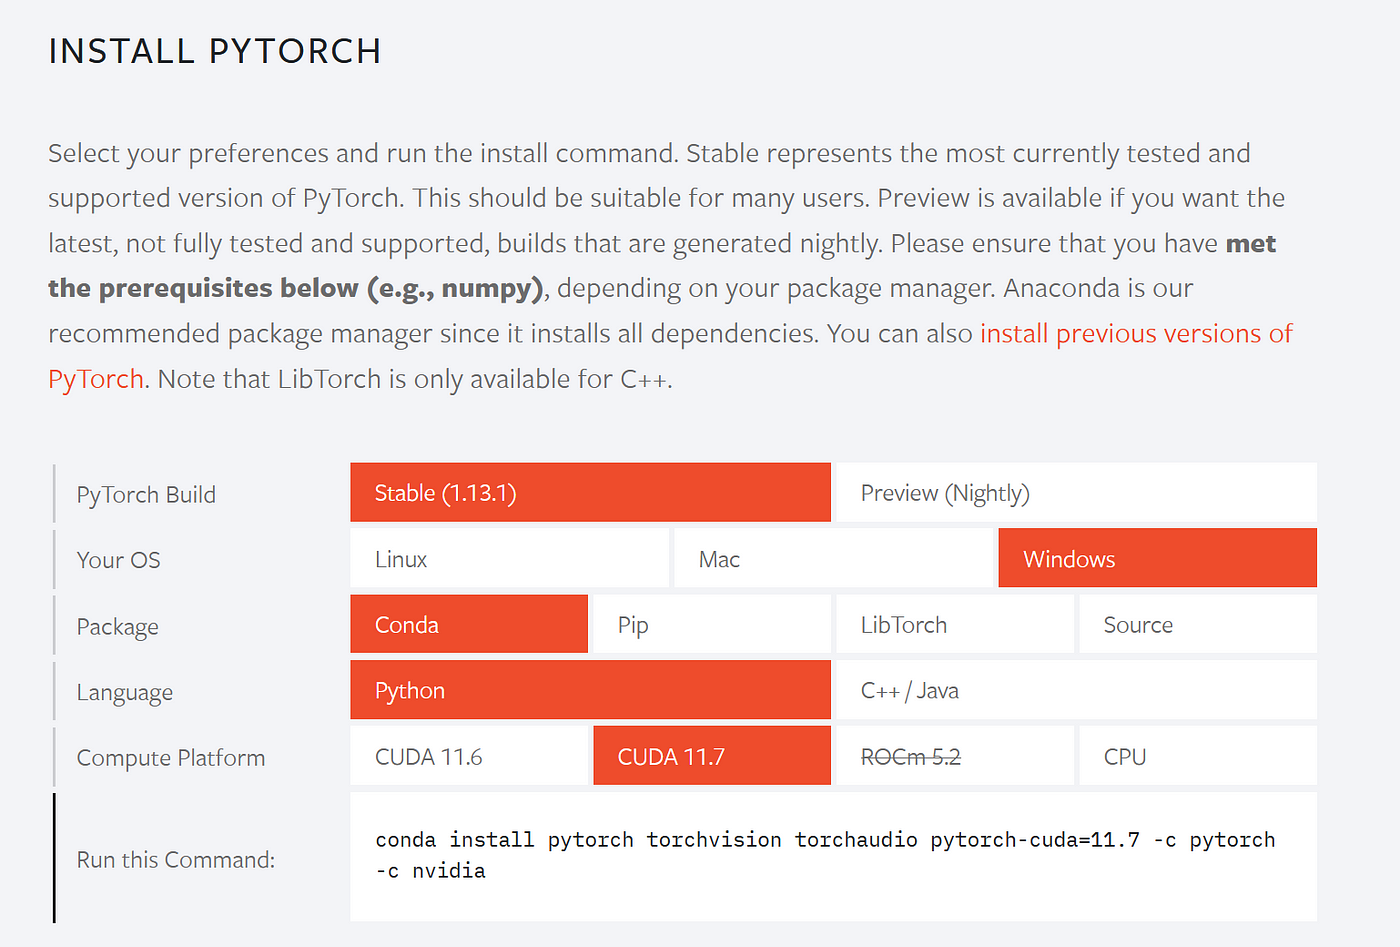
4. Install PyTorch: Visit the official website https://pytorch.org/ to get the command in order to install PyTorch and its relevant dependencies.
Install PyTorch
conda install pytorch torchvision torchaudio pytorch-cuda=11.7 -c pytorch -c nvidia
The above one line command will install PyTorch and its dependencies. However, as we can see the the PyTorch will only work with Cuda=11.7. Thus, we need to download and install the exact same version of Cuda as well as Cudnn (for Deep Learning)
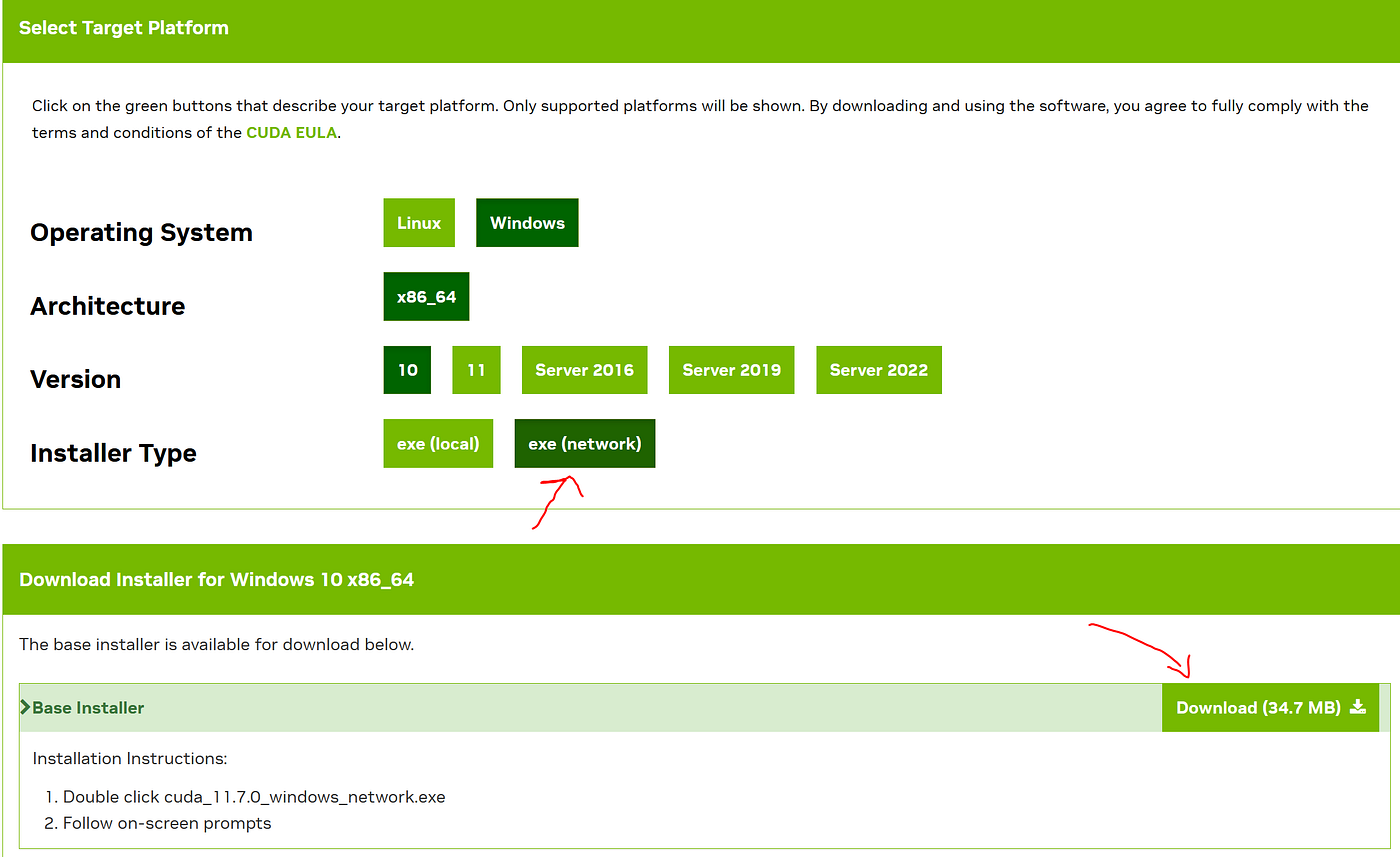
5. Install CUDA: To install CUDA, we’ll need to download the CUDA toolkit from NVIDIA’s official website https://developer.nvidia.com/cuda-11-7-0-download-archive. Make sure to download the correct version of CUDA toolkit that is compatible with your Windows version and graphics card.
There are two type of installers: either to download and install it on local machine; or to just download the installer and later run it from remote computer, this gives you the control to customize your installation. Which one does suit you, go for it. Basically it all depends on your network speed and if you want to keep the download 2.5GB exe file for future use.
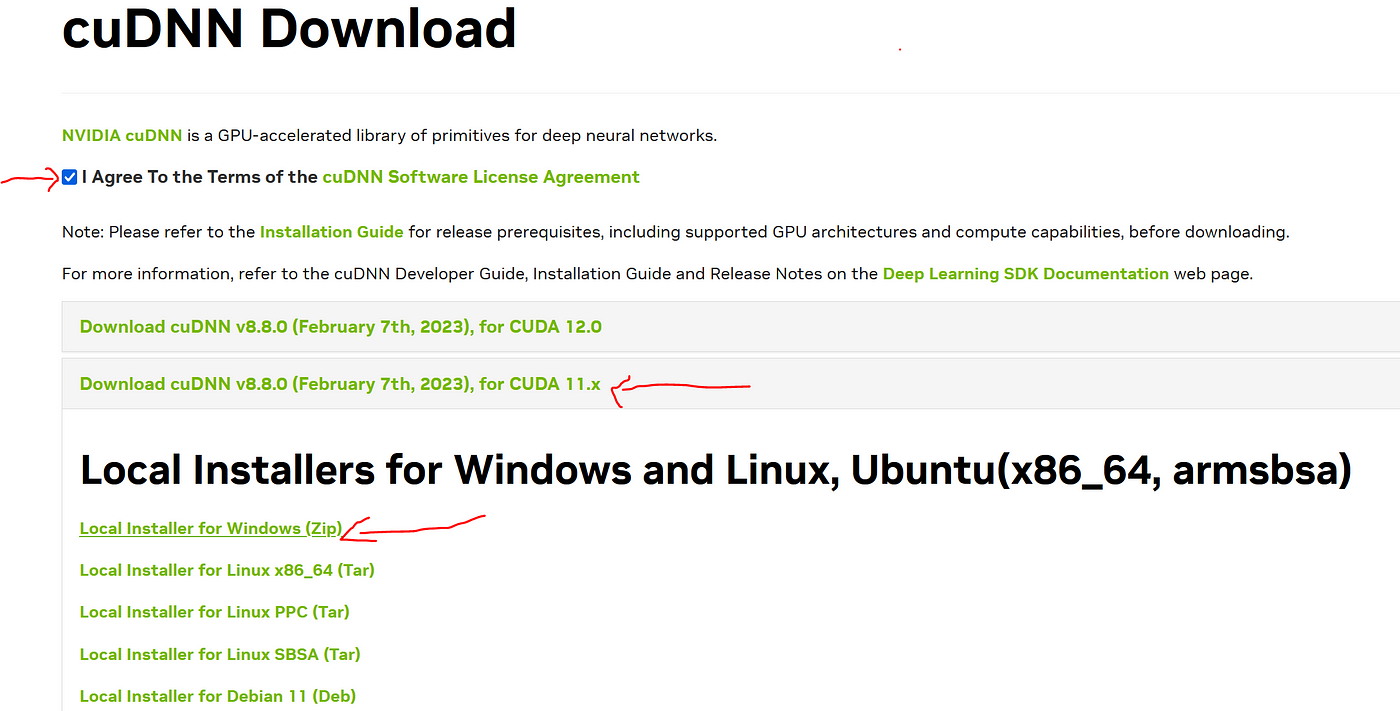
6. Download and Extract Cudnn: If you are working on some Deep Learning projects then next step is to download the Cudnn from the official website: https://developer.nvidia.com/rdp/cudnn-download. Since we’ve downloaded and installed Cuda=11.7. Hence, upon clicking on the right version will give you a list of links to different files. Download the local installer for windows (Zip).
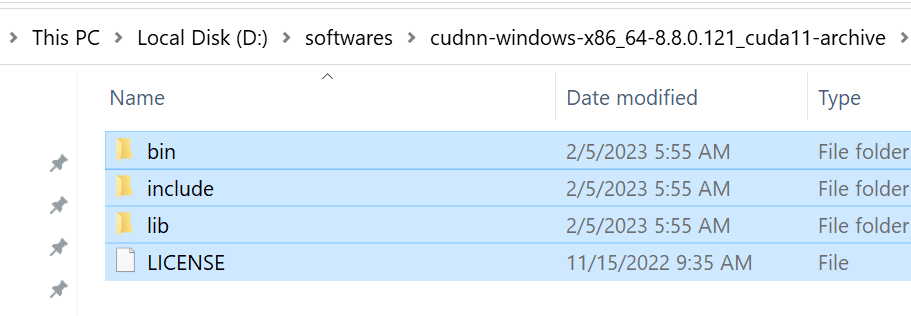
Once we download and Extract the zip file. Ctrl+A to select all and paste it in the directory of Cuda. we are asked to replace it? we clicked on replace button.
7. Verifying CUDA with PyTorch via Console: To verify that CUDA is working with PyTorch, you can run a simple PyTorch code that uses CUDA. In the Anaconda Prompt, activate the “cudatest” environment and run the following code:
import torch
print(torch.cuda.is_available())
If the output is “True,” it means CUDA is working with PyTorch and you’re ready to use CUDA for your PyTorch projects.
Verify Cuda with PyTorch
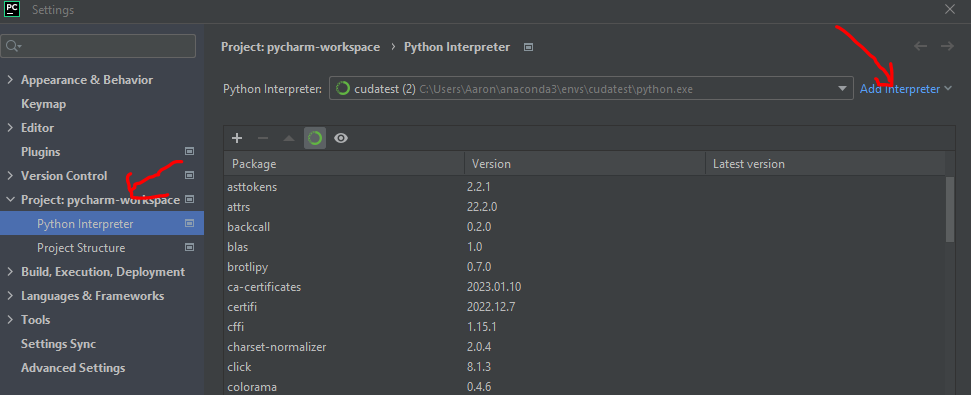
8. Verifying Cuda with PyTorch via PyCharm IDE: Download and install your favorite IDE. We focus on PyCharm for this example. Steps are shown in the following points as well as in their corresponding figures.
a. Create a new project with CudaTest. b. Go to File > Settings > CudaTest > Add Interpreter > Add Local Interpreter c. Select Conda Environment > Use existing environment > cudatest (we’ve created this earlier) d. click ok and apply
Create a new python file with the name main.py and place the following code snippet
import torch

print(torch.cuda.is_available())

if torch.cuda.is_available():
    print("Cuda is Availabe")
else:
    print("Cuda Can't be found")
Output:
True
Cuda is Availabe
cuda pycharm
In conclusion, by the above mentioned steps, you should be able to install CUDA using PyTorch in Conda for Windows. If you encounter any issues during the installation process, make sure to check the NVIDIA website for support or troubleshooting tips.

