GitHub Dashboard Deployment Guide
This dashboard requires infrastructure being deployed in Azure. The infrastructure consists of a PowerShell Function App, Application Insights for monitoring and a Storage Account where results from the GitHub REST API calls will be stored in different tables. The following diagram represents the infrastructure to be deployed.
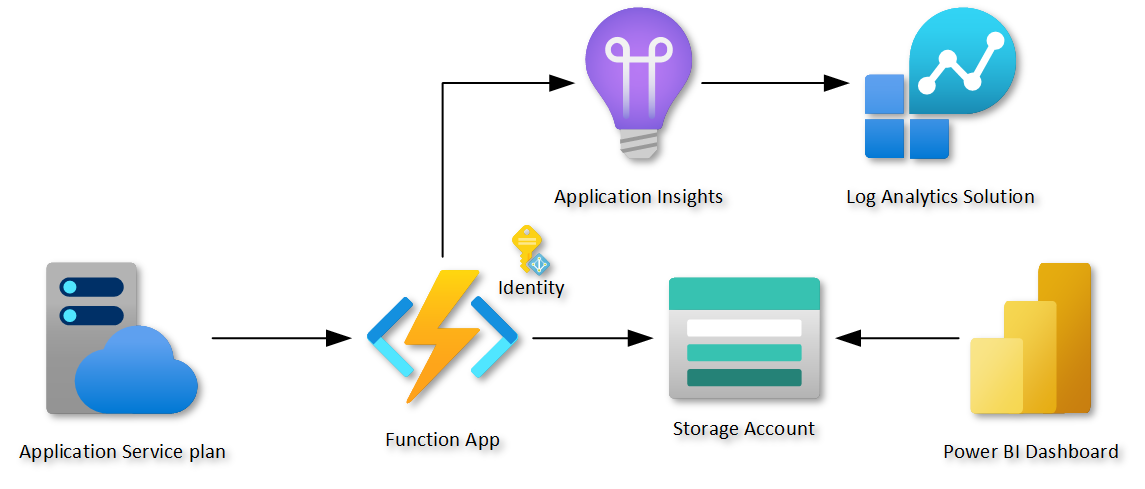
Here is the link to the required bicep template that will deploy and connect the architecture presented previously.
In order to successfully user the deploy.bicep and workflow provided, you will need to have:
-
This repository forked in your own environment.
-
An Azure subscription. If you don't have one you can create one for free using this link. If you already have an Azure tenant but you want to create a new subscription you can follow the instructions here.
-
A resource group already created.
-
A service principal with Owner permissions in your subscription. You will need owner permissions because as part of the architecture you will be creating a Managed Identity that will require a role assignment to save the retrieve data in the Storage Account. You can create your service principal with Contributor permissions by running the following commands:
az ad sp create-for-rbac --name "<<service-principal-name>>" --role "Contributor" --output "json"
-
A secret in your GitHub repository with the name
AZURE_CREDENTIALS. You can use the output from the previous command to generate this secret. The format of the secret should be:{ "clientId": "<client_id>", "ClientSecret": "<client_secret>", "SubscriptionId": "<subscription_id>", "TenantId": "<tenant_id>" } -
Another secret in your GitHub repository with the name
PAT. This will be store the value of a PAT token you will need to generate with the following permissions:Scope Permission repo Full control of private repositories user Update ALL user data admin:repo_hook Full control of repository hooks admin:org Full control of orgs and teams, read and write org projects -
In the local.settings.json file, update the values for the
owner,repository,resourceGroupandstorageAccountwith the names you want to configure in your environment. Also, make sure that these names match the values in the deploy.bicep file for the same resources.Note: The owner and repository names correspond to the GitHub organization and repository name from where the information needs to be retrieved.
In the infrastructure folder you will find a deploy.bicep file which is the template that will be used to deploy the infrastructure. Update the first two parameters (name and staname) with your unique values. Name will be used to compose the name of all resources except for the storage account, which will leverage the staname parameter.
In the src folder you can find the source code that will be deployed in the Function App once the infrastructure is ready. Basically you will deploy two endpoints:
- InitializeTables: you will need to run this endpoint once manually to initialize the Storage Account with the required tables and collect all the data history available in the GitHub API.
-
GitHubDailySync: this endpoint will be automatically run on a daily basis and will add more data to the already created storage account tables. If you don't want a daily cadence you can update the cron expression in the
function.jsonfile under the GitHub DailySync folder.
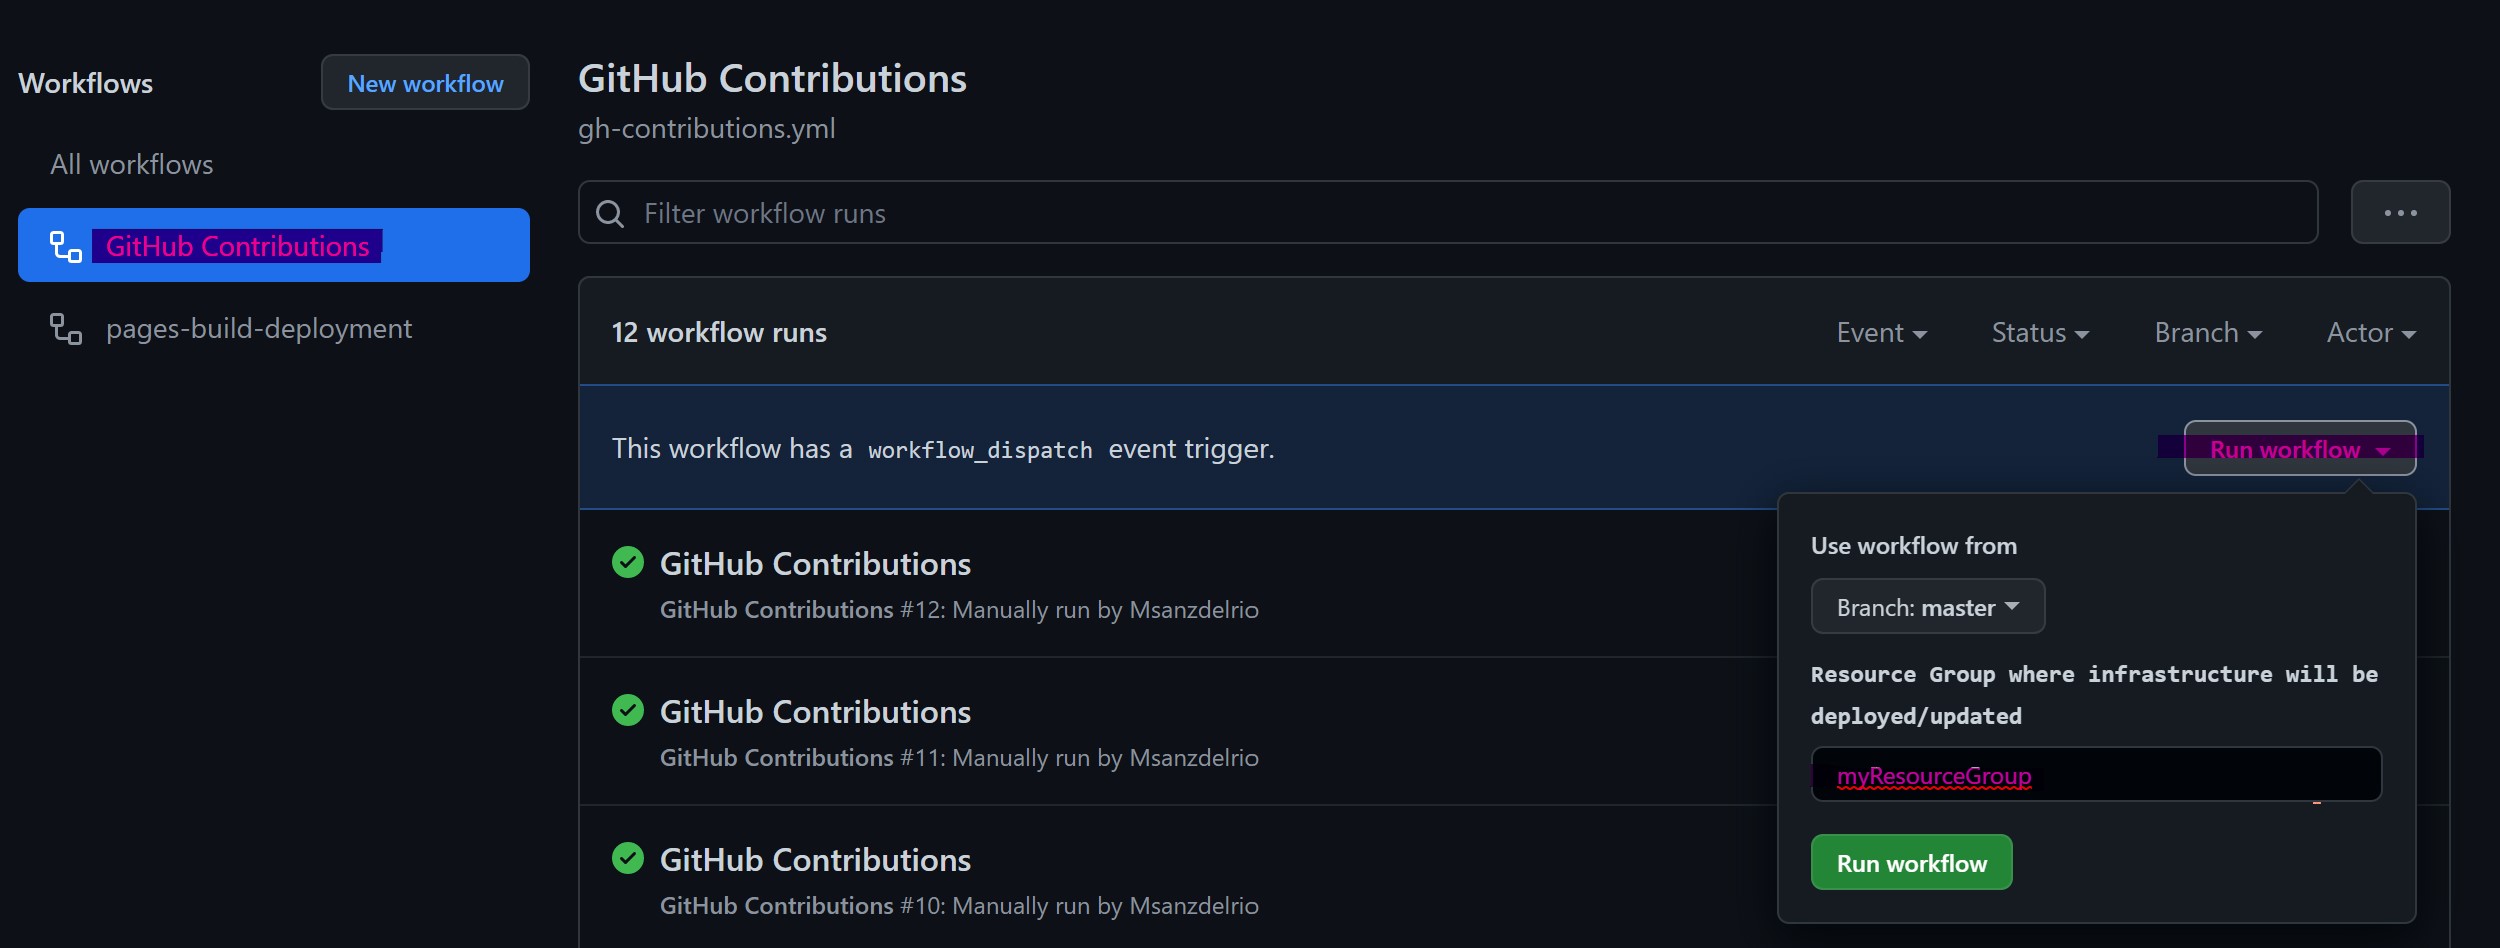
Finally, navigate to the root folder of the repository where you will find the workflows folder under the .github folder. There you can locate the workflow that you will have to run to deploy the backend of the dashboard. The only parameter you will need to setup manually while triggering the workflow is the resourceGroupName that you created earlier.
Now you are ready to deploy your backend in your environment:
After successfully deploying the backend go to the Azure portal and manually run the InitializeTables endpoint.
On the Azure portal, go to the Storage account and under the Tables section in the Storage browser, verify that the following tables are present:
- Repository
- Forks
- Clones
- OpenPullRequests
- ClosedPullRequests
- Stargazers
- Contributors
- Traffic
- Issues
- Releases