Quick Start
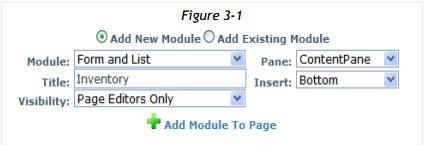
When working with the Form and List in a publicly viewable web site, we recommend that you add your first Form and List module to a new portal page that only Administrators can view and edit. By creating a new page viewable by Administrators only, your information will be hidden from public view during the time you are working to configure the Form and List module. Professional website designers and authors work in this manner to ensure that their site does not accidentally display incomplete or unapproved information. Once you have selected the module from the dropdown list, select Page Editors Only from the Visibility control, then click Add Module to Page to place the Form and List module to your page. For this example, we will create a Form and List inventory of items that may be stored in a home, so we designate the Title ‘Inventory’ for this Form and List instance.
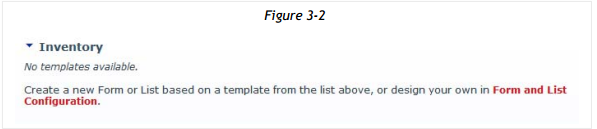
After the module has been placed on the page, click the Form and List Configuration link to begin defining columns for this Form and List instance. (Figure 3-2).
When you click Form and List Configuration, or select the Form and List Configuration command from the action menu, the Form and List Configuration, Schema Definition should display (Figure 3-3).

Four system columns are automatically created for every List and Form instance: Created by, Created at, Changed by and Changed at. All four columns are required by Form and List for tracking records. These columns can be renamed but they cannot be deleted. By default, these columns do not display to users unless ‘Display on List’ is enabled.
Listed just below the columns, the Privacy setting is enabled by default. If you would like to keep the data stored in this Form and List instance from appearing to users searching with DotNetNuke portal search function, keep this setting enabled. When Form and List is used in form mode to collect info from users that is not intended for display to any other users, enabling Privacy keeps the data secure.
For our example, we will create a list of personal items we have around the house, using the following data elements: Quantity, Item, Value, Location, Container and Notes.
You can add a column by clicking Add New Column. (Figure 3-4). After adding the columns for our inventory example, the Data Table Setup looks like this:
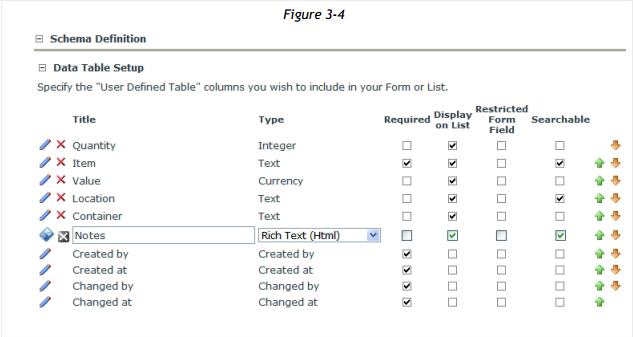
Note that we have assigned column Titles that indicate what data that will be stored in the columns. In this example, our custom column Titles are only single words, but a Title may contain two or more words with spaces, for example, ‘First Name’.
When creating a column, you have the option to choose the Data Type, and set other properties such as ‘Required’, ‘Display on List’, ‘Restricted Form Field’, and ‘Searchable’, simply by enabling or disabling the property checkbox.
| Column Property | State: Enabled |
|---|---|
| Required | When entering a new record, this column must contain a value or the record cannot be stored. |
| Display on List | Show this column when displaying a list of records. |
| Restricted Form Field | Special permissions set with module Settings will control which User or Roles have access to this column. |
| Searchable | This column will be searched for data by the Form and List search function. |
When you are finished defining your columns, click Save Configuration and Return to exit Form and List Configuration and return to the display view.
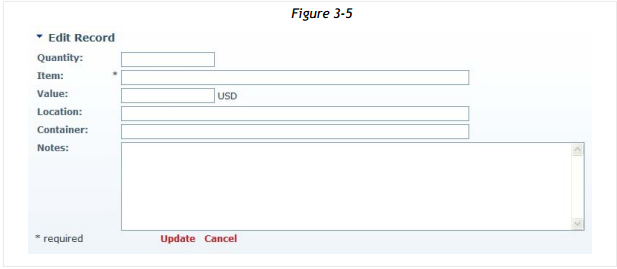
You can now add a record to your table by clicking Add New Record, and a blank entry form will display (Figure 3-5).
We enter several items into our Form and List inventory data collection. After entering four records, our list looks like this (Figure 3-6):

To sort the records by any column, simply click the associated column header. To edit a record, click the edit pencil located in the left column.
Congratulations! You have created your first list using Form and List. More detailed options and functionality are explained in the following chapters.
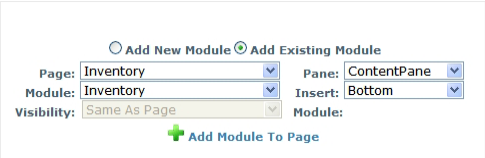
In this example, we will use the existing inventory Form and List instance to create a Form view. We want to display this form on a different page than the inventory list, so we first create a new page. After creating the page, we choose Add Existing Module then click Add Module to Page to place Form and List on this page (Figure 3-7).
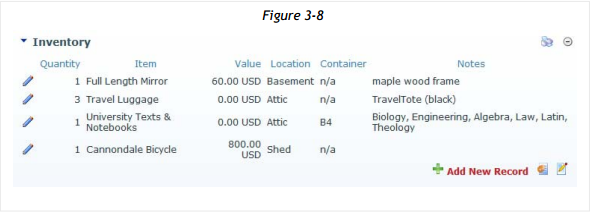
The Form and List module from the Inventory page will display in List mode. (Figure 3-8). Mouse over the down arrow next to the module Title ‘Inventory’ to activate the action menu, and choose Form and List Configuration from the menu.
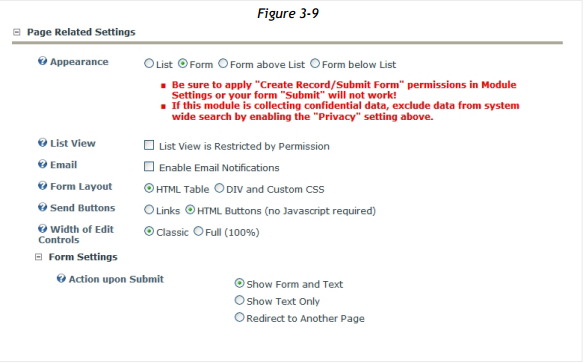
Under the Page Related Settings, choose Appearance: Form – and for Send Buttons, choose HTML Buttons (no JavaScript required). (Figure 3-9).
For this example, we will leave all other settings as default, and click Save Configuration and Return.
We need to apply Permissions to this Form and List module before the form will work properly. Mouse over the action menu, and choose ‘Settings’ (Figure 3-10).

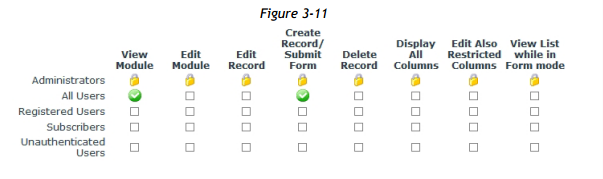
We want to allow all website visitors to use the form, so for All Users role, we enable the View Module and Create Record/Submit Form permissions. (Figure 3-11).
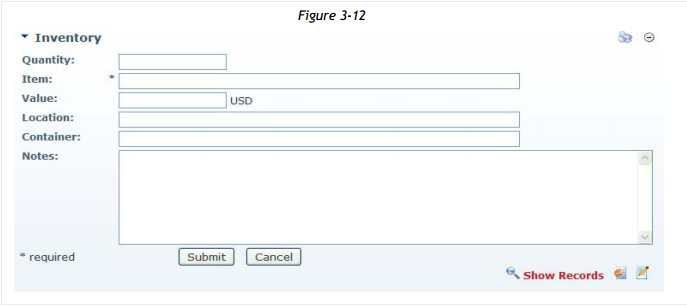
Congratulations! You have successfully created your first Form. (Figure 3-12).