📖 About • 📋 Features • 🏗️ Installation • ⛏️ Usage • 🚀 Examples
The Acunetix telegram bot is a powerful and convenient Telegram bot designed to manage and automate your Acunetix vulnerability scans. This bot allows you to control your Acunetix scans directly from your Telegram account through simple commands.
- Features
- Automated Target Addition: Easily add new targets to your Acunetix scan queue via Telegram commands.
- Real-Time Vulnerability Alerts: Receive instant notifications on Telegram whenever new vulnerabilities are discovered during scans.
- Detailed Vulnerability Information: Get comprehensive details about each detected vulnerability directly in your Telegram chat, enabling quick assessment and action.
- Convenient Scan Management: Start, stop, and manage your scans with simple and intuitive Telegram commands.
- User Restriction: Only users specified in the configuration file can issue commands to the bot, ensuring controlled access. Currently, the bot sends all updates and vulnerability details to a single authorized user, even if the bot is added to a group.
- API interaction: By leveraging Acunetix's own API, this feature enables users to perform various operations without directly exposing the Acunetix server
- Future Enhancements
- Group Command: Plans to add support for group commands, allowing the bot to accept commands from multiple authorized users within a group and send updates to the entire group.
Prerequire: You must be install the following tools first: subfinder, httpx(1), nuclei(2), notify
To install Acunetix telegram bot, follow these steps:
git clone https://github.com/DTai261/Acunetix_tele_bot
cd Acunetix_tele_bot
pip install -r requirements.txt

# Edit the file config.py then run the bot:
python Telegram_bot.pyThe following command are use for control the acunetix scan using telegram. More details in the examples.
/start: just a start !
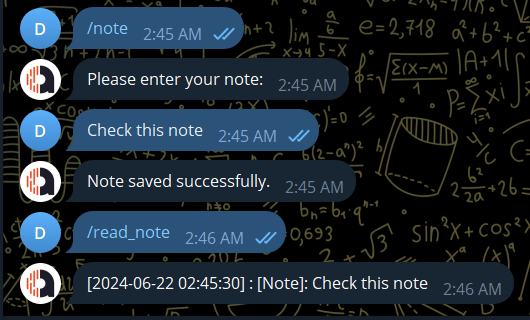
/note: write a note
/read_note: retrive note, can add arg as number of line
/help: help !
/add_target: add wildcard target to find it subdomains.
/start_scan: start scan on wildcard / single target
/set_targets: Set number of targets simultaneously scan acunetix
/list_target: list all the target add by /add_target that not been scan nuclei
/print_subdomains: print subdomains of target
/stop_vuln: add vuln to list out of scope
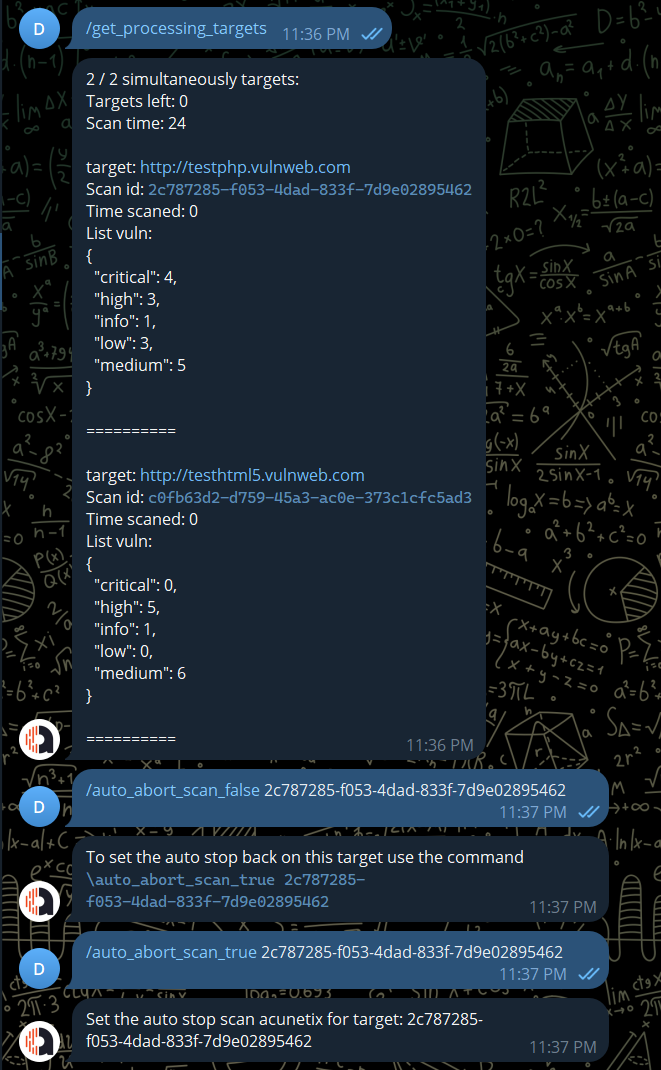
/auto_abort_scan_true: set auto abort scan after x hours for all targets (default)
/auto_abort_scan_false: unset auto abort scan after x hours for all targets
/ram: show system memory usage
/get_processing_targets: list all the target have status proccessing acunetix
/stop_scan_acunetix: stop an acunetix scan by scan_id
/get_list_vulns: get all the vuln by filter eg: /get_list_vulns 2,3,4 https://example.com, https://google.com
/vuln_detail: get vuln detail by vuln id
/vuln_type: get all scanned vulns by severity (1-4)
/search_vuln: search for vuln has been scaned
/manual_activate_auto_scan: Manual activate auto scan after it dead. Not sure if this work :)
/notification: Enable or disable new vulnerabilities notifications from the bot
/get_api_token: generate a new API token that can be used for authenticating requests to the associated API server
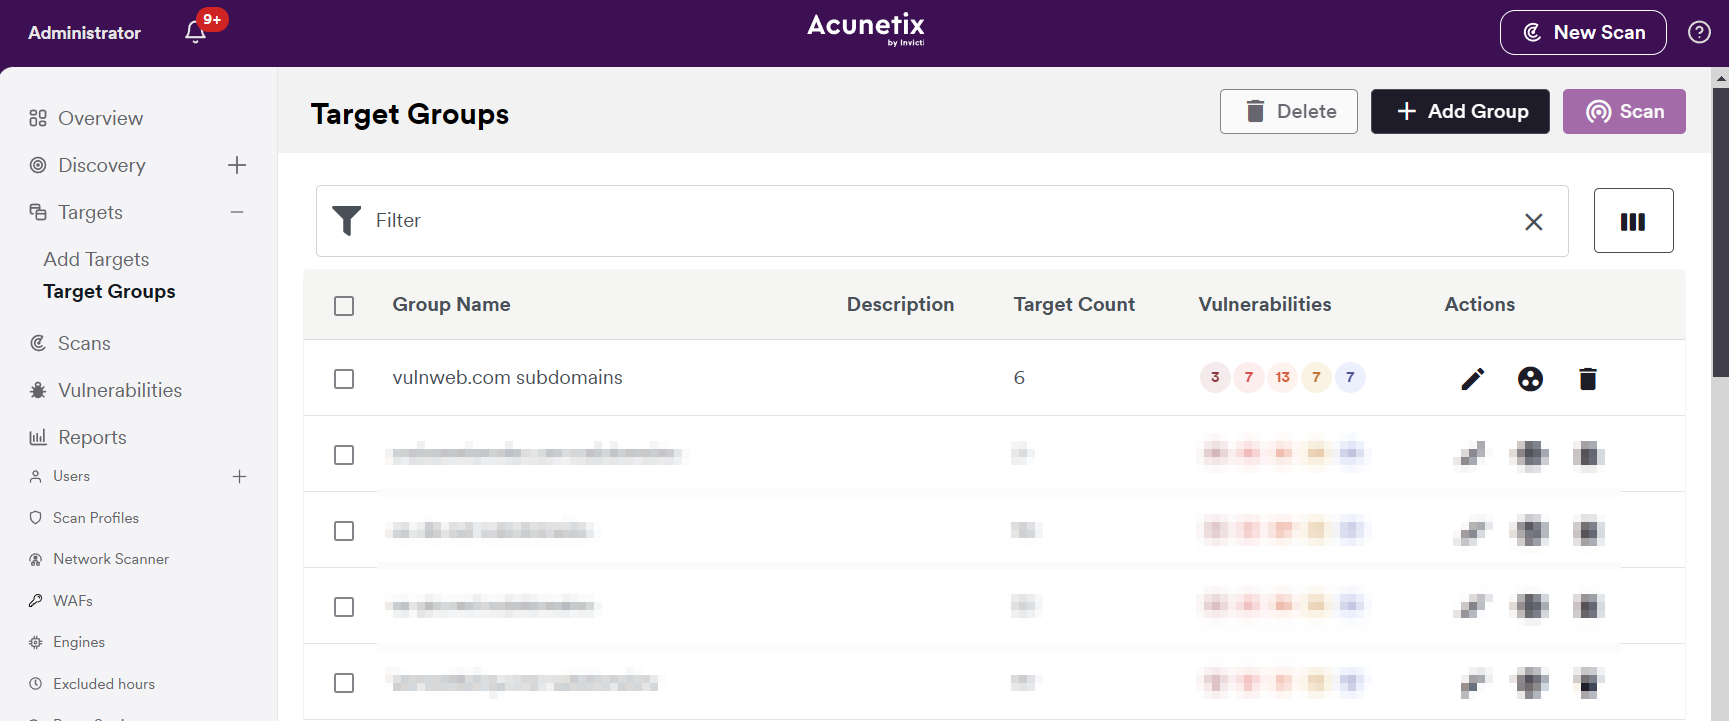
When user provide domain target, the bot will scan subdomain using subfinder and httpx then add them to the Acunetix target list.
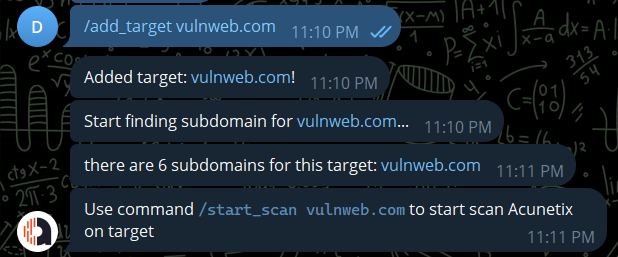
/add_target <domain>
|
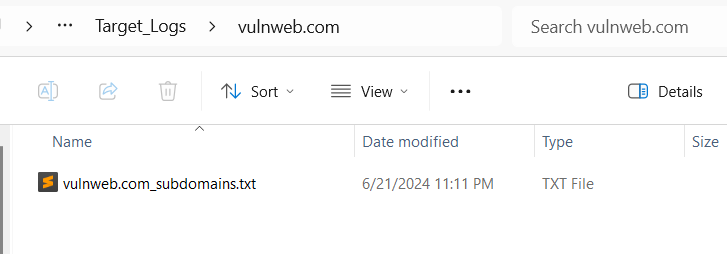
subdomain will be save to Target_Logs/<domain>/<domain>_subdomain.txt
|
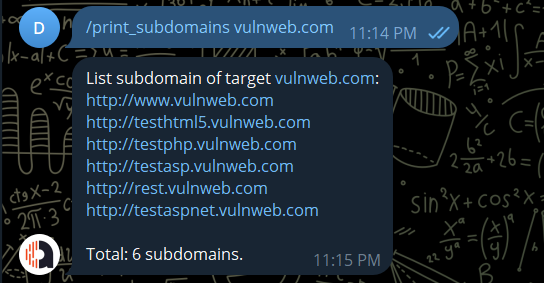
/print_subdomains <domain>
|
Add single target to Acunetix scan list and scan it immediately.

/start_scan <target URL>
|

|
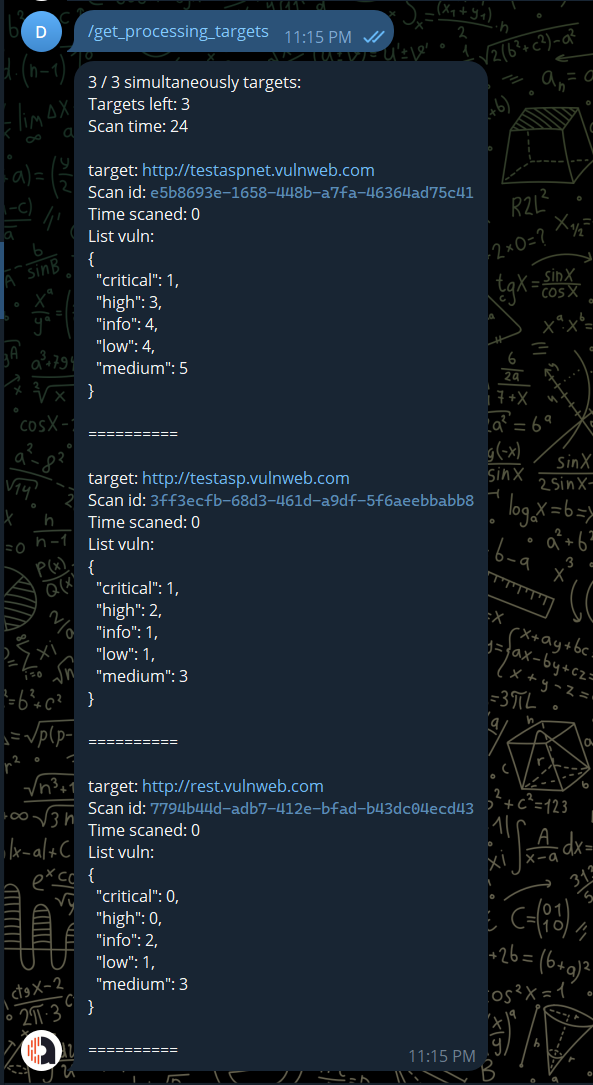
/get_processing_targets: get processing targets
|
Set number of concurrent targets. If the current number of targets is larger than the set number, the bot will do nothing but wait for one of the targets end, or force to end by the scan time in config file.
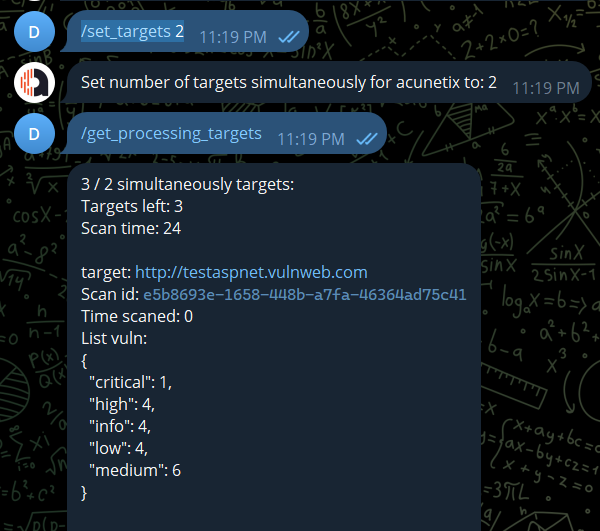
/set_target <int>
|
Stop scan by it id. You can get the scan id of the target by using command /get_processing_targets.
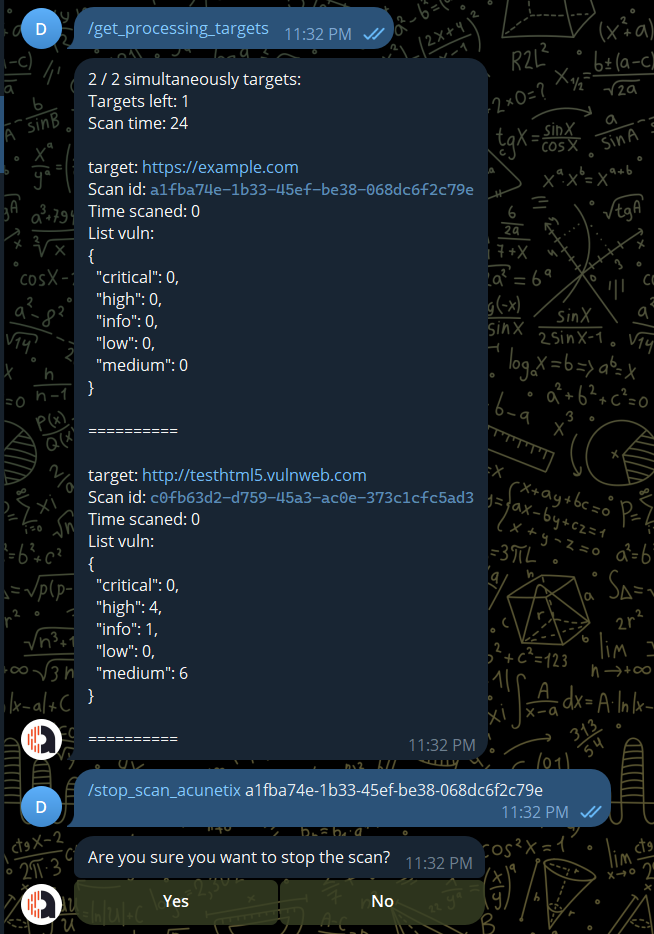
/set_target: <scan_id>
|
The bot will auto check for new vulns found by Acunetix of all targets every 1 min, if there are new vuln have severity from medium-critical it will sent user the vuln detail.
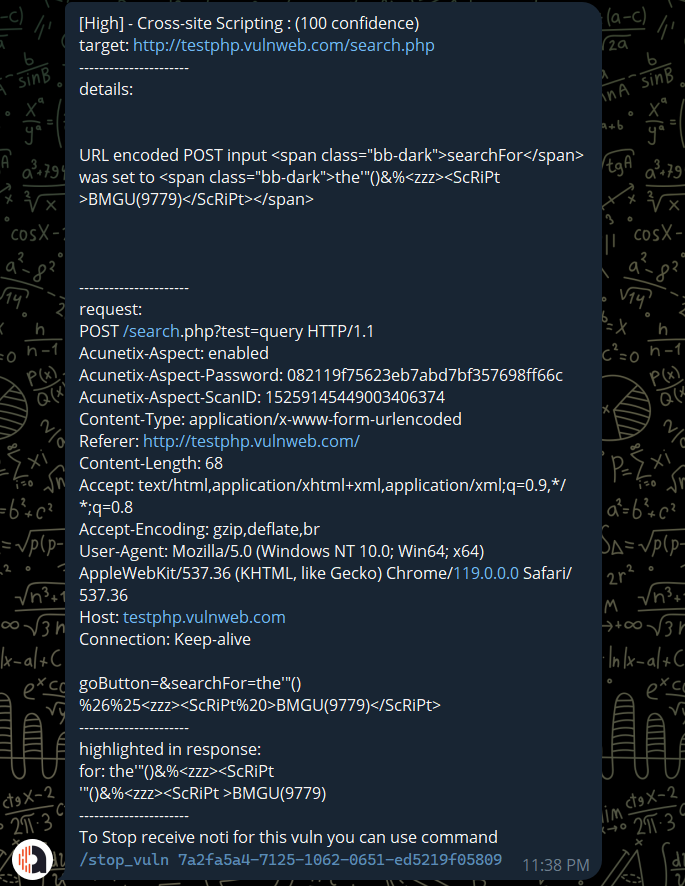
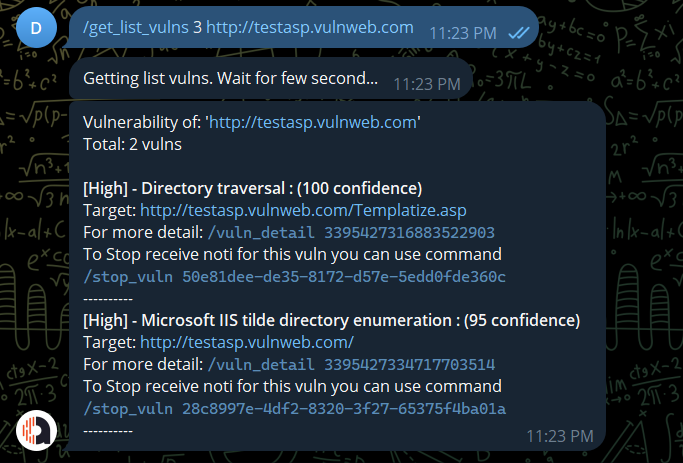
To stop receive a specific vuln you can use command /stop_vuln vuln_id. You can get the vuln id at the end of the vuln detail message or use command /vuln_type int or command /get_list_vulns int
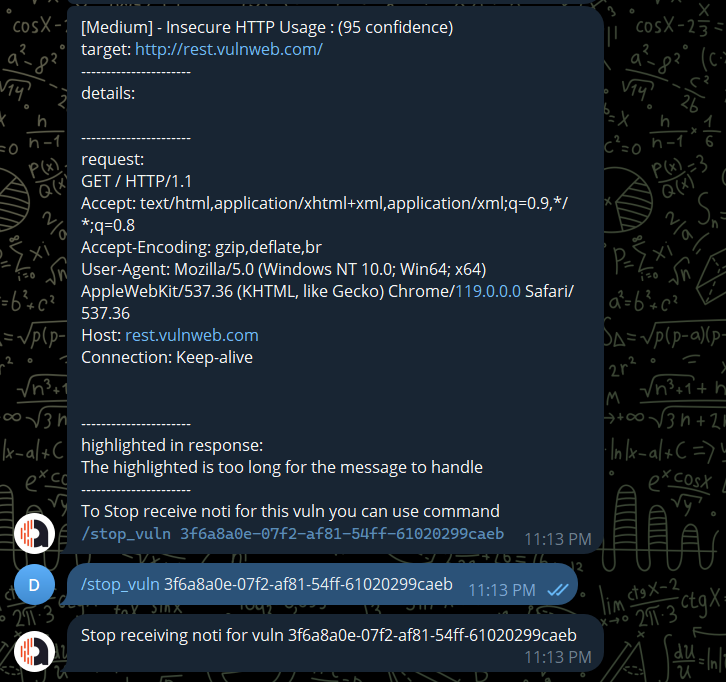
/stop_vuln <vuln_id>
|
Find vuln type by severity (1-4: 4 is critical, 1 is info) on all targets. Eg: search for high severity vulns:
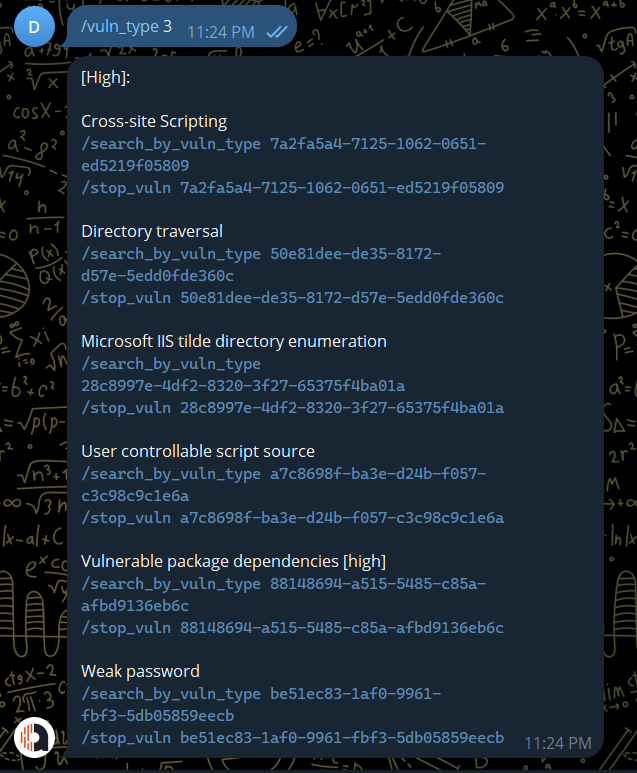
/vuln_type <int(1-4)>
|
Search all the targets that have specific vulnerabilities by vuln type id.
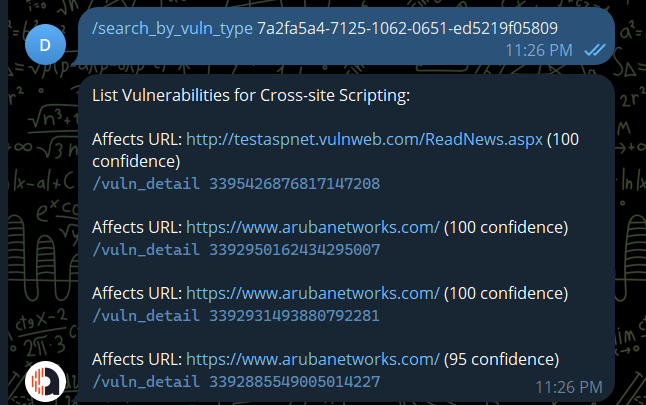
/search_by_vuln_type <vuln_type_id>
|
Or you can search for specific severity for specific target URL.
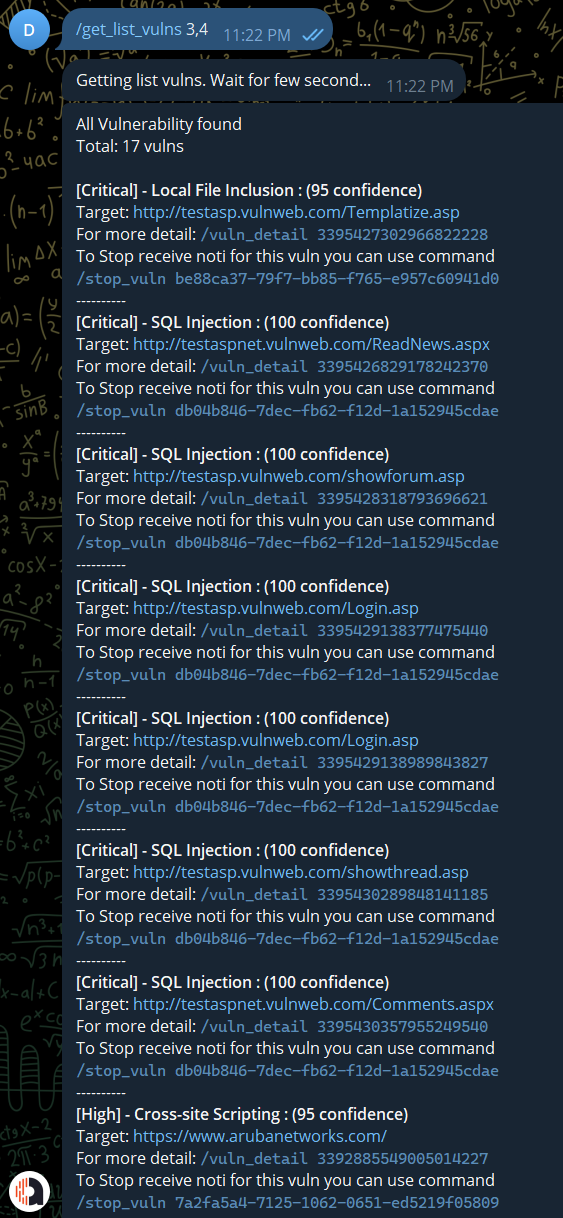
/get_list_vulns <severity> <target URL>
|
|
Get the vuln detail by id: http request, highlighted, references, ...
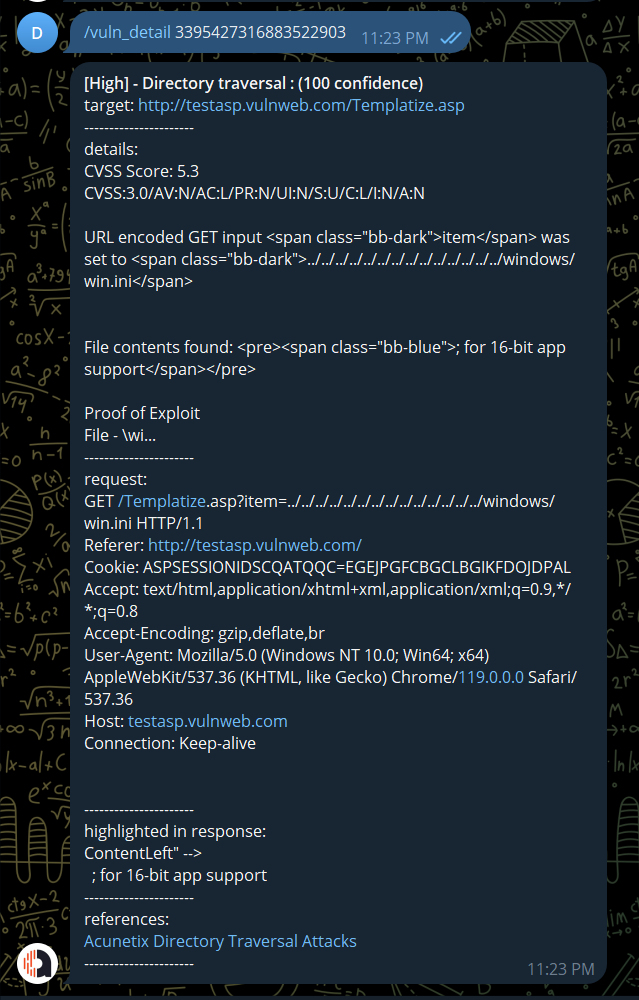
/vuln_detail <vuln_id>
|

/ram
|
/note / /read_note
|
/auto_abort_scan_false / /auto_abort_scan_true
|
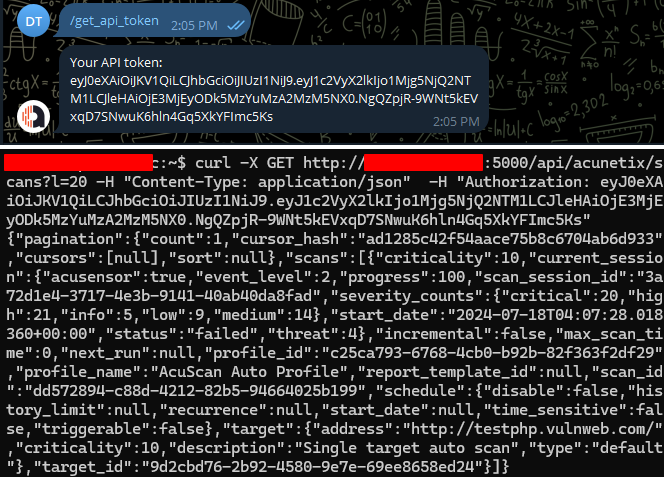
/get_api_token
|
- It may have a conflict between httpx module of python and the httpx tool so you can modify this line to the absolute path of the binary file.
- Currently scan nuclei not available yet because I did some stupid stuff with it :v I may update it in the future.
