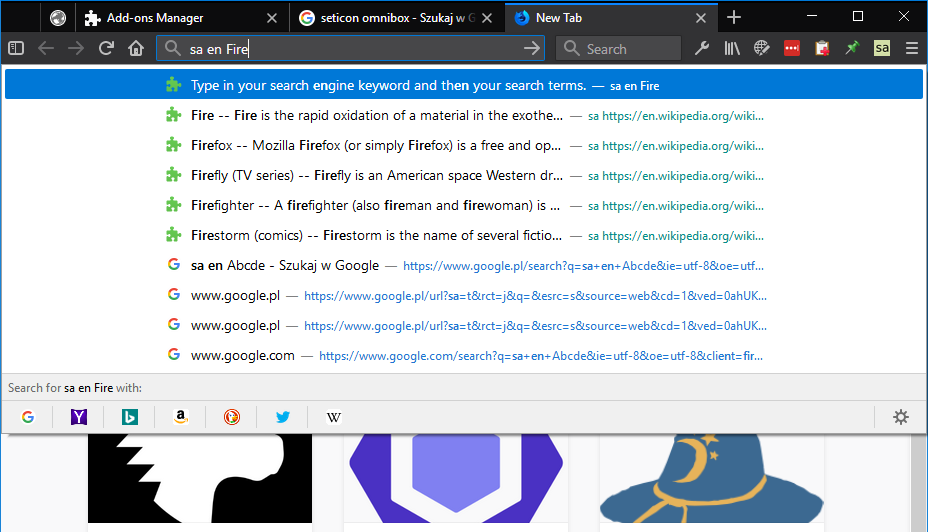
This WebExtension aims to give you quick, keyword based autocomplete for your search engines. Making your address bar an effective tool again 😉. Should be a good replacement for Omnibar add-on (that worked until FF 56).
Installation through AMO page: https://addons.mozilla.org/pl/firefox/addon/searchautocomplete/
If you would like to contribute (or fork) this extension see the Development instruction.
By default you are provided with autocomplete for English and Polish Wikipedia.
You can easily add new Wikipedia by coping existing engine definition. Just change the base URL and the keyword.
I support any search engine that is roughly similar to Wikipedia.
For any Wikipedia website (and MediaWiki based website) you can just copy one of the default engines. In settings all you need to change is the Title, Keyword and Base URL. On some rare occasions you might to tweak other URLs.
Wikipedia uses the OpenSearch Suggestions standard. Some other sites might support this too.
For this format the server returns something like this:
[
	'search term',
	[...titles...],
	[...descriptions...],
	[...direct urls...]
]
I only require that the search term and tiles array is present. I don't actually use the search term, but it seems to be required by the standard.
- titles -- title of the matched article.
- descriptions -- description (preview) of the matched article. If not present then just titles will be displayed.
- direct urls -- url of the matched article. If not present then I will use
openaction definition to build the URL.
As I said above I only require an array with search term and tiles array is present. So that should be easy to implement (if you have a control over the server).
Outside of Wikipedia world OpenSearch is not very popular. Chances are that if you see an auto-complete on a page it's not using OpenSearch. But fear not 😉! You can still use this extension with a bit effort (or a friend that can send you instructions).
Typical steps are:
- Open the page with search autocomplete.
- Open DevTools (CTRL+SHIFT+F11).
- Go to Network tab.
- Click on the search field with autocomplete.
- Observe requests in the Network tab of the DevTools.
From the request you should get all the necessary information. That is:
- What is the URL for autocomplete.
- What are the attributes.
- What is the format of the Objects' array.
I'll give you an example of how to configure search autocompletefor AMO (Addons Mozilla Org). But before we start...
Here is how you can simply import it:
- Install the Search Autocomplete extenstion. Obviously 😉.
- Type in
sa optionsin the address bar. - Click on "Import engines" button.
- Copy the code below.
- Paste the code in Import section.
- Click "Append engines" and "Store changes permanently".
And your done. Immediately after storing changes you are ready to go. Type in e.g. sa amo translate and you should see some extensions for translation.
{
	"keywords": [
		"amo"
	],
	"baseUrl": "https://addons.mozilla.org/",
	"title": "AMO",
	"credential": "",
	"openAction": {
		"url": "{baseUrl}firefox/search/",
		"method": "GET",
		"type": "",
		"autocompleteType": "",
		"paths": {},
		"data": {
			"q": "{searchTerms}",
			"platform": "windows"
		}
	},
	"autocompleteAction": {
		"url": "{baseUrl}api/v3/addons/autocomplete",
		"method": "GET",
		"type": "",
		"autocompleteType": "objects",
		"paths": {
			"root": "results",
			"titles": "name",
			"urls": "url"
		},
		"data": {
			"q": "{searchTerms}",
			"platform": "windows",
			"app": "firefox",
			"appversion": "59.0",
			"lang": "en-US"
		}
	},
	"id": 3
}
Open action is the thing that happens when you type in something and press Enter without choosing an option.
So on AMO search page if you type in translate in the search field and press Enter you will be redirected to something like:
https://addons.mozilla.org/en-US/firefox/search/?platform=windows&q=translate
So only two parameters here. And the URL is https://addons.mozilla.org/en-US/firefox/search/.
I'll assume you already have DevTools opened. If not see above.
I've typed in translate in the search bar. And got some requests. You will want to look at the last one (just after you typed in the last character).
First thing to do is we can copy the request URL which will be something like:
https://addons.mozilla.org/api/v3/addons/autocomplete/?app=firefox&appversion=59.0&platform=windows&q=translate&lang=en-US
You can copy the URL by using right-click on the request (this should bring up menu for the request with Copy -> Copy URL command).
Looking for the search term translate I typed in I notice it is passed as q parameter. So I simply add q as the first parameter with {searchTerms} value ({searchTerms} will be replaced with the phrase you type in). And the rest of the parameters just follow.
Oh, and we can use https://addons.mozilla.org/api/v3/addons/autocomplete/ for the autocomplete URL.
At this point you might notice that https://addons.mozilla.org/ is common for both URLs. You can use it as a base URL by:
- Pasting
https://addons.mozilla.org/in the "Base URL" field (above actions). - Replacing
https://addons.mozilla.org/with{baseUrl}template in the Open action URL field ({baseUrl}firefox/search/). - And the same for the URL field in the Autocomplete action (
{baseUrl}api/v3/addons/autocomplete).
Using the base URL is not required here. Might be a bit more readable though.
Go back to the request in the DevTools. Then click on the "Response" tab of the request.
You'll see something like results: [...] and then some items. So you already have the root path (results).
You'll also notice each item is pretty much the same and something like:
{
	"id":914462,
	"icon_url":"https://addons.cdn.mozilla.net/user-media/addon_icons/914/914462-64.png?modified=1517152823",
	"name":"Search Autocomplete",
	"url":"https://addons.mozilla.org/en-US/firefox/addon/searchautocomplete/"
}
So, a path for titles is name and for URLs it's url. Easy.
Right, so AMO has relatively simple results. And most of the autocomplete API should be similar.
You might see something more complicate though. I got you coverd
meta.title path will work for items like:
{
	"meta":{
		"title": "some title",
	},
}
meta.titles[0] path will work for items like:
{
	"meta":{
		"titles": ["main title", "sub title"]
	},
}
Note that arrays have 0-based indexes. If you want to get to the 2nd item ("sub title" in example above) use meta.titles[1].
meta.titles[0].main will work for items like:
{
	"meta":{
		"titles": [{
			"main": "main title",
			"extra": "sub title",
			"lang": "en"
		}]
	},
}
If you still need something else let me know. Please add an issue and specify the format you need (or simply URL of the autocomplete request).
If you are interested how parsing responses is currently working have a look at OpenSearchParser class (app\scripts.babel\inc\resultParsers\OpenSearchParser.js) and compare with ObjectsArrayParser class in the same folder.
If you would like to contribute to this extension please see the Development instruction.