Home_eng

- What's array tools ?
- Why using this addon, Blender has already an array modifier ?
- Local / world
- Linear / factor
- Pivot point
- Local / world
Array tools is an addon for Blender 2.80+ to create array with random options. Mix translation, scale and rotation array in any direction.
True but for rotation array, the modifier isn't handy. Have you ever tried to create a spiral stairs? Plus, there's no way for scale.
(remove any previous version)
- download the files (download zip)
- in Blender, go to edit > user preferences... > add-ons > install... and select the zip file
- check the array_tools tab
The ArrayTools creates array from selected objects.
- in object mode, select one or more reference objects for array.
- in the sidebar, look for ArrayTools tab
- click on the start button

- set the number of copies (reference object counts as one)

- modify translation and/or scale and/or rotation
- (optional) add a pivot point

- (optional) add more rows
- (optional) add random
- (optional) add an animation
- click on the 'Done!' button
The addon looks like the image below at the beginning.
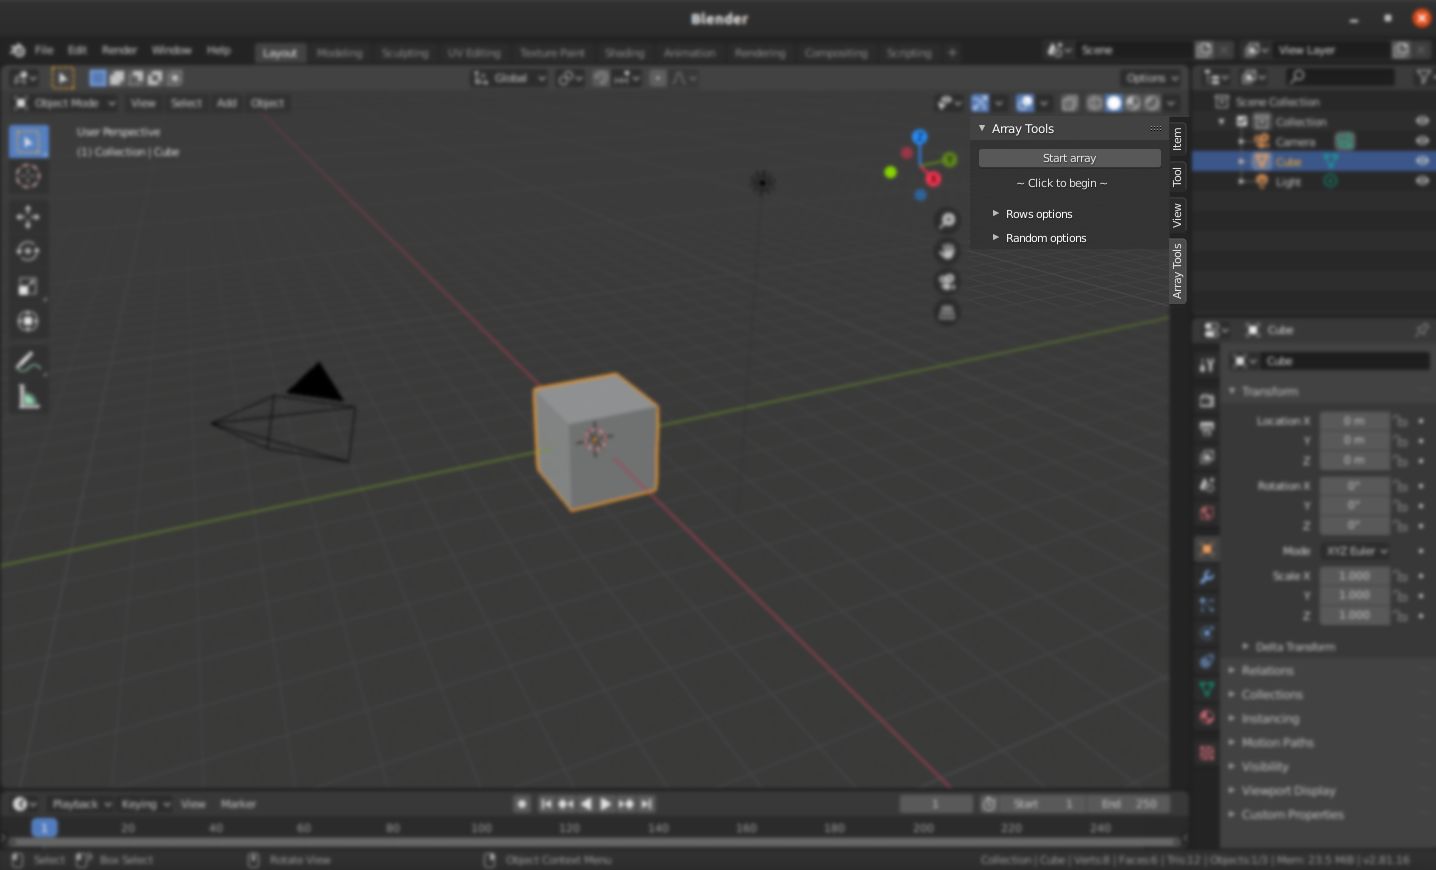
Note : the tab will show only in object mode and with at least one object selected.
- click on the start button
From here, users have many options.
 Warning : please do not use undo when playing with settings.
Need for help ? The addon contains many tooltips : just wait few seconds over a parameter to see informations on it.
Increase (or decrease if count is upper than two : original + copy) number of objects.
Example :

If you need 4 copies, click the right arrow or click and type 5 in the count. As you notice, the reference count as one element.
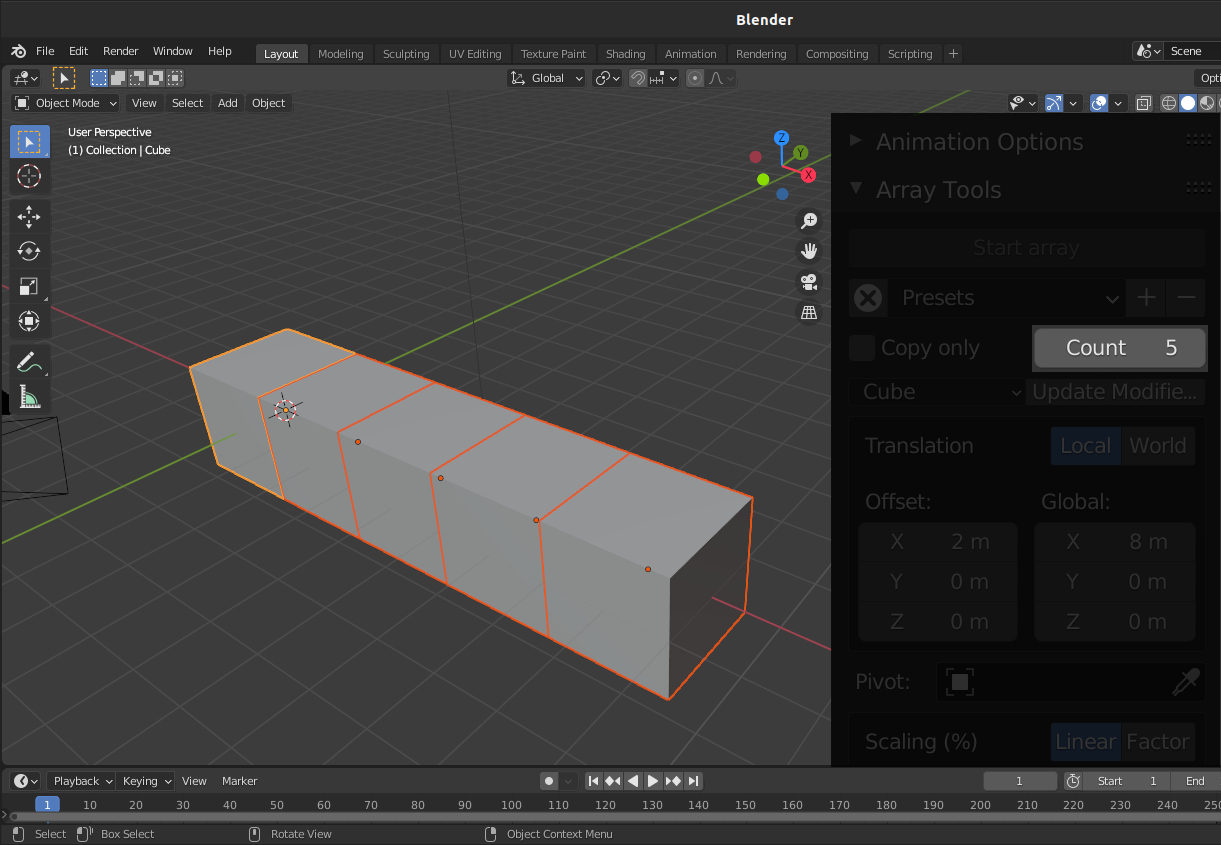
Note : the location of a new object depends on the last mode used (offset or global).
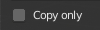
By default, the addon creates duplicates (or copies link). Check this if you want only copy(ies) of your object.
Duplicates are link, which means if one of them is modified in edit mode, others will be too.
When you're happy with your settings, confirm your choices by clicking on the 'Done!' button.
You can also cancel the array.
The Tab name of the addon can be modified at any time. To do so, go in Edit > Preferences > Addons > Array_Tools and rename the tab.
By default, the tab name is Array Tools. (see image below)


To save a specific array, you can add your own preset.
To add a preset :
- click on the plus button
- give a significant name to the preset
- click ok
To remove a preset :
- select the preset you want to remove in the list
- click on the minus button
There is two way to reset parameters. The first one resets all parameters of the addon. The second is provided by Blender but for one or a group of parameters.
-
To reset all parameters, click on the cross button.

-
To reset a group of parameters, right click on a parameter and select Reset All to Default Values OR use the shortcut Backspace.

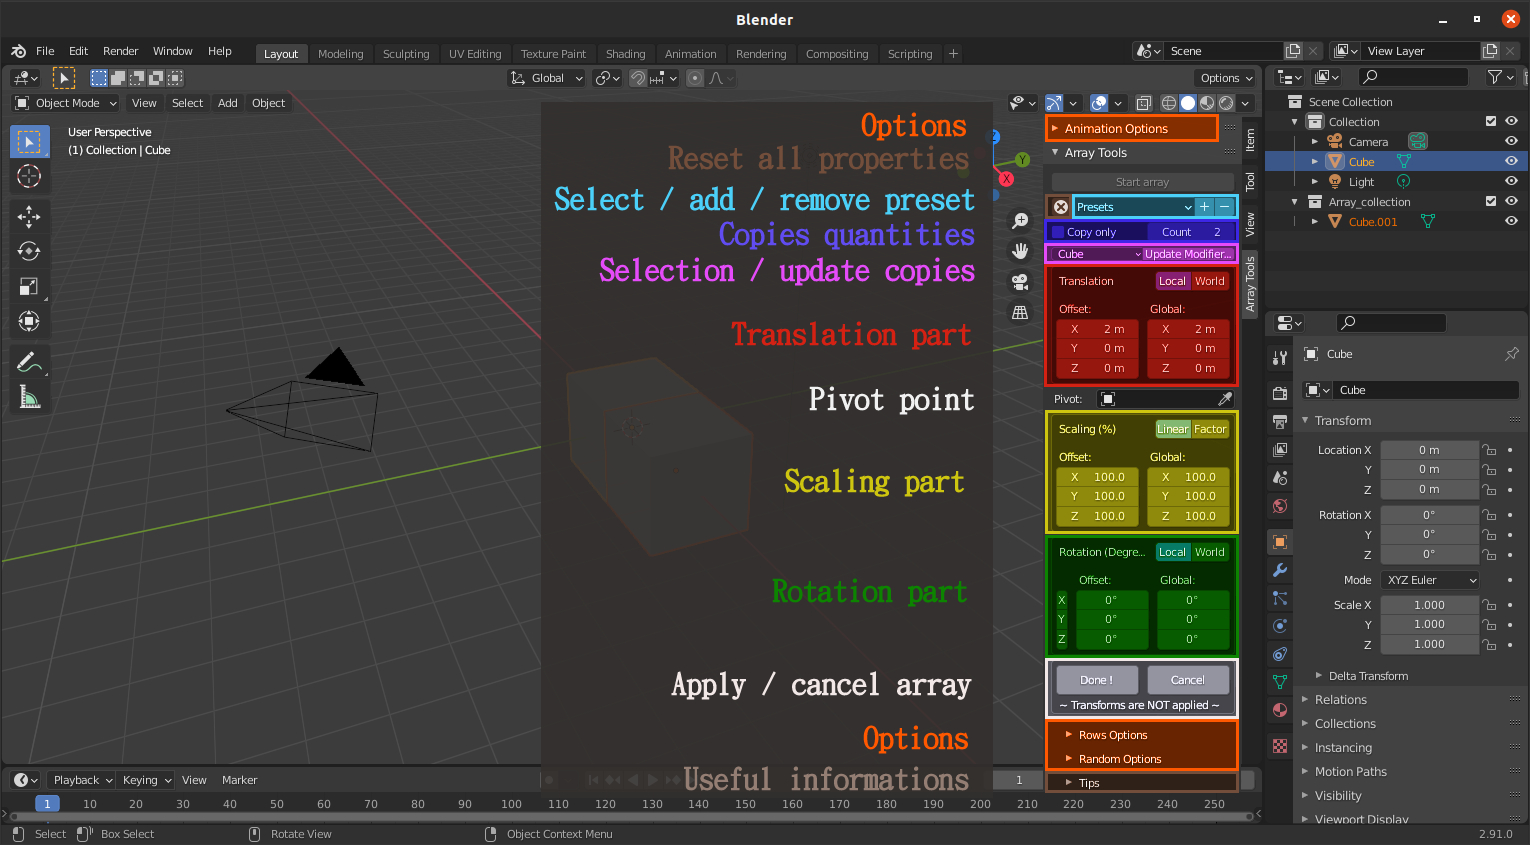
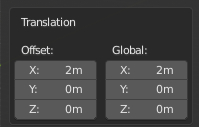
Translation is the transform by default. Choose between offset or global according to your needs.
Offset is the distance between each element. While global is the distance between the reference and the last element. Each time one of them is modified, the other is updated.
Examples:
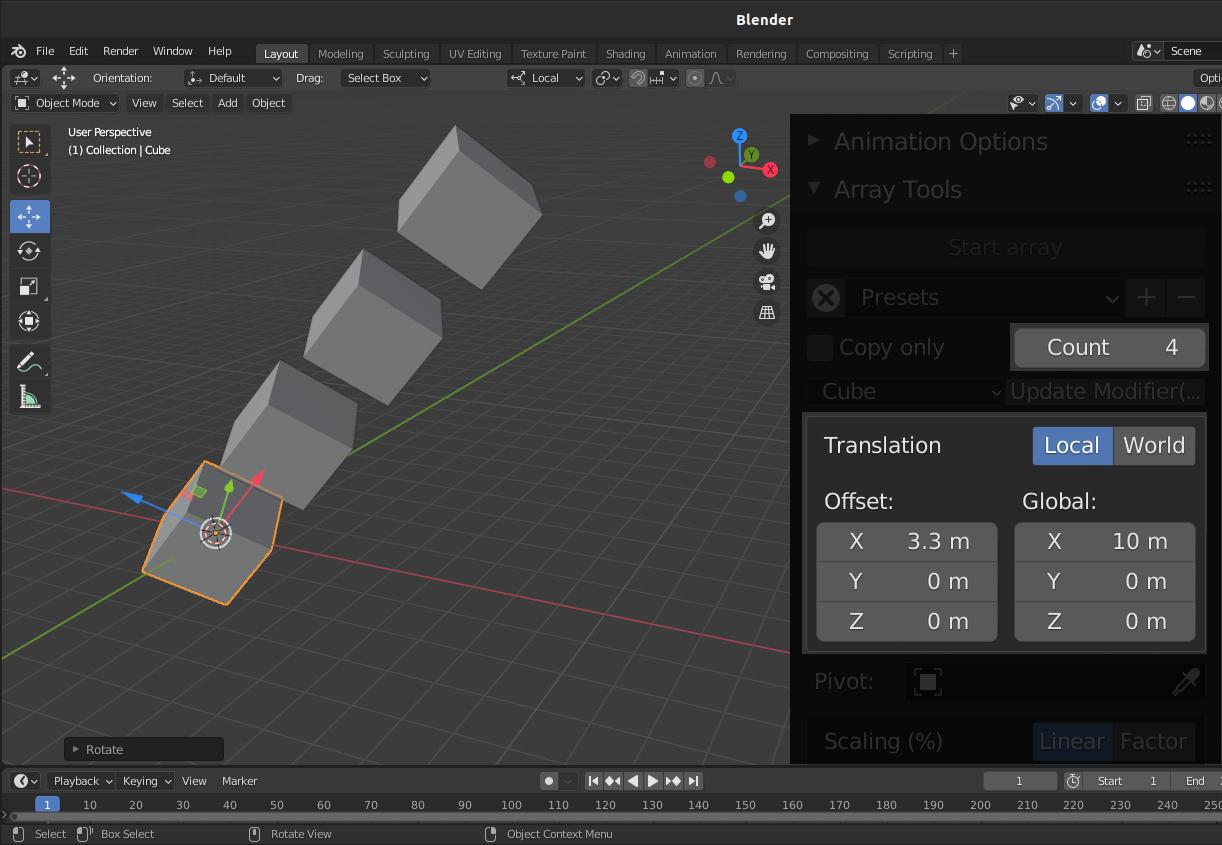
At the beginning, the count is at 2 : the reference and one copy which mean, offset and global are the same distance.
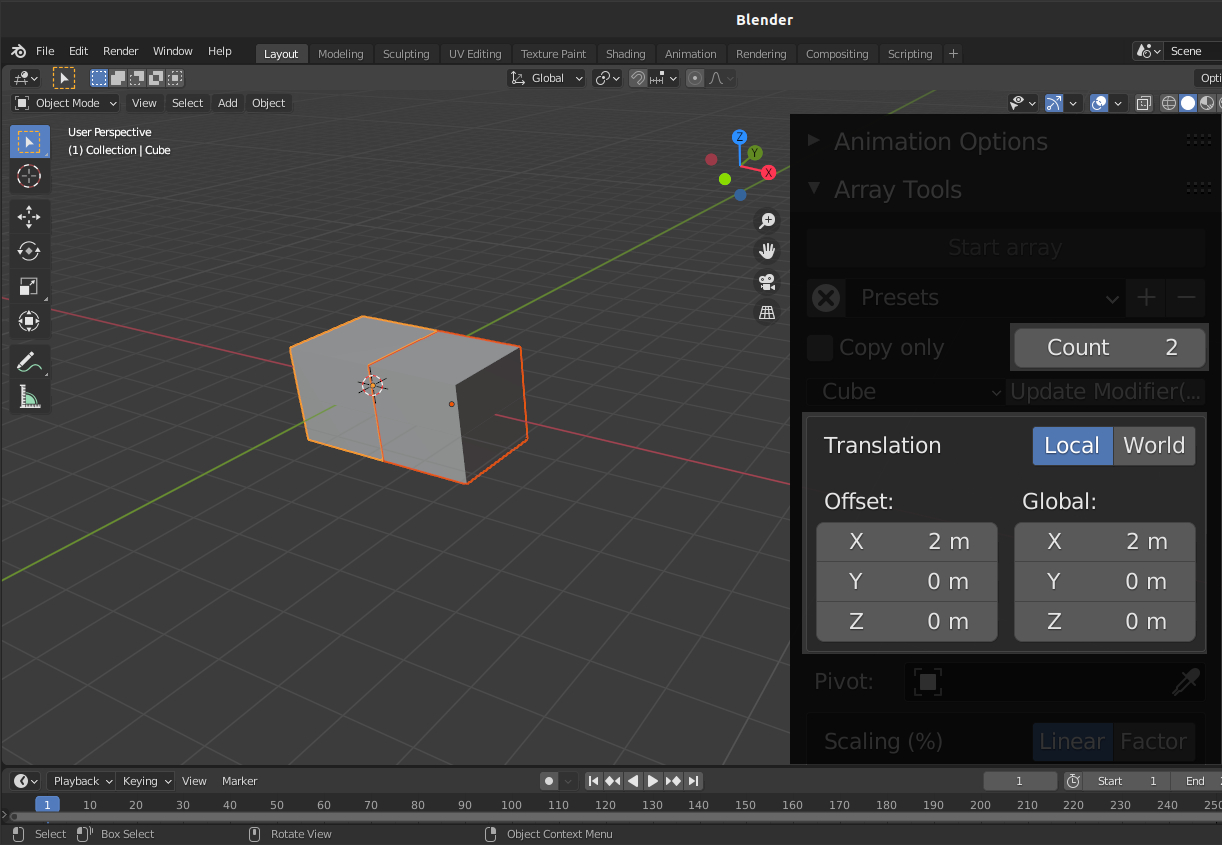
Let's change x offset to 3 meters and add one element (so count = 3). The new copy is therefore at 3 meters on x axis from the first copy. Global updates to 6 meter on x axis.

One more example, change the x global to 10 meters and add another element (count is at 4). The last element created is at 10 meters from the reference. And offset is updated.
 Note : global distance can be useful for stairs when you know the length and the height.

Choose between local axis of the reference object or world axis. By default, axis are local.
With the same example as above but with a rotated cube, copies are aligned with the local x of the reference object.
However, if we change for 'world', copies are aligned with the global x axis.

Like translation, you have the choice between offset or global scale.

Offset is the scale of the first copy, and global of the last copy. Default scale is 100 %, unlike Blender which is 1. Below 100 % the object will be smaller and bigger above.
Which mean if the x offset scale is at 80 % and with 3 copies. (count at 4 don’t forget), on x offset, the first copy will be at 80 %, the second at 60 % and the last at 40 %. Since the last is at 40 %, global x offset will be also at 40 %.
 Notice that with many copy the scale may be negative.

There is two methods to calculate the scale. Linear scale increases or decreases the size regularly while factor scale uses a factor!
To illustrate this, here an example with linear scale.

And with factor scale.

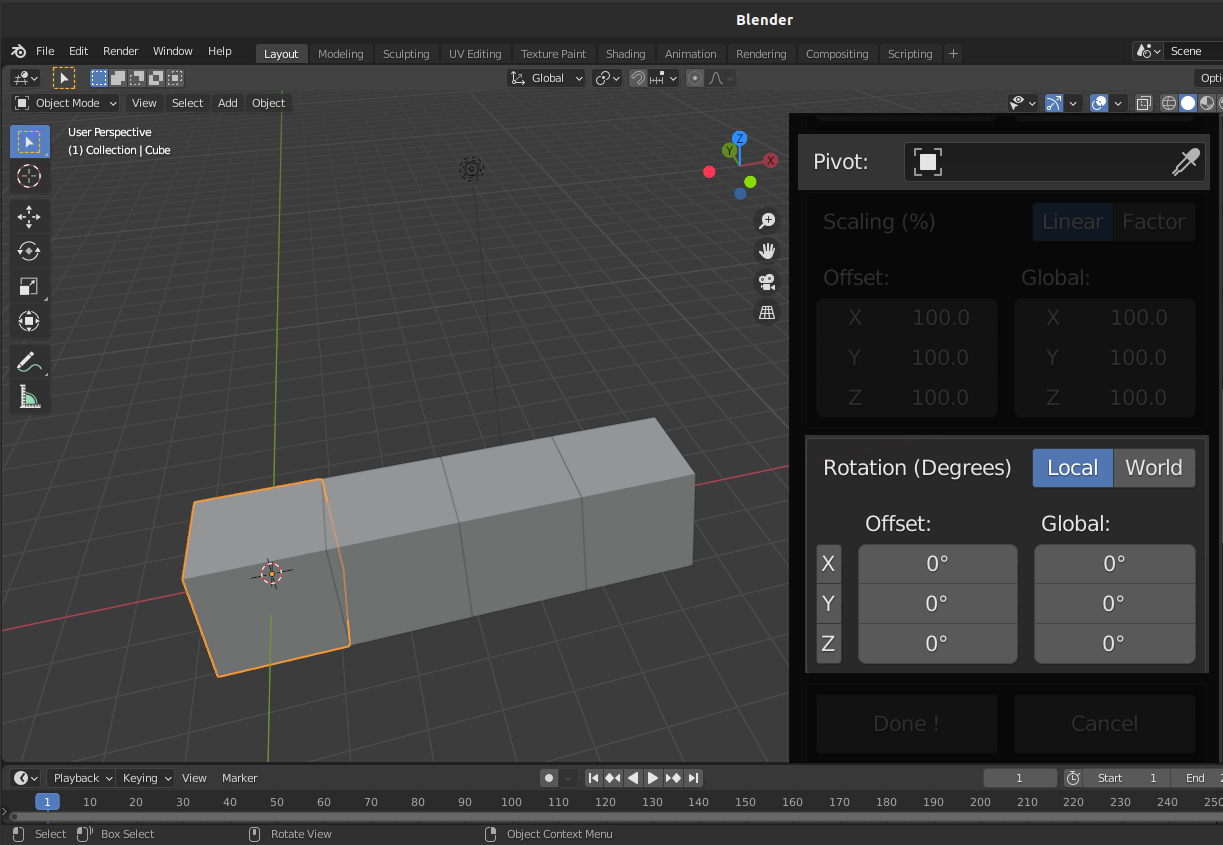
In rotation, offset is the angle formed by the origin of the reference object, the pivot and the origin of the first copy.

While global is the angle formed by the origin of the reference object, the pivot and the last copy.
Use one of the three buttons for a quick 360°.
Example:
Reset all values, add 2 more objects.
Add 15 degrees in the x offset axis.

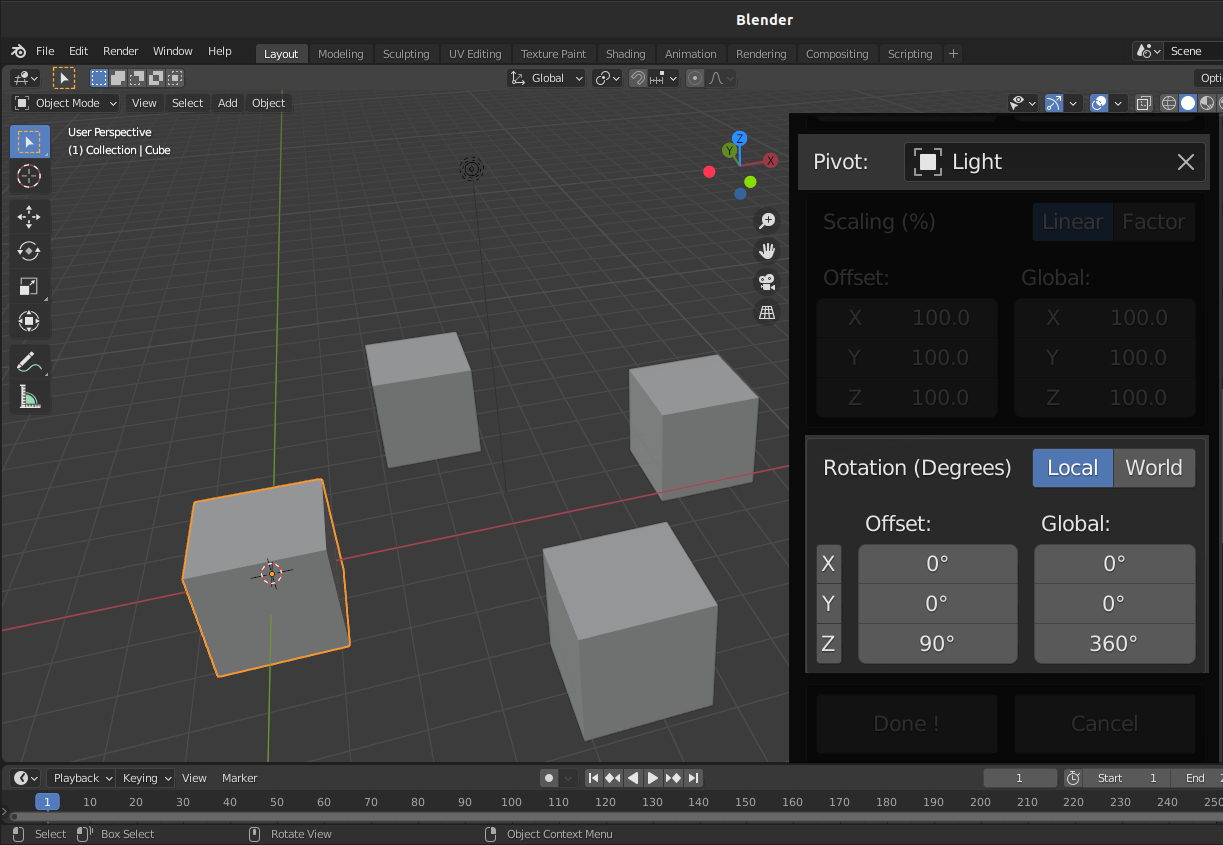
User may choose a pivot. If none, origin of the reference is used instead (avoid the array copy).
With the same example as before, add a pivot (like the light) and click on the small 'z' button to get a quick 360 degrees around the z axis.
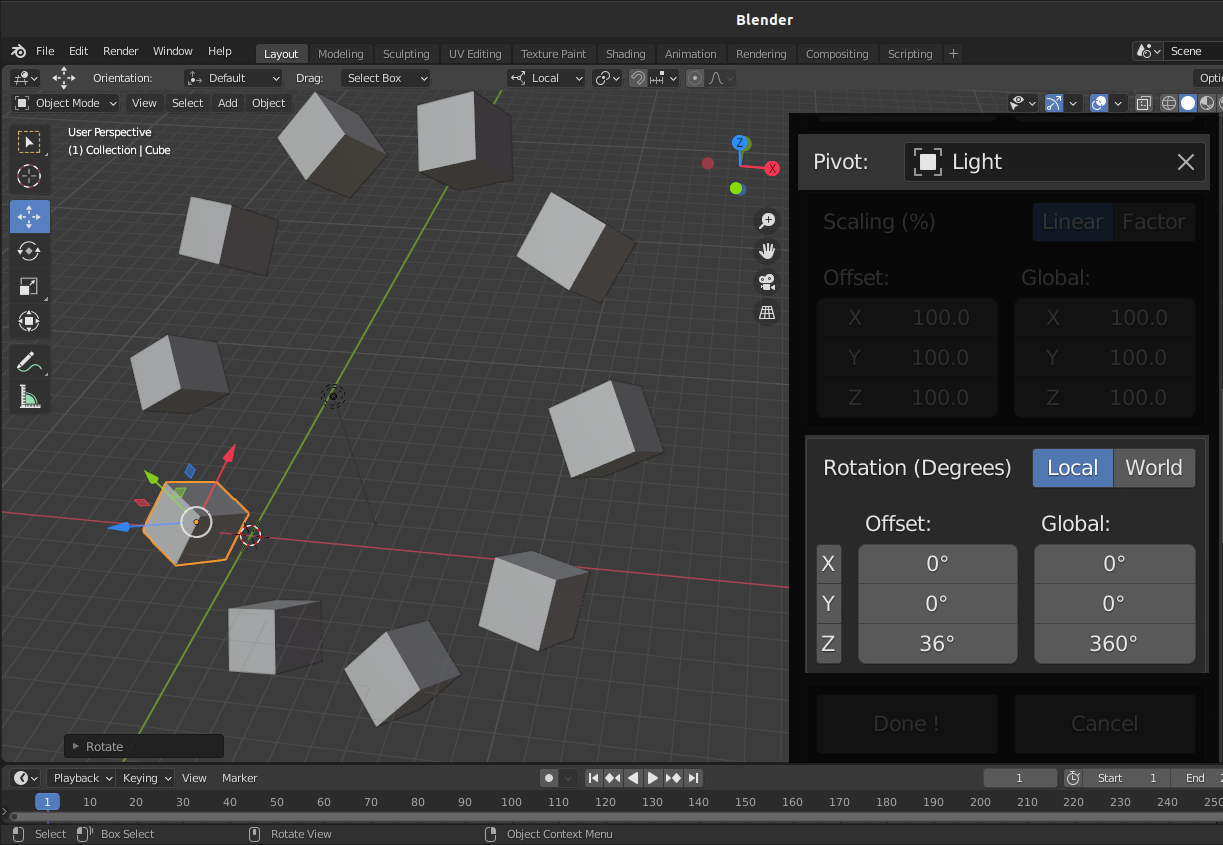
Like translation, you can choose between local and global axis.
Here an example with a rotated cube, count at 10, the light as pivot and a rotation of 360 degrees on the z local axis.
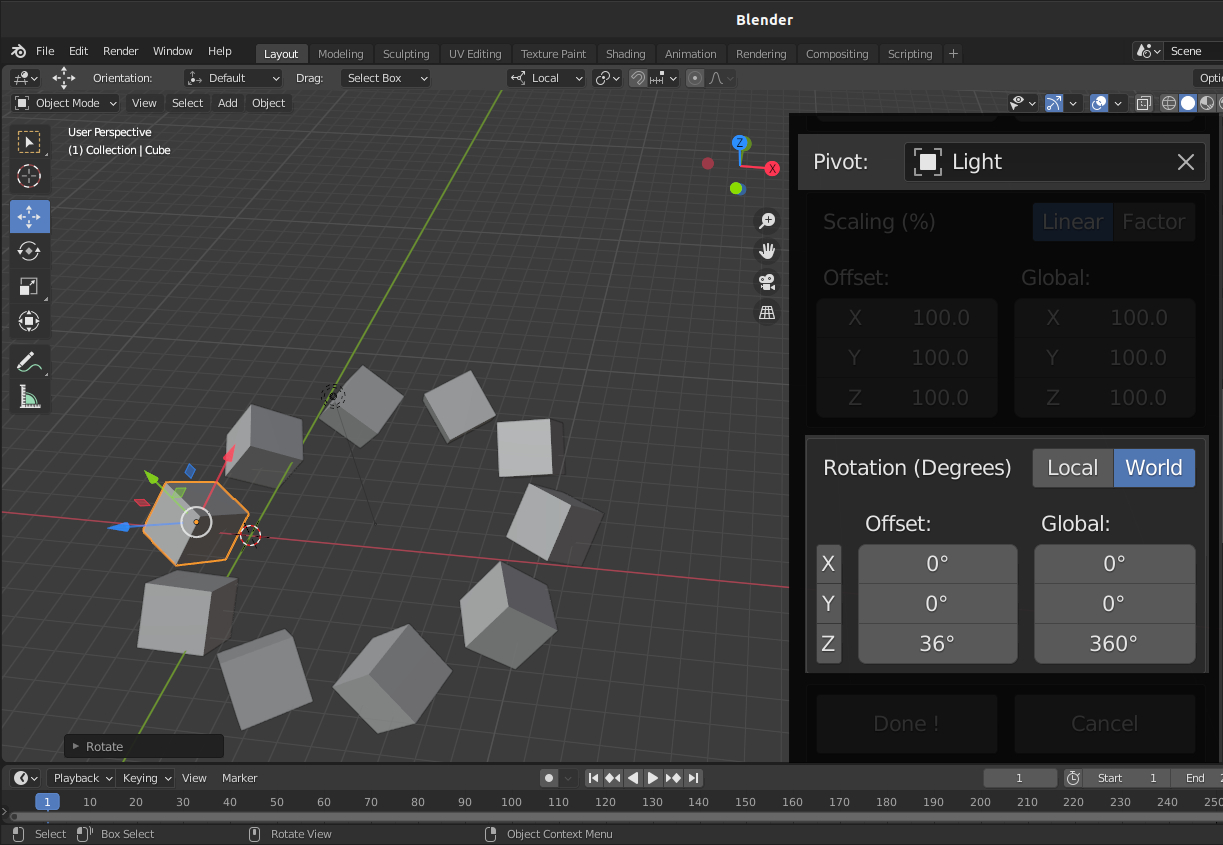
And the same example with world axis.
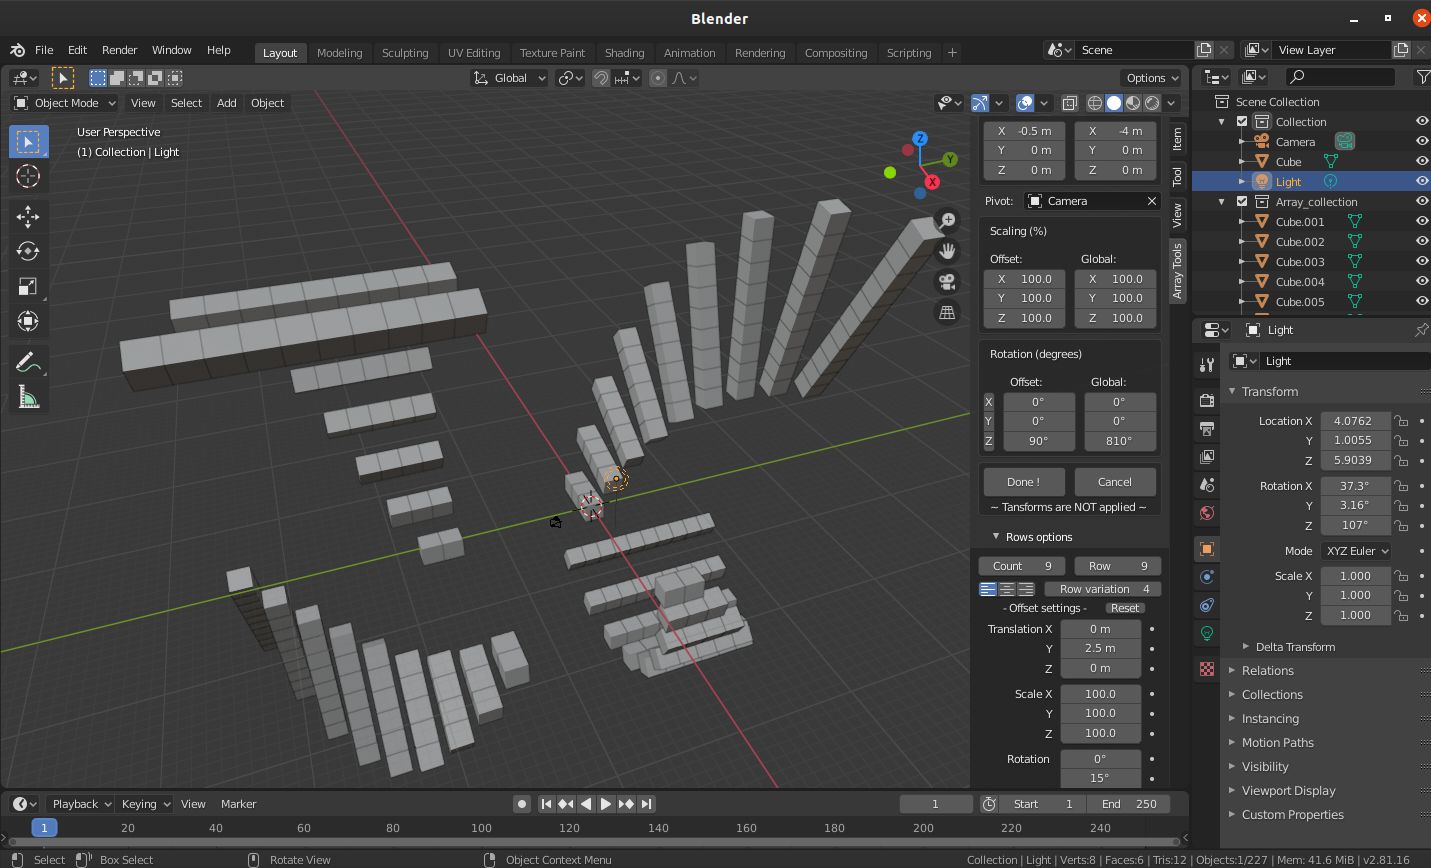
Options contains rows, random and animation.
Rows options looks like this.

Count is the same as the one at the top of the addon and gives the number of objects in column and row indicates the number of elements in row.
Translation, scale and rotation can be mix like others transforms but these one affect only the rows.
At the bottom, a total and the number of elements of the current row are displayed.

Variation is a special part of the rows options since it gives you the ability to vary the number of elements in a row between -5 to +5 elements.
An illustration is always preferable to a long explanation so here an example of a variation of -1.

Note : be careful when using the variation as the number of elements increase greatly.
Since the rows haven’t the same size, you can change their aligment : left, centrer and right.
Here the same example but with center align.

And with right align.

Two modes are available in random.
- a simple mode for all axis.

Check the box(es) to add translation, scale and / or rotation and change the values. Then, modify the seed.
- an advance mode for precision.

Use the fill buttons to get random values. Don't forget to check transforms to be include in random.
Mask is a way to make 'holes' in your array. Copies are first hiden and then deleted once the changes are validated.
Add masked objects :
- set the number of copies to be mask (they will be erase later)
- click on the 'Mask' button until the desired result
- click on the 'Done!' button
Remove masked objects :
- click on 'Reset mask'
Note: masked objects aren't delete until the 'Done!' button is clicked.
At this time, animate addon properties with Blender does'nt work, that why this part exist.
This is what this part looks like.
 This panel is a condensed version of what already exists except for the top.
It is quite possible to modify its settings in creation mode and only then switch to animation mode.
The creation mode is similar to the main panel and uses the same properties.
The animation mode is slightly different: instead of count it is column quantity and instead of row it is row quantity. These two values allow you to hide or show copies according to the desired number. This simulates the addition or deletion of an element.
The following toggle buttons represent from left to right : position, scale, rotation, visibility in the viewport and visibility in render.
They can be independently switched on or off. If one of them is on when the button  is pressed, it will be animated.


add selected properties in the animation at the current frame.
 remove selected properties at the current frame.
 erase all keys.
When all settings are ready, click on the "done!" button or cancel your choices with the "cancel" button.
Have fun !
As a conclusion, here are some examples of what you could create. (all examples are made with the default scene)


Simply click on any object in the scene. The name of reference object is store when you click on the start button. So no worry, continue to play with the addon.
You can report here or leave a comment at blenderartists.