07 Demo
The purpose of this demo is to display the capabilities of our Annotation Web Service to potential clients. An intuitive user interface abstracts the technicalities away from the user and lets them experience our service with real-world examples from code repositories. The demo frontend itself is a microservice that is quickly setup and accessible as a Docker container along the other microservices.
The following sections describe the technologies used in the Demo Frontend and reasons for their usage.
We implemented the user interface with the Vue framework. This decision was driven by the prior experience with this technology and because it is well-fitted for implementing an interactive single-page application. Furhermore, we use Pinia stores to manage the data on the client side.
For quick scaffolding we leveraged the Tailwind framework in combination with UI components from the DaisyUI component library. Using these predefined components enabled us to quickly iterate between versions and smoothenend the developing experience.
We followed recommended practices from the NestJs documentation while developing the Web API. The folder structure is as follows.
| Folder | Description |
|---|---|
| src/views | Folder where the main views can be found. Because the demo is a SPA, only one view (Home.vue) exists |
| src/components | As usual in Vue projects, elements of the main layout as well as re-usable components are organized in this folder |
| src/composables | Helper scripts and JS files that can be imported in components are in this folder |
| src/stores | All the pinia stores can be found in here |
| src/main.js | Entry point for the Vue application |
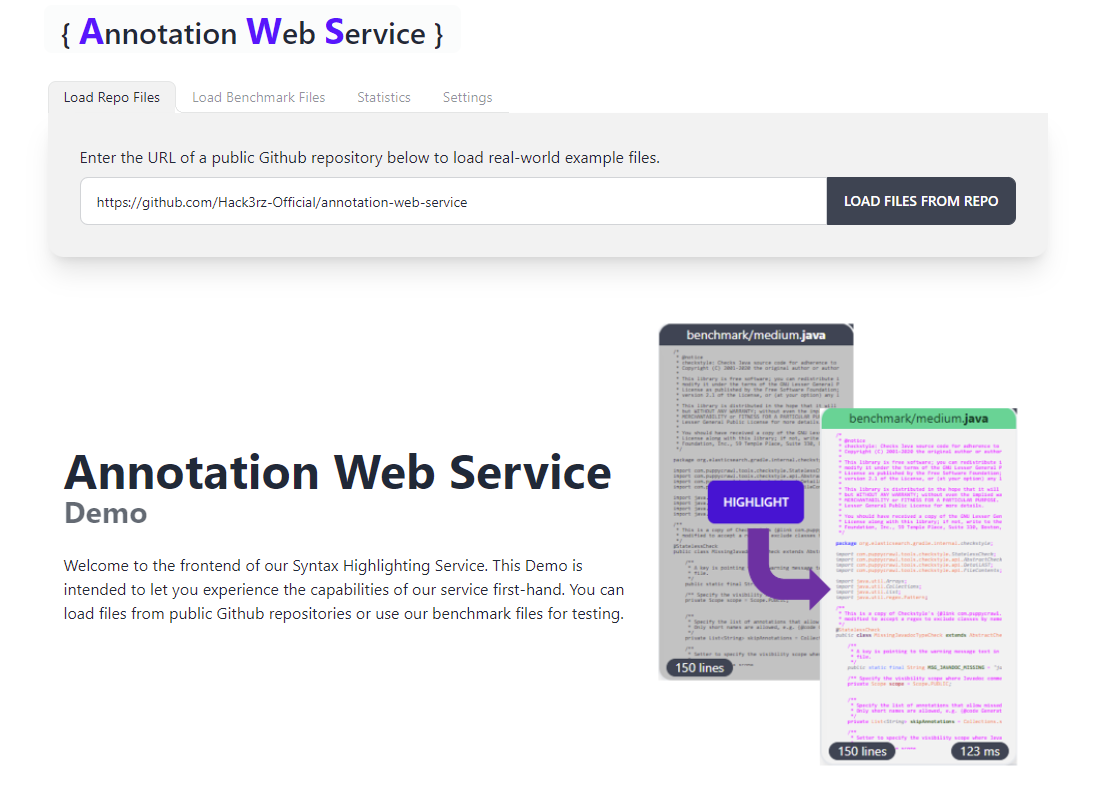
Files can be loaded in two seperate ways: The user can load source code files from public Github repositories via the "Load Repo Files" tab. We also provide predefined benchmark files (tab "Load Benchmark Files") that can be used for performance testing and allow the use of our application in offline-mode.
Requests for highlighting a file can be sent seperately for each file or alternatively all files can be highlighted at the same time by clicking on the "Highlight All" button. The status of the request is color-coded and information about the request time and the file size is indicated on the preview cards.
Upon clicking a preview card, the selected code file is openened in a modal in which the user can inspect the file in detail. Editing of the file and changing the programming languages is also possible and allows the user to experiment with the highlighting service.
Under the "Statistics" tab, the user may see a visualization of all performed requests in the current session. This is valuable to observe the performance of our service given different loads and file sizes.
By default the frontend sends all requests sequentially to the backend. This is by design to guarantee an accurate calculation of the response times. The user may heighten this limit such that the frontend sends up to 10 concurrent requests. This allows the simulation of multiple concurrent users.
The activation of the "Performance Mode" will disable the rendering of the file previews on the webpage. This setting is highly recommended for the execution of performance tests, because otherwise the client-side application may slow down and in consequence skew the response times considerably.

Upon starting the Docker containers, the Demo frontend is accessible at port :80, e.g. http://localhost:80