sudo apt-get update
1- install SSH server in Ubuntu :
sudo apt-get install openssh-server
2 - to re-enable the service to start up at boot
sudo systemctl enable ssh
3 - to start the service :
sudo systemctl start ssh
4 - haythamasalama@192.168.0.1 or haytham@hp-pc
ssh user@server-name
check if ssh service is running :
sudo systemctl status ssh
1- install nginx :
sudo apt install nginx
2- adjusting the Firewall :
sudo ufw allow 'Nginx Full'
check if nginx service is running
systemctl status nginx
3- to re-enable the service to start up at boot :
sudo systemctl enable nginx
Managing the Nginx Process :
sudo systemctl start nginx
sudo systemctl stop  nginx
sudo systemctl restart  nginx
sudo systemctl reload  nginx
install nodejs :
curl -fsSL https://deb.nodesource.com/setup_17.x | sudo -E bash -
sudo apt-get install -y nodejs
check node version and if it install successfully
node -v
node –version
install Git :
sudo apt-get install git
check git version and if it install successfully
git --version
configure your Git username and email using :
 git config --global user.name "Haytham Salama"
 git config --global user.email "haythamasalama@gmail.com"
if you want to install php
8.0you can change formphp8.1tophp8.0-fpmand all installations tophp8.1
1- install PPA for PHP 8.1 Add the ndrej/php which has PHP 8.1 package and other required PHP extensions
sudo apt install software-properties-common
sudo add-apt-repository ppa:ondrej/php
2- install php 8 for nginx :
sudo apt install php8.1-fpm
2- install php 8 for Apache :
sudo apt install php8.1
systemctl status php8.1-fpm
3- to installing PHP extension :
sudo apt install php8.1-[extname]
for example to install MySQL , GD , intl , fileinfo ,dom and curl extensions, you would run the following command:
sudo apt install php8.1-gd php8.1-curl php8.1-intl php8.1-fileinfo php8.1-mysql php8.1-dom
or
sudo apt install php8.1-{gd,curl,intl,fileinfo,mysql,dom}
sudo apt install php-cli unzip
cd ~
curl -sS https://getcomposer.org/installer -o /tmp/composer-setup.php
HASH=`curl -sS https://composer.github.io/installer.sig`
install composer globally and install Composer as a system-wide command named composer, under /usr/local/bin:
sudo php /tmp/composer-setup.php --install-dir=/usr/local/bin --filename=composer
check if composer if it install successfully
composer
1- install mysql :
sudo apt install mysql-server
2- Securing MySQL :
sudo mysql_secure_installation
3- output for mysql_secure_installation :
$ Press y|Y for Yes, any other key for No:  Y
LOW    Length >= 8
MEDIUM Length >= 8, numeric, mixed case, and special characters
STRONG Length >= 8, numeric, mixed case, special characters and dictionary  file
Please enter 0 = LOW, 1 = MEDIUM and 2 = STRONG:  2

Please set the password for root here.
$ New password:
$ Re-enter new password:

Estimated strength of the password: 100
$ Do you wish to continue with the password provided?(Press y|Y for Yes, any other key for No) : Y
4- Creating a Dedicated MySQL User and Granting Privileges :
sudo mysql
create user :
CREATE USER 'username'@'localhost' IDENTIFIED WITH mysql_native_password BY 'STRONG_PASSWORD_HERE';
FLUSH PRIVILEGES;
update user :
ALTER USER 'username'@'localhost' IDENTIFIED WITH mysql_native_password BY 'STRONG_PASSWORD_HERE';
FLUSH PRIVILEGES;
5- to re-enable the service to start up at boot :
sudo systemctl enable mysql
1- open config file for mysql
sudo nano /etc/mysql/mysql.conf.d/mysqld.cnf
2- after opend the config file change bind-address from 127.0.0.1 to 0.0.0.0
. . .
lc-messages-dir = /usr/share/mysql
skip-external-locking
#
# Instead of skip-networking the default is now to listen only on
# localhost which is more compatible and is not less secure.
bind-address            = 0.0.0.0
. . .
3- allow specific IP addresses on the firewall to connect to the database
sudo ufw allow from remote_IP_address to any port 3306
or allow any IP address on the firewall to connect to the database which I do not recommend it
sudo ufw allow 3306
check if mysql service is running :
sudo systemctl status mysql
sudo apt-get install supervisor
go to configuration files and create file to sotre your configrtion file-name.conf :
cd /etc/supervisord.conf
Example for config laravel queues :
[program:file-name]
process_name=%(program_name)s_%(process_num)02d
command=php /home/html/wwww/project/artisan queue:work sqs --sleep=3 --tries=3 --max-time=3600
autostart=true
autorestart=true
stopasgroup=true
killasgroup=true
user=forge
numprocs=8
redirect_stderr=true
stdout_logfile=/home/html/wwww/project/worker.log
stopwaitsecs=3600
Starting Supervisor :
sudo supervisorctl reread

sudo supervisorctl update

sudo supervisorctl start file-name:*
1- install lightdm :
sudo apt install lightdm
2- reboot :
sudo reboot
3- install x11vnc :
sudo apt install x11vnc
4 - open config x11vnc service
sudo nano /lib/systemd/system/x11vnc.service
5- Copy and paste these commands and change the password yourPassword to strong password
this password that request when you use vnc viewer
[Unit]
Description=x11vnc service
After=display-manager.service network.target syslog.target

[Service]
Type=simple
ExecStart=/usr/bin/x11vnc -forever -display :0 -auth guess -passwd yourPassword
ExecStop=/usr/bin/killall x11vnc
Restart=on-failure

[Install]
WantedBy=multi-user.target
6 - reload
sudo systemctl daemon-reload
7- to re-enable the service to start up at boot :
sudo systemctl enable x11vnc.service
8- to start the service :
sudo systemctl start x11vnc.service
check if x11vnc service is running :
sudo systemctl status x11vnc.service
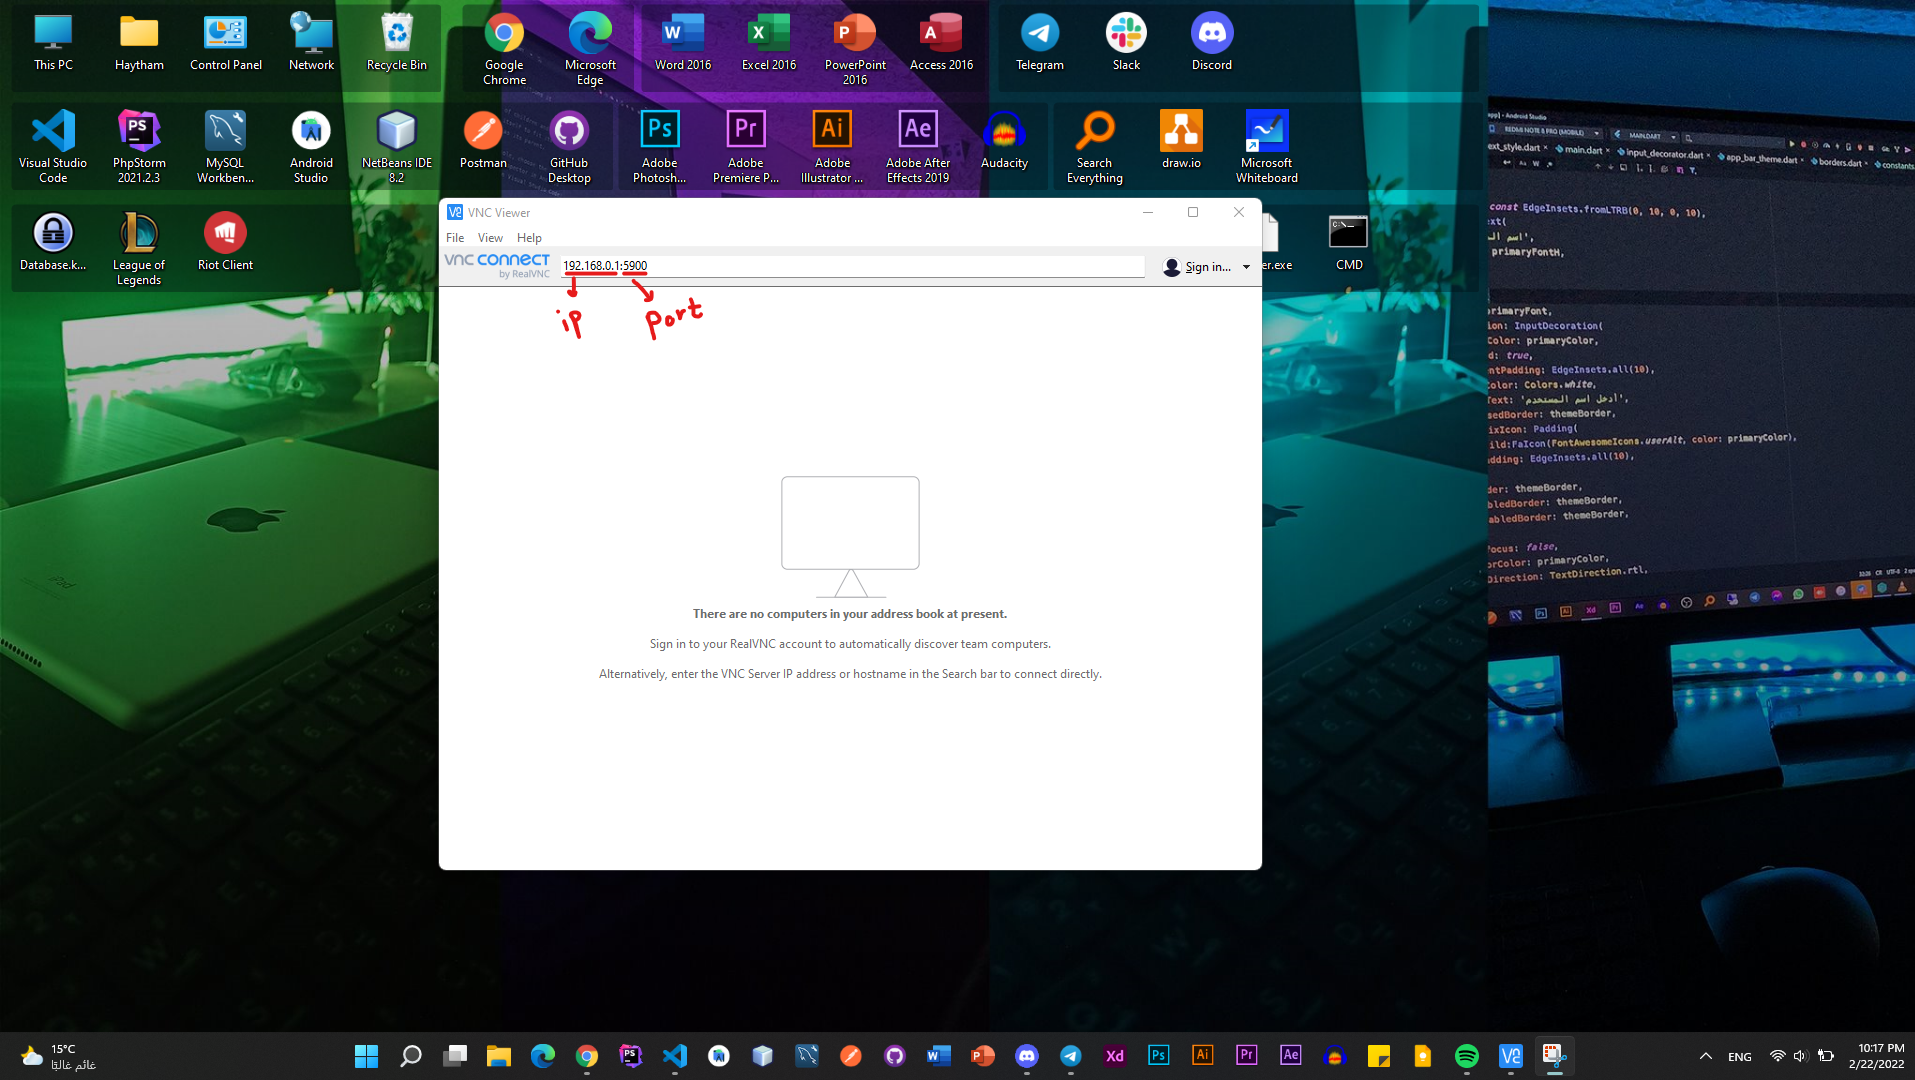
to use vnc viewer on windoes or other operating system :
https://www.realvnc.com/en/connect/download/viewer/
Pull requests and stars are always welcome.
Copyright © 2022, Haytham Salama. Released under the MIT License.