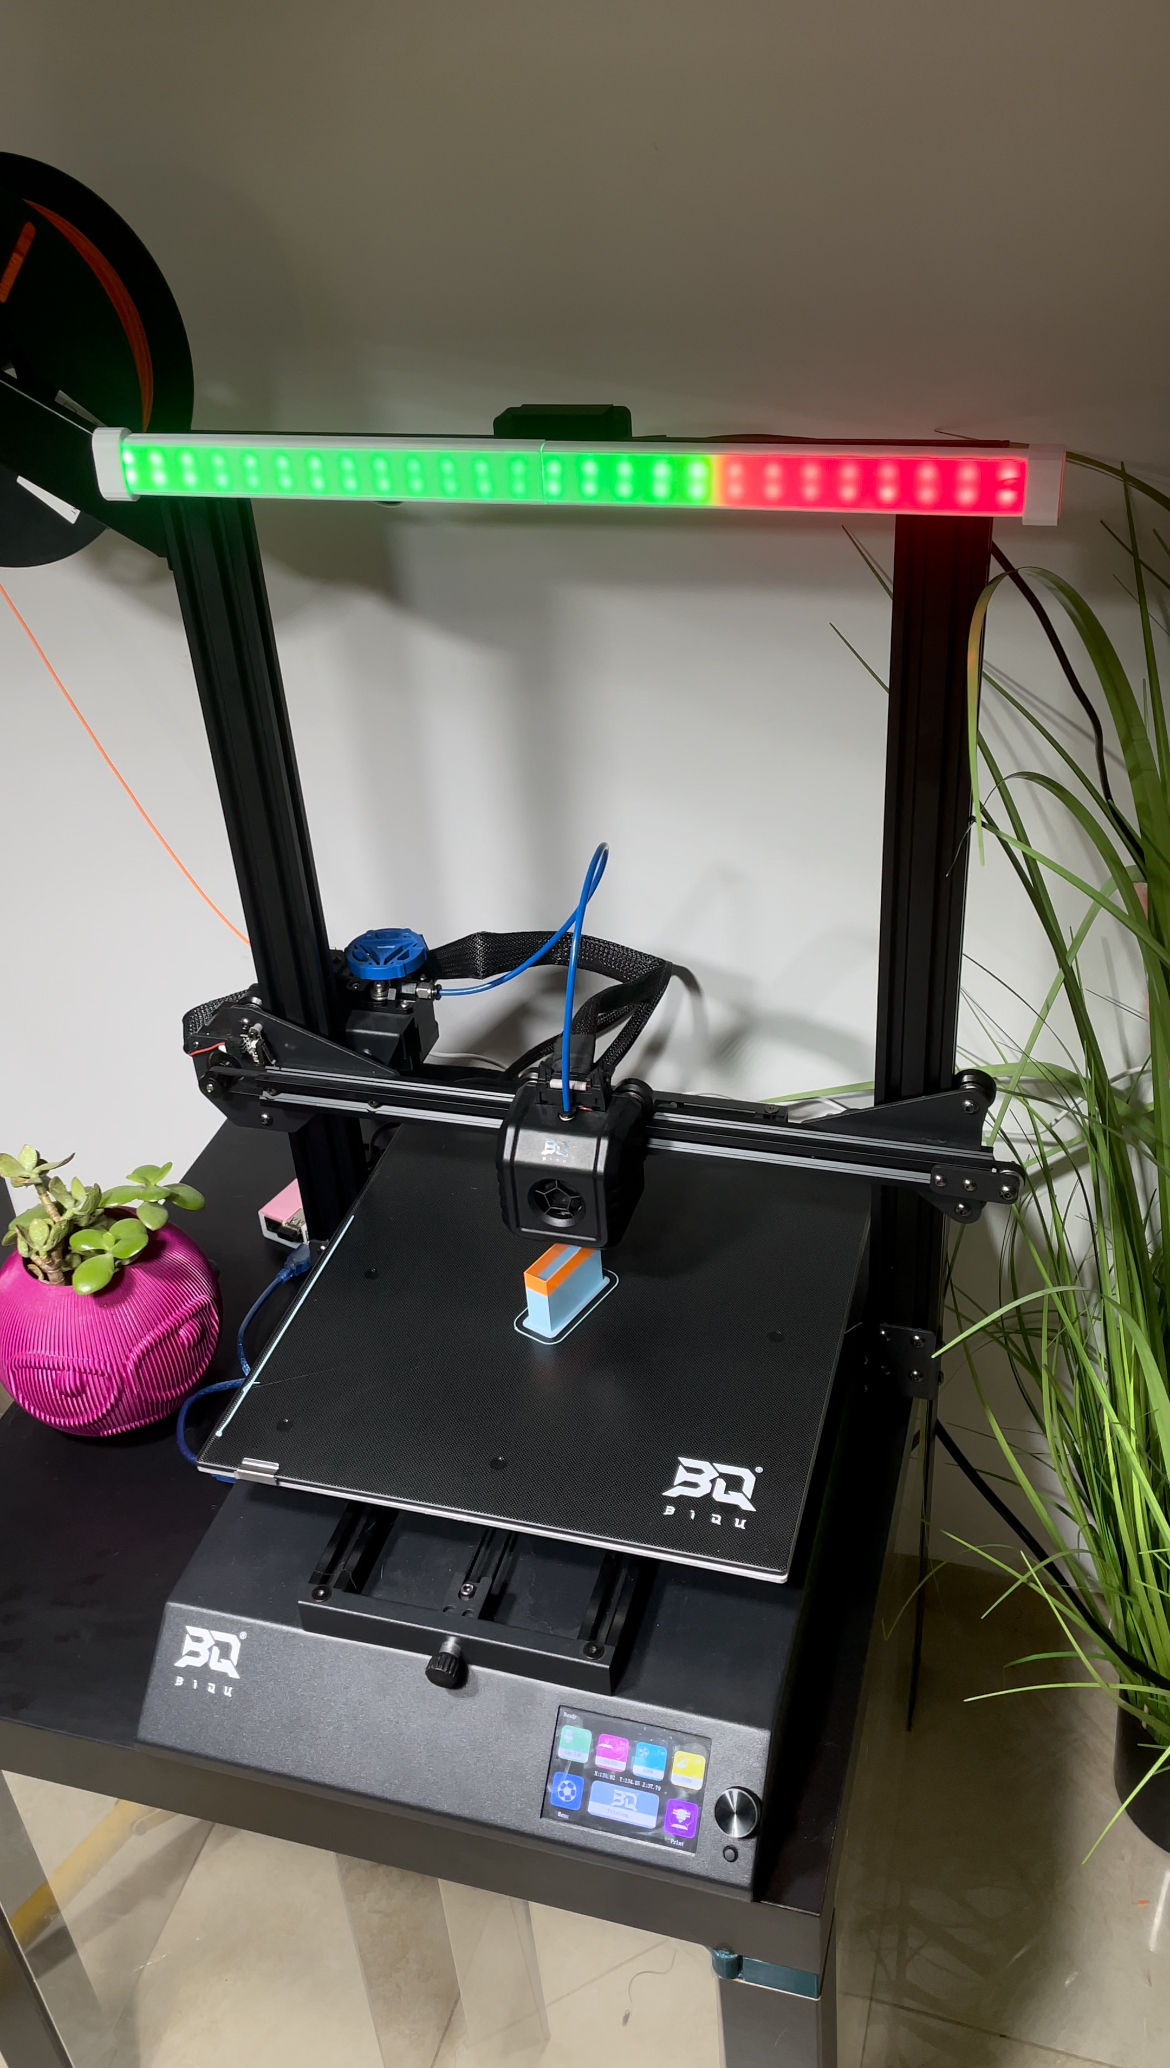
The project will show you the current state of your printer, and progress bar for live printing / heating through smart LEDs

Click the image to open YouTube video demo
This project requires:
- Raspberry Pi with Octoprint installed (I used Pi 4B 4GB)
- NeoPixel LEDs with ESP8266/ESP32 module (I used WS2812B LEDs and ESP8266 CH340)
- a 3D Printer (I used Biqu B1 SE Plus)
This project will show you the current state of the printer.
| State | Colors | Effect | Notes |
|---|---|---|---|
| Unrecoverable error, Printer disconnected, or Octoprint server is not responding | Red-White | Blink | The printer has disconnected from octoprint or halted |
| Connected | Blue | Fade | The printer is connected to octoprint and operational |
| Printing | Green-Red | Progress-Bar | The printer is printing and the LEDs showing a progress bar |
| Print Completed | Green | Fireworks | The printer has completed the print |
| Print Cancelling | Blue | Loading | The printer is cancelling the print |
| Filament Change | Blue-Violet | Running | The printer is waiting for filament change |
| Heating | Red-Blue | Progress-Bar | The printer is heating and the LEDs showing a progress bar |
At first, you will flash the WLED image on your ESP. flasher, image
after flashing, connect to the WLED via wifi - WLED-AP, password is wled1234.
it will redirect you to the wled page, and there you need to connect the ESP to your home network.
on Octoprint, install the plugin MQTT, and then restart octoprint server
Get your Raspberry Pi's IP address (192.168.1.xx, 10.10.10.x, etc)
Open cmd or terminal in your pc, and connect to the Pi via ssh. (ssh pi@<IPAddress>, your password is 'raspberry' by default)
Run the following commands:
sudo apt-get updatesudo apt-get install mosquittosudo apt-get install mosquitto-clientssudo nano /etc/mosquitto/mosquitto.conf- in this file, enter on the top of the file (after the # lines) -'allow_anonymous true', press Ctrl X and Save.sudo systemctl restart mosquittosudo apt install nodejssudo apt install npmsudo apt-get updatesudo apt-get upgradesudo npm install -g nsudo n stablesudo reboot
wait for your raspberry to reboot, and connect to via ssh again.
Clone the repository to the raspberry pi. enter the commands:
cd /home/pigit clone https://github.com/LidorBaum/3DPrinterWLED.git
After the cloning succeeded, configure the program with your own parameters:
-
cd /home/pi/3DPrinterWLED -
sudo nano config.js
host & OCTOPRINT - your raspberry pi IP, should be the same address. keep the original pattern
MQTTport - should be 1883 if you did not change it
WLED - the IP of the ESP
LEDS - how many LEDs you are using
ROWS - how many rows are there in your arrangement (you can use matrix leds)
APIKEY - Octoprint API Key, can be found in settings -> API -> global api key.
To save the config, press CTRL X , Y , ENTER
Enter commandnpm ito install all the dependencies of the project -
Go to octoprint in the browser, Go to settings -> MQTT (under plugins) -
Host - your Raspberry Pi IP
Port - 1883
Uncheck the 'Enable retain flag' option
Hit save
In ssh, clean the old events from the MQTT service: -
sudo systemctl stop mosquitto.service -
sudo rm /var/lib/mosquitto/mosquitto.db -
sudo systemctl start mosquitto.service
Enter the following command to listen to octoprint events:
mosquitto_sub -h localhost -p 1883 -t '#'
Test your connection - press printer connect and disconnect in octoprint in the browser,
and you should see the events for connect and disconnect in the terminal.
Create the service for the program, so it will run automatically on the raspberry startup:
Press CTRL C to exit the listening to the MQTT, and enter the command:
sudo nano /etc/systemd/system/led.service
this will create a new empty file the following code is the service.
you can copy and paste it to the file you created.
[Unit]
Description="3DPrinterWLED-LidorBaum"

[Service]
ExecStart=/usr/local/bin/node server.js
Type=simple
User=root
WorkingDirectory=/home/pi/3DPrinterWLED
Restart=always
RestartSec=10
StandardOutput=syslog
StandardError=syslog
SyslogIdentifier=led

[Install]
WantedBy=multi-user.target
Save the file - CTRL X, Y, Enter
run systemctl enable led to enable the script to run on startup.
Now restart your Raspberry Pi and LEDS (unplug and plug).
That's it, your LEDs supposed to be all up and running, according to the printer's state.
Have fun!
I recommend installing Print Time Genius octoprint plugin for better progress bar accuracy.