Paywalls: added Mac Catalyst to list of supported platforms
#312
Conversation
PreviewsSee contentsRevenueCat's Paywalls allow you to to remotely configure your entire paywall view without any code changes or app updates. Whether you’re building a new app, exploring new paywall concepts, or diving into experimentation; RevenueCat’s Paywalls make it easy to get started.
How Paywalls workOverviewOur paywall templates use native code to deliver smooth, intuitive experiences to your customers when you’re ready to deliver them an Offering; and you can use our Dashboard to pick the right template and configuration to meet your needs. To use RevenueCat Paywalls on iOS, simply:
Offerings and PaywallsYou can think of a Paywall as an optional feature of your Offering. An Offering is the collection of Products which are organized into Packages to be displayed to your customers as a single "offer" across platforms. Now, with Paywalls, you can control the actual view that is used to display that "offer" in addition to controlling the products that are offered. Therefore, you can create a unique Paywall for each of your Offerings, and can create an unlimited number of Offerings & Paywalls for each variation you want to test with Experiments. How to create a PaywallSelect an OfferingFirst, click on Paywalls in the Products and pricing section of the Project you’re working on. 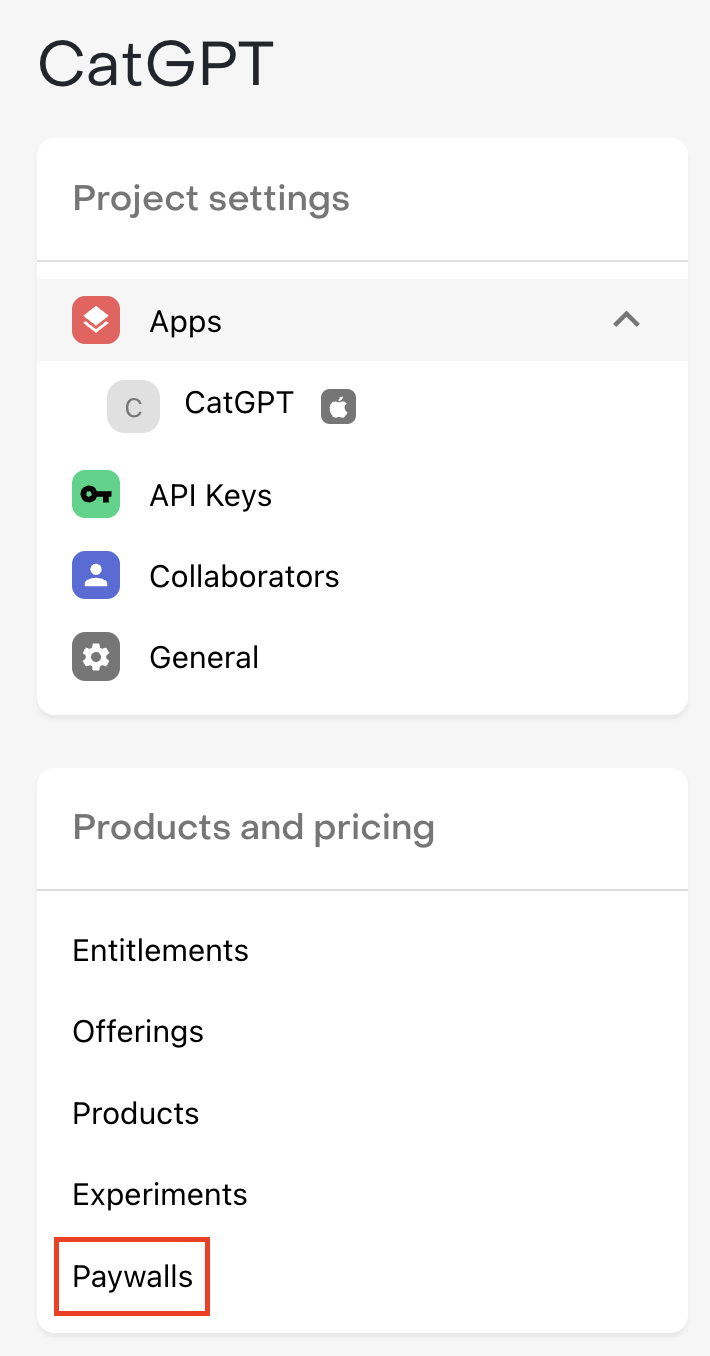
Then, click + Add paywall next to the Offering that you want to create a Paywall for. 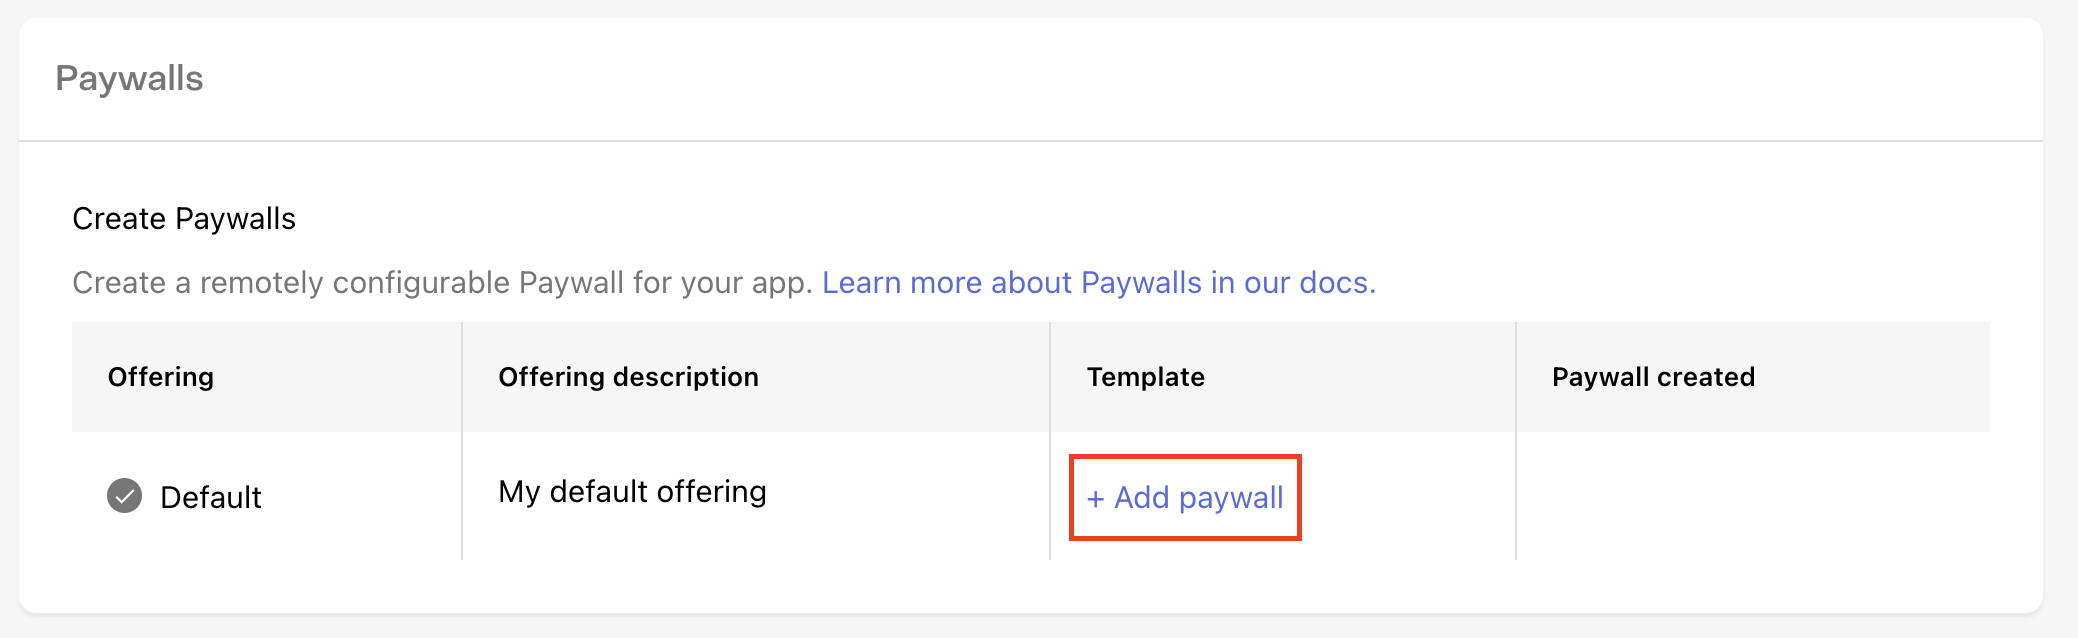
Select a templateThe first thing to do when creating a new Paywall is to select the template you’ll use as the starting point. Templates may support different package setups, content layouts, image sizes, and much more; so we recommend browsing each template to pick the one that’s best suited for what you’re looking to accomplish with your paywall. For example, if you’re trying to draw contrast between a few different packages you’re offering, try the #2 - Sphynx template. Or, if you want to try your own version of the Blinkist Free Trial Paywall start with the #3 - Leopard template. Configure your PaywallOnce you’ve selected a template, you can configure any of its properties on the right side of the screen and see the change previewed immediately. PackagesPackages represent the individual products you want to serve a customer on your Paywall. You don’t necessarily need to display every package that’s available in your Offering, and some templates may only support displaying one or a limited number of packages, so be sure to choose a template that reflects the options you want to offer your customers. For templates that support multiple packages, you should select packages in the order that you’d like them to display. Then, you can separately choose which package should be preselected for your customers by default.
StringsHow you describe your product has a huge impact on how likely a customer is to subscribe to it. Every descriptive string on our Paywall templates is fully configurable so you have control over exactly how you pitch your product
VariablesFor some Paywall strings you may want to set values based on the package that’s being displayed instead of hardcoding a single value, such as when quoting a price, or describing the duration of an Introductory Offer. To make this easier and ensure accuracy, we recommend using Variables for these values that are package-specific. For example, to show a CTA like “Try 7 Days Free & Subscribe”, you should instead use the {{ sub_offer_duration }} variable, and enter “Try {{ sub_offer_duration }} Free & Subscribe” to ensure the string is accurate for any product you use, even if you make changes to the nature of the offer in the future. We support the following variables:
Intro offer eligibilityRevenueCat Paywalls automatically check for Introductory Offer eligibility, and therefore for applicable fields like the Call to action and Offer details you can enter distinct strings based on the nature of the offer. For example, you may want to highlight the length of your free trial for a customer who is eligible for that Introductory Offer. Uploading imagesUse the Select a file button for the applicable image to upload your own to use for your Paywall. We’ll center and scale the image to fit, regardless of its aspect ratio, so we recommend using source images that are appropriate for the area of the template they cover. We support .jpg, jpeg, and .png files up to 5MB. ColorsUse your own hex codes, select a custom color, or use our color picker to select background and text colors for each element that reflect your app’s branding.
How to display a fullscreen Paywall in your appRevenueCat Paywalls will, by default, show paywalls fullscreen and there are multiple ways to do this with SwiftUI and UIKit. SwiftUI
import SwiftUI

import RevenueCat
import RevenueCatUI

struct App: View {
    var body: some View {
        ContentView()
            .presentPaywallIfNeeded(requiredEntitlementIdentifier: "pro") { customerInfo in
                print("Purchase completed: \(customerInfo.entitlements)")
            }
    }
}
import SwiftUI

import RevenueCat
import RevenueCatUI

struct App: View {
    var body: some View {
        ContentView()
            .presentPaywallIfNeeded { customerInfo in
                // Returning `true` will present the paywall
                return customerInfo.entitlements.active.keys.contains("pro")
            } purchaseCompleted: { customerInfo in
                print("Purchase completed: \(customerInfo.entitlements)")
            }
    }
}
import SwiftUI

import RevenueCat
import RevenueCatUI

struct App: View {
    @State
    var displayPaywall = false

    var body: some View {
        ContentView()
            .sheet(self.$displayPaywall) {
                PaywallView()
            }
    }
}
UIKIt
import UIKit

import RevenueCat
import RevenueCatUI

class ViewController: UIViewController {

    override func viewDidLoad() {
        super.viewDidLoad()
    }

    @IBAction func presentPaywall() {
        let controller = PaywallViewController()
        controller.delegate = self

        present(controller, animated: true, completion: nil)
    }
}

extension ViewController: PaywallViewControllerDelegate {

    func paywallViewController(_ controller: PaywallViewController,
                               didFinishPurchasingWith customerInfo: CustomerInfo) {

    }

}
How to display a footer Paywall on your custom paywallRevenueCatUI also has a paywall variation that can be displayed as a footer below your custom paywall. This allows you to design your paywall exactly as you want with native components while still using RevenueCat UI to handle. This is done by adding the The footer paywall mainly consists of:
This is all remotely configured and RevenueCatUI handles all the intro offer eligibility and purchase logic. SwiftUI
import SwiftUI

import RevenueCat
import RevenueCatUI

struct YourPaywall: View {

    var body: some View {
        ScrollView {
            // Your custom paywall design content
        }
        .paywallFooter()
    }

}
import SwiftUI

import RevenueCat
import RevenueCatUI

struct YourPaywall: View {

    let offering: Offering

    var body: some View {
        ScrollView {
            // Your custom paywall design content
        }
        .paywallFooter(offering: offering, condensed: true) { customerInfo in
            // Purchase completed! Thank your user and dismiss your paywall
        }
    }

}
How to use custom fontsPaywalls can be configured to use the same font as your app using a By default, paywalls will use the Use
|
No description provided.