Change "current" Offering to "default" Offering when referencing a Project #542
Conversation
| > | ||
| > The current Offering for a given customer may change based on the experiment they're enrolled in, any targeting rules they match, or the default Offering of your Project. Your Project's default Offering is the Offering that will be served as "current" when no other conditions apply for that customer. | ||
|
|
||
| To change the default Offering, navigate to the Offerings tab for your project in the RevenueCat dashboard and click **Make default** next to the Offering you'd like to enable. | ||
|
|
||
| .png") |
There was a problem hiding this comment.
This image and the corresponding instructions still need to be updated -- waiting on Dashboard changes to do that
Previewstemp/configuring-experiments-v1.md See contentsBefore setting up an experiment, make sure you've created the products and Offerings that you want to test and added any new products to the appropriate entitlements in your project (more on this below). You should also test the Offerings you've chosen on any platform your app supports. Setting up a new experiment[block:image] Select + New to create a new experiment. [block:image] Then, enter the following details:
Enrollment criteriaYou may choose to setup custom enrollment criteria for your experiment to target a specific segment of your customers, using any combination of the following enrollment criteria:
Once done, select CREATE EXPERIMENT and view your new experiment. Starting an experimentWhen viewing a new experiment, you can start, edit, or delete the experiment.
FAQs[block:parameters] See contents[block:embed] How to create a new PaywallSelect an OfferingFirst, click on Paywalls in the Products and pricing section of the Project you’re working on. 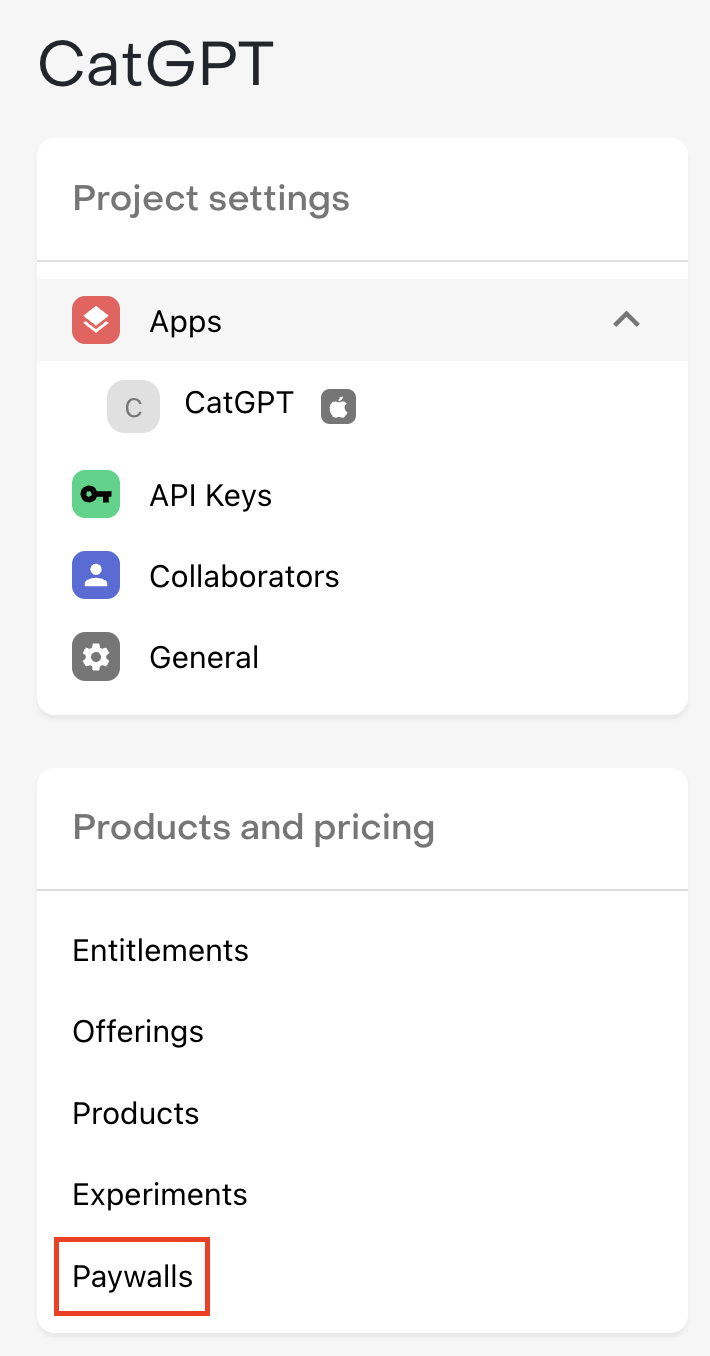
Then, click + Add paywall next to the Offering that you want to create a Paywall for. 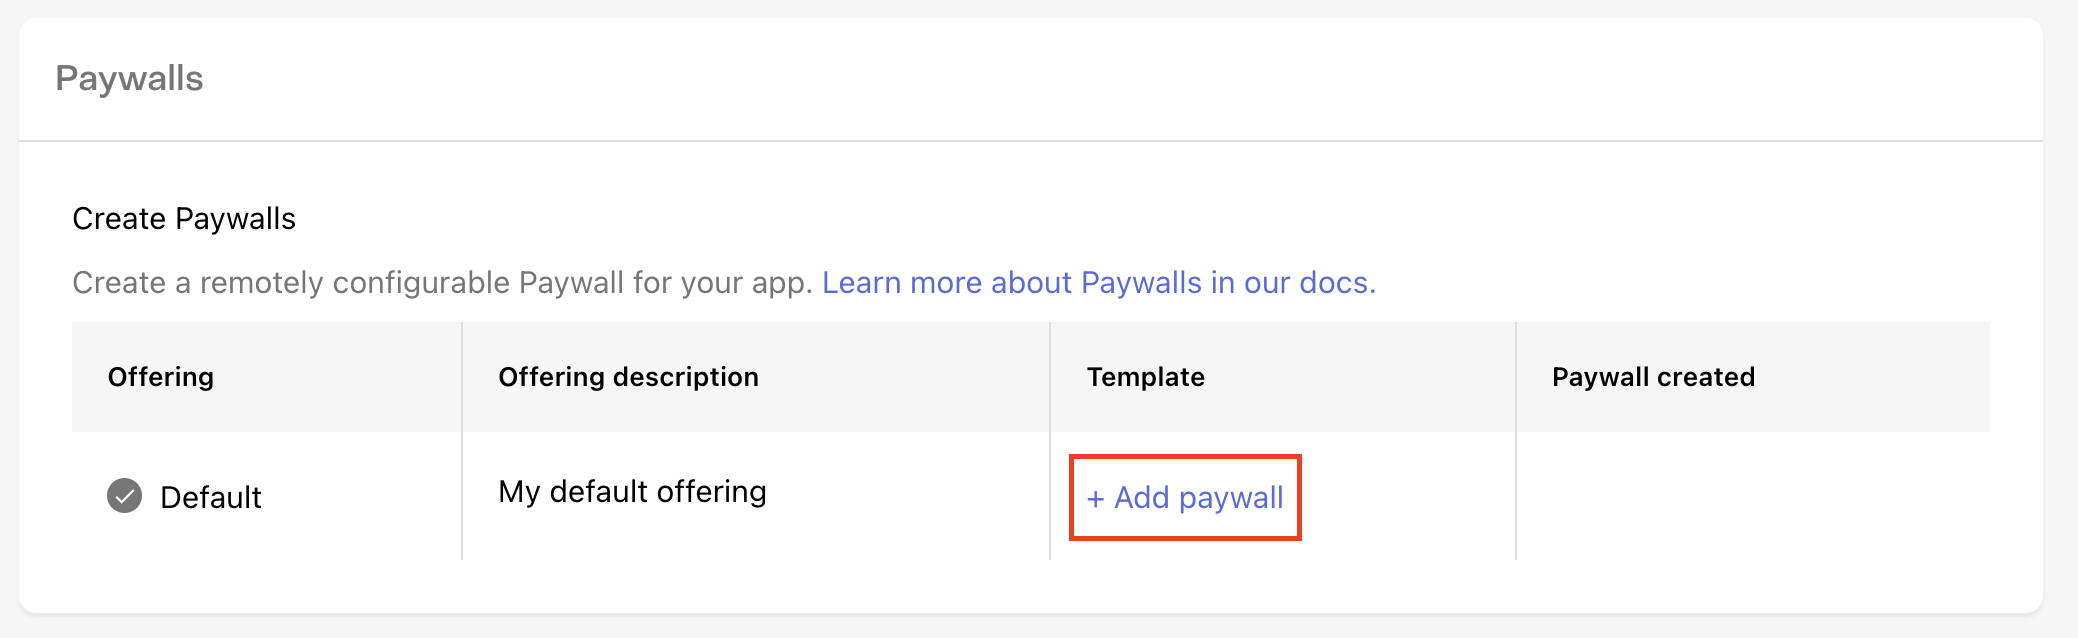
Select a templateThe first thing to do when creating a new Paywall is to select the template you’ll use as the starting point. Templates may support different package setups, content layouts, image sizes, and much more; so we recommend browsing each template to pick the one that’s best suited for what you’re looking to accomplish with your paywall. For example, if you’re trying to draw contrast between a few different packages you’re offering, try the #2 - Sphynx template. Or, if you want to try your own version of the Blinkist Free Trial Paywall start with the #3 - Leopard template. How to configure your PaywallOnce you’ve selected a template, you can configure any of its properties on the right side of the screen and see the change previewed immediately. PackagesPackages represent the individual products you want to serve a customer on your Paywall. You don’t necessarily need to display every package that’s available in your Offering, and some templates may only support displaying one or a limited number of packages, so be sure to choose a template that reflects the options you want to offer your customers. For templates that support multiple packages, you should select packages in the order that you’d like them to display. Then, you can separately choose which package should be preselected for your customers by default.
StringsHow you describe your product has a huge impact on how likely a customer is to subscribe to it. Every descriptive string on our Paywall templates is fully configurable so you have control over exactly how you pitch your product.
VariablesFor some Paywall strings you may want to set values based on the package that’s being displayed instead of hardcoding a single value, such as when quoting a price, or describing the duration of an Introductory Offer. To make this easier and ensure accuracy, we recommend using Variables for these values that are package-specific. For example, to show a CTA like “Try 7 Days Free & Subscribe”, you should instead use the {{ sub_offer_duration }} variable, and enter “Try {{ sub_offer_duration }} Free & Subscribe” to ensure the string is accurate for any product you use, even if you make changes to the nature of the offer in the future. We support the following variables:
Intro offer eligibilityRevenueCat Paywalls automatically check for Introductory Offer eligibility, and therefore for applicable fields like the Call to action and Offer details you can enter distinct strings based on the nature of the offer. For example, you may want to highlight the length of your free trial for a customer who is eligible for that Introductory Offer. Uploading imagesUse the Select a file button for the applicable image to upload your own to use for your Paywall. We’ll center and scale the image to fit, regardless of its aspect ratio, so we recommend using source images that are appropriate for the area of the template they cover. We support .jpg, jpeg, and .png files up to 5MB. ColorsUse your own hex codes, select a custom color, or use our color picker to select background and text colors for each element that reflect your app’s branding.
LocalizationRevenueCat Paywalls come with built-in support for localization. This will allow you to customize your paywall content for all the languages that your app supports. Locales can be added to your paywall through the 'Localization' dropdown. [block:image] Each paywall template may differ in the localized values that you will need to provide. The options that most templates have are:
Since RevenueCatUI allows for dynamic text with Variables, all the output of variables will automatically localized. This includes period lengths like "Annual", "Monthly" and "Weekly" being localized to "Anual", "Mensual", and "Semanalmente". Price per period like "$6.99/mo" and "$53.99/yr" will also be localized to "$6.99/m." and "$53.99/año". Other paywall components like "Restore purchases", "Terms of Service", and "Privacy Policy" will also automatically be localized. Supported localesWe currently support all 39 locales that are supported on App Store Connect.
See contentsIf you've configured Offerings in RevenueCat, you can control which products are shown to users without requiring an app update. Building paywalls that are dynamic and can react to different product configurations gives you maximum flexibility to make remote updates.
Fetching OfferingsOfferings are fetched through the SDK based on their configuration in the RevenueCat dashboard. The Purchases.shared.getOfferings { (offerings, error) in
if let packages = offerings?.current?.availablePackages {
self.display(packages)
}
}[[RCPurchases sharedPurchases] getOfferingsWithCompletion:^(RCOfferings *offerings, NSError *error) {
if (offerings.current && offerings.current.availablePackages.count != 0) {
// Display packages for sale
} else if (error) {
// optional error handling
}
}];Purchases.sharedInstance.getOfferingsWith({ error ->
// An error occurred
}) { offerings ->
offerings.current?.availablePackages?.takeUnless { it.isNullOrEmpty() }?.let {
// Display packages for sale
}
}Purchases.getSharedInstance().getOfferings(new ReceiveOfferingsCallback() {
@Override
public void onReceived(@NonNull Offerings offerings) {
if (offerings.getCurrent() != null) {
List<Package> availablePackages = offerings.getCurrent().getAvailablePackages();
// Display packages for sale
}
}
@Override
public void onError(@NonNull PurchasesError error) {
// An error occurred
}
});try {
Offerings offerings = await Purchases.getOfferings();
if (offerings.current != null && offerings.current.availablePackages.isNotEmpty) {
// Display packages for sale
}
} on PlatformException catch (e) {
// optional error handling
}try {
const offerings = await Purchases.getOfferings();
if (offerings.current !== null && offerings.current.availablePackages.length !== 0) {
// Display packages for sale
}
} catch (e) {
}func displayUpsellScreen() {
Purchases.getOfferings(
offerings => {
if (offerings.current !== null && offerings.current.availablePackages.length !== 0) {
// Display packages for sale
}
},
error => {
}
);
}const displayUpsellScreen = async () => {
try {
const offerings = await Purchases.getOfferings();
if (offerings.current !== null && offerings.current.availablePackages.length !== 0) {
// Display packages for sale
}
} catch (error) {
// Handle error
}
}var purchases = GetComponent<Purchases>();
purchases.GetOfferings((offerings, error) =>
{
if (offerings.Current != null && offerings.Current.AvailablePackages.Count != 0){
// Display packages for sale
}
});
You must choose one Offering that is the "Default Offering" - which can easily be accessed via the
To change the default Offering, navigate to the Offerings tab for your project in the RevenueCat dashboard and click Make default next to the Offering you'd like to enable. Offerings can be updated at any time, and the changes will go into effect for all users right away. Custom Offering identifiersIt's also possible to access other Offerings besides the Default Offering directly by its identifier. Purchases.shared.getOfferings { (offerings, error) in
if let packages = offerings?.offering(identifier: "experiment_group")?.availablePackages {
self.display(packages)
}
}[[RCPurchases sharedPurchases] offeringsWithCompletionBlock:^(RCOfferings *offerings, NSError *error) {
NSArray<RCPackage *> *availablePackages = [offerings offeringWithIdentifier:"experiment_group"].availablePackages;
if (availablePackages) {
// Display packages for sale
}
}];Purchases.sharedInstance.getOfferingsWith({ error ->
// An error occurred
}) { offerings ->
offerings["experiment_group"]?.availablePackages?.takeUnless { it.isNullOrEmpty() }?.let {
// Display packages for sale
}
}Purchases.getSharedInstance().getOfferings(new ReceiveOfferingsCallback() {
@Override
public void onReceived(@NonNull Offerings offerings) {
if (offerings.get("experiment_group") != null) {
List<Package> availablePackages = offerings.get("experiment_group").getAvailablePackages();
// Display packages for sale
}
}
@Override
public void onError(@NonNull PurchasesError error) {
// An error occurred
}
});try {
Offerings offerings = await Purchases.getOfferings();
if (offerings.getOffering("experiment_group").availablePackages.isNotEmpty) {
// Display packages for sale
}
} on PlatformException catch (e) {
// optional error handling
}try {
const offerings = await Purchases.getOfferings();
if (offerings.all["experiment_group"].availablePackages.length !== 0) {
// Display packages for sale
}
} catch (e) {
}Purchases.getOfferings(
offerings => {
if (offerings.all["experiment_group"].availablePackages.length !== 0) {
// Display packages for sale
}
},
error => {
}
);try {
const offerings = await Purchases.getOfferings();
if (offerings.all["experiment_group"].availablePackages.length !== 0) {
// Display packages for sale
}
} catch (error) {
// Handle error
}var purchases = GetComponent<Purchases>();
purchases.GetOfferings((offerings, error) =>
{
if (offerings.All.ContainsKey("experiment_group") && offerings.All["experiment_group"].AvailablePackages.Count != 0) {
// Display packages for sale
}
});Displaying PackagesPackages help abstract platform-specific products by grouping equivalent products across iOS, Android, and web. A package is made up of three parts: identifier, type, and underlying store product. [block:parameters] Packages can be access in a few different ways:
let packages = offerings.offering(identifier: "experiment_group")?.availablePackages
// --
let monthlyPackage = offerings.offering(identifier: "experiment_group")?.monthly
// --
let packageById = offerings.offering(identifier: "experiment_group")?.package(identifier: "<package_id>")
[offerings offeringWithIdentifier:"experiment_group"].availablePackages
// --
[offerings offeringWithIdentifier:"experiment_group"].monthly
// --
[[offerings offeringWithIdentifier:"experiment_group"] packageWithIdentifier:@"<package_id>"]offerings["experiment_group"]?.availablePackages
// --
offerings["experiment_group"]?.monthly
// --
offerings["experiment_group"]?.getPackage("<package_id>")offerings.getOffering("experiment_group").availablePackages
// --
offerings.getOffering("experiment_group").monthly
// --
offerings.getOffering("experiment_group").getPackage("<package_id>")offerings.all["experiment_group"].availablePackages
// --
offerings.all["experiment_group"].monthly
// --
offerings.all["experiment_group"].availablePackages.find(package => package === "<package_id>")offerings.all["experiment_group"].availablePackages
// --
offerings.all("experiment_group").monthly
// --
offerings.all("experiment_group").package("<package_id>")offerings.All["experiment_group"].AvailablePackages
// --
offerings.All["experiment_group"].Monthly
// --
// Manually filter AvailablePackages by the custom package identifierGetting the Product from the PackageEach Package includes an underlying product that includes more information about the price, duration, and other metadata. You can access the product via the Purchases.shared.getOfferings { (offerings, error) in
// Accessing the monthly product
if let product = offerings?.current?.monthly?.storeProduct {
// Display the product information (like price and introductory period)
self.display(product)
}
}// Accessing the monthly product
[[RCPurchases sharedPurchases] offeringsWithCompletionBlock:^(RCOfferings *offerings, NSError *error) {
if (offerings.current && offerings.current.monthly) {
SKProduct *product = offerings.current.monthly.storeProduct;
// Get the price and introductory period from the StoreProduct
} else if (error) {
// optional error handling
}
}];// Accessing the monthly product
Purchases.sharedInstance.getOfferingsWith({ error ->
// An error occurred
}) { offerings ->
val product = offerings.current?.monthly?.product?.also {
// Get the price and introductory period from the SkuDetails
}
}// Accessing the monthly product
Purchases.getSharedInstance().getOfferings(new ReceiveOfferingsCallback() {
@Override
public void onReceived(@NonNull Offerings offerings) {
if (offerings.getCurrent() != null && offerings.getCurrent().getMonthly() != null) {
StoreProduct product = offerings.getCurrent().getMonthly().getProduct();
// Get the price and introductory period from the StoreProduct
}
}
@Override
public void onError(@NonNull PurchasesError error) {
// An error occurred
}
});// Accessing the monthly product// Displaying the monthly product
try {
Offerings offerings = await Purchases.getOfferings();
if (offerings.current != null && offerings.current.monthly != null) {
Product product = offerings.current.monthly.product;
// Get the price and introductory period from the Product
}
} on PlatformException catch (e) {
// optional error handling
}// Accessing the monthly product// Displaying the monthly product
try {
const offerings = await Purchases.getOfferings();
if (offerings.current && offerings.current.monthly) {
const product = offerings.current.monthly;
// Get the price and introductory period from the PurchasesProduct
}
} catch (e) {
}// Accessing the monthly product
func displayUpsellScreen() {
Purchases.getOfferings(
offerings => {
if (offerings.current && offerings.current.monthly) {
const product = offerings.current.monthly;
// Get the price and introductory period from the PurchasesProduct
}
},
error => {
}
);
}// Accessing the monthly product
const displayUpsellScreen = async () => {
try {
const offerings = await Purchases.getOfferings();
if (offerings.current && offerings.current.monthly) {
const product = offerings.current.monthly;
// Get the price and introductory period from the PurchasesProduct
}
} catch (error) {
// Handle error
}
}// Accessing the monthly product
var purchases = GetComponent<Purchases>();
purchases.GetOfferings((offerings, error) =>
{
if (offerings.Current != null && offerings.Current.Monthly != null){
var product = offerings.Current.Monthly.Product;
// Get the price and introductory period from the Product
}
});Choosing which Offering to displayIn practice, you may not want to display the default current Offering to every user and instead have a specific cohort that see a different Offering. For example, displaying a higher priced Offering to users that came from paid acquisition to help recover ad costs, or a specific Offering designed to show iOS Subscription Offers when a user has cancelled their subscription. This can be accomplished with custom Offering identifiers for each of these "cohorts". Purchases.shared.getOfferings { (offerings, error) in
var packages: [Package]?
if user.isPaidDownload {
packages = offerings?.offering(identifier: "paid_download_offer")?.availablePackages
} else if user.signedUpOver30DaysAgo {
packages = offerings?.offering(identifier: "long_term_offer")?.availablePackages
} else if user.recentlyChurned {
packages = offerings?.offering(identifier: "ios_subscription_offer")?.availablePackages
}
// Present your paywall
self.display(packages)
}[[RCPurchases sharedPurchases] offeringsWithCompletionBlock:^(RCOfferings *offerings, NSError *error) {
NSArray<RCPackage *> *packages;
if (user.isPaidDownload) {
packages = [offerings offeringWithIdentifier:"paid_download_offer"].availablePackages;
} else if (user.signedUpOver30DaysAgo) {
packages = [offerings offeringWithIdentifier:"long_term_offer"].availablePackages;
} else if (user.recentlyChurned) {
packages = [offerings offeringWithIdentifier:"ios_subscription_offer"].availablePackages;
}
[self presentPaywallWithPackages:packages];
}];Purchases.sharedInstance.getOfferingsWith({ error ->
// An error occurred
}) { offerings ->
val packages: Package? = when {
user.isPaidDownload -> offerings["paid_download_offer"]?.availablePackages
user.signedUpOver30DaysAgo -> offerings["long_term_offer"]?.availablePackages
user.recentlyChurned -> offerings["ios_subscription_offer"].availablePackages
else -> null
}
presentPaywall(packages)
}Purchases.getSharedInstance().getOfferings(new ReceiveOfferingsCallback() {
@Override
public void onReceived(@NonNull Offerings offerings) {
List<Package> packages = null;
if (user.isPaidDownload) {
if (offerings.get("paid_download_offer") != null) {
packages = offerings.get("paid_download_offer").getAvailablePackages();
}
} else if (user.signedUpOver30DaysAgo) {
if (offerings.get("long_term_offer") != null) {
packages = offerings.get("long_term_offer").getAvailablePackages();
}
}
presentPaywall(packages);
}
@Override
public void onError(@NonNull PurchasesError error) {
// An error occurred
}
});try {
Offerings offerings = await Purchases.getOfferings();
var packages;
if (user.isPaidDownload) {
packages = offerings?.getOffering("paid_download_offer")?.availablePackages;
} else if (user.signedUpOver30DaysAgo) {
packages = offerings?.getOffering("long_term_offer")?.availablePackages;
} else if (user.recentlyChurned) {
packages = offerings?.getOffering("ios_subscription_offer")?.availablePackages;
}
presentPaywall(packages);
} on PlatformException catch (e) {
// optional error handling
}try {
const offerings = await Purchases.getOfferings();
let packages;
if (user.isPaidDownload) {
packages = offerings.all["paid_download_offer"].availablePackages;
} else if (user.signedUpOver30DaysAgo) {
packages = offerings.all["long_term_offer"].availablePackages;
} else if (user.recentlyChurned) {
packages = offerings.all["ios_subscription_offer"].availablePackages;
}
presentPaywall(packages);
} catch (e) {
}Purchases.getOfferings(
offerings => {
let packages;
if (user.isPaidDownload) {
packages = offerings.all["paid_download_offer"].availablePackages;
} else if (user.signedUpOver30DaysAgo) {
packages = offerings.all["long_term_offer"].availablePackages;
} else if (user.recentlyChurned) {
packages = offerings.all["ios_subscription_offer"].availablePackages;
}
presentPaywall(packages);
},
error => {
}
);Purchases.getOfferings(
offerings => {
let packages;
if (user.isPaidDownload) {
packages = offerings.all["paid_download_offer"].availablePackages;
} else if (user.signedUpOver30DaysAgo) {
packages = offerings.all["long_term_offer"].availablePackages;
} else if (user.recentlyChurned) {
packages = offerings.all["ios_subscription_offer"].availablePackages;
}
presentPaywall(packages);
},
error => {
}
);var purchases = GetComponent<Purchases>();
purchases.GetOfferings((offerings, error) =>
{
List<Purchases.Package> packages;
if (user.isPaidDownload) {
packages = offerings.All["paid_download_offer"].AvailablePackages;
} else if (user.signedUpOver30DaysAgo) {
packages = offerings.All["long_term_offer"].AvailablePackages;
} else if (user.recentlyChurned) {
packages = offerings.All["ios_subscription_offer"].AvailablePackages;
}
presentPaywall(packages);
});
Best Practices
Next Steps
temp/experiments-overview-v1.md See contentsExperiments allow you to answer questions about your users' behaviors and app's business by A/B testing two Offerings in your app and analyzing the full subscription lifecycle to understand which variant is producing more value for your business. While price testing is one of the most common forms of A/B testing in mobile apps, Experiments are based on RevenueCat Offerings, allowing you A/B test more than just prices, including: trial length, subscription length, different groupings of products, etc. Plus, by attaching metadata to your Offerings and programming your paywall to be responsive to it, you can remotely test any aspect of your paywall. Learn more here.
How does it work?After configuring the two Offerings you want and adding them to an Experiment, RevenueCat will randomly assign users to a cohort where they will only see one of the two Offerings. Everything is done server-side, so no changes to your app are required if you're already displaying the
If you need help making your paywall more dynamic, see Displaying Products. The Swift sample app has an example of a dynamic paywall that is Experiments-ready. Dynamic paywall examples in other languages can be found within our other sample apps as well.
As soon as a customer is enrolled in an experiment, they'll be included in the "Customers" count on the Experiment Results page, and you'll see any trial starts, paid conversions, status changes, etc. represented in the corresponding metrics. (Learn more here)
Implementation stepsExperiments requires you to use Offerings and have a dynamic paywall in your app that displays the current Offering for a given customer. While Experiments will work with iOS and Android SDKs 3.0.0+, it is recommended to use these versions:
If you meet these requirements, you can start using Experiments without any app changes! If not, take a look at Displaying Products. The Swift sample app has an example of a dynamic paywall that is Experiments-ready. Implementation Overview
Tips for Using ExperimentsDecide how long you want to run your experiments There’s no time limit on tests. Consider the timescales that matter for you. For example, if comparing monthly vs yearly, yearly might outperform in the short term because of the high short term revenue, but monthly might outperform in the long term. Keep in mind that if the difference in performance between your variants is very small, then the likelihood that you're seeing statistically significant data is lower as well. "No result" from an experiment is still a result: it means your change was likely not impactful enough to help or hurt your performance either way.
** Test only one variable at a time** It's tempting to try to test multiple variables at once, such as free trial length and price; resist that temptation! The results are often clearer when only one variable is tested. You can run more tests for other variables as you further optimize your LTV. ** Bigger changes will validate faster** Small differences ($3 monthly vs $2 monthly) will often show ambiguous results and may take a long time to show clear results. Try bolder changes like $3 monthly vs $10 monthly to start to triangulate your optimal price. ** You can run only one test at a time** If you want to run another test, you must stop the one currently running. You can, however, create as many tests as you need. ** Running a test with a control** Sometimes you want to compare a different Offering to the one that is already the default. If so, you can set one of the variants to the Offering that is currently used in your app. ** Run follow-up tests after completing one test** After you run a test and find that one Offering won over the other, try running another test comparing the winning Offering against another similar Offering. This way, you can continually optimize for lifetime value (LTV). For example, if you were running a price test between a $5 product and a $7 product and the $7 Offering won, try running another test between a $8 product and the $7 winner to find the optimal price for the product that results in the highest LTV. temp/experiments-results-v1.md See contentsWithin 24 hours of your experiment's launch you'll start seeing data on the Results page. RevenueCat offers experiment results through each step of the subscription journey to give you a comprehensive view of the impact of your test. You can dig into these results in a few different ways, which we'll cover below. Results chartThe Results chart should be your primary source for understanding how a specific metric has performed for each variant over the lifetime of your experiment. Customer journey tablesThe customer journey tables can be used to dig into and compare your results across variants. The customer journey for a subscription product can be complex: a "conversion" may only be the start of a trial, a single payment is only a portion of the total revenue that subscription may eventually generate, and other events like refunds and cancellations are critical to understanding how a cohort is likely to monetize over time. To help parse your results, we've broken up experiment results into three tables:
Metric definitionsInitial conversion metric definitions[block:parameters] Paid customers metric definitions[block:parameters] Revenue metric definitions[block:parameters] [block:callout] FAQs[block:parameters] See contentsMetadata allows you to attach a custom JSON object to your Offering that can be used to control how to display your products inside your app, determine the Offering to show based on provided attributes, and much more. The metadata you configure in an Offering is available from the RevenueCat SDK. For example, you could use it to remotely configure strings on your paywall, or even URLs of images shown on the paywall. Offering metadata is supported in the following SDK versions:
Benefits of using Offering metadataUsing Offering metadata has several advantages:
[block:image] How to add metadata to your OfferingFirst, navigate to the Offering you'd like to add metadata to and click Edit. 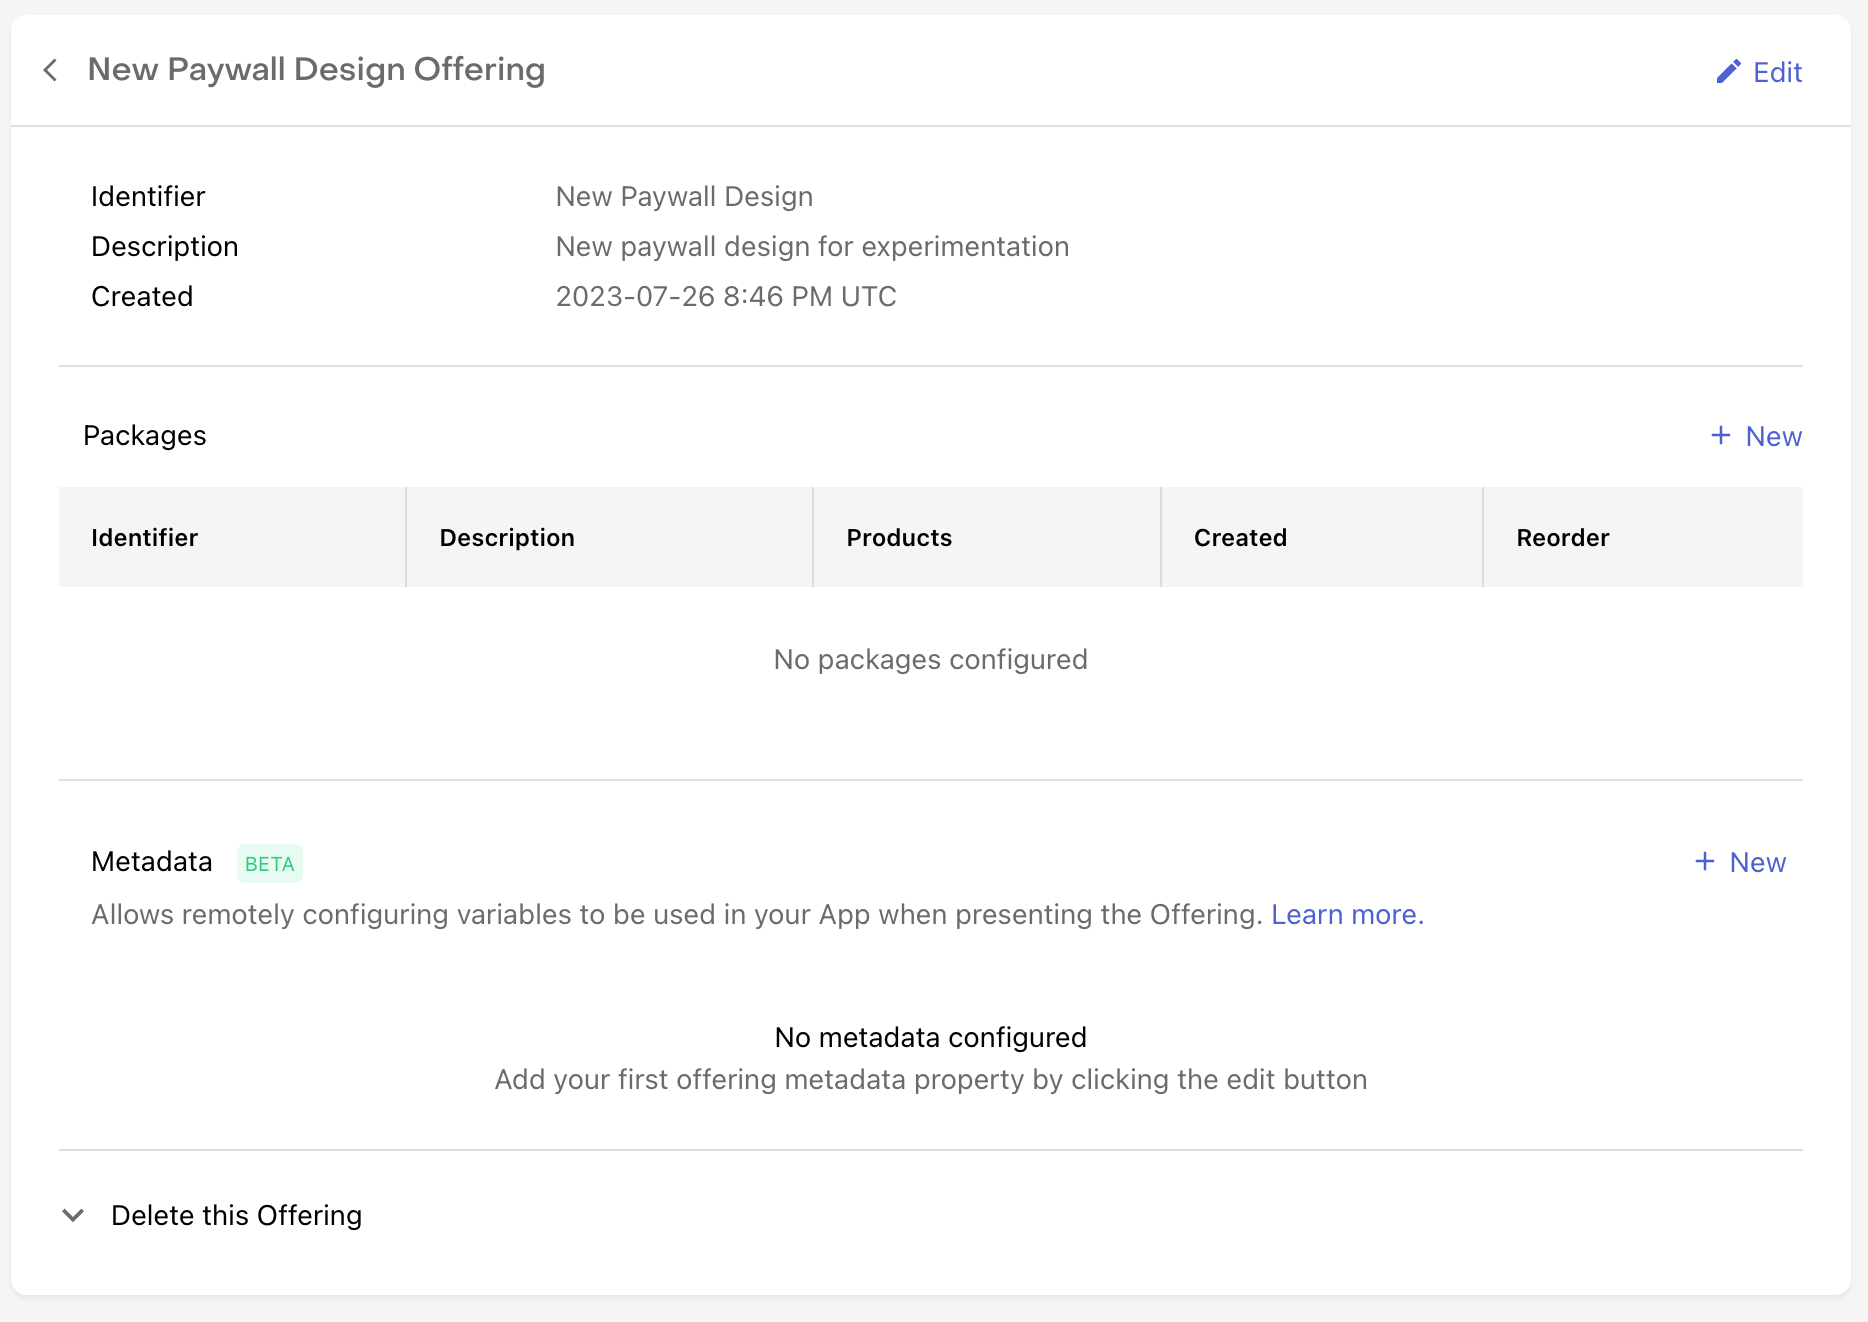
Then begin adding valid JSON in the Metadata field for your Offering. 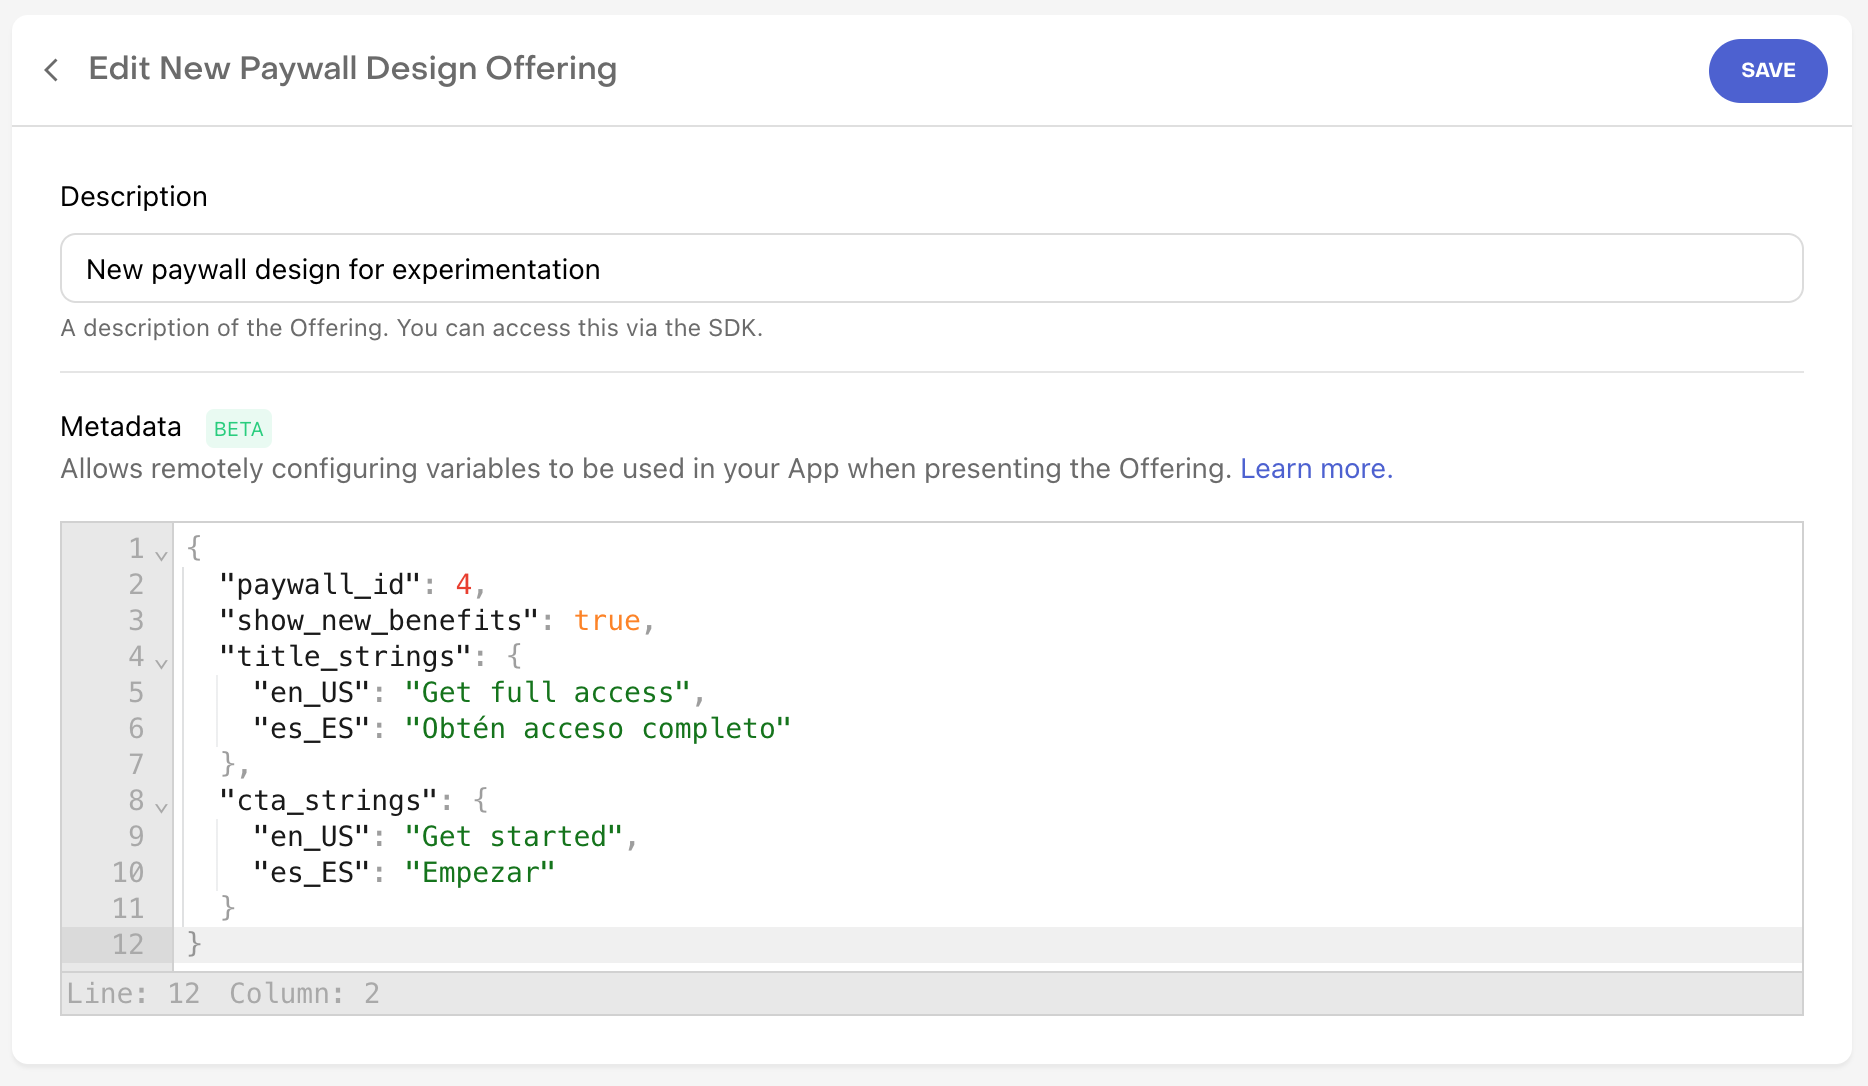
Once you've entered your desired JSON object, click Save to save your changes. 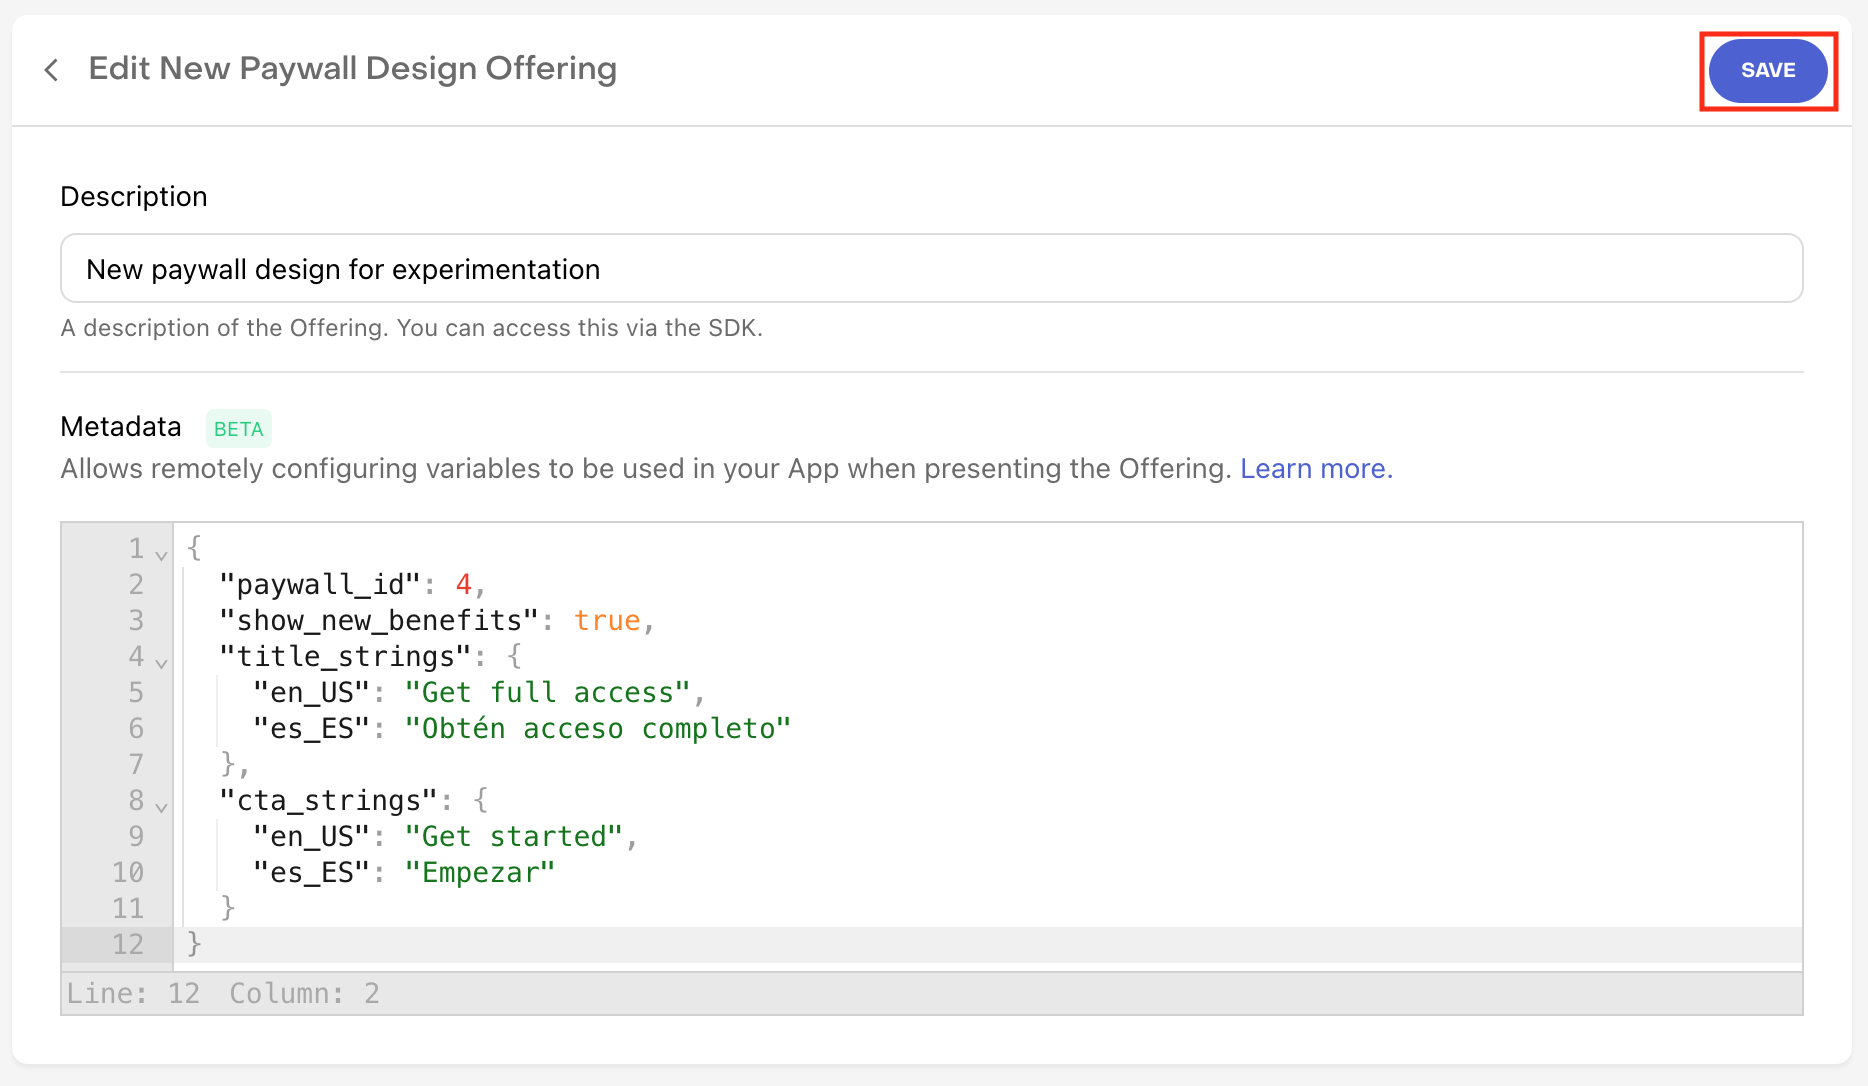
After saving your changes, you'll be navigated back to the summary page for your Offering, where the new metadata JSON object you've created will be displayed. (NOTE: Objects will be alphabetically ordered) 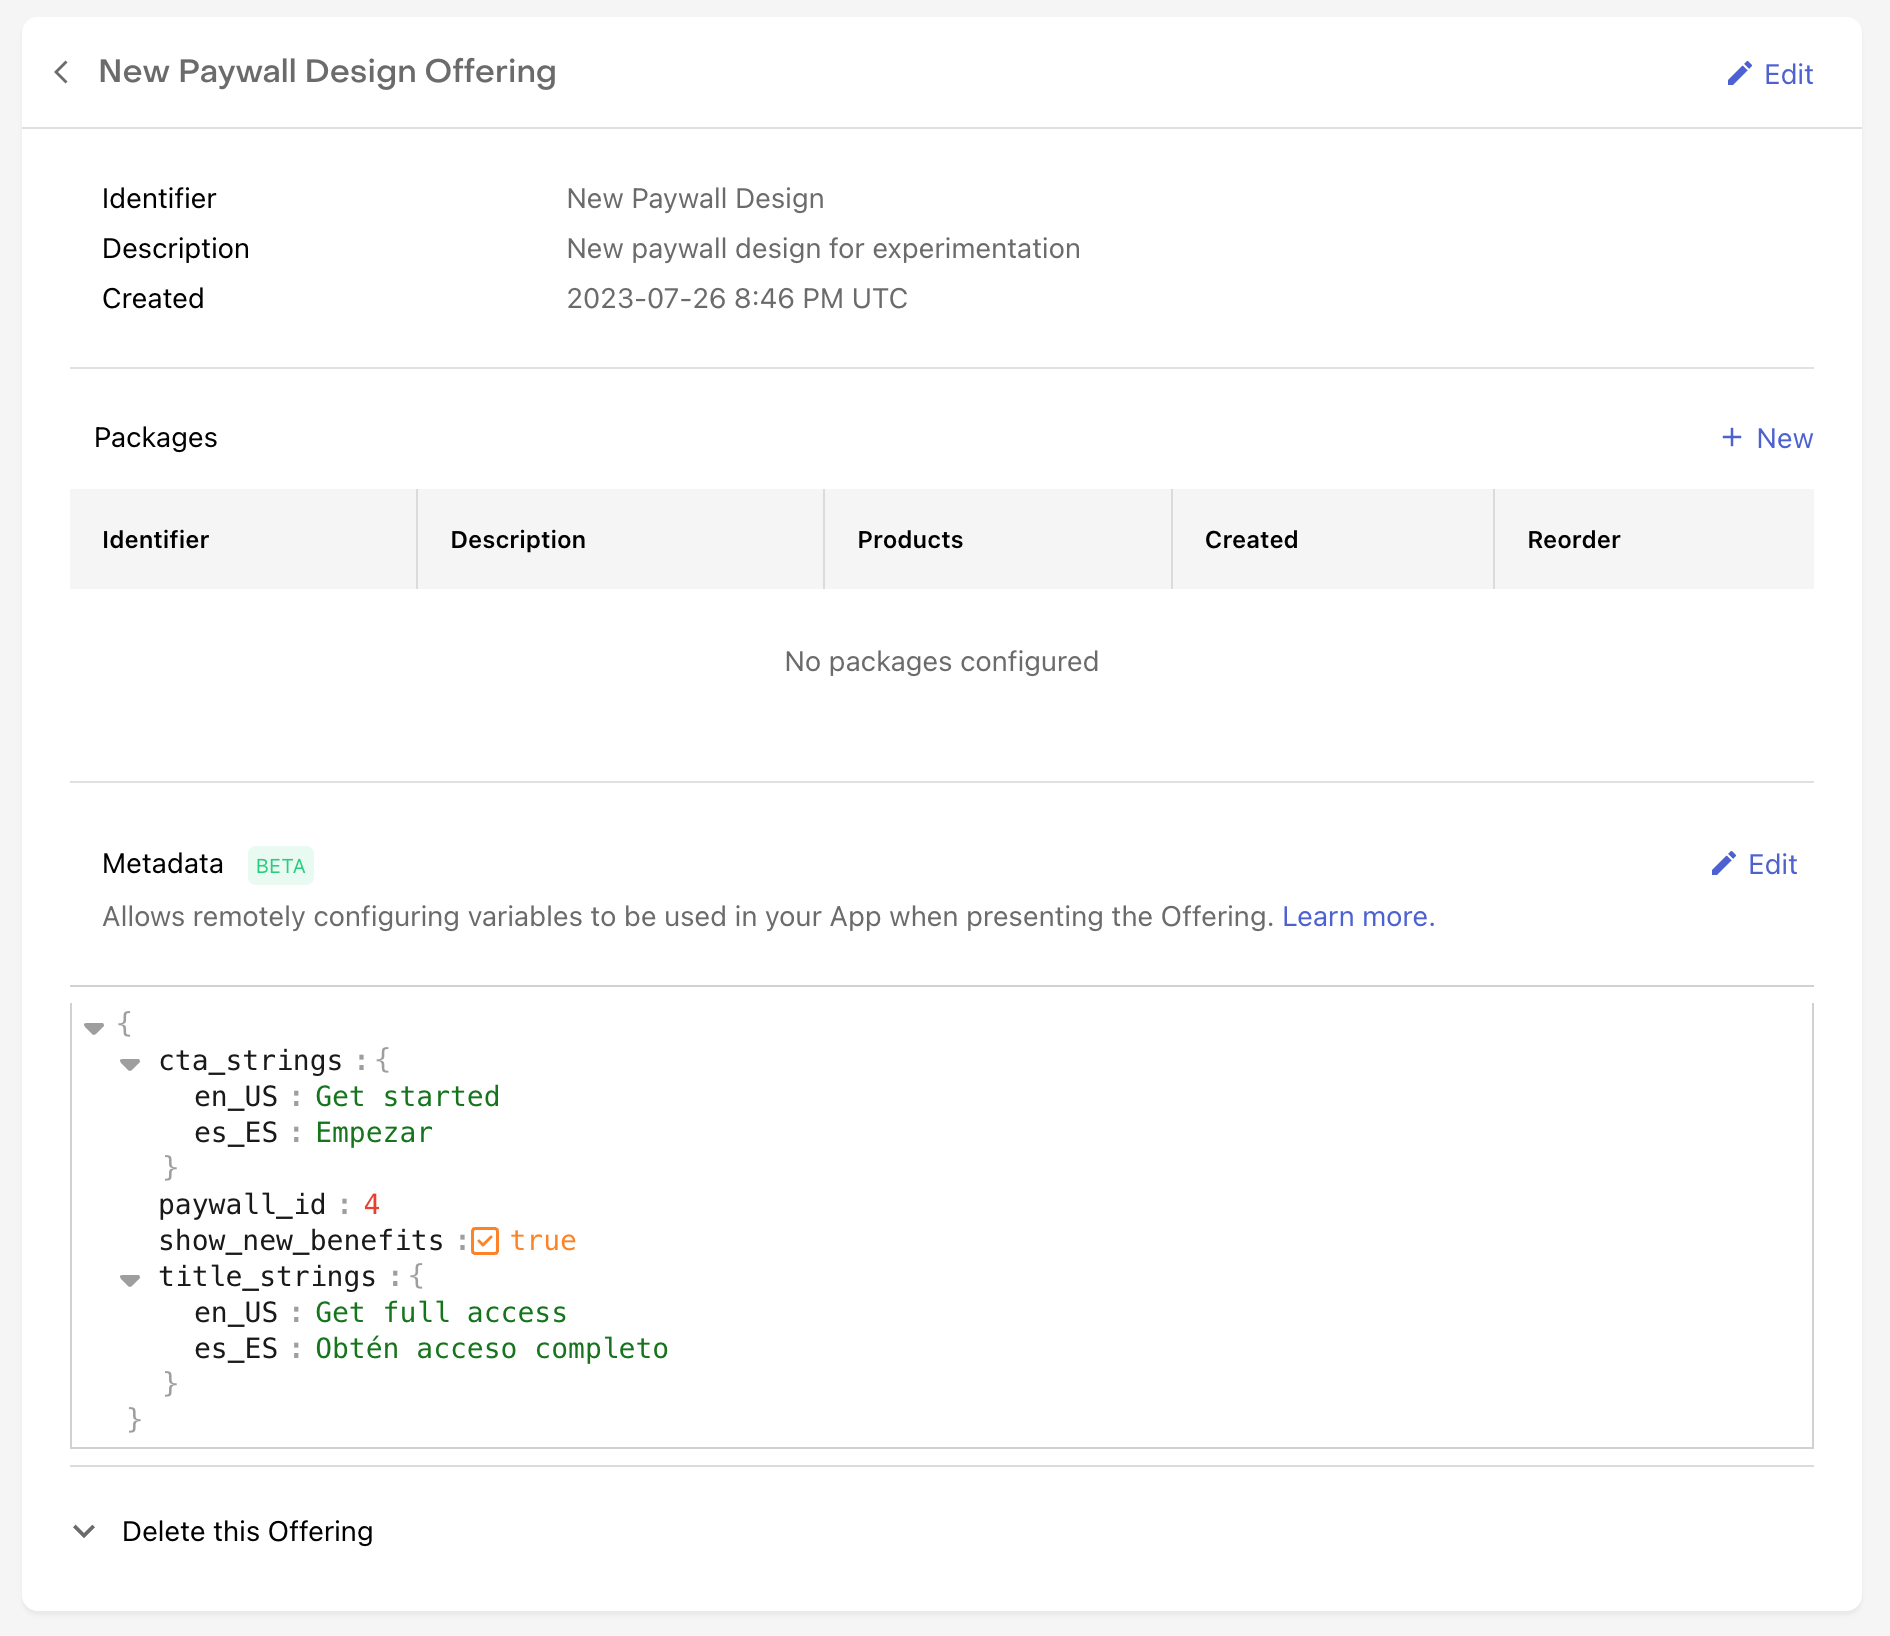
Creating a JSON object
Accessing metadata from your appYou can access metadata directly from the Offering object in the RevenueCat SDKs. let offerings = try await Purchases.shared.offerings()
if let offering = offerings?.current {
let paywallTitle = offering.getMetadataValue(for: "title", default: "Get Pro")
let paywallSubtitle = offering.getMetadataValue(for: "subtitle", default: "Unlock all the features")
let paywallButton = offering.getMetadataValue(for: "button", default: "Redeem Trial")
}Purchases.sharedInstance.getOfferingsWith({ error ->
// An error occurred
}) { offerings ->
offerings.current?.let {
val paywallTitle = it.getMetadataString("title", default="Get Pro")
val paywallSubtitle = it.getMetadataString("title", default="Unlock all the features")
val paywallButton = it.getMetadataString("title", default="Redeem Trial")
}
}Offering metadata limits
Offering metadata use case examplesYou can find some example use cases in action in our Offering Metadata example use cases doc. See contentsYou can override the current offering that displays in your app on a per-user basis by selecting a different offering in the Current Offering card. This can be useful for:
In the card, you'll see the current offering for the user: See contentsWith our Singular integration you can:
Integration at a Glance
1. Send device data to RevenueCatThe Singular integration requires some device-specific data. RevenueCat will only send events into Singular if the below Subscriber Attributes keys have been set for the device.
These properties can be set manually, like any other Subscriber Attributes, or through the helper method import AdSupport
// ...
Purchases.configure(withAPIKey: "public_sdk_key")
// ...
Purchases.shared.attribution.collectDeviceIdentifiers()//..
Purchases.configure(this, "public_sdk_key")
//..
Purchases.sharedInstance.collectDeviceIdentifiers()You should make sure to call
(Optional) Send campaign data to RevenueCatRevenueCat itself is not an attribution network, and can't determine which specific ad drove an install/conversion. However, if you're able to collect this information from another source, such as Singular, it's possible to attach it to a user in RevenueCat using Subscriber Attributes as well.
2. Send RevenueCat events into SingularAfter you've set up the Purchases SDK to send device data to RevenueCat, you can "turn on" the integration and configure the event names from the RevenueCat dashboard.

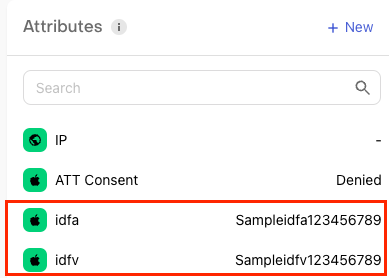
3. Testing the Singular integrationYou can test the Singular integration end-to-end before going live. It's recommended that you test the integration is working properly for new users, and any existing users that may update their app to a new version. Add a sandbox SDK key in the RevenueCat dashboardBefore you test the integration, make sure you have a Singular SDK key set in the "Sandbox API key" field in RevenueCat. This is required if you want the integration to trigger for sandbox purchases. Make a sandbox purchase with a new userSimulate a new user installing your app, and go through your app flow to complete a sandbox purchase. Check that the required device data is collectedNavigate the the Customer View for the test user that just made a purchase. Make sure that all of the required data from step 1 above is listed as attributes for the user.
Check that the Singular event delivered successfullyWhile still on the Customer View, click into the test purchase event in the Customer History and make sure that the Singular integration event exists and was delivered successfully.
See contentsTargeting allows you to create rules for serving distinct audiences their own Offering. Instead of having a single Default Offering that all customers receive, you can instead create a cascading sequence of rules to deliver different Offerings to each audience that you define. This allows you to create paywall experiences that are tailored to each of your audiences so you can make an effective pitch for your product and maximize lifetime value.
Terminology
How Targeting worksBefore you setup any Targeting Rules, if you use Offerings, here's how they're returned in your app:
As long as your app is setup to display a customer's Current Offering on your paywall, then you can change the Default Offering that gets provided for a customer at any time from our Dashboard, or run an Experiment to serve two different Offerings to specific audiences. Once you setup Targeting Rules, you unlock an additional level of customization, because the Current Offering that gets returned for each customer will be based on the Rule they qualify for. For example:
When determining which (if any) Targeting Rule a customer matches, we'll assess them from top to bottom as you've ordered them in the Dashboard. Creating Targeting RulesFirst, navigate to "Targeting" in the "Monetization tools" section of your Project Settings. Then click on "Create a New Rule" to begin. [block:image] Then, create your rule by:
[block:image] Once you've entered all of the required fields for your rule, click "Save" and it will be added to the list of rules in State you've selected. Ordering Targeting RulesHow Live rules are added to the listWhen a rule is newly set Live (either when it's created or when an Inactive rule is set Live), it'll be ordered at the bottom of that list so that if its targeted audience has any overlap with other Live rules, the existing Live rules will "outrank" the new rule when determining what a customer receives.
Ordering Live rules
[block:image]
Editing, deleting, and moreRules can also be edited, deleted, or made inactive at any time if you need to modify how Offerings are being served to your customers. [block:image] In addition, if you're looking to add a new rule that's similar to an existing one, you can start by duplicating that rule and then making the desired modifications to the rule conditions. Learn more about conditionsDefinitions[block:parameters] How conditions interact with each other
[block:image] FAQs[block:parameters] |


.png")


Motivation / Description
Full background is here. TL;DR version is:
Changes introduced
I went through all of the places in our docs that need to be updated, but definitely need a QA to make sure:
Linear ticket (if any)
https://linear.app/revenuecat/issue/PWL-426/update-docs-for-the-current-to-default-terminology-change
Additional comments