-
Notifications
You must be signed in to change notification settings - Fork 13.5k
Adding Images to the Curriculum
Austin Sullivan edited this page Sep 20, 2022
·
3 revisions
Adding images to the curriculum is a two-step process that involves two PRs. For a general overview, you need to:
- Upload the image to the repository
- Create a statically.io link to the image and add that link to the lesson you’re wanting to an image to
-
Have a copy of the image you want to upload on your local machine
-
If it doesn’t already exist create a directory with the same name in the same directory as the lesson you want to add an image to
-
If it doesn’t already exist create an
imgsdirectory inside of the directory you made in step 2. -
Add your image to the directory you made in step 3, naming it the order it appears on the page starting from 00 (I.e. the second image in a lesson will be 01.extension)
-
PR the addition of images
Here is an example PR where this process was followed
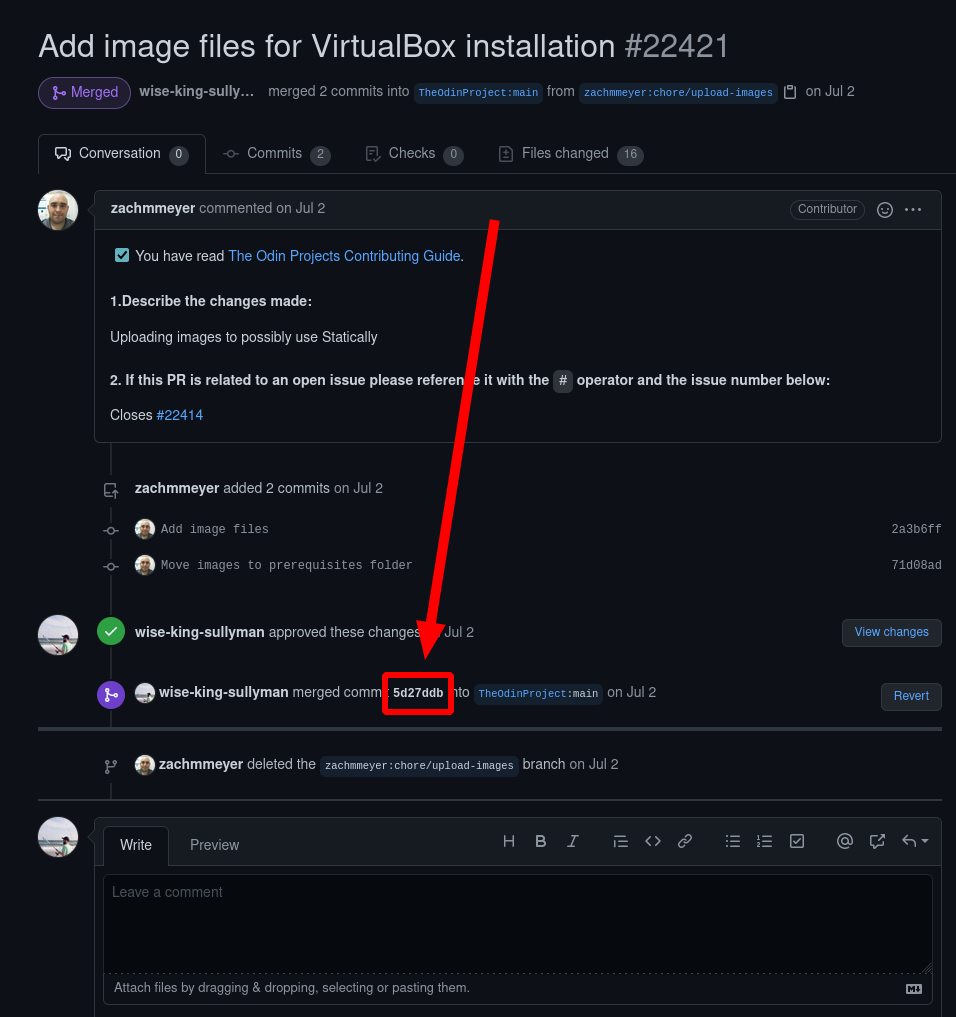
- Go to the PR that added the image to the repo
- Right-click the commit ID where it was merged and select
copy link - Go to https://wise-king-sullyman.github.io/better-statically-converter-react/
- Paste the URL you copied into the text box on the main screen of that site
- Hit enter
- The site will generate the statically CDN link to each image that was merged into the curriculum with that commit, you can click each link to auto-copy that link to your clipboard
- Use each of these links to link to your desired images in the curriculum content you’re editing/adding
- PR the addition of the image links (and any other content you’ve added/changed)
