An open source NVIDIA project where you can build a miniature driving bot with the help of IoT and AI. Use the below link to know more about the project.
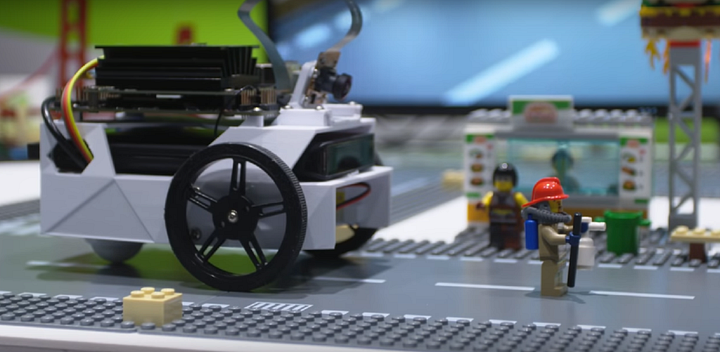
Note: I have used a two wheels chassis car and need Jetson.GPIO python library to run this project and need a network connection.
Let’s get into the software part first. Click Here for the instructions to download the customized JetPack for flashing into the Jetson Device and to complete the initial software setup of the Jetbot program.
Inside the jetbot directory (that you downloaded from the link), there will be a file named “setup.py”. Remove the Adafruit packages from the installation as we are not using Adafruit motor driver. So it’s kind of unnecessary to install. The file content will be looking like this at the end:
import glob
import subprocess
from setuptools import setup, find_packages, Extension

def build_libs():
    subprocess.call(['cmake', '.'])
    subprocess.call(['make'])

build_libs()

setup(
    name='jetbot',
    version='0.4.3',
    description='An open-source robot based on NVIDIA Jetson Nano',
    packages=find_packages(),
    #install_requires=[
    #    'Adafruit_MotorHat',
    #    'Adafruit-SSD1306',
    #    'sparkfun-qwiic'
    #],
    package_data={'jetbot': ['ssd_tensorrt/*.so']},
)
After running this code, you initial setup of this project is complete. TO proceed further, We have to jump into the hardware setup now.
Now, power off and unplug the Jetson device and start connecting it with the motor driver.
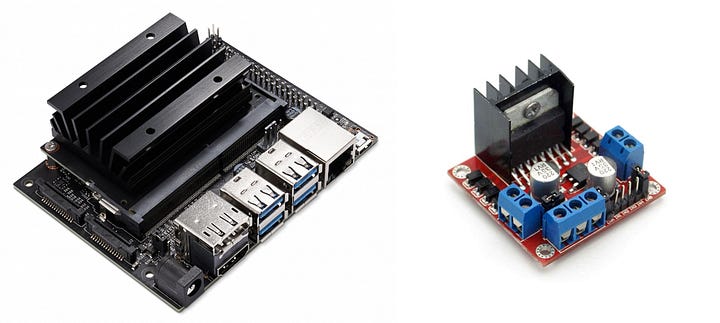
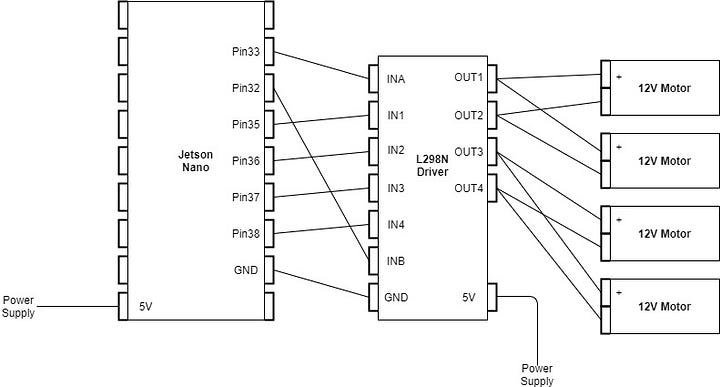
Use the below diagram to connect the devices accordingly. Here, Pin 32 and 33 has been used for PWM ouput and rest Pins for L298N inputs. You a 2A power bank for Jetson and 1500mAh Lithium ion battery for the motor.
Add a CSI camera (or any other) to the Jetson module for this project.
Now it’s time to play around the codes to make with work.
Now power on the jetson nano module and connect with a monitor and keyboard and mouse. Go to the jetbot/jetbot/ directory where you can see files like motor.py, robot.py, camera.py which are used to control the different parts of the car. We have to change the code in motor and robot and camera python files alone to add L298N motor driver to work with this project.
# run
sudo pip install Jetson.GPIO
Inside robot.py file, change the Adafruit motor code to PWM motor code. Pins 35 and 36 is connected to the two left motors and Pins 37 and 38 is connected to the two right motors through the motor driver. The PWM speed ranges from 0(no speed) to 100(full speed).
change the code to this bellow or downlod the file and replace yours.
import time
import Jetson.GPIO as GPIO
GPIO.setwarnings(False)
GPIO.setmode(GPIO.BOARD)
class Robot():
 def __init__(self, *args, **kwargs):
  super(Robot, self).__init__(*args, **kwargs)
  self.left_motor = [35,36]
  self.right_motor = [37,38]
  self.left_speed = 0
  self.right_speed = 0
  GPIO.setup(32,GPIO.OUT)
  GPIO.setup(33,GPIO.OUT)
  self.pwm=[GPIO.PWM(32,50),GPIO.PWM(33,50)]
  GPIO.setup(self.left_motor[0],GPIO.OUT,initial=GPIO.LOW)
  GPIO.setup(self.right_motor[0],GPIO.OUT,initial=GPIO.LOW)
  GPIO.setup(self.left_motor[1],GPIO.OUT,initial=GPIO.LOW)
  GPIO.setup(self.right_motor[1],GPIO.OUT,initial=GPIO.LOW)
  self.pwm[0].start(0)
  self.pwm[1].start(0)
def set_motors(self, left_speed=1.0, right_speed=1.0):
  GPIO.output(self.left_motor[0],GPIO.HIGH)
  GPIO.output(self.right_motor[0],GPIO.HIGH)
  self.left_speed = ((left_speed - (-1))/2)*100
  self.right_speed = ((right_speed - (-1))/2)*100
  print()
  print()
  self.pwm[0].ChangeDutyCycle(self.left_speed)
  self.pwm[1].ChangeDutyCycle(self.right_speed)

 def forward(self, speed=1.0, duration=None):
  GPIO.output(self.left_motor[0],GPIO.HIGH)
  GPIO.output(self.right_motor[0],GPIO.HIGH)
  GPIO.output(self.left_motor[1],GPIO.LOW)
  GPIO.output(self.right_motor[1],GPIO.LOW)
  self.speed = ((speed - (-1))/2)*100
  self.pwm[0].ChangeDutyCycle(self.speed)
  self.pwm[1].ChangeDutyCycle(self.speed)
def backward(self, speed=1.0):
  GPIO.output(self.left_motor[0],GPIO.LOW)
  GPIO.output(self.right_motor[0],GPIO.LOW)
  GPIO.output(self.left_motor[1],GPIO.HIGH)
  GPIO.output(self.right_motor[1],GPIO.HIGH)
  self.speed = ((speed - (-1))/2)*100
  self.pwm[0].ChangeDutyCycle(self.speed)
  self.pwm[1].ChangeDutyCycle(self.speed)
def left(self, speed=1.0):
  GPIO.output(self.left_motor[0],GPIO.LOW)
  GPIO.output(self.right_motor[0],GPIO.HIGH)
  GPIO.output(self.left_motor[1],GPIO.HIGH)
  GPIO.output(self.right_motor[1],GPIO.LOW)
  self.speed = ((speed - (-1))/2)*100
  self.pwm[0].ChangeDutyCycle(self.speed)
  self.pwm[1].ChangeDutyCycle(self.speed)
def right(self, speed=1.0):
  GPIO.output(self.left_motor[0],GPIO.HIGH)
  GPIO.output(self.right_motor[0],GPIO.LOW)
  GPIO.output(self.left_motor[1],GPIO.LOW)
  GPIO.output(self.right_motor[1],GPIO.HIGH)
  self.speed = ((speed - (-1))/2)*100
  self.pwm[0].ChangeDutyCycle(self.speed)
  self.pwm[1].ChangeDutyCycle(self.speed)
def stop(self):
  GPIO.output(self.left_motor[0],GPIO.LOW)
  GPIO.output(self.right_motor[0],GPIO.LOW)
  GPIO.output(self.left_motor[1],GPIO.LOW)
  GPIO.output(self.right_motor[1],GPIO.LOW)
  self.left_speed = 0
  self.right_speed = 0
  self.pwm[0].ChangeDutyCycle(self.left_speed)
  self.pwm[1].ChangeDutyCycle(self.right_speed)
Delete the motor.py file as it is not necessary as all the required code for the motor is implemented in the robot.py file.
If you use a camera that is not a CSI Camera, consider checking this
Now the coding part is completely done. Using a WiFi adapter connected to the Jetson module, connect a PC system and Jetson module to the same network to test the product remotely.
If you installed the customized JetPack given in the site above, then power up the Jetson Nano using power bank and connect to the module’s Jupyterlab using module’s WiFi IP address from the PC System. If you have used other versions of JetPack, please install jupyterlab server and configure it to access remotely.
Before running the model, open the terminal in jupyterlab and run the below command with “sudo” privilege:
# Enable Pin 32 / PWM0
busybox devmem 0x700031fc 32 0x45
busybox devmem 0x6000d504 32 0x2

# Enable Pin 33 / PWM2
busybox devmem 0x70003248 32 0x46
busybox devmem 0x6000d100 32 0x00
It is used to enable the PWM pins, else the JetBot wont move. Each time you start the Jetson module, please do run this code to run the model.
Use this link to play around with the project like collision avoidance, road following and also come up with creative ideas. All the best.
Special Appreciation to Anand Mohan for his blog post on medium
Hope this information was useful to you. Feel Free star this repository.
Don’t forget to give add your contributions to this project.