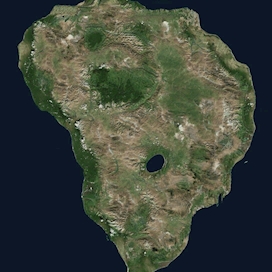
 We tackle the problem of texture synthesis in the setting where many input
images are given and a large-scale output is required. We build on recent
generative adversarial networks and propose two extensions in this paper.
First, we propose an algorithm to combine outputs of GANs trained on
a smaller resolution to produce a large-scale plausible texture map with
virtually no boundary artifacts. Second, we propose a user interface to
enable artistic control. Our quantitative and qualitative results showcase the
generation of synthesized high-resolution maps consisting of up to hundreds
of megapixels as a case in point.
Watch our video on Youtube:
Some of our results can be viewed interactively on EasyZoom:
The TileGAN application consists of two independent processes, the server and the client. Both can be run locally on your machine or you can choose to run the server on a remote location, depending on your hardware setup. All network operations are performed by the server process, which sends the result to the client for displaying.
- Download the network(s) to the location of your server (this can be your local machine or a remote server)
- Extract the
.zipto./data. There should be a separate folder for each dataset in./data(e.g../data/vangogh) containing a*_network.pkl, a*_descriptors.hdf5, a*_clusters.hdf5and a*_kmeans.joblibfile.
- Install requirements from
requirements-pip.txt - Install hnswlib:
git clone https://github.com/nmslib/hnswlib.git cd hnswlib/python_bindings python setup.py install - Run
python tileGAN_server.py - The server process will start, then tell you the IP to connect to.
- Install Qt for Python. The easiest way to do this is using conda:
conda install -c conda-forge qt pyside2 - Install requirements from
requirements-pip.txt - Run
python tileGAN_client.py XX.XX.XX.XX(insert the IP from the server). If you're running the server on the same machine as the application, you can omit the IP address or use 'localhost'.
- Train a network on own your data using Progressive Growing of GANs
- run
create_dataset path_to_pkl num_latents t_size num_clusters network_name(expected to take between 10 and 60 minutes depending on the specified sample size)path_to_pklthe path to the trained network pickle of your ProGAN networknum_latentsthe size of the database entries (a good number would be 50K to 300K)t_sizethe size of the output descriptors (an even number somewhere around 12 and 24)num_clustersthe number of clusters (approx. 8-16)network_namethe name you want to assign your network
- run server and client and load network in UI from the drop down menu. First time the network is loaded, an ANN index is created (expected to take <5mins depending on sample size)
Anna Frühstück, Ibraheem Alhashim, Peter Wonka Contact: anna.fruehstueck (at) kaust.edu.sa
If you use this code for your research, please cite our paper:
@article{Fruehstueck2019TileGAN,
  title      = {{TileGAN}: Synthesis of Large-Scale Non-Homogeneous Textures},
  author     = {Fr\"{u}hst\"{u}ck, Anna and Alhashim, Ibraheem and Wonka, Peter},
  journal    = {ACM Transactions on Graphics (Proc. SIGGRAPH) },
  issue_date = {July 2019},
  volume     = {38},
  number     = {4},
  pages      = {58:1-58:11},
  year       = {2019}
}
Our project is based on ProGAN. We'd like to thank Tero Karras et al. for their great work and for making their code available.


