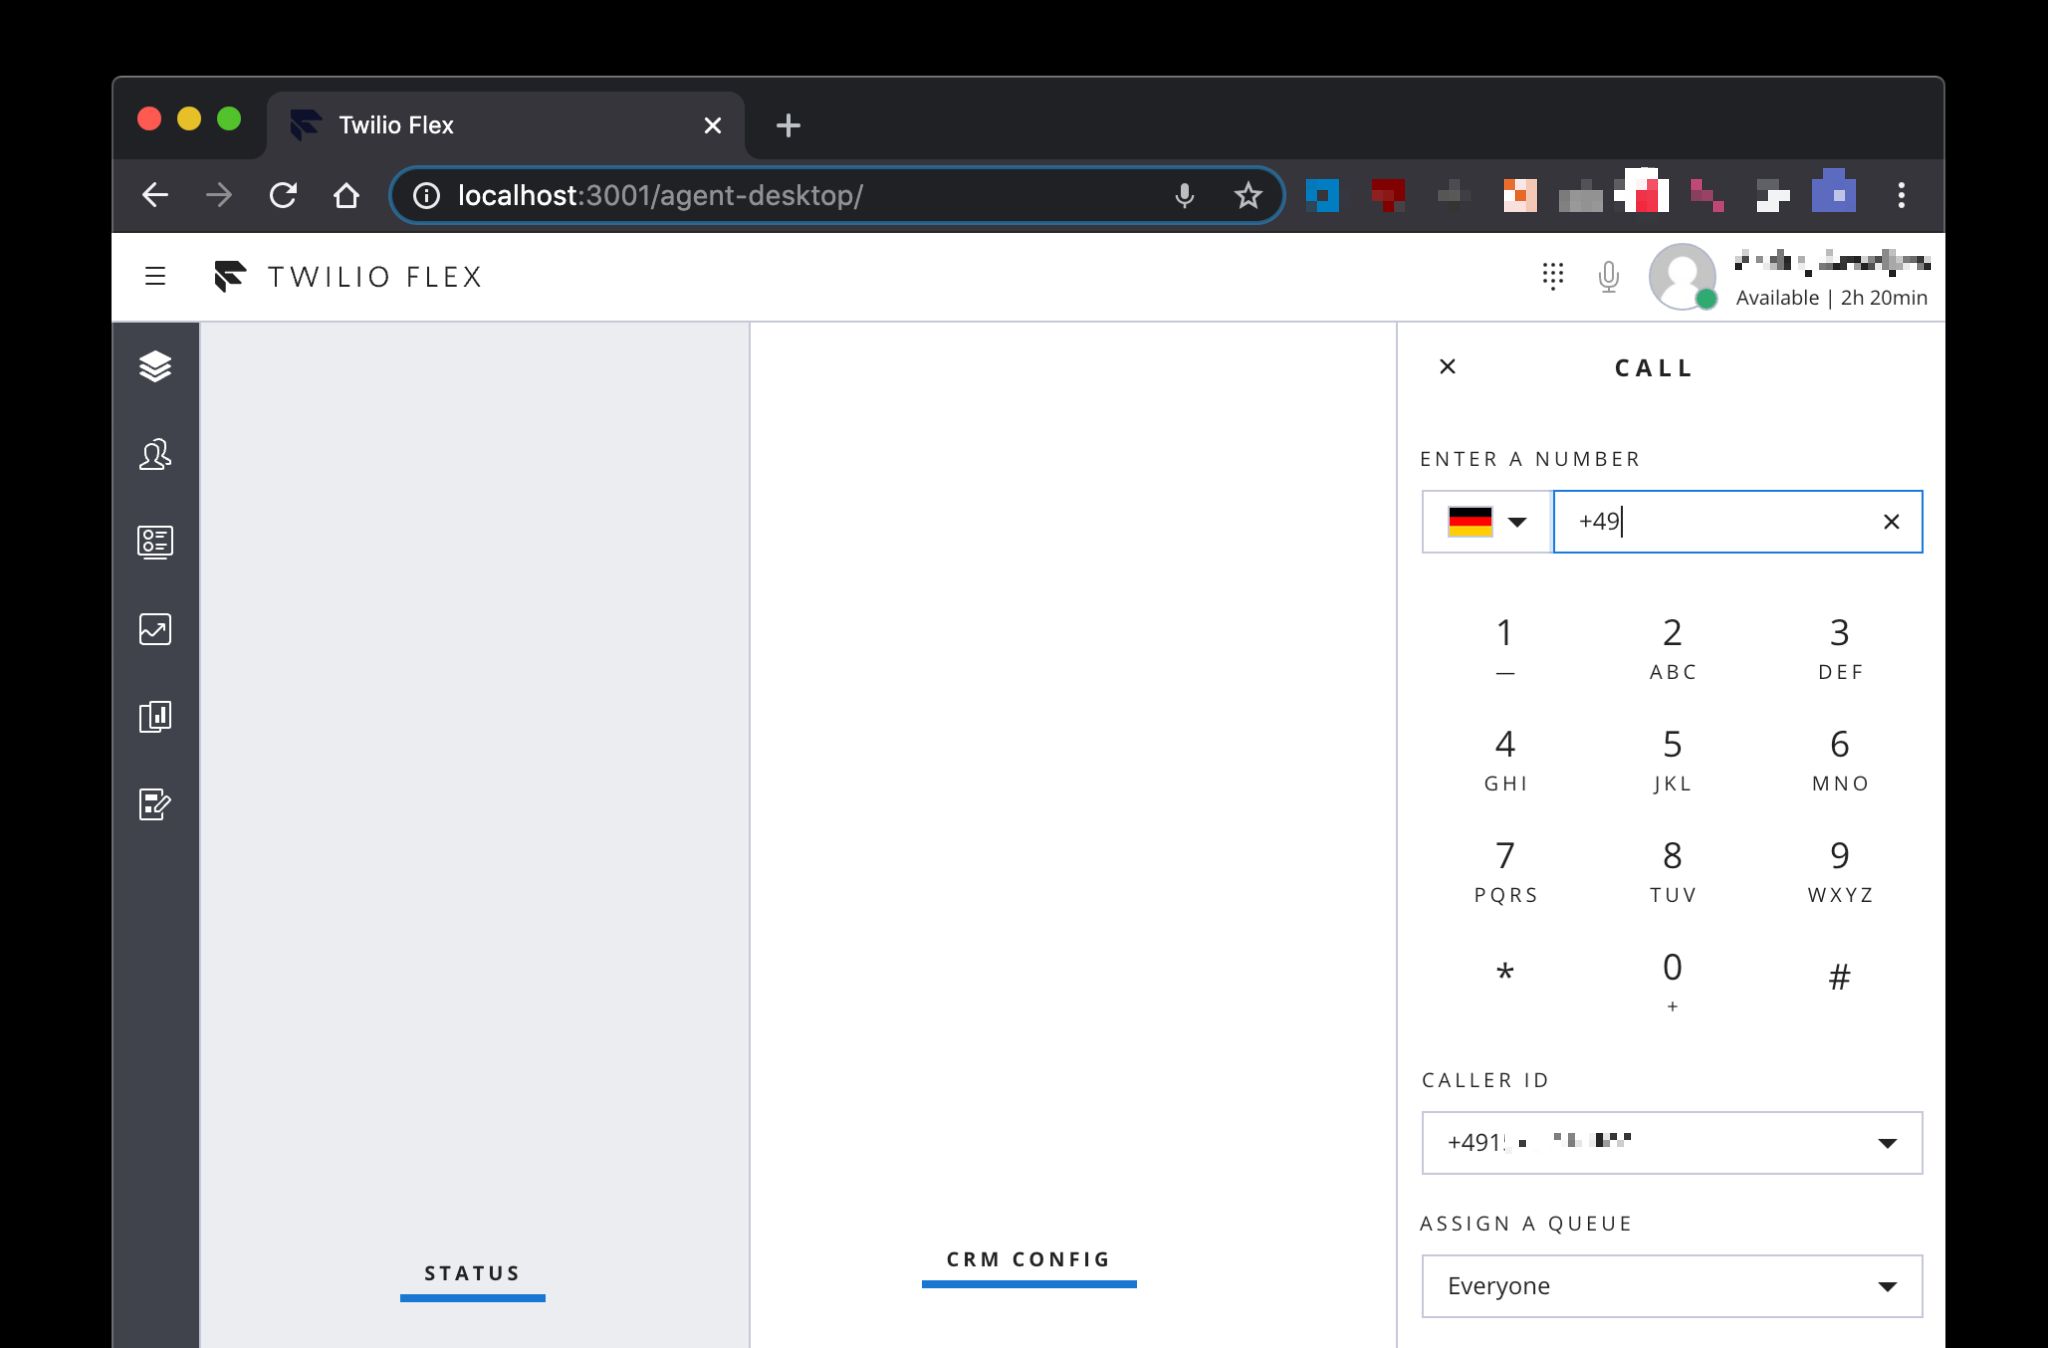
This plugin customizes the behavior of Twilio Flex. Specifically, it adds the option to select an Outbound Caller Id in the new Outbound Dialpad:
If using click to dial, Flex will show a number selection sidebar:

This plugin is meant for educational purposes, comes with no guarantee, and should not be used as-is in production.
Each TaskRouter worker should have two new attributes:
callerIds- an array of caller ids the worker is allowed to use, e.g."callerIds":["+160123456","+160654321"]autoInvalidate- boolean, iftrue, a caller id must be picked on every click to dial, if false, Flex will pick the last chosen caller id until changed in the dialpad
If the Flex Action StartOutboundCall is triggered with the attribute callerId, the plugin will not overwrite this function and just initiate the call.
Make sure you have Node.js as well as npm and Flex Plugins CLI installed.
Afterwards, install the dependencies by running npm install (or --legacy-peer-deps):
cd

# If you use npm
npm installIn order to develop locally, you can use the Webpack Dev Server by running:
twilio flex:plugins:startThis will automatically start up the Webpack Dev Server and open the browser for you. Your app will run on http://localhost:3000. If you want to change that you can do this by setting the PORT environment variable:
When you make changes to your code, the browser window will be automatically refreshed.
When you are ready to deploy your plugin, in your terminal run:
twilio flex:plugins:deploy --major --changelog "Notes for this version" --description "Functionality of the plugin"Once deployed, you can manually release your plugin via the Flex UI or via
twilio flex:plugins:release --plugin plugin-name@version --name "name" --description "description"Note: Common packages like React, ReactDOM, Redux and ReactRedux are not bundled with the build because they are treated as external dependencies so the plugin will depend on Flex to provide them globally.