
Engage customers with in‑app messages and support them with an integrated knowledge base and help desk.
The BOTTER Messenger enables you to use it like a Messenger in your app, have conversations with your customers, send rich outbound messages, and track events. The BOTTER SDK is the home for the conversations your customers have with you, and the place where they can self-serve for support or to learn more about your product. You can open BOTTER from a persistent button that sits over your app’s UI, From there, your customer can start a conversation, replies in both directions happen in real time.
- Installation
- Integration
- Supported integration languages
- Current supported bot languages
- Customer support
- Push Notifications (FCM)
- Customizations
- On-premise extra customizations
- Share Location (Optional)
- Custom User Attributes (Optional)
- Customizations parameters table
- Licence
Install BOTTER to see and talk to users of your Android app, BOTTER for Android supports API 23 and above.
maven {
  url "from our support team"
     credentials {
       username = "*ask for your username*" //from our support team
       password = "*ask for your password*" //from our support team
    }
}
 compileOptions {
        sourceCompatibility JavaVersion.VERSION_1_8
        targetCompatibility JavaVersion.VERSION_1_8
    }
implementation "com.bluecrunch:botter:1.6.0"
First, you'll need to get your BOTTER Android API key. To find this, just contact our support team to get you one. Then, initialize BOTTER by calling the following in the onCreate() method of your application class
Botter.initialize(this,"Your API Key",
new BotterCustomization.Builder().build());
Note: If you don't currently implement a custom application, you’ll need to create one. A custom application looks like this:
public class CustomApplication extends Application {
    @Override public void onCreate() {
        super.onCreate();
        Botter.initialize(this,"Your API Key",
new BotterCustomization.Builder().build());
   }
}
You’ll need to update your manifest to use your application:
<application
    android:name=".CustomApplication">
</application>
👋 Contact us with any integration/issues at BOTTER - Contact us page. If you bump into any problems or need more support, just start a conversation with our support team.
Below, we’ll show you how to send push notifications to your customers, with Firebase Cloud Messaging (FCM) in BOTTER.
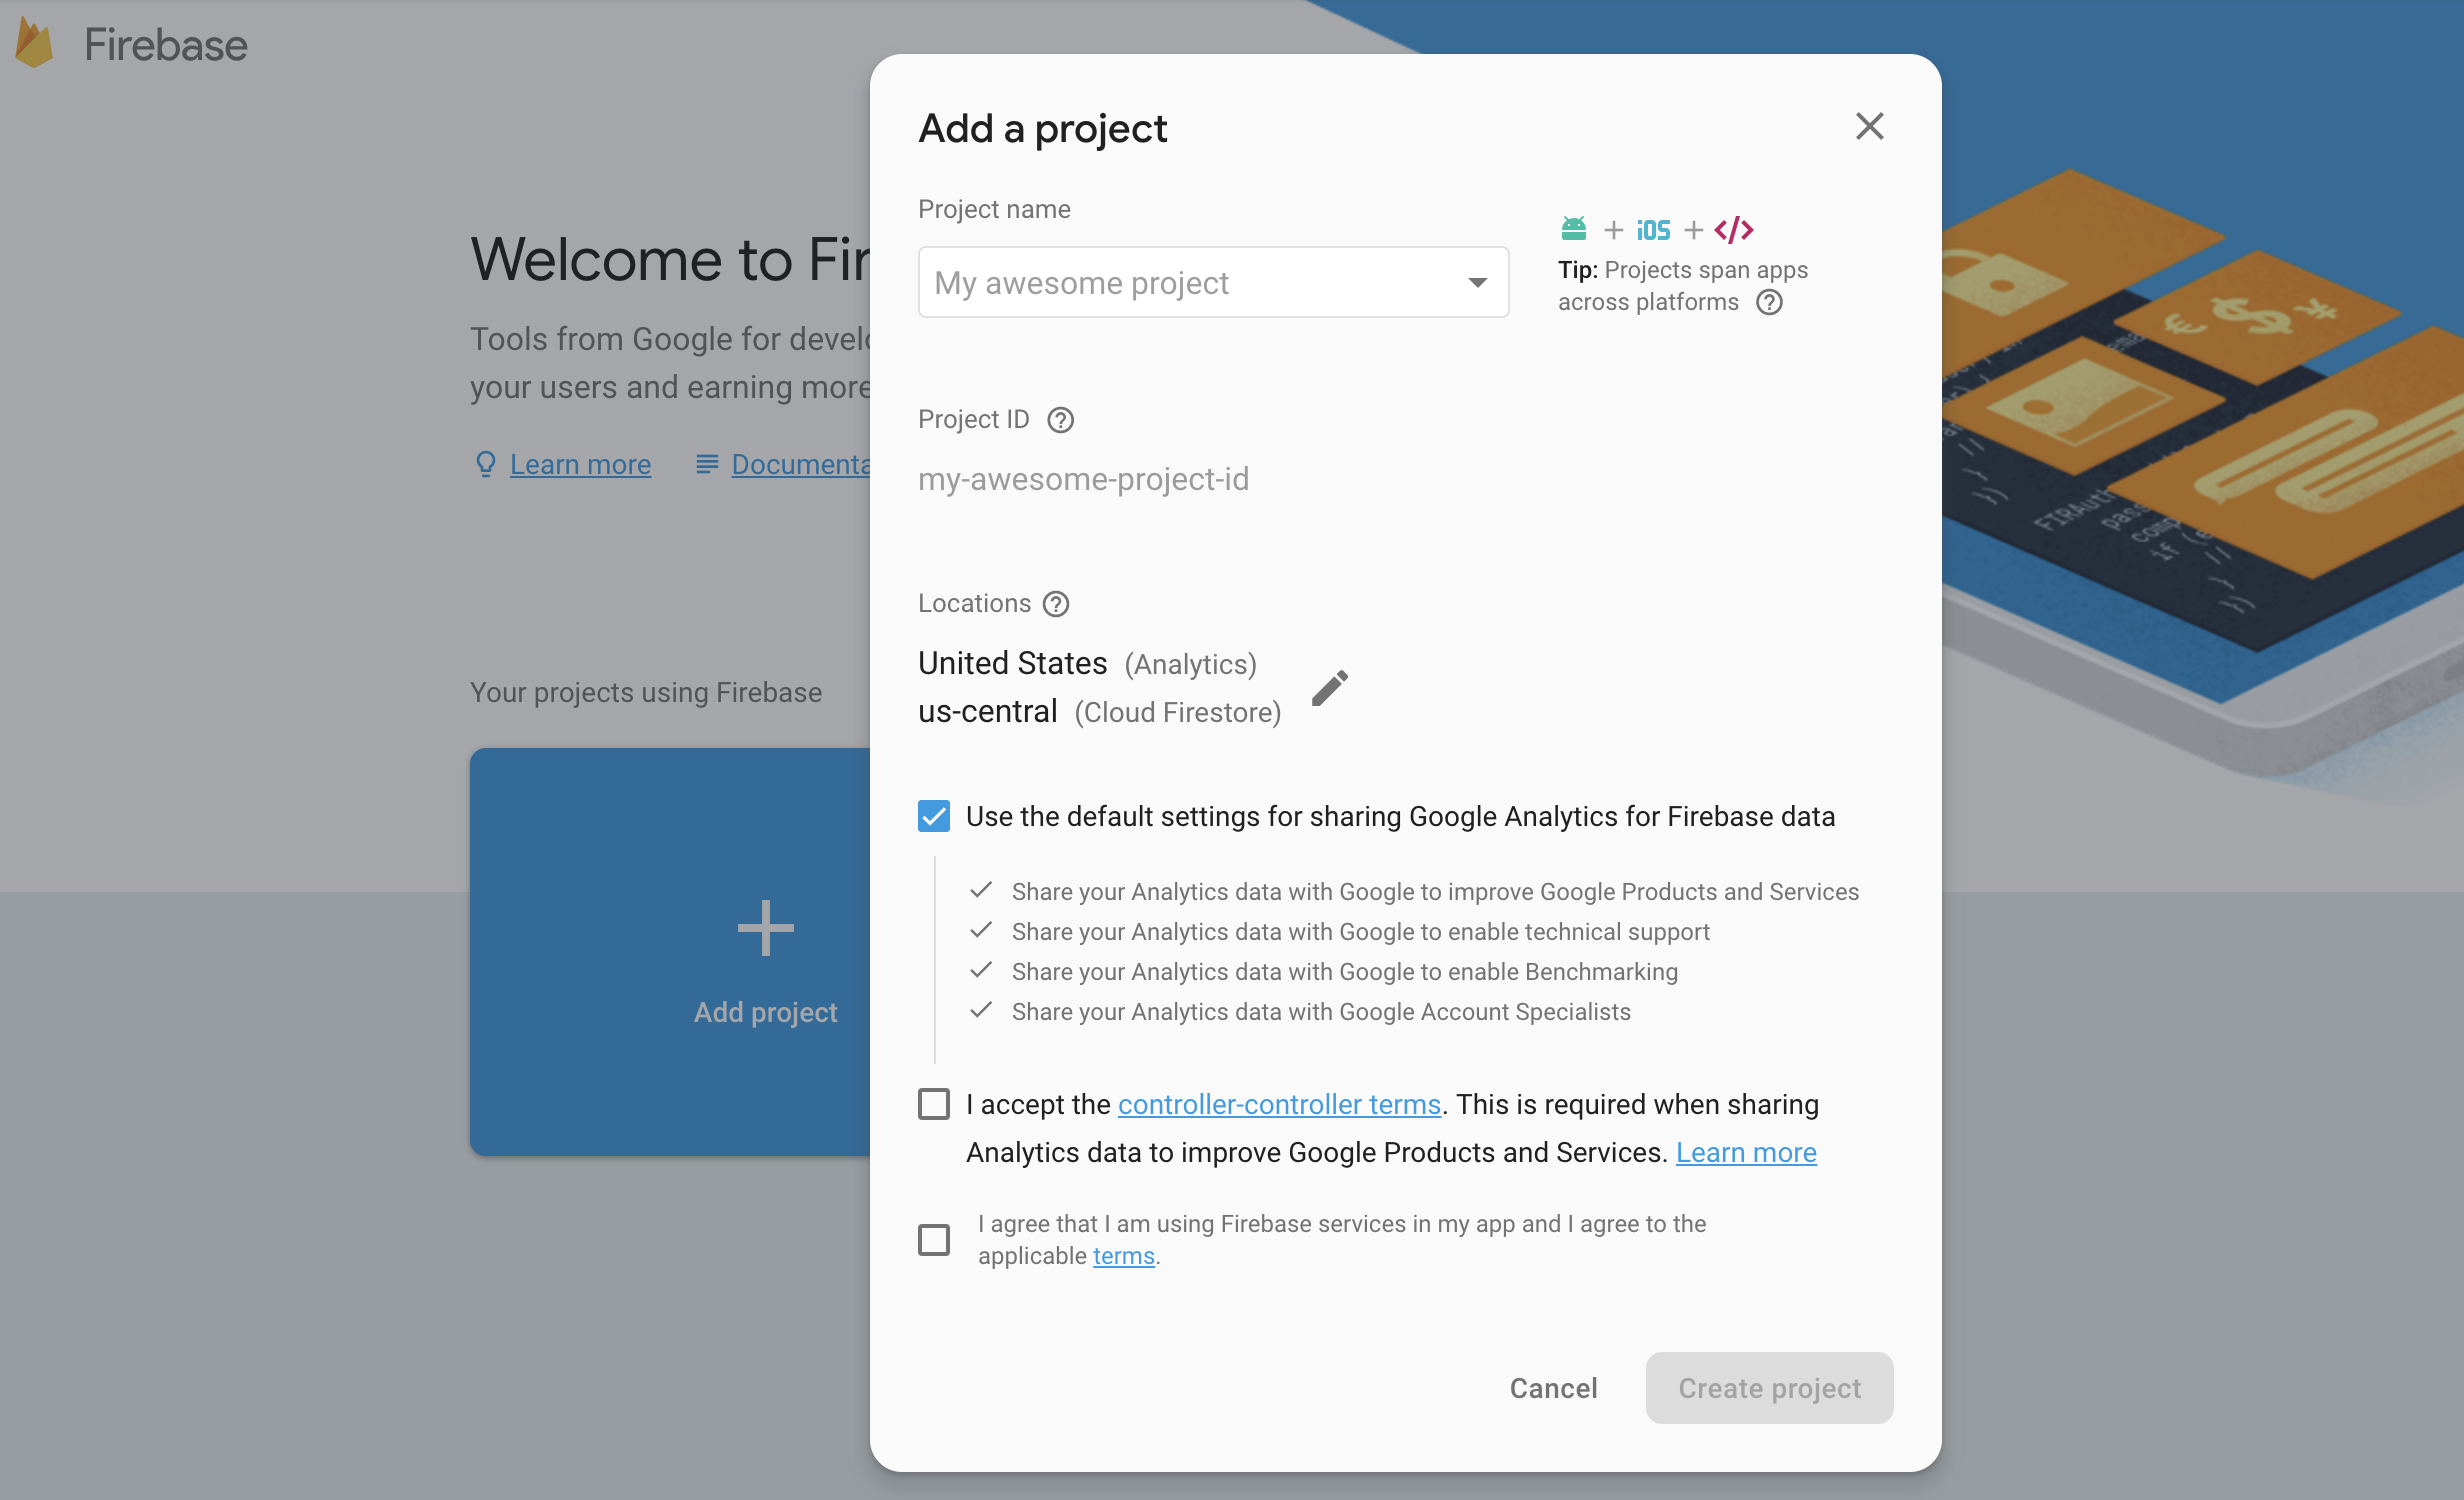
If you already have a Firebase project with notifications enabled you can skip to the next step. Otherwise go to the FCM Console page and create a new project following these steps:
Give the project a name and click ‘Create Project’.
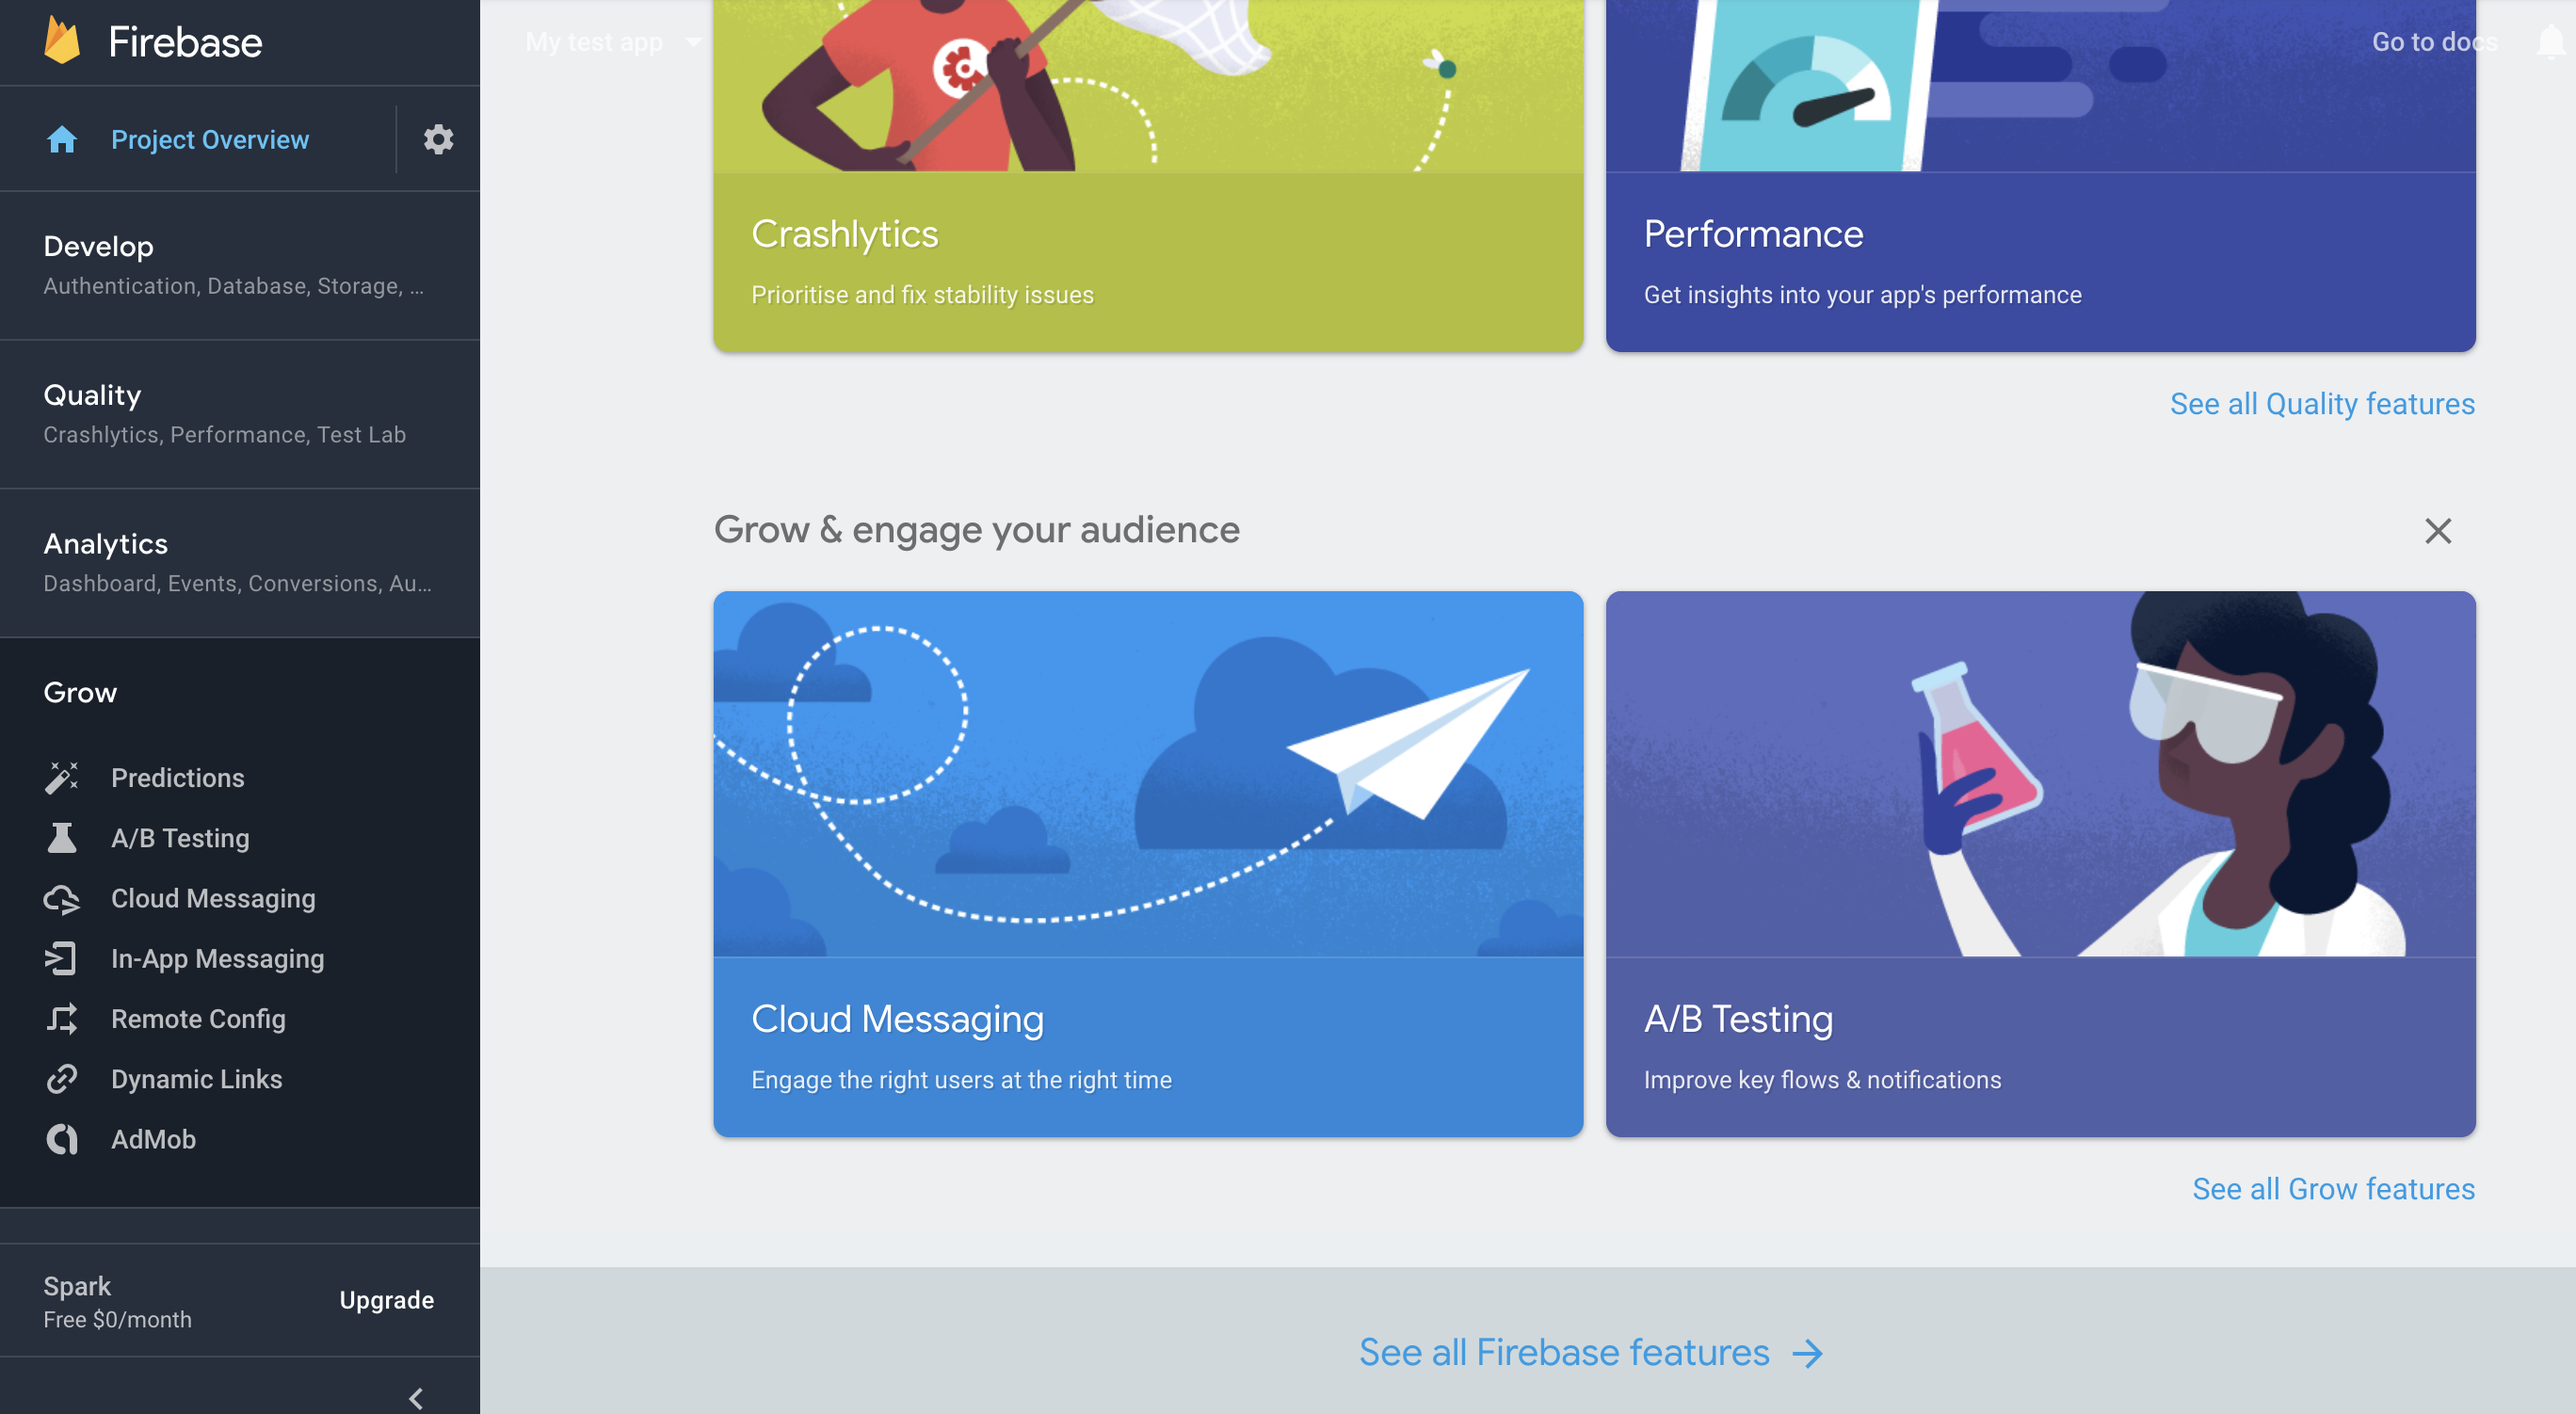
Once your project is set up, scroll down and select the ‘Cloud Messaging’ card.
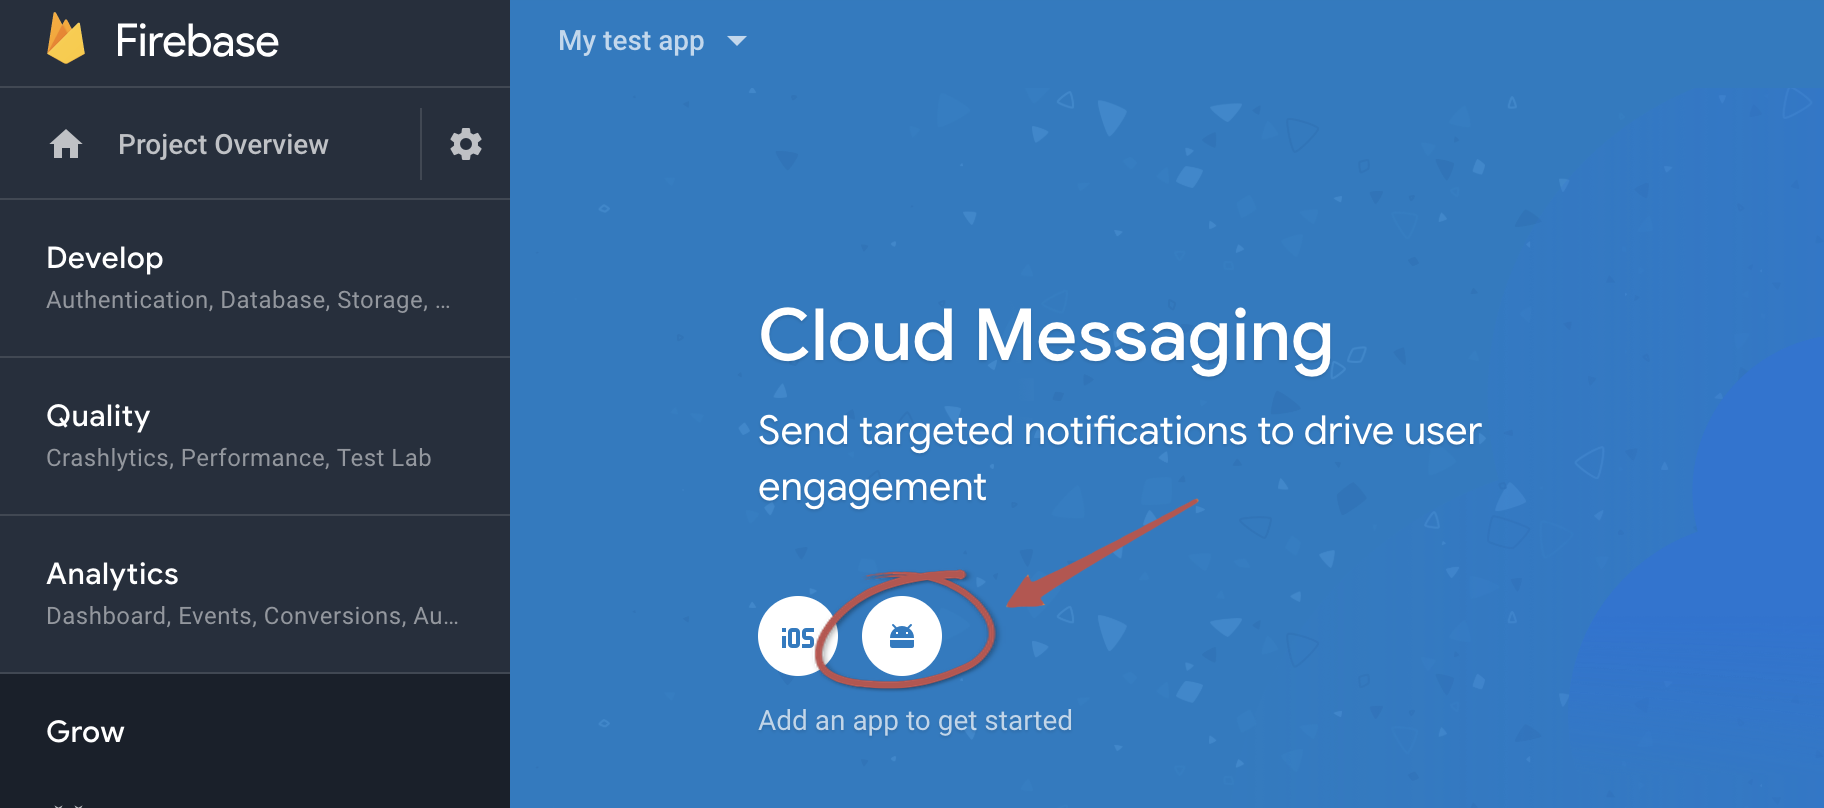
Click on the Android icon to continue setup.
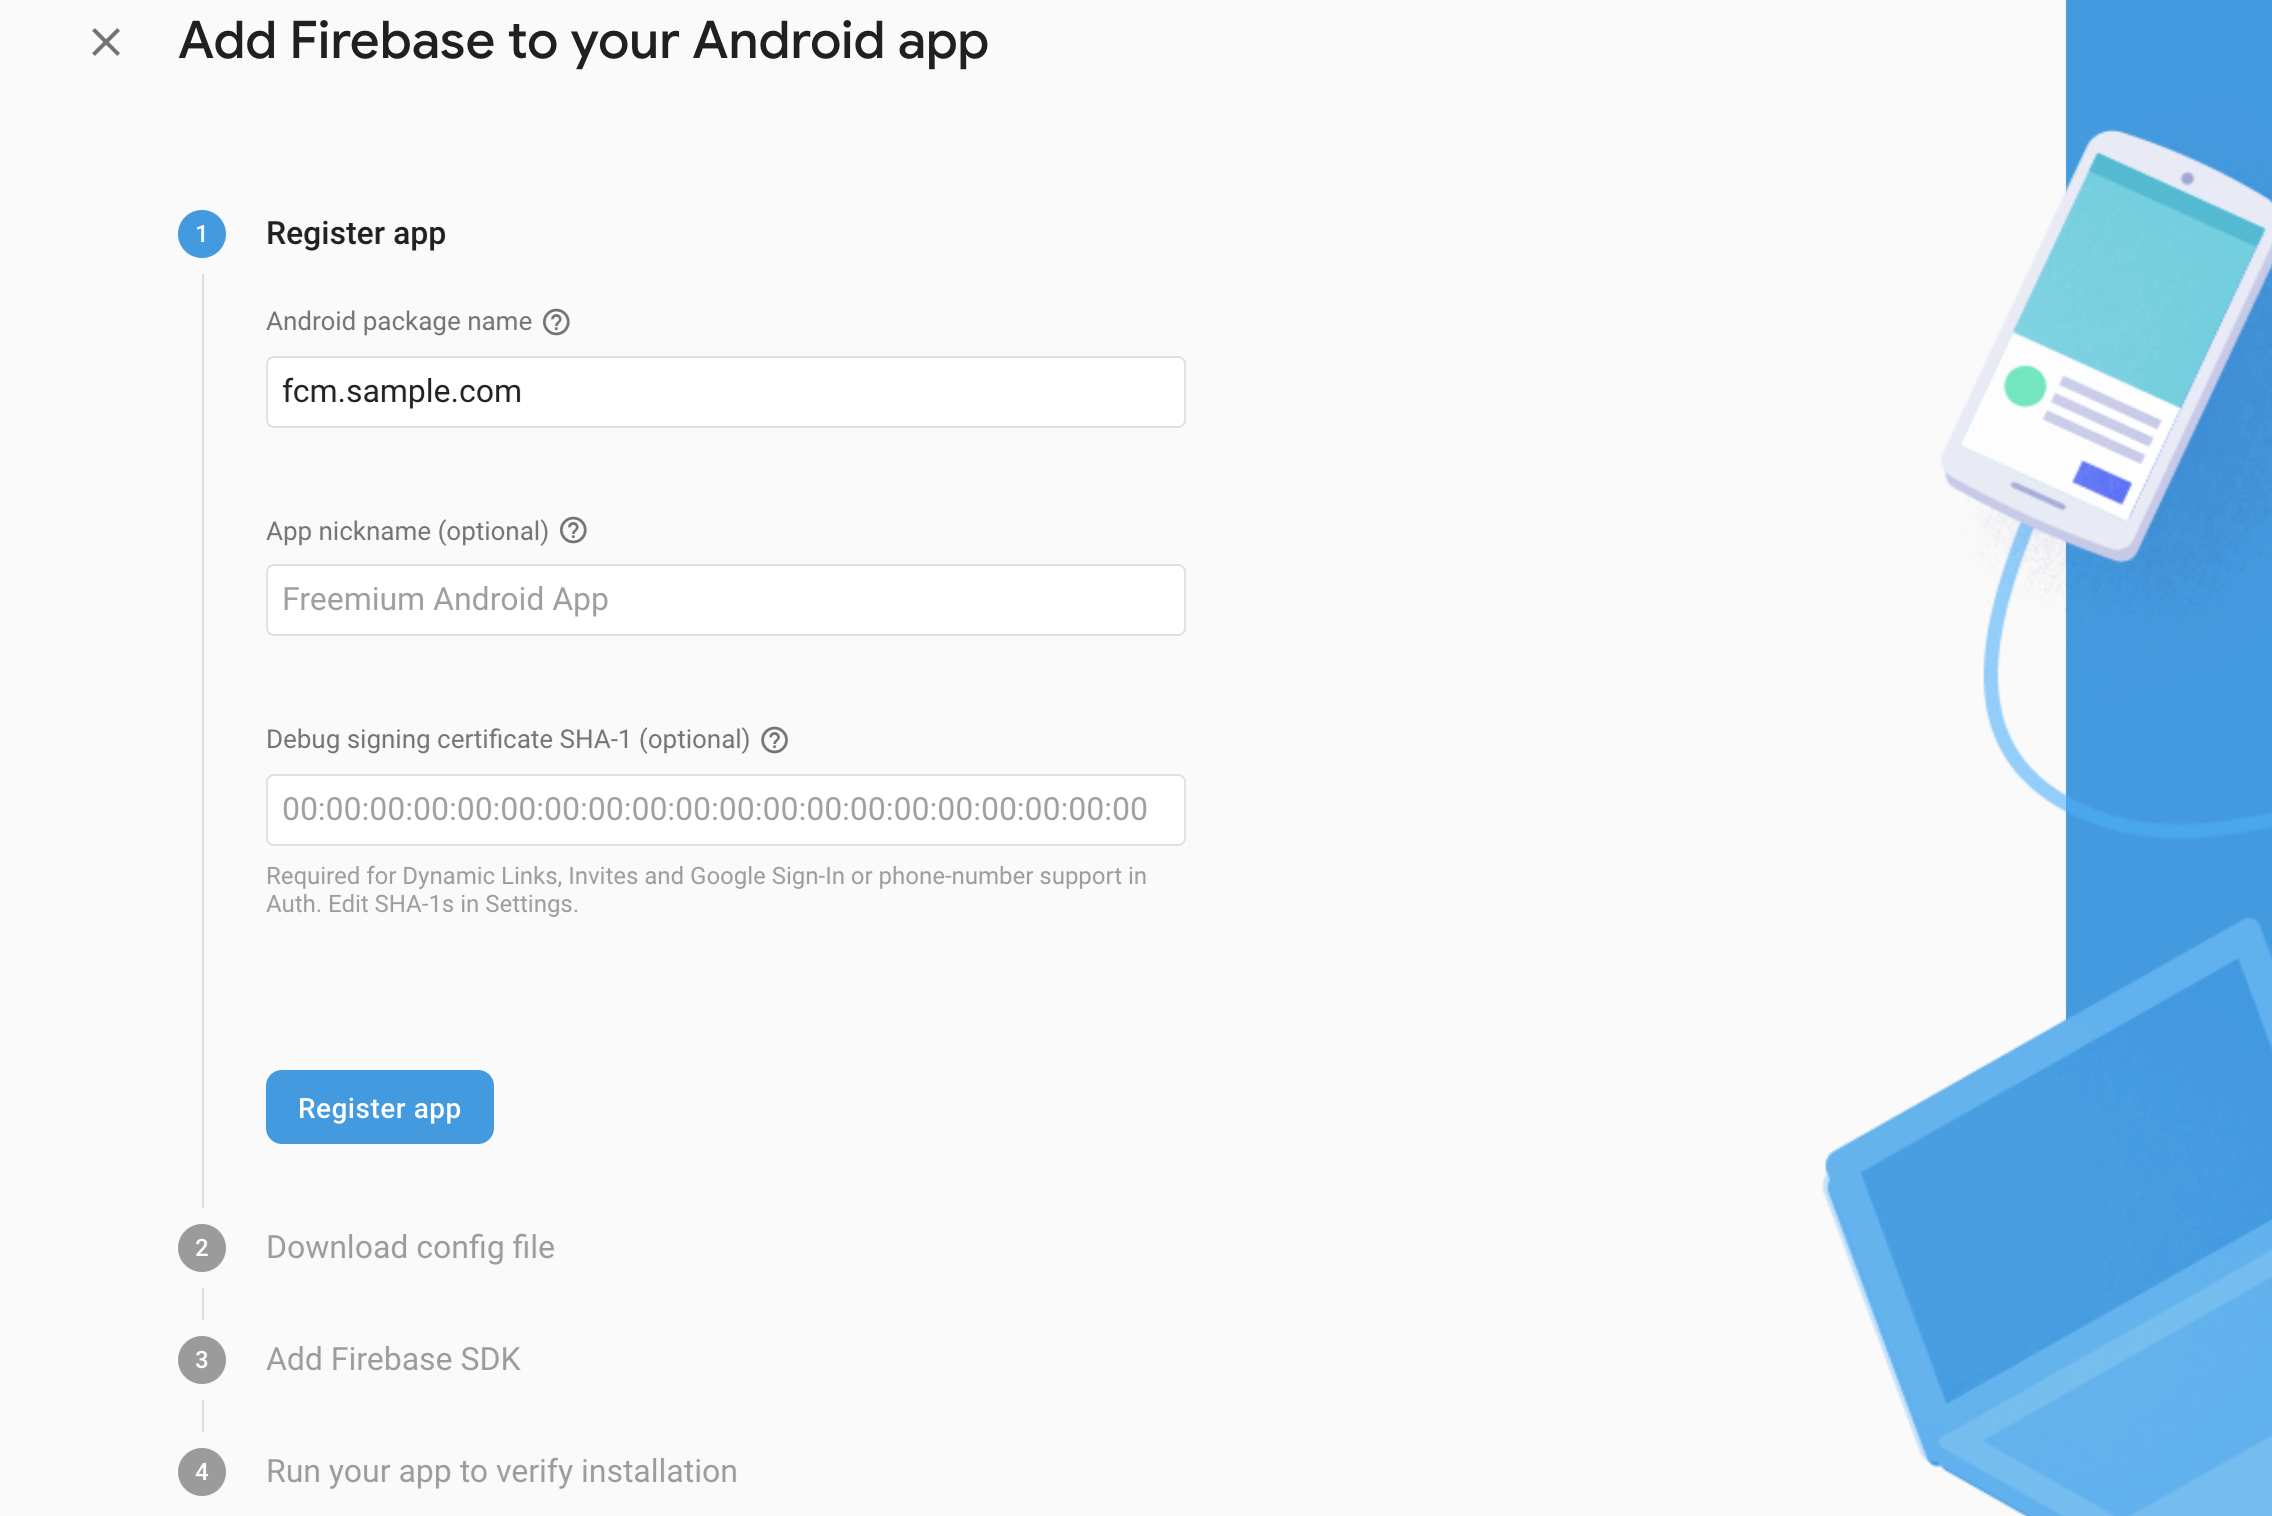
Enter your app’s package name and click ‘Register App’.
Click the button "Download google-services.json" to download the config file. You’ll need to move that file into the same directory as your application level build.gradle.
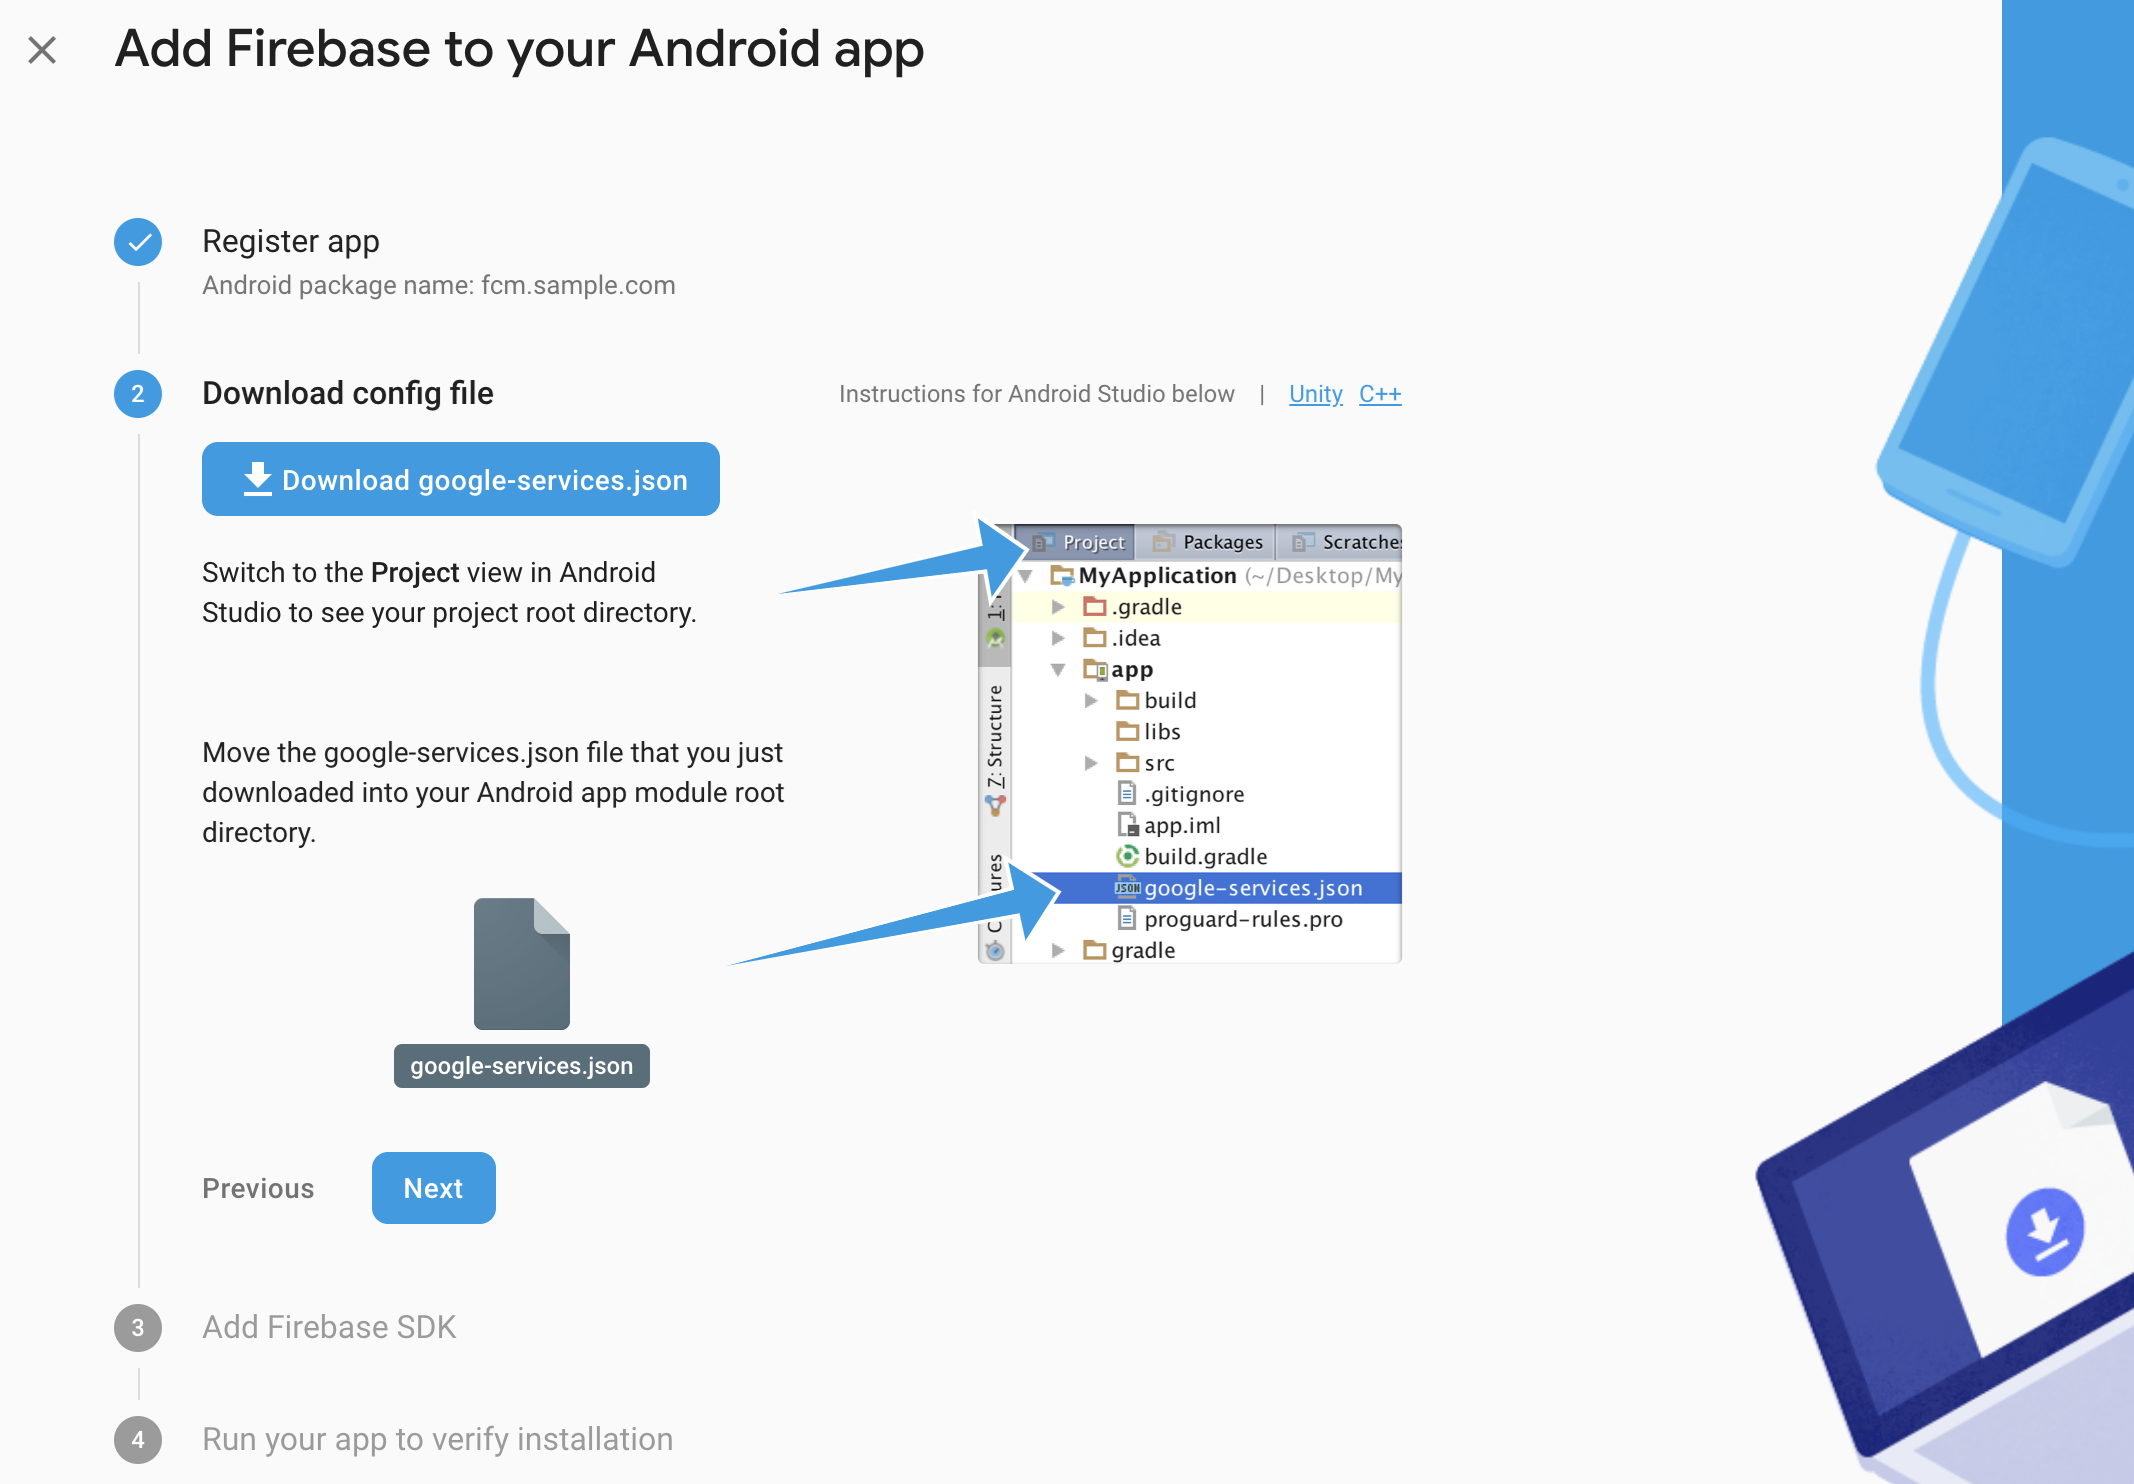
Click "next" and then in your app build.gradle you will need to add the following lines to your dependencies:
dependencies {
    implementation 'com.google.firebase:firebase-messaging:20.2+'
}
At the bottom of your build.gradle you must add:
apply plugin: 'com.google.gms.google-services'
It is important that this is at the very end of the file.
Click the Next button and then skip the verification step.
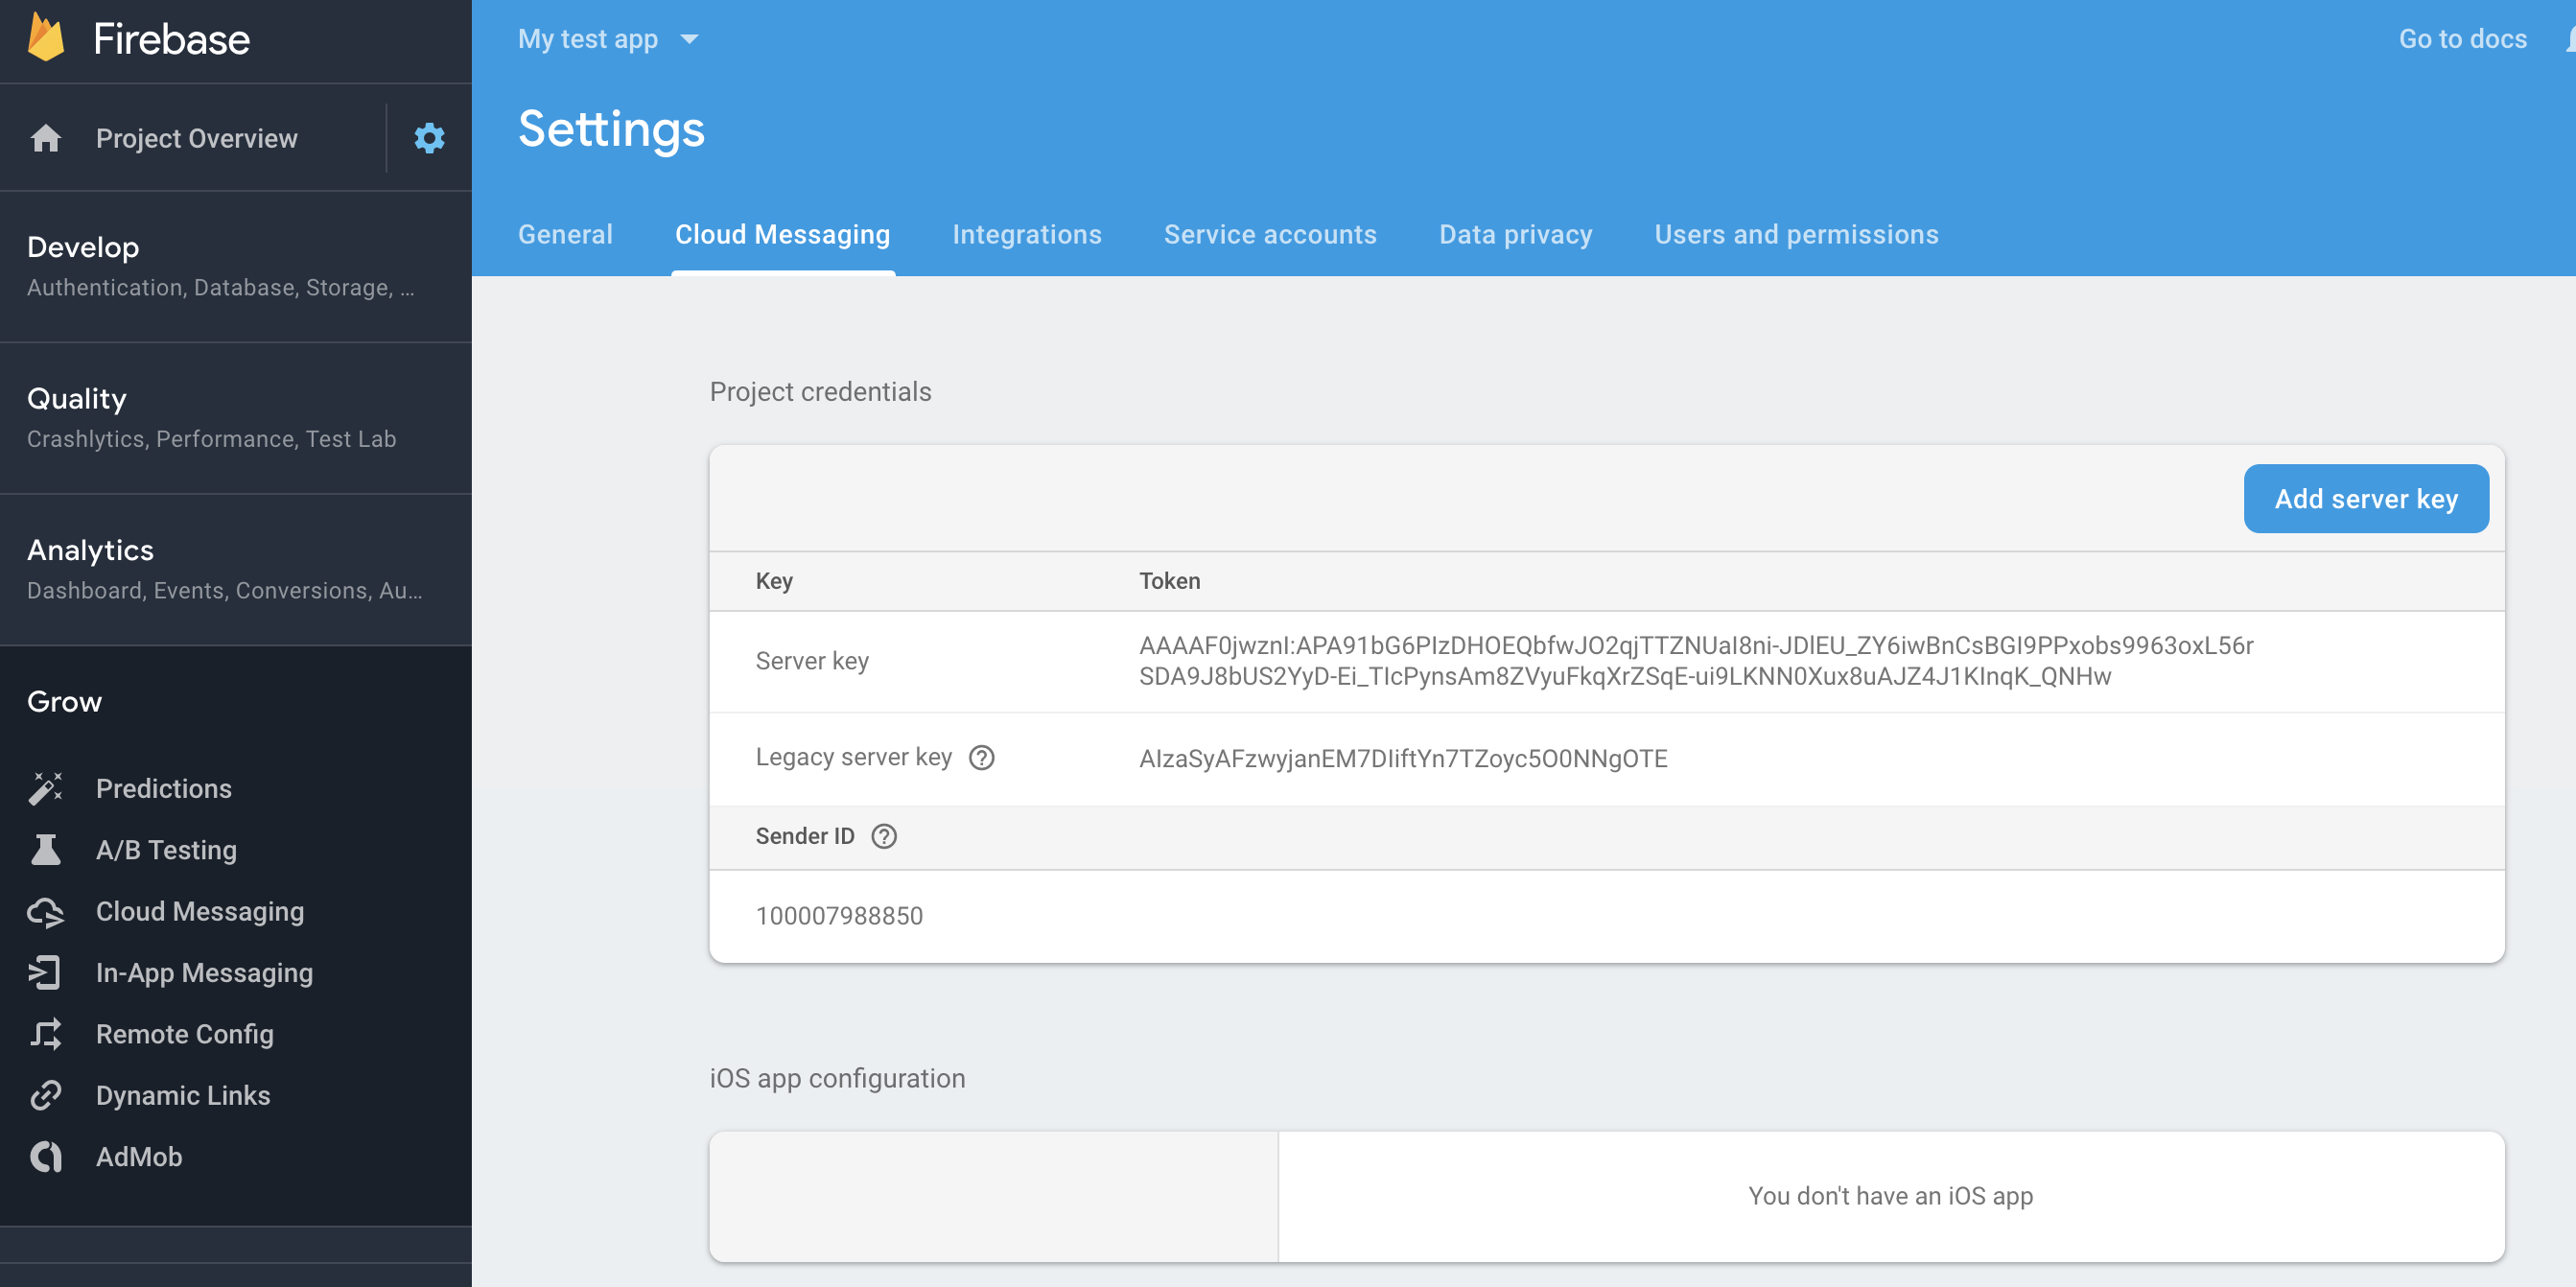
Finally, click the settings icon on top left and select ‘Project settings’, then ‘Cloud Messaging tab’ and copy your Server key.
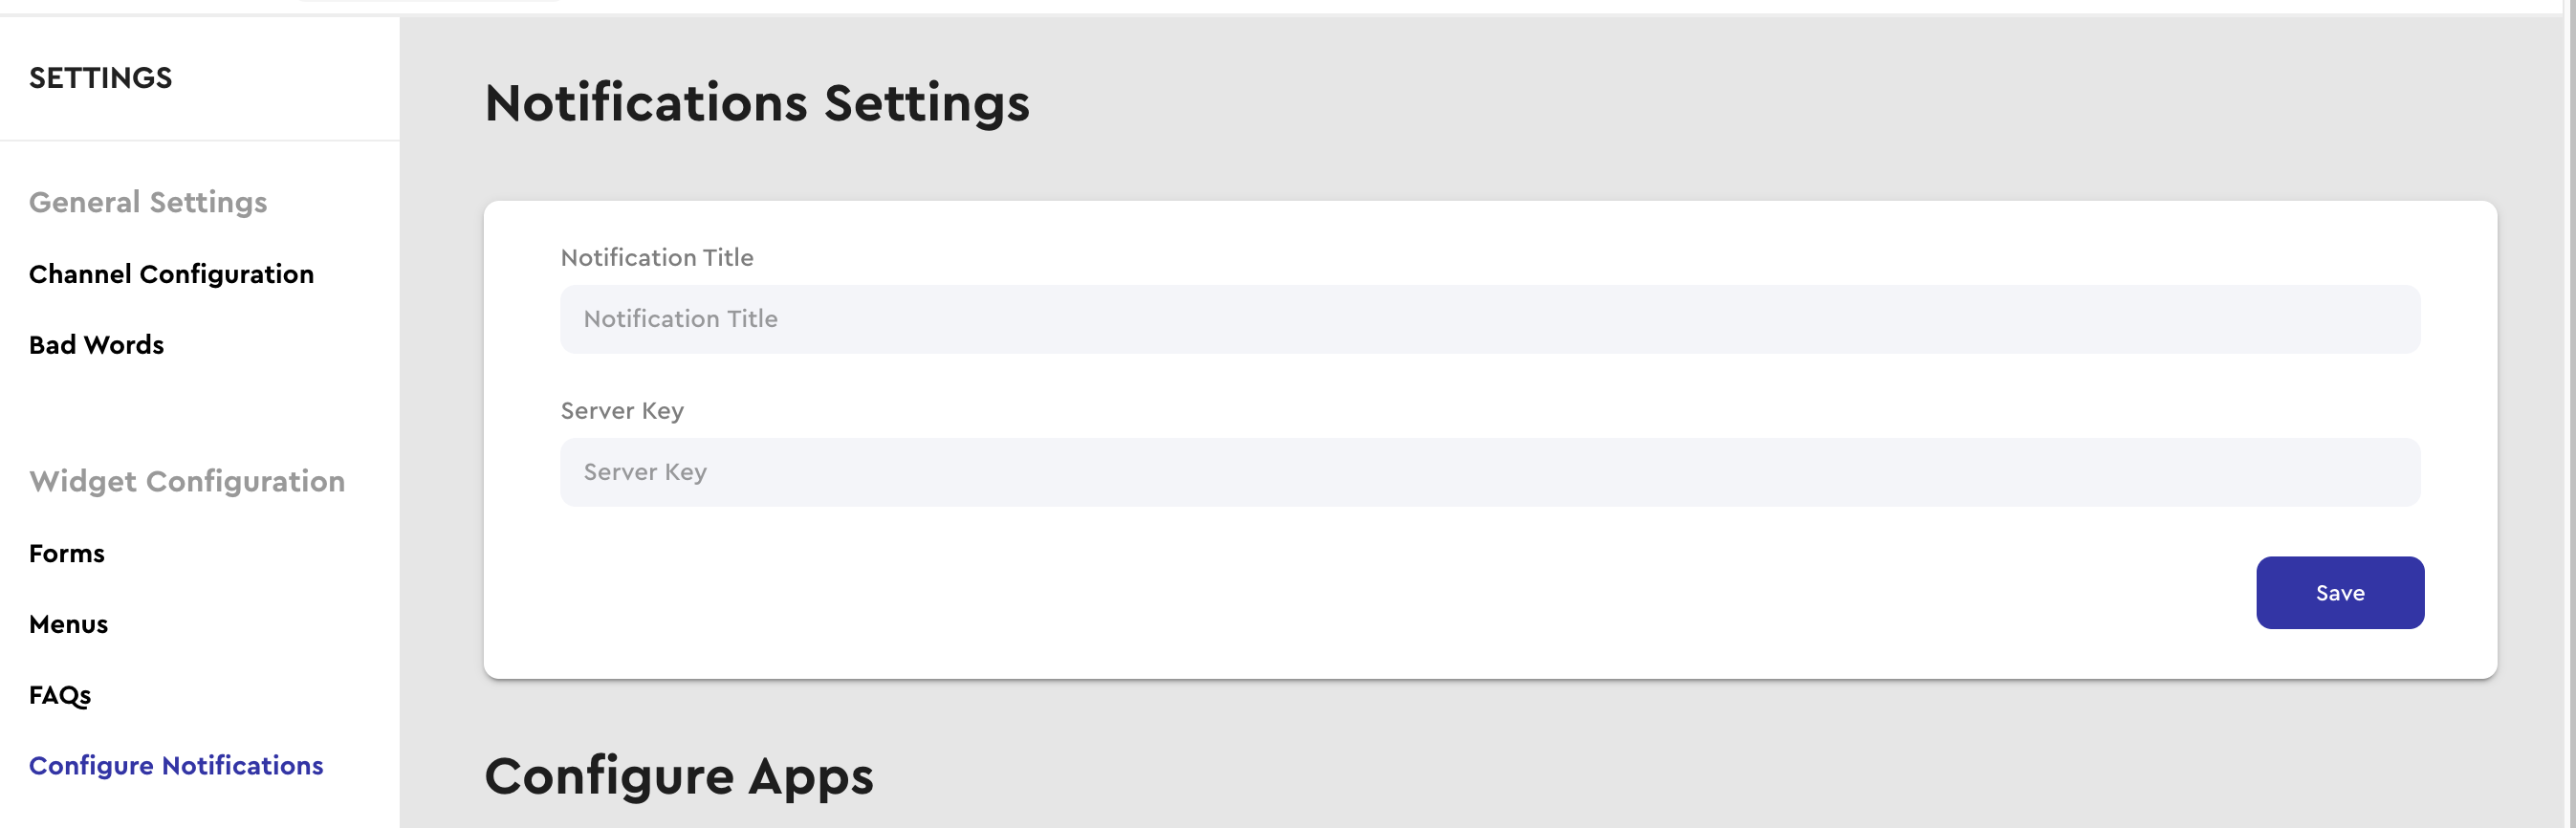
Open your BOTTER app’s dashboard and select ‘Settings -> Configure Notifications’. Then find the ‘Server Key’ field. Here you'll be able to paste and save your Server API key.
If you want to add a custom icon for your notifications, just add an image named ic_botter_push_icon.png to each of your supported densities. Please note that vector drawables cannot be used here. For example:
/res/drawable-xxxhdpi/ic_botter_push_icon.png
/res/drawable-xxhdpi/ic_botter_push_icon.png
/res/drawable-xhdpi/ic_botter_push_icon.png
/res/drawable-hdpi/ic_botter_push_icon.png
/res/drawable-mdpi/ic_botter_push_icon.png
We recommend following these material design guidelines for producing this icon or you can directly use this link to generate your notification icon (recommended white icon 72x72 px.).
You should have a class that extends FirebaseMessagingService. That service is where you get the device token to send to your backend to register for push notifications. To register for BOTTER push set it up like this:
public class MyFirebaseMessagingService extends FirebaseMessagingService {

    private final BotterPushClient botterPushClient = new BotterPushClient();

    @Override
    public void onNewToken(@NonNull String s) {
        super.onNewToken(s);
        botterPushClient.sendTokenToBotter(getApplication(), s);
        // do other host logic
    }

    @Override
    public void onMessageReceived(@NonNull RemoteMessage remoteMessage) {
        super.onMessageReceived(remoteMessage);
        if (botterPushClient.isBotterPush(remoteMessage.getData())) {
            botterPushClient.handlePush(getApplication(), remoteMessage.getData());
        }
        else{
            // do other host logic
        }
    }
}
Don't forget to register this service in the AndroidManifest.xml like this:
  <service android:name=".MyFirebaseMessagingService">
      <intent-filter>
          <action android:name="com.google.firebase.MESSAGING_EVENT" />
      </intent-filter>
 </service>
if you want anytime at any screen hide the BOTTER chat icon, just write the below line inside onResume() method :
Botter.client().setLauncherVisibility(Botter.Visibility.GONE);
and you can show it anytime using the below line at onResume() also :
Botter.client().setLauncherVisibility(Botter.Visibility.VISIBLE);
Note that you can specify a list of activities to hide BOTTER into them like below :
Botter.client().hideLauncherInActivities(activitiesToHide); // activitiesToHide is an ArrayList holds the activities to hide BOTTER (i.e. MainActivity.class)
You can also change margins around the launcher button using :
Botter.client().setLauncherMargin(left,top,right,bottom);
If you have your custom button , and want to show chat screen directly then you can use the below line:
Botter.client().openChatActivity();
You can customize BOTTER with your preferred settings, when you initialize BOTTER instance inside onCreate method of your Application class like below :
Botter.initialize(this,
"Your API Key"
new BotterCustomization.Builder()
.setLauncherGravity(BotterCustomization.LauncherGravity.LEFT) // set the launcher icon to the left/right of your screen. (default right).
.setDefaultLocal(BotterCustomization.Local.AR) // set default bot language either AR/EN. (default EN).
.setLauncherIcon(R.drawable.) //set the launcher icon.
.setBotterLogo(R.drawable.) //set the seen icon logo.
.setBotterHeaderLogo(R.drawable.) //set the chat header logo.
.setWelcomeBrandLogo(R.drawable.) //set the welcome screen brand logo.
.setBotterAccentColor(R.color.) //set the chat accent color.
.setBotterHeaderAccentColor(R.color.) // set the chat header accent color.
.setBotterLauncherAccentColor(R.color.) // set the launcher accent color.
.setBotterHeadlineText("") // set welcome screen headline text.
.setBotterHeadlineTextColor(R.color.) // set welcome screen headline text color.
.seBtotterWelcomeText("") // set welcome screen headline welcome message.
.setBotterWelcomeTextColor(R.color.) // set welcome screen headline welcome message color.
.setBotterChatHeaderTitle("") //set chat screen header title.
.setBotterChatHeaderTitleColor(R.color.) // set chat screen header title color.
.setBotterChatBubbleColor(R.color.) // set botter bubble color.
.setBotterChatBubbleTextColor(R.color.) // set botter bubble text color.
.setSenderChatBubbleColor(R.color.) // set sender bubble color.
.setSenderChatBubbleTextColor(R.color.) // set sender bubble text color.
.setBotterRegularFontFamily(R.font.) // set chat primary font.
.setBotterSemiBoldFontFamily(R.font.) // set chat secondry font.
.setHasFAQs(true) // Determine if chat has FAQs or not.
.setHasStartForm(false) // Determine if chat will show the start form or not
.setAgentDefaultIcon(R.drawable.) // set the default icon for agent.
// use this method to add a card with custom action in the welcome screen like this
.addCustomAction(R.drawable.ic_register, R.string.register, new OnActionClickListener() {
                            @Override
                            public void onActionClick() {
                            }
                        })
// or you can pass the argument like this
.addCustomAction(R.drawable.ic_register, "Register", new OnActionClickListener() {
                            @Override
                            public void onActionClick() {
                            }
                        })

.build());
Note
You can edit the initial customizations parameters at runtime using Botter.client()
(i.e. when changing your app language and want to change BOTTER accordingly) like below :
 Botter.client().updateCustomizations(Botter.client().getOldCustomizations()
                .setDefaultLocal(BotterCustomization.Local.AR)
                .setBotterHeadlineText("Arabic Text")
                .build());
Note you can also clear the current active session and user data that BOTTER using Botter client (i.e. when user logout from your app ) like below :
Botter.client().updateCustomizations(Botter.client().getOldCustomizations()
                   .setHasStartForm(true)// to show the form in botter welcome screen
                   .build());
Botter.client().resetUserAttributes();
Note or you can also provide BOTTER client with your user data (i.e. when user logged in to your app , and you don't want to show the form in the welcome screen) like below :
  UserAttributes userAttributes = new UserAttributes.Builder()
                .withCustomAttribute("id","UserID")
                .withCustomAttribute("email","email@email.com")
                .withCustomAttribute("mobile","+20123456788")
                .withCustomAttribute("first_name","John")
                .withCustomAttribute("last_name","Doe")
                .build();
        Botter.client().updateCustomizations(Botter.client().getOldCustomizations()
                .setHasStartForm(false)
                .build());
        Botter.client().updateUser(userAttributes);
for on-premise servers you can easily set (socket, API and upload) URLs using same builder method in Application class:
Botter.initialize(this,
"Your API Key"
new BotterCustomization.Builder()
......
.setSocketURL("wss://...") // set the socket url for the bot (must start with wss:// or ws://)
.setApiURL("https://...") // set the base API url for the bot (must start with https:// or http://)
.setUploadApiURL("https://...") // set the upload-attachments API for the bot (must start with https:// or http://)
.build());
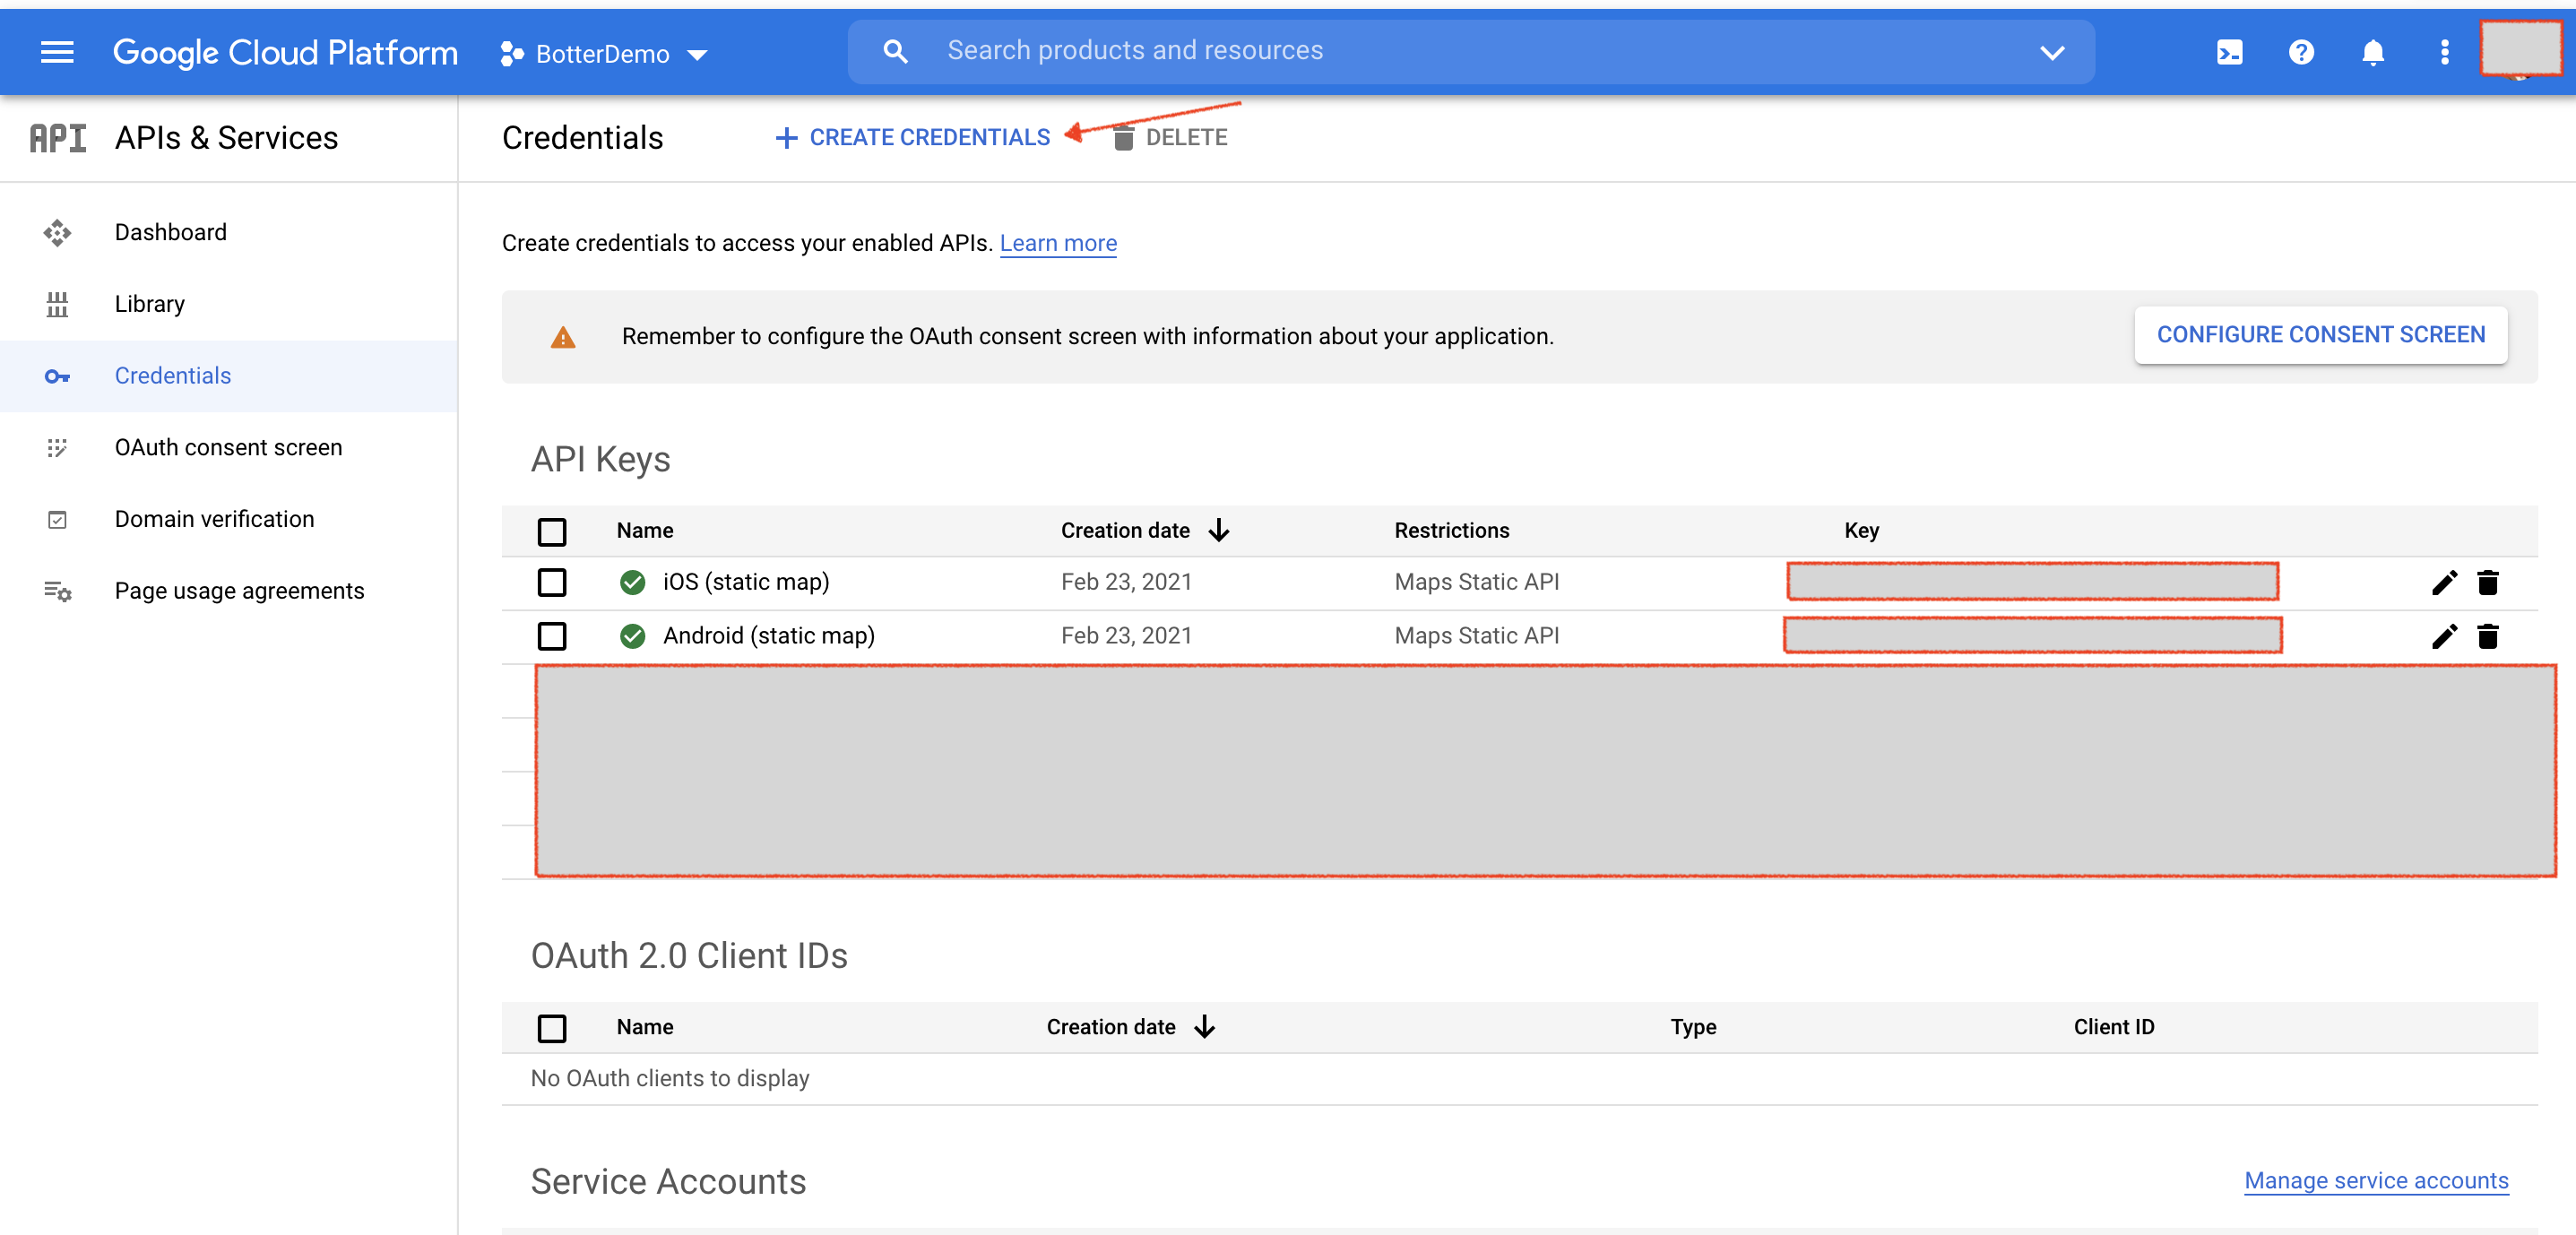
If you want to enable share current location feature you have to provide google static maps API key, you need to open Google cloud console and make sure you choose the desired project.
From the left menu you need to choose Credentials tab then press on (+ CREATE CREDENTIALS) and create your static map key.
(it's recommended to restrict your key to be used with static maps only) - please refer to image below :
You need to pass the key from step 1 to BOTTER initialize method in the app class to activate the share location feature like below :
Botter.initialize(this,
"Your API Key"
new BotterCustomization.Builder()
.enableShareLocationWithGoogleStaticMapKey("You google static map key here") // To enable share location feature.
.build());
If you want to pass custom user attributes to BOTTER SDK instead of showing start form or along with this form then you can use the UserAttributes.Builder() class to create and pass your custom attributes to the SDK through the Botter.client() like below :
UserAttributes userAttributes = new UserAttributes.Builder()
.withCustomAttribute("custom_key","custom_value")
.withCustomAttribute("custom_key","custom_value")
.build();
Or if you want to buid your hash map at once like :
Map<String,Object> attrsMap = new HashMap<>();
attrsMap.put("custom_key","custom_value");
attrsMap.put("custom_key","custom_value");

UserAttributes userAttributes = new UserAttributes.Builder()
.withCustomAttributes(attrsMap)
.build();
then pass it to Botter.client() :
Botter.client().updateUser(userAttributes);
Important :
To make sure that you have your user attributes ready, you need to use the above code in your main/home activity i.e. MainActiviy class's onCreate() method.
| Name | Description | Screenshot |
|---|---|---|
| setLauncherGravity | To set the launcher to the right/left of the screen. | |
| setDefaultLocal | To set the default bot language either AR/EN. | |
| setLauncherIcon | To change the launcher icon. |  |
| setBotterLogo | To set the chat main logo. | 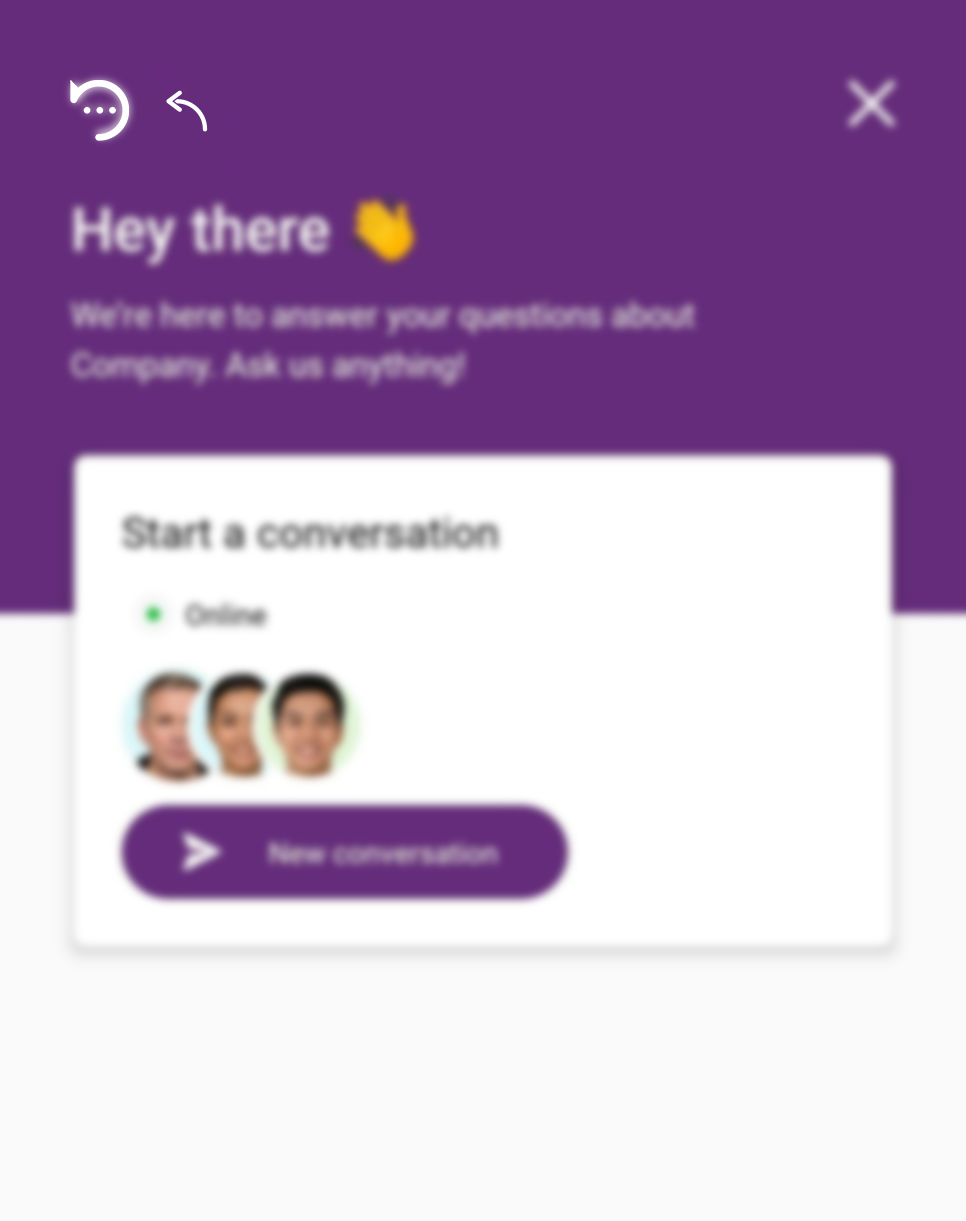 |
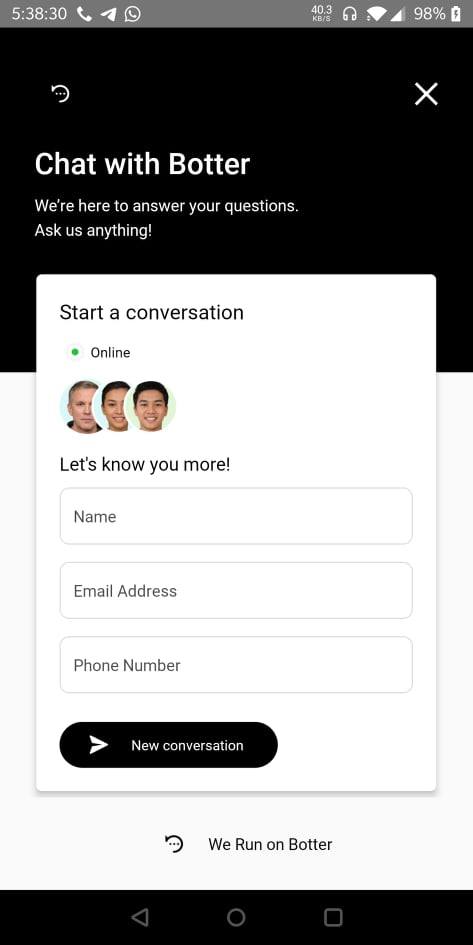
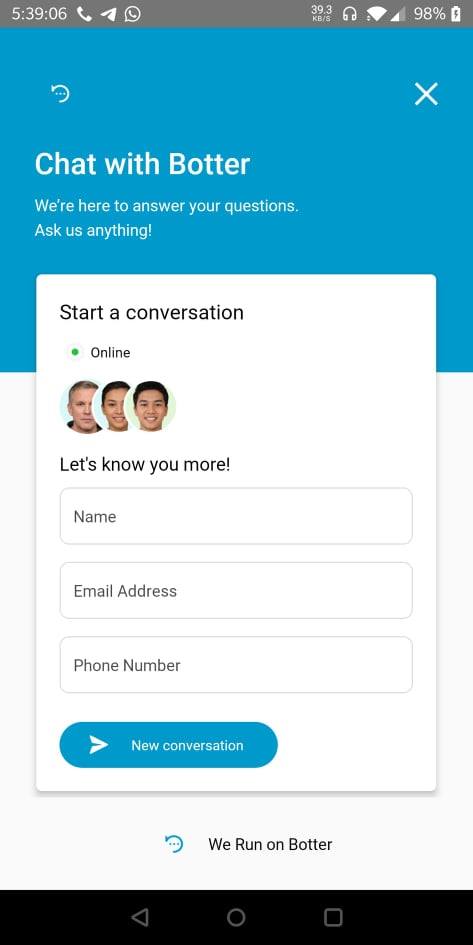
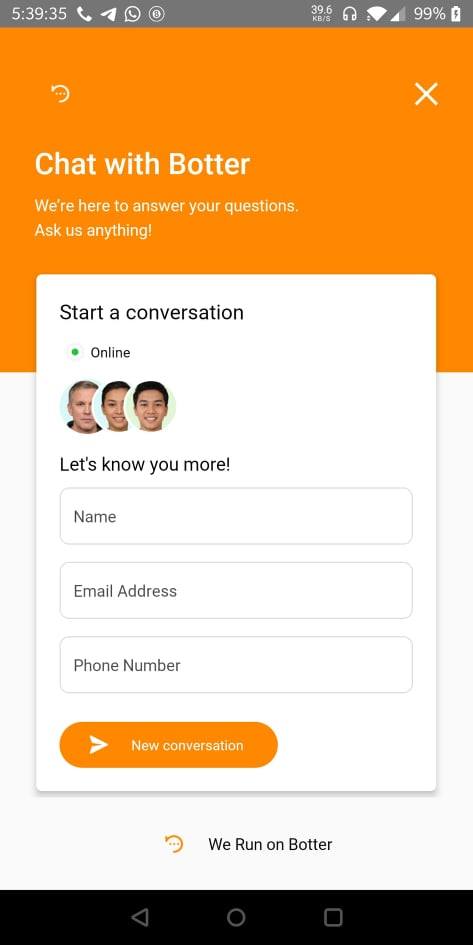
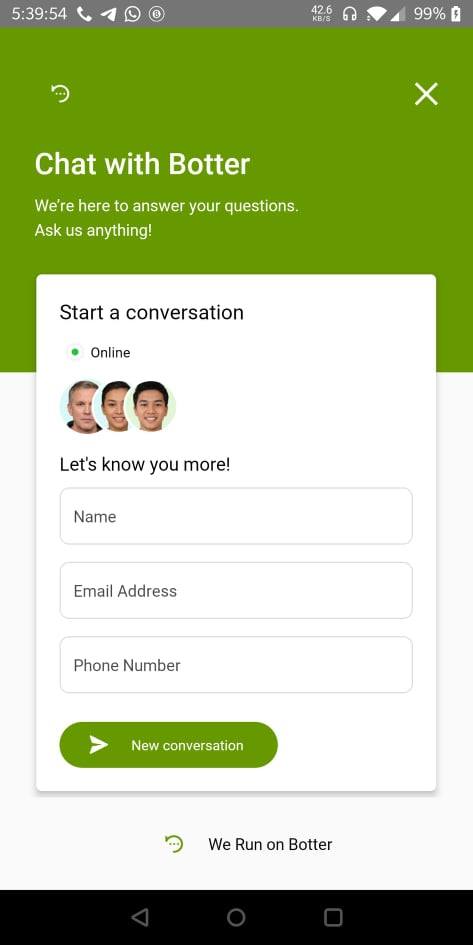
| setBotterAccentColor | This is the main color used all over the chat like welcome screen top area bg color, ect… I.e. in the image accent color is purple. | 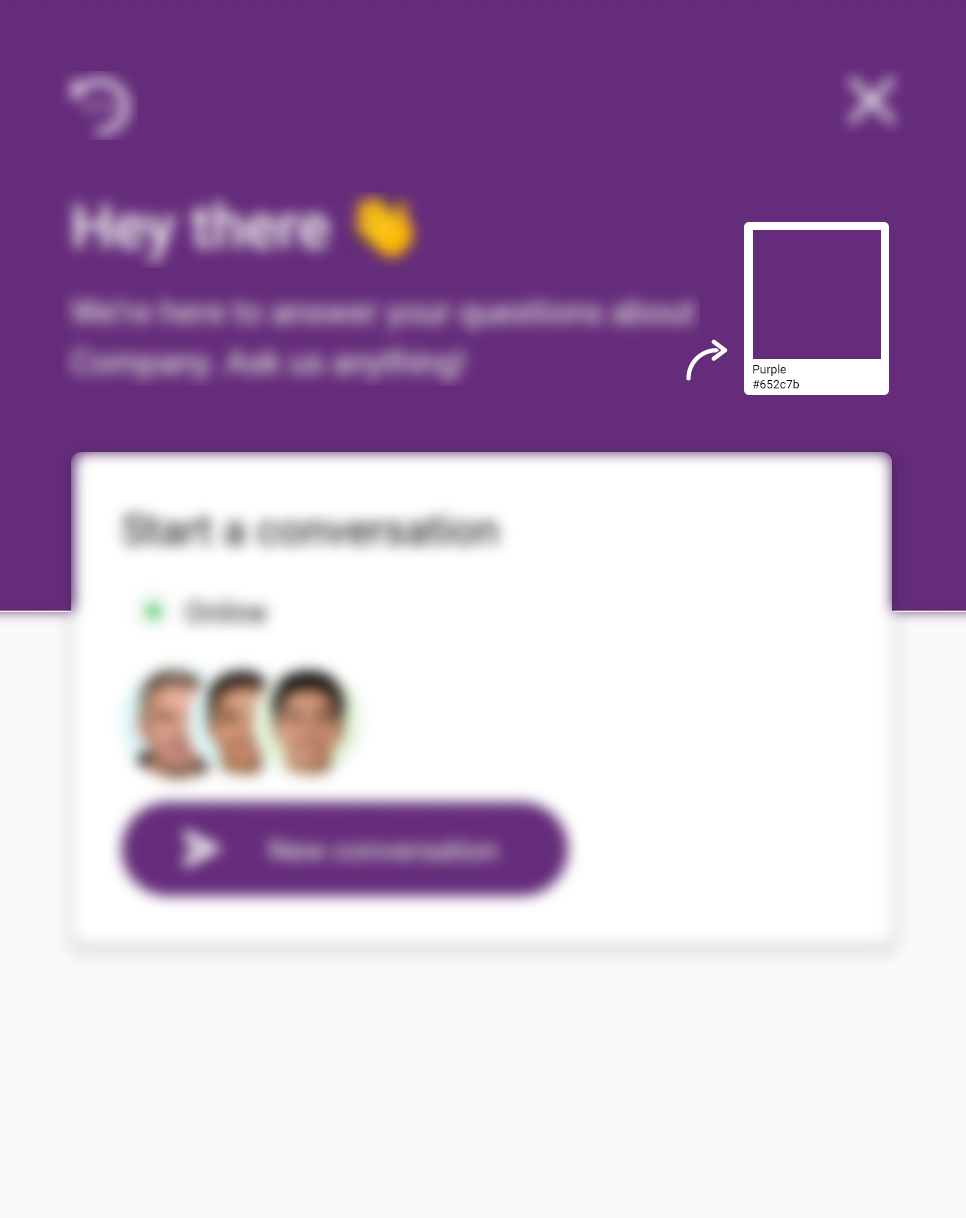 |
| setBotterHeadlineText , setBotterHeadlineTextColor | Used to set the welcome screen header title text and color. |  |
| seBotterWelcomeText , setBotterWelcomeTextColor | Used to set the welcome screen header subtitle text and color. |  |
| setBotterChatHeaderTitle , setBotterChatHeaderTitleColor | Used to set the main chat header title text and color |  |
| setBotterChatBubbleColor , setBotterChatBubbleTextColor | Used to set the BOTTER message bubble bg color and it’s text color. | 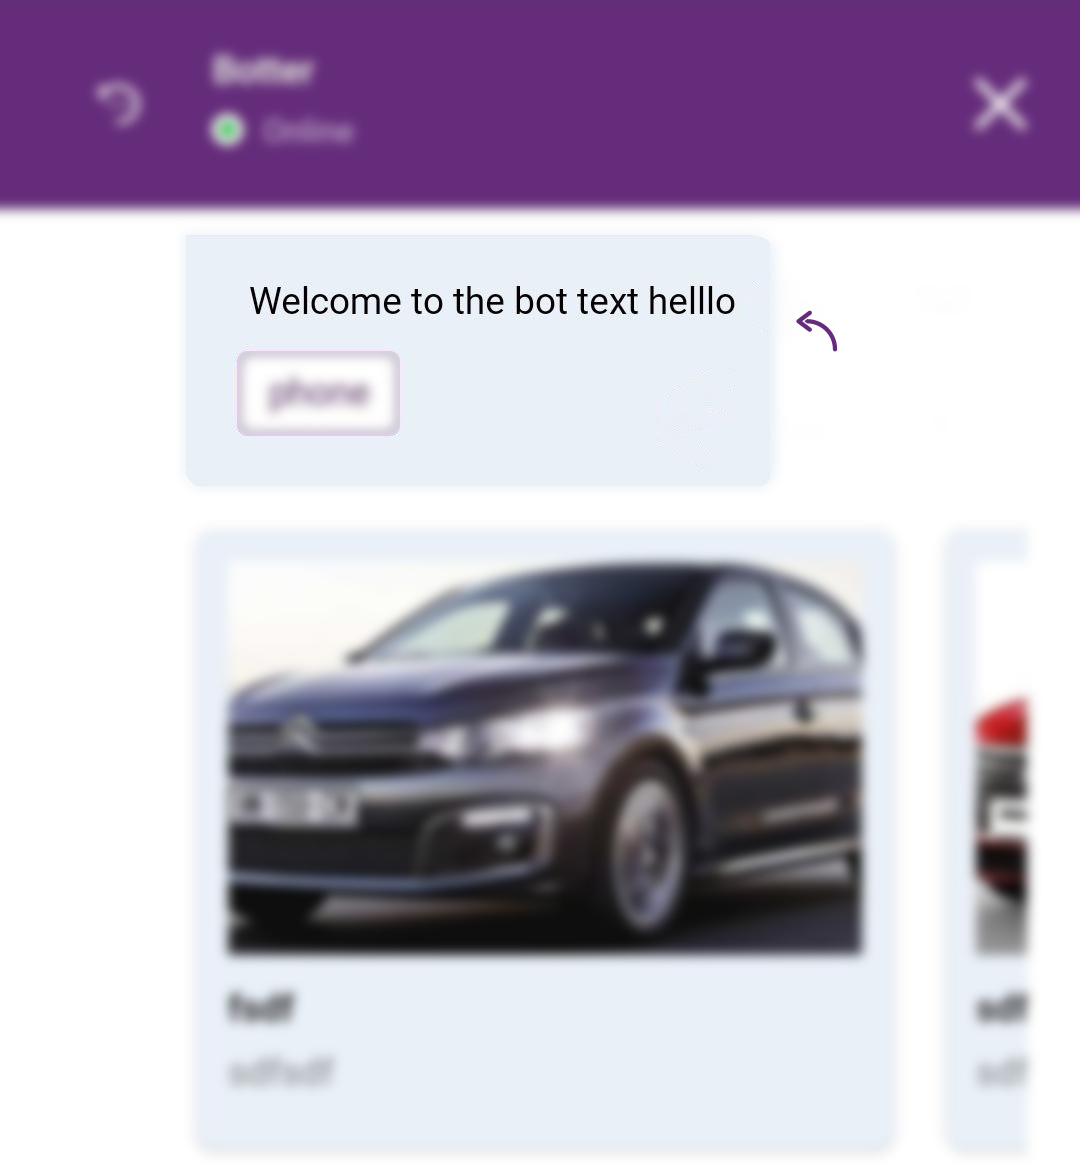 |
| setSenderChatBubbleColor , setSenderChatBubbleTextColor | Used to set the sender/user message bubble bg color and it’s text color. | 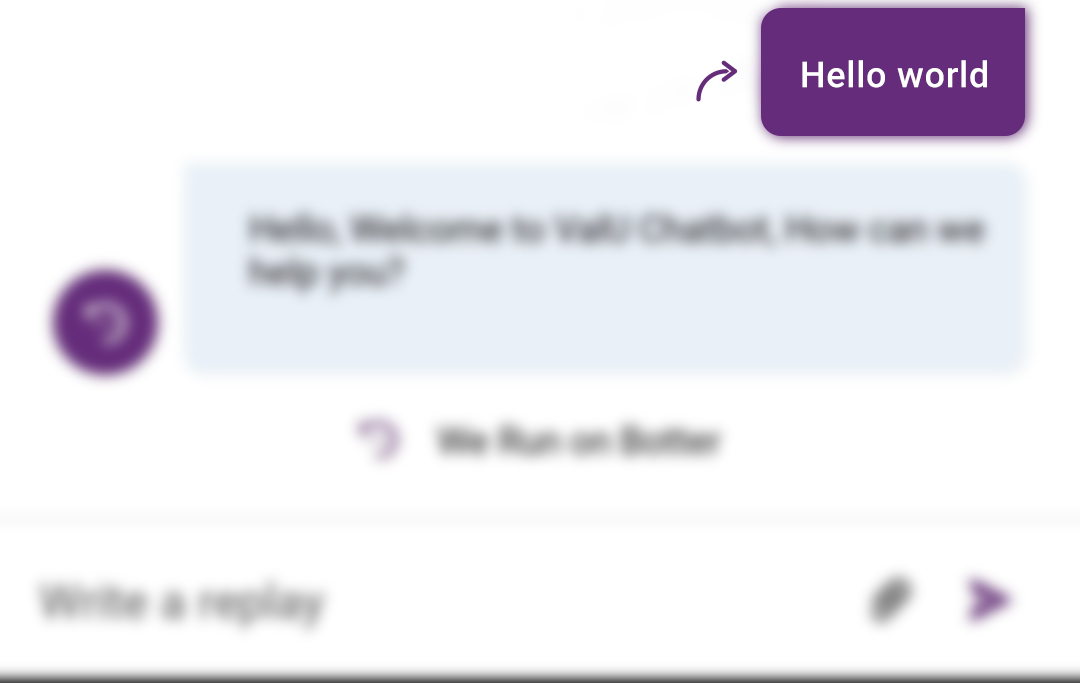 |
| setWelcomeBrandLogo | Used to set the welcome screen brand logo. | |
| setAgentDefaultIcon | Used to set the default agent chant icon. | |
| setBotterRegularFontFamily | Used to set the primary font all over the chat. | |
| setBotterSemiBoldFontFamily | Used to set the secondary font all over the chat. |
Licensed under the Apache License, Version 2.0 (the "License"); you may not use this work except in compliance with the License. You may obtain a copy of at: https://opensource.org/licenses/apache2.0.php