-
Notifications
You must be signed in to change notification settings - Fork 63
Get Started
The following guide assumes no particular IDE. It can be used with just a text editor and a terminal. If you are using PlatformIO for IoT development, then see the separate guide Using PlatformIO.
Install the ESP-IDF framework and toolchain if you haven't done so yet. See ESP-IDF Programming Guide – Get Started
Download and unzip ttn-esp32 from https://github.com/manuelbl/ttn-esp32/archive/master.zip. Rename the folder to ttn-esp32 if it is named otherwise after unzipping.
Copy the folder examples/hello_world to a new location. hello_world will be your first TTN project.
Create a folder components within hello_world and copy the entire ttn-esp32 folder into your hello_world/components folder. (This might seem a bit strange as the hello_world example is also part of the copied ttn_esp32 folder, and now there is an inner hello_world somewhere within the outer hello_world. The inner one is just a template for new project and not directly used. See Component Setup for alternative setups.)
Your directories should now look like this:
hello_world/
+- CMakeLists.txt
+- components/
|  +- ttn-esp32
|     +- ...
+- main/
|   - CMakeLists.txt
|   - component.mk
|   - main.cpp
+- Makefile
In CMakeLists.txt (in hello_world folder, not sub folder), comment the following line:
#list(APPEND EXTRA_COMPONENT_DIRS "../..")
The line is not needed as the ttn-esp32 component is in the local components folder.
Set the target to the correct variant of the ESP32 chip (esp32, esp32s2, esp32s3 etc.):
idf.py set-target esp32s2
The region and frequency plan must be configured according to your country and device. Currently, EU868, US915, AU915, AS923, AS923_JP, KR920 and IN866 are supported.
From the hello_world directory, run:
idf.py menuconfig
In the menu, select Component config ---> and then select The Things Network ---> (at the very bottom). Now select TTN LoRa frequency / region (LoRa disabled) ---> and choose the correct frequency plan. Then select Exit several times and confirm that the new configuration should be saved.
In the TTN console go to your application (or create one if needed), select the Devices tab and click register device:

First select the brand, model etc. of your device in the section Select the end device.
Then enter the data in the Enter registration data section. First select the frequency plan of your region.
The AppEUI (also called JoinEUI), the DevEUI and the AppKey should be provided by the device manufacturer. If so, enter them. If not, kill Fill with zeros for the AppEUI and click Generate for the DevEUI and AppKey.
Finally finish by clicking Register end device.
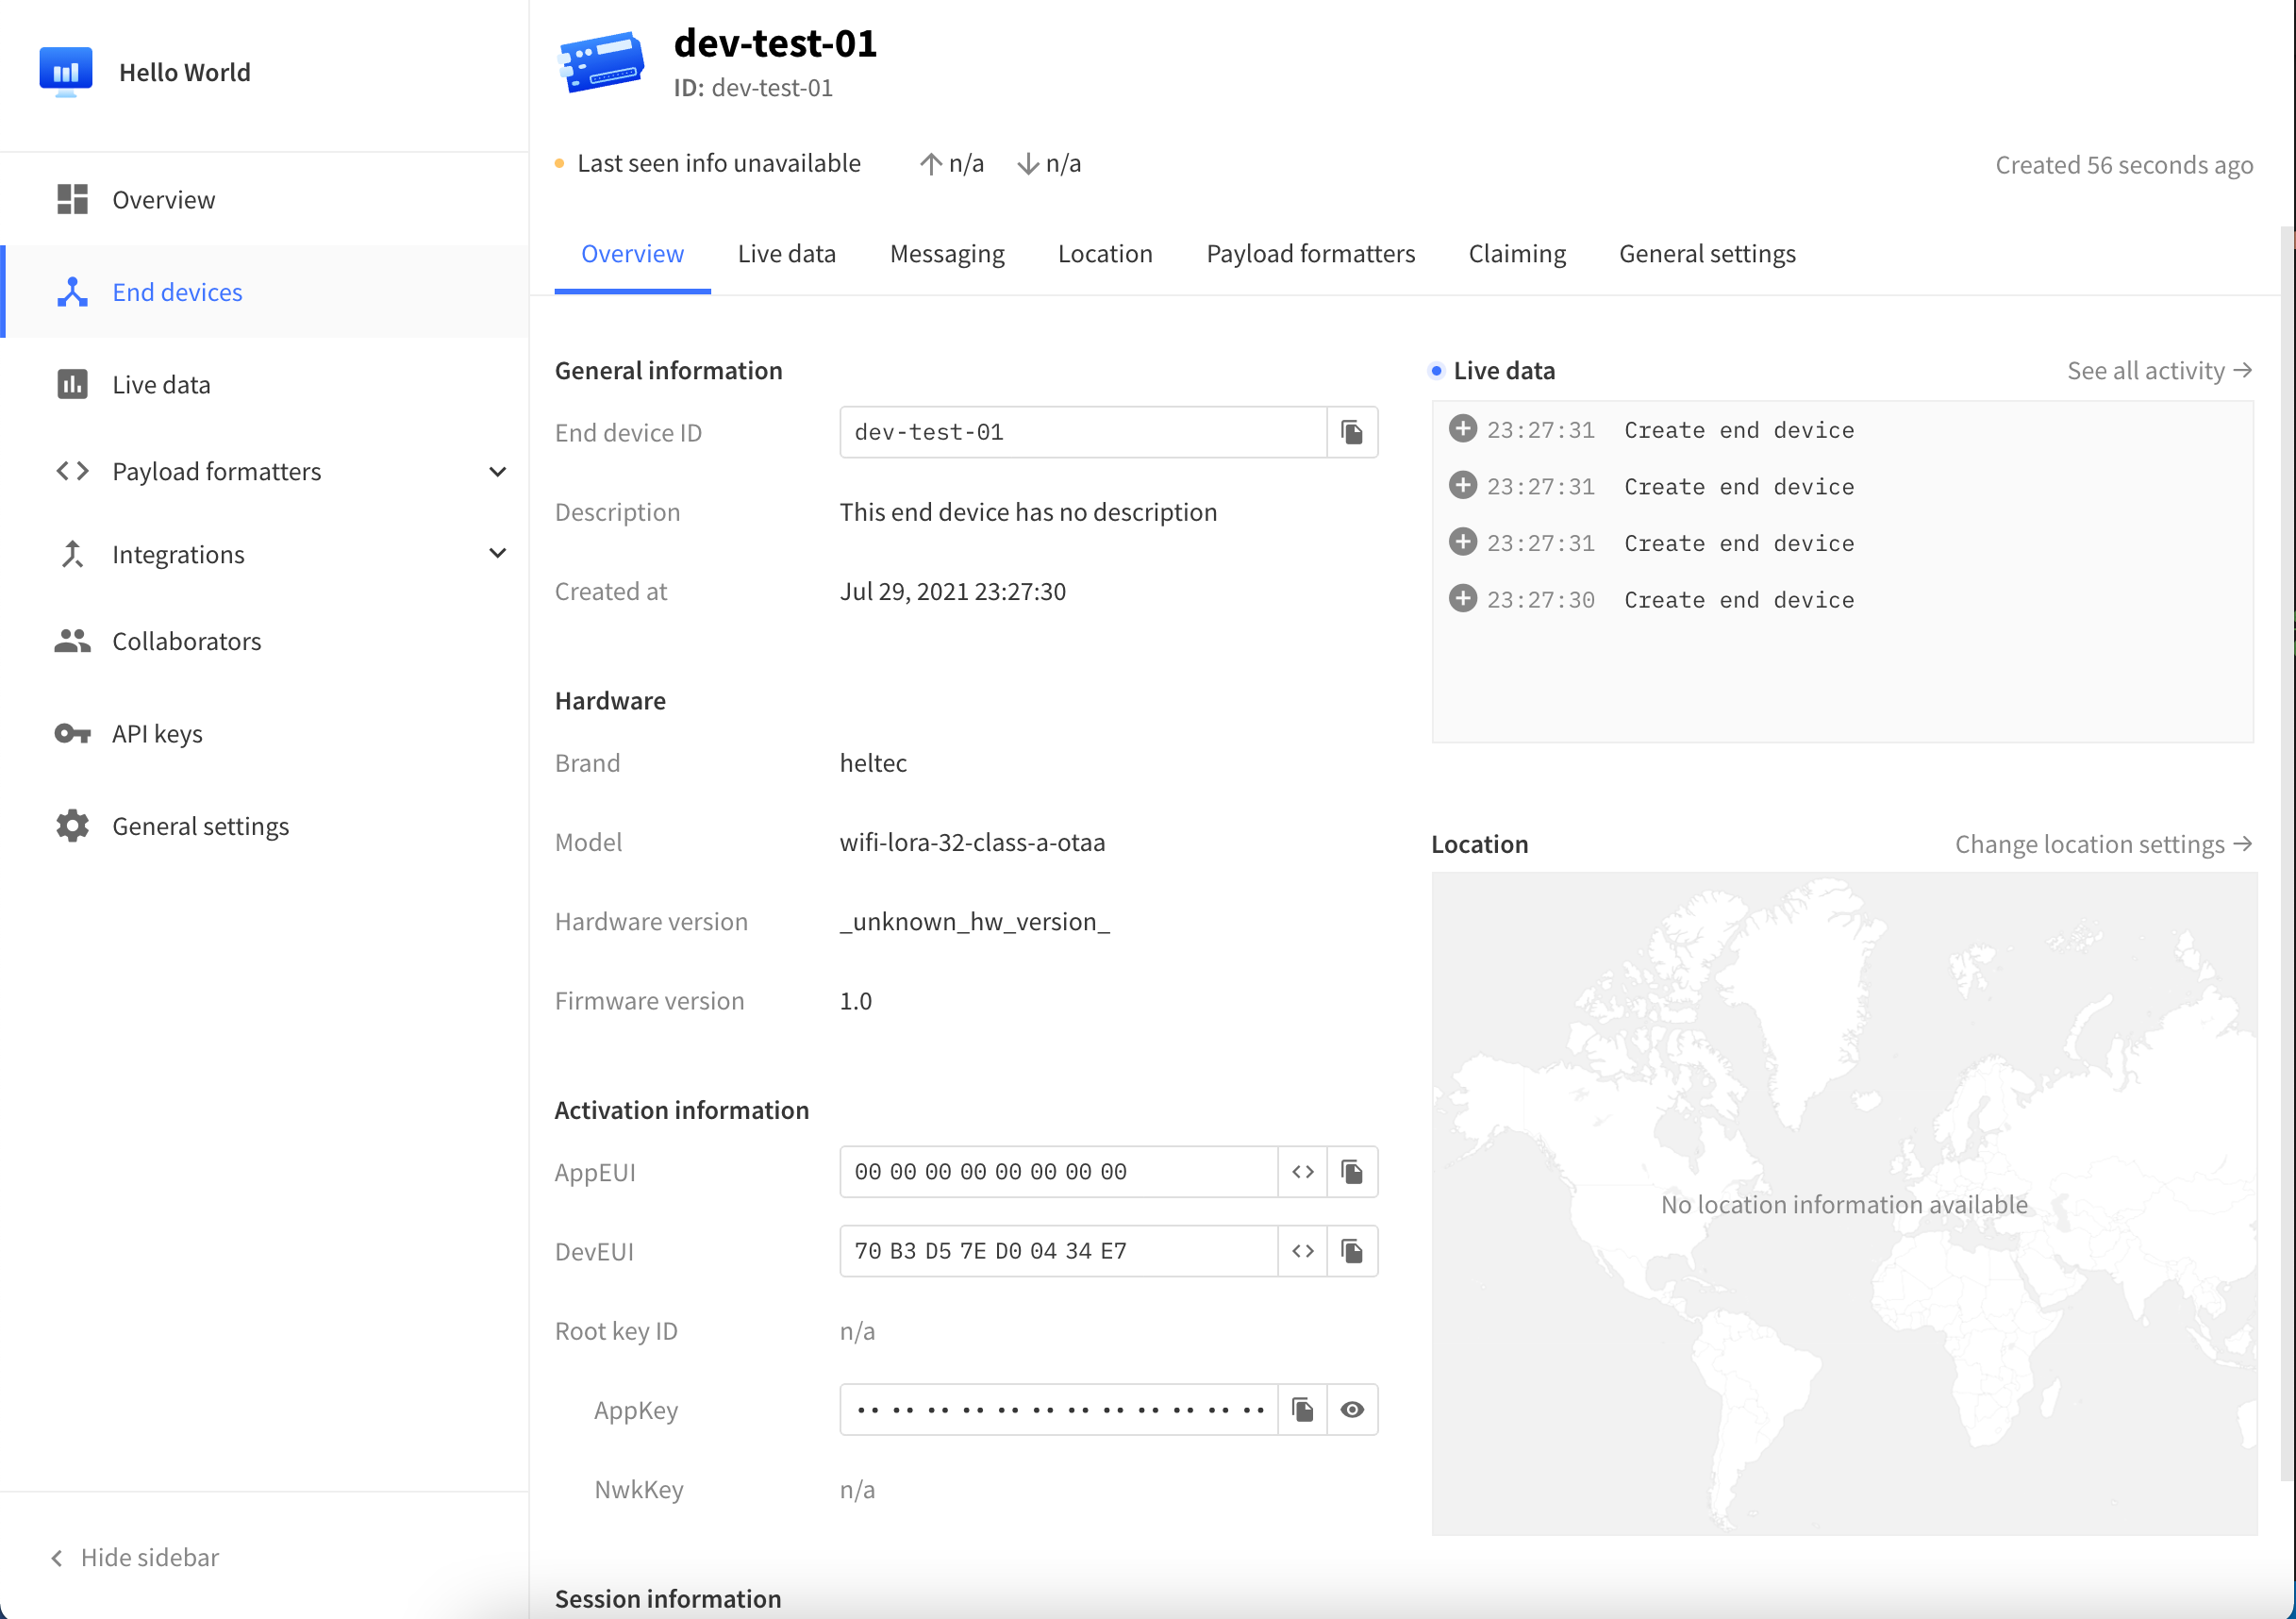
The device will be registered and the overiew page will be displayed:

For each of AppEUI, DevEUI and AppKey, copy the hexadecimal value by clicking the copy icon after the value and paste it into main.cpp to replace the question marks in the below line:
// AppEUI (sometimes called JoinEUI)
const char *appEui = "????????????????";
// DevEUI
const char *devEui = "????????????????";
// AppKey
const char *appKey = "????????????????????????????????";
becomes
// AppEUI (sometimes called JoinEUI)
const char *appEui = "0000000000000000";
// DevEUI
const char *devEui = "70B3D57ED00434E7";
// AppKey
const char *appKey = "5FF08D16C310BB05A09A17783C7A43B4";
Please copy your own values and not the example values above.
Go to main.cpp and change the pin numbers where needed:
// Pins and other resources
#define TTN_SPI_HOST      HSPI_HOST
#define TTN_SPI_DMA_CHAN  1
#define TTN_PIN_SPI_SCLK  5
#define TTN_PIN_SPI_MOSI  27
#define TTN_PIN_SPI_MISO  19
#define TTN_PIN_NSS       18
#define TTN_PIN_RXTX      TTN_NOT_CONNECTED
#define TTN_PIN_RST       14
#define TTN_PIN_DIO0      26
#define TTN_PIN_DIO1      33
See Boards and Pins for the pin configuration of popular boards.
Connect your device to the USB port and run:
idf.py -p /dev/cu.usbserial build flash monitor
Instead of /dev/cu.usbserial, insert your serial port (on Windows it will look like COM3).
The app should be built, uploaded to your device and the app's output should be shown in your terminal window:
me@MacBook hello_world % idf.py -p /dev/cu.usbserial-0001 build flash monitor
Executing action: all (aliases: build)
Running ninja in directory /Users/me/Documents/hello_world/build
Executing "ninja all"...
[0/1] Re-running CMake...
-- Building ESP-IDF components for target esp32
-- Project sdkconfig file /Users/me/Documents/hello_world/sdkconfig
-- App "hello_world" version: v3.2.0-22-g5c1db03

...

Writing at 0x0003e23b... (77 %)
Writing at 0x00043b92... (88 %)
Writing at 0x0004997c... (100 %)
Wrote 239392 bytes (133071 compressed) at 0x00010000 in 3.4 seconds (effective 562.8 kbit/s)...
Hash of data verified.

Leaving...
Hard resetting via RTS pin...
Executing action: monitor
Running idf_monitor in directory /Users/me/Documents/hello_world
--- idf_monitor on /dev/cu.usbserial-0001 115200 ---
--- Quit: Ctrl+] | Menu: Ctrl+T | Help: Ctrl+T followed by Ctrl+H ---
ets Jun  8 2016 00:22:57

rst:0x1 (POWERON_RESET),boot:0x13 (SPI_FAST_FLASH_BOOT)
configsip: 0, SPIWP:0xee
clk_drv:0x00,q_drv:0x00,d_drv:0x00,cs0_drv:0x00,hd_drv:0x00,wp_drv:0x00
mode:DIO, clock div:2

...

I (309) cpu_start: Starting scheduler on PRO CPU.
I (0) cpu_start: Starting scheduler on APP CPU.
I (355) ttn_hal: IO initialized
I (355) ttn_hal: SPI initialized
I (355) ttn_hal: Timer initialized
I (385) ttn_prov: DevEUI, AppEUI/JoinEUI and AppKey saved in NVS storage
Joining...
I (385) ttn: event EV_JOINING
I (6675) ttn: event EV_TXSTART
I (11705) ttn: event EV_RXSTART
I (11815) ttn: event EV_JOINED
Joined.
Sending message...
I (11815) ttn: event EV_TXSTART
I (16845) ttn: event EV_RXSTART
I (17835) ttn: event EV_RXSTART
I (17925) ttn: event EV_TXCOMPLETE
Message sent.
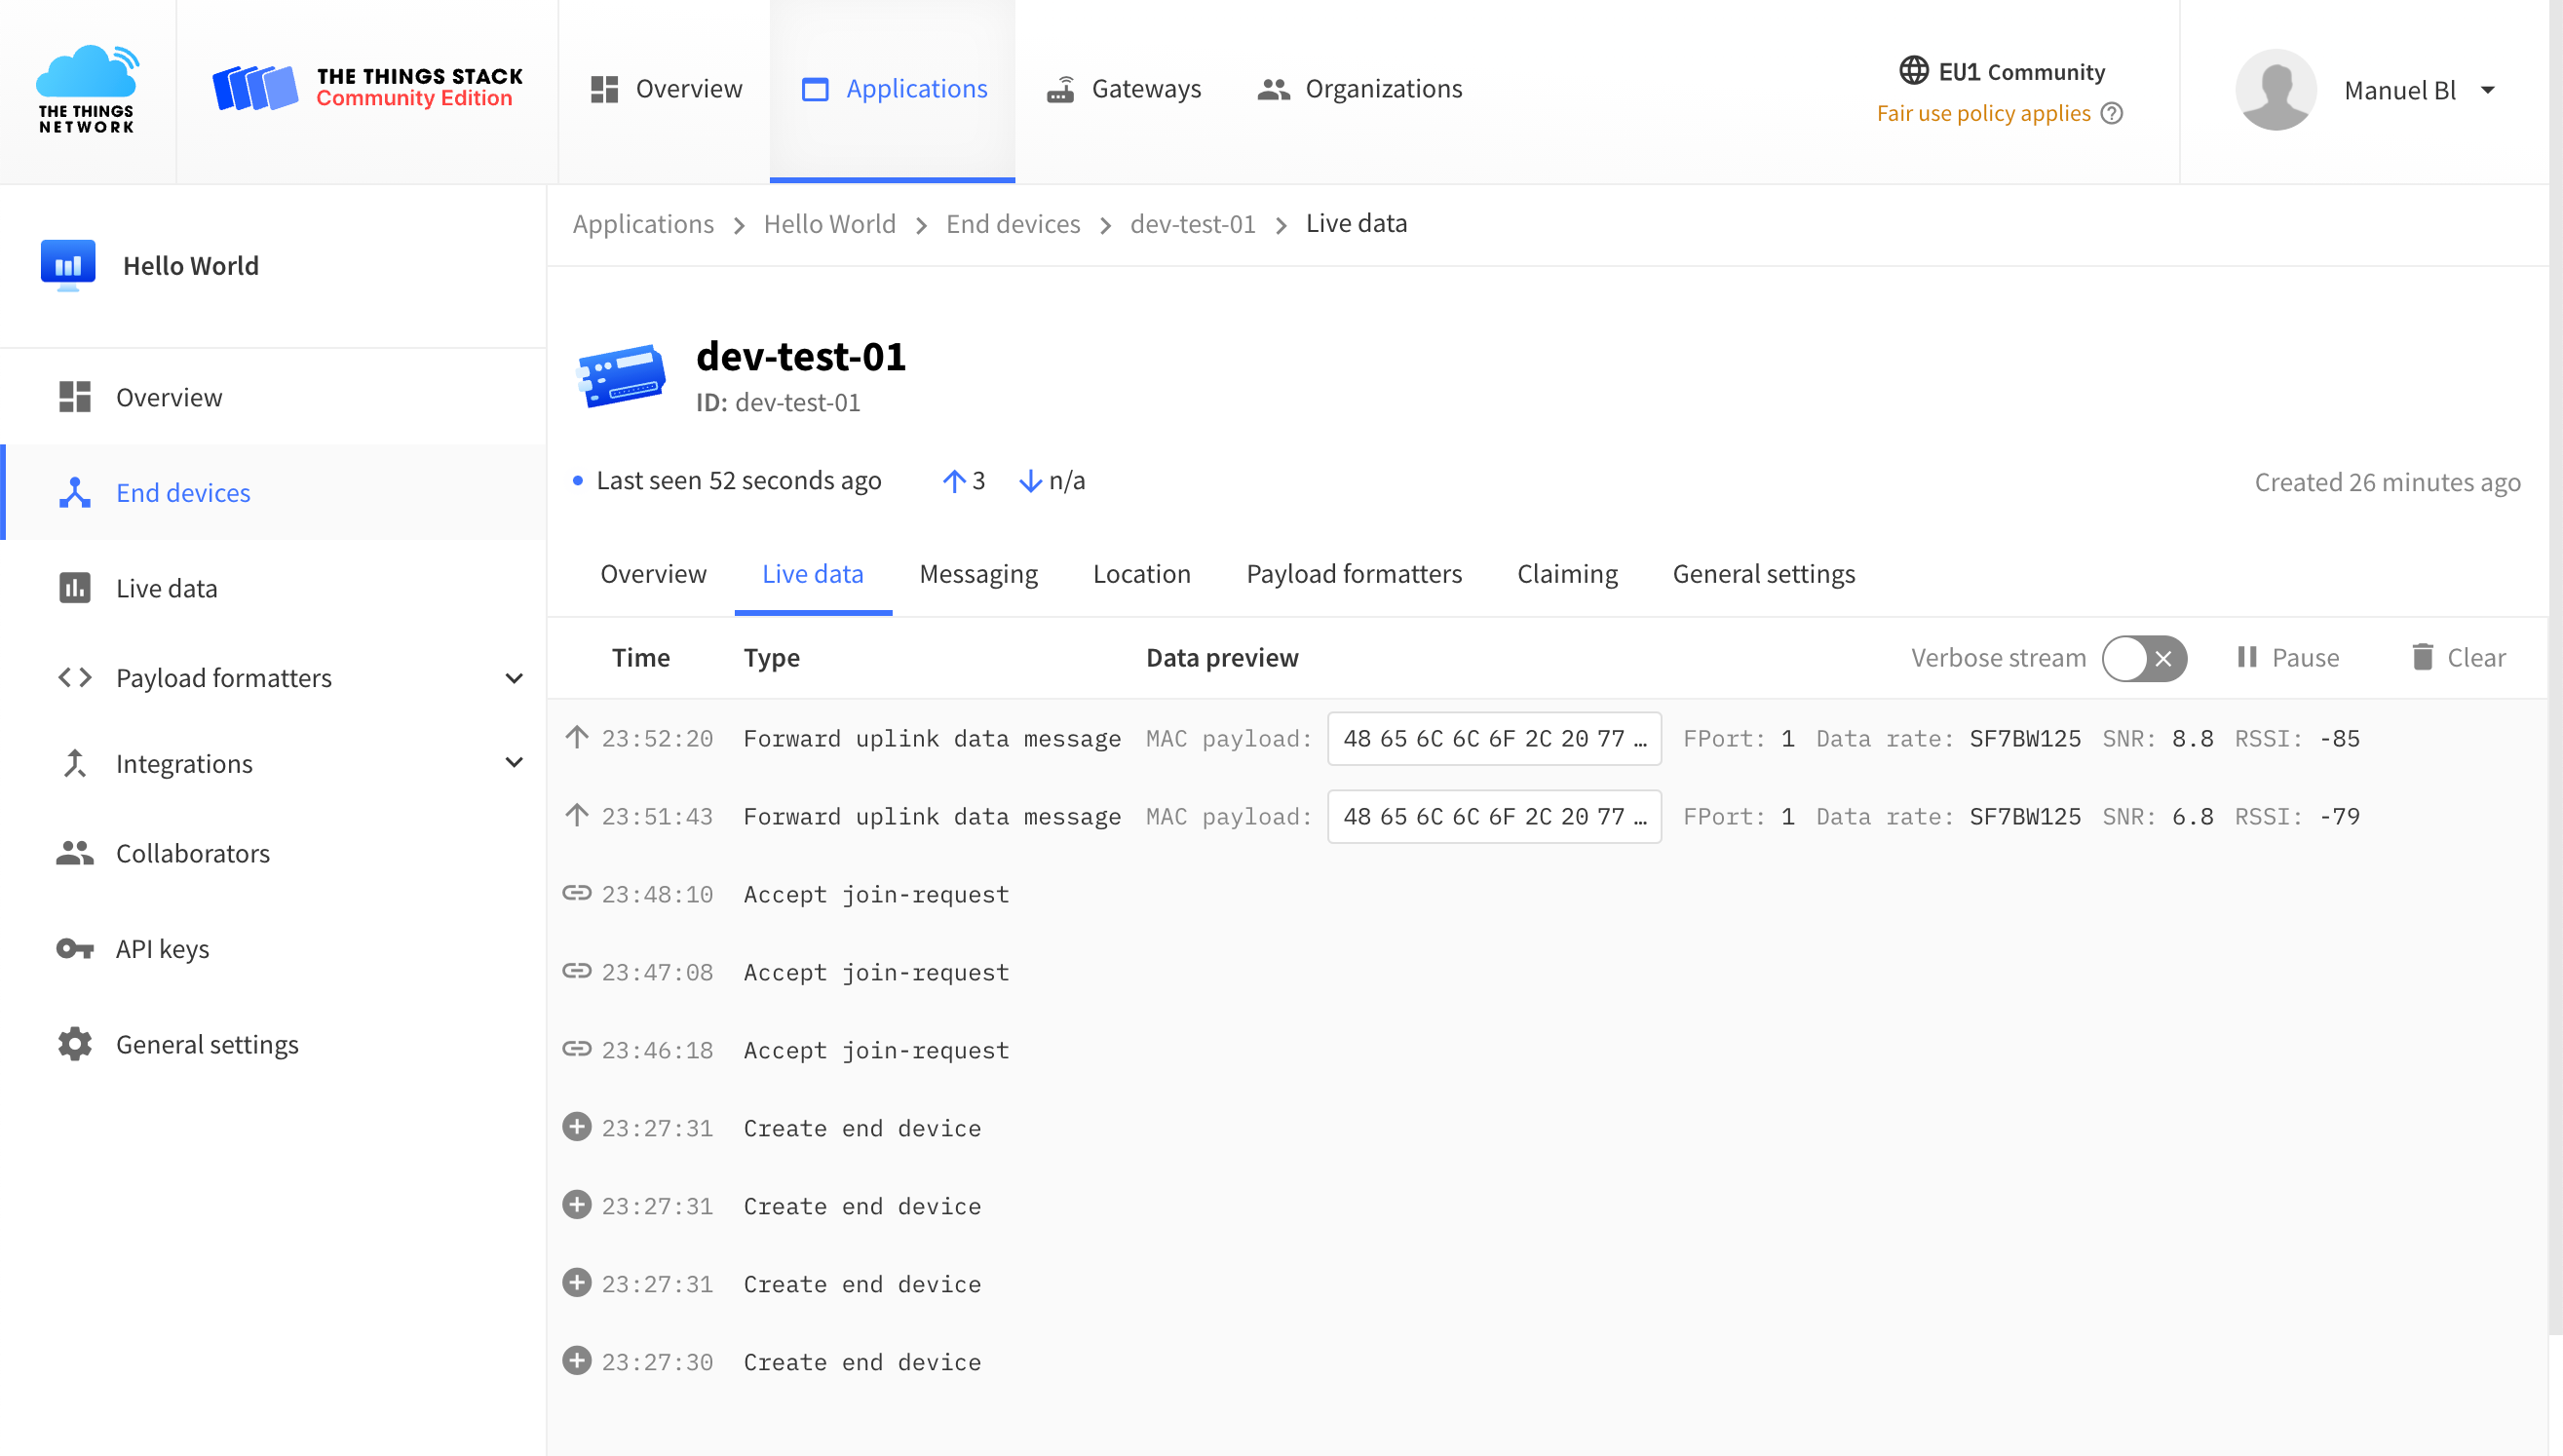
Go to the TTN console, select your region, click Applications, select your application, click End devices, select your device and click on the Live data tab. After at most 30 seconds, the first message should appear and further messages should arrive about twice a minute:

The payload should read: 48 65 6C 6C 6F 2C 20 77 6F 72 6C 64, which are the hexadecimal ASCII codes for Hello, world.