T4HE Installation
- Click on the <> Apps Code section of your Hubitat Elevation.
- Click on New App button in upper right hand corner.
- Click on Import.
- Paste this URL into the dialog.
https://raw.githubusercontent.com/markus-li/Hubitat/release/apps/expanded/tasmota-device-manager-expanded.groovy - Click Import and click Overwrite if prompted.
- Once the import has completed click on Save.
- Return to the <> Apps Code section. It should now include a line like the one shown below to indicate the installation of the App code is complete.

- Click on the <> Drivers Code section of your Hubitat Elevation.
- Click on New Driver button in upper right hand corner.
- Click on Import.
- Paste this URL into the dialog.
https://raw.githubusercontent.com/markus-li/Hubitat/release/drivers/expanded/tasmota-universal-parent-expanded.groovy - Click Import and click Overwrite if prompted.
- Once the import has completed click Save.
- Return to the <> Drivers Code section. It should now include a line like the one shown below to indicate the installation of the Universal Parent driver is complete.

Earlier we installed the code for this software into the HE repository. Now we must install it into production on our Hubitat hub.
- Click on the Apps section of your Hubitat Elevation.
- Click on Add User App button in upper right hand corner.
- You will see Tasmota Device Manager among the list of available apps to install.
- Click on Tasmota Device Manager
- The App will be installed and you will see a screen like this when it is finished.
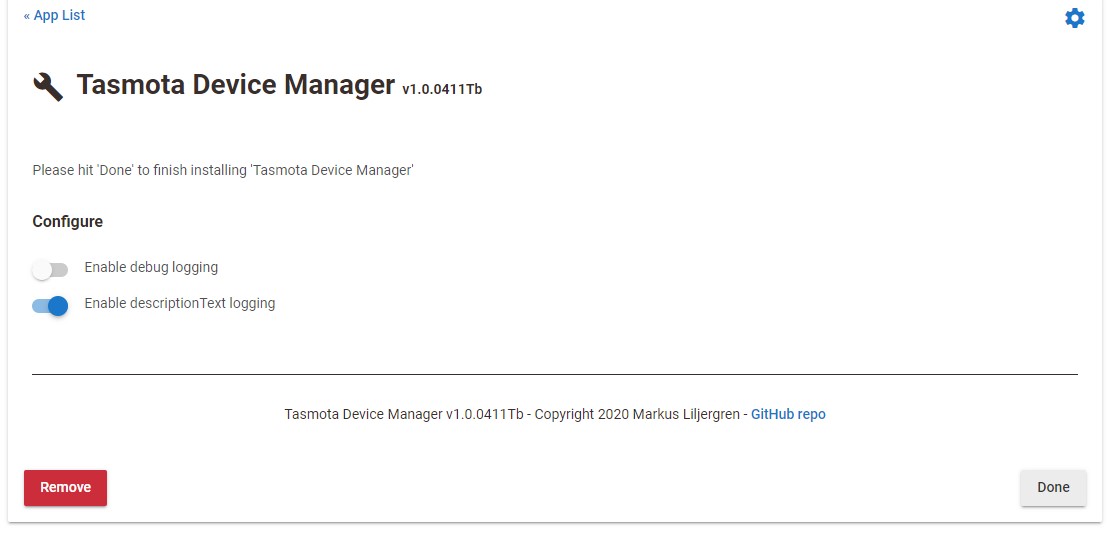 6) Click on Done to finish the install.
You have now complete all of the necessary installation steps for T4HE. But before we start installing our Tasmota devices there are a few things to consider that will save you some time in the long run.
All Tasmota devices will have a parent driver and at least one child driver. For example this device is an RGBW bulb.
 A Tasmota device with multiple components will have one child driver for each component. In this case the device is a power outlet with two independently addressable plugs.
 When you install a new Tasmota device using the Tasmota Device Manager you will be prompted for a name to assign to the device. The name you provide is assigned to the parent device driver exactly as you enter it. Child devices have the same name with a (1), (2) etc. appended. The parent name is also then applied to the Tasmota device as the friendly name but is subject to a 32 character limit.
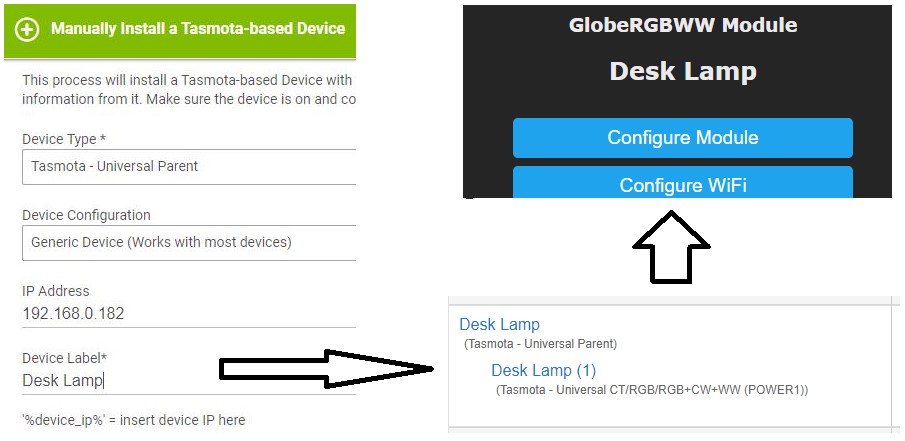
Before you start naming devices consider how you would like things to be grouped in the device list as well as in the various HE device pickers. If you have used room names in many of your other devices you probably want to continue doing that so that all “Kitchen” devices will be listed sequentially for example.
Tasmota Device Manager supports Autodiscover of Tasmota devices on the network using the SSDP protocol. For this to work you must enable Hue Bridge emulation in Tasmota. You can do this by going to the device's web interface by typing its IP address in a web browser and then going to the "Configuration" and then "Configure Other" menus. If you have installed Tasmota with Hubitat enhancements this will be automatically enabled.
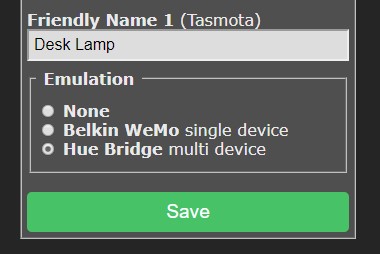
Changing the emulation setting will cause the device to reboot.
All Tasmota devices will automatically have their TimeZone configured to match the Hubitat hub. This ensures that power stats for “Today” or “yesterday” reflect local time vs UTC time. This is also convenient when observing Console messages on the Tasmota webpage.