-
Notifications
You must be signed in to change notification settings - Fork 1
How to Add a Background
It’s time to add a background. You’ll start by working on the user interface created from How to Add a New Screen.
By default, a new screen is added to the project with a transparent background. A transparent background has no color. It is best practice to use a Panel widget to add color. The Panel widget is sized fill the extent of the screen.
Add a Panel Widget to the screen to give it a background color.
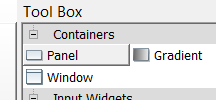
- In the Toolbox under Containers, drag the Panel widget onto Screen1.

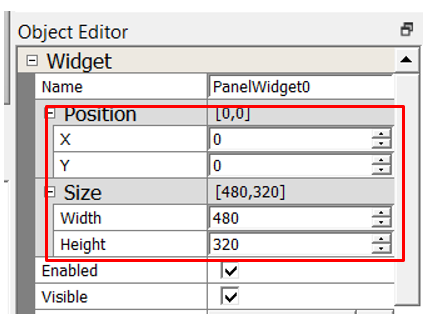
- Use the Object Editor to set its exact size and location. Under Position field, set X to 0 and Y to 0. Under Size field, set Width to 480 and set Height to 320.

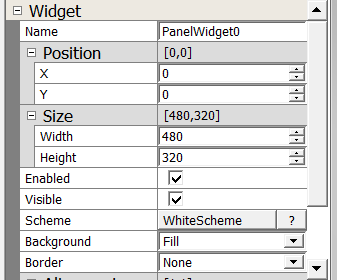
- Use the Object Editor to set its Scheme field to WhiteScheme. This will change the PanelWidget0 base color to the base color of WhiteScheme.

There are no other property settings need at this time.
In this guide, you learned how to use the Screens Pane to add a new interface to your existing design. You learn to add Label Widget to set a background color. At this point, you’re ready to add additional UI widgets. Go to the next tutorial in this series: How to Add a Image.
If you are new to MPLAB® Harmony, you should probably start with these tutorials:
- MPLAB® Harmony v3 software framework
- MPLAB® Harmony v3 Configurator Overview
- Create a New MPLAB® Harmony v3 Project
Is this page helpful? Send feedback

- Simulator
- User Guides
- Best Practices
- Advanced Topics
 How to add a Background