Godot example with C++ and OpenCV functions in GDNative.
Purpose:
- Acquire video with a webcam
- Process frames with OpenCV
- Display output in AR/VR headset
Referred from: https://docs.godotengine.org/en/3.5/tutorials/scripting/gdnative/gdnative_cpp_example.html
- Clone
- Compile godot-cpp
- Compile our OpenCV code with Godot wrapper
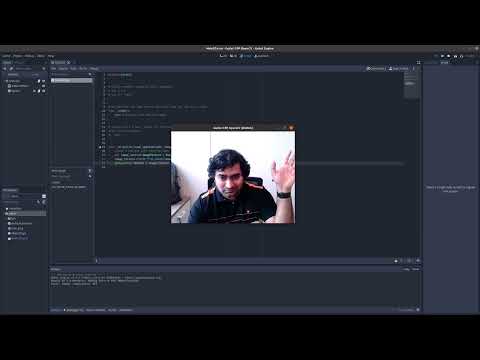
- Using our code to access webcam in a 2D scene | Watch Video
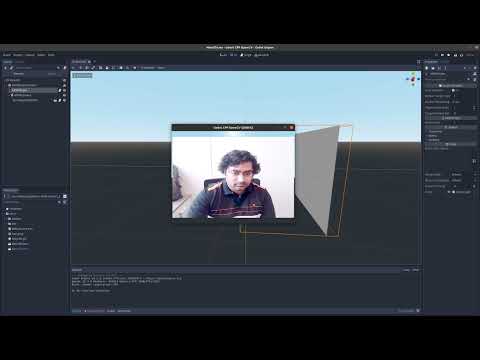
- Showing the webcam frames in a 3D scene | Watch Video
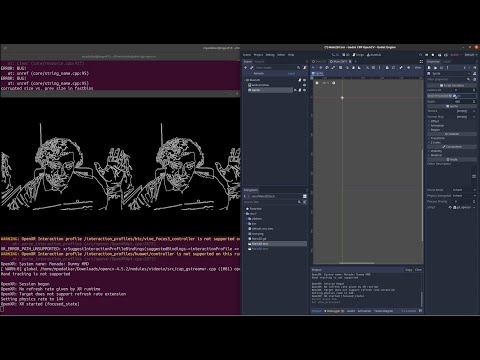
- Displaying the OpenCV output in HMD | Watch Video
git clone --recursive https://github.com/mgpadalkar/godot-cpp-opencv.git
cd godot-cpp-opencv
# git submodule update --init --recursive
P.S.: If you are downloading the .zip file, ensure that the godot-cpp folder if populated. See the structure below to be sure.
Structure that we now have (click to expand)
godot-cpp-opencv                  # the repository
├── godot-cpp                     #
│   ├── godot-headers             #
│   │   ├── <lots of files>       #
│   ├── <lots of other files>     #
├── demo                          # project folder
│   ├── bin                       #
│   │   ├── gd_opencv.gdnlib      #
│   │   ├── gd_opencv.gdns        #
│   ├── default_env.tres          #
│   ├── icon.png                  #
│   ├── Main2D.tscn               #
│   ├── Main2D.gd                 #
│   ├── project.godot             #
├── misc                          #
│   ├── set_opencv4.sh            # my opencv install settings
├── README.md                     #
├── SConstruct                    #
├── src                           # C++ code folder
│   ├── gd_opencv.h               # header for wrapper to use OpenCV in Godot
│   ├── gd_opencv.cpp             # wrapper to use OpenCV in Godot
│   ├── gd_opencv_library.cpp     # library for the wrapper
│   ├── own_opencv_processing.h   # our OpenCV header
│   ├── own_opencv_processing.cpp # out OpenCV code
└── ...
cd godot-cpp
scons platform=linux generate_bindings=yes -j8
# It generates: godot-cpp/bin/libgodot-cpp.linux.debug.64.a- Compile OpenCV from source if needed.
I had followed this for Ubuntu 20.04: https://gist.github.com/raulqf/f42c718a658cddc16f9df07ecc627be7
# This step requires opencv to be installed and available in the path.
# In my case, I had compiled OpenCV myself and set the path
# using the script misc/set_opencv4.sh
# (OpenCV was installed in ${HOME}/localInstalls/opencv-4.5.2/).
# I had to do `source misc/set_opencv4.sh` to set the paths.

cd ..
scons platform=linux

# It generates: demo/bin/x11/libgdopencvexample.so
Now use Godot (I used v3.5.2) to use the generated library.
Note: If OpenCV is built from source, like in my case,
start Godot from the terminal in which the OpenCV paths are
already set so that the OpenCV shared libs are available to
Godot.
I am using Godot 3.5.2 downloaded from https://github.com/godotengine/godot/releases/download/3.5.2-stable/Godot_v3.5.2-stable_x11.64.zip
The scene is already created using the following steps.
Simply run to view the webcam output in Godot.
- Add a
TextureRecttoMain2Dand rename it towebcamView - Add a
SpritetoMain2D - Attach the
bin\gd_opencv.gdnsscript toSprite - Create a
Main2D.gdscript and attach it toMain2D - Connect
frame_updatedsignal ofSpritetoMain2D - Modify the
Main2D.gdscripts'func _on_Sprite_frame_updated(node image)function with the following lines:
func _on_Sprite_frame_updated(node, image):
	var image_texture:ImageTexture = ImageTexture.new()
	image_texture.create_from_image(image)
	$webcamView.texture = image_texture
For more details, watch the following video.
- Create a new 3D Scene
- Rename
SpatialtoMain3D - Save the scene as
Main3D.tscnand set it as the main scene. - Go to
AssetLiband search forxr - Download and install
Godot XR Tools - AR and VR helper library - Go to
Project->Project Settings->Pluginstab and enable theGodot XR Toolsplugin. - Save and go to
Project->Reload Current Project - Add a
WorldEnvironmenttoMain3D - Add a
ARVROrigintoMain3D - Add a
ARVRCameratoARVROrigin - In
FileSystemgot toaddons->godot-xr-tools->objects->viewport_2d_in_3d.tscn, drag and drop it ontoARVRCamera - The above step creates a
Viewport2Din3D.- Set
Viewport Sizeto640x480andTransformto[0, 0, -1.63] - Drag and drop
Main2D.tscnfromFileSystemontoScenefor theViewport2Din3D - Select
Unshaded
- Set
- In
FileSystemgot toaddons->godot-xr-tools->xr->start_xr.gd, drag and drop it ontoARVROrigin - Save the scene and run to view the output in the 3D scene.
For more details watch the following video.
- Go to
AssetLiband search forxr - Download and install
OpenXR Plugin - Go to
Project->Project Settings->Pluginstab and enable theGodot OpenXRplugin. - Save and go to
Project->Reload Current Project - Start your XR runtime:
- If you have a XR runtime like Monado start with in a new terminal with
monado-service - If you have SteamVR, start it so that your HMD is available
- If you have a XR runtime like Monado start with in a new terminal with
- Now run the project. The output should be visible to you in your HMD.
(In my case, I did not have a HMD attached, so the output was shown on screen in a Dummy HMD)
How I installed Monado? (click to expand)
# the following should be sufficient
sudo add-apt-repository ppa:monado-xr/monado
sudo apt-get update
sudo apt-get install libopenxr-loader1 libopenxr-dev libopenxr1-monado
sudo apt-get install xr-hardware libopenxr-utils openxr-layer-apidump monado-cli monado-gui

# if you need to build from source, see https://monado.freedesktop.org/getting-started.html#monado-installation
sudo apt-get install build-essential cmake libgl1-mesa-dev libvulkan-dev libx11-xcb-dev libxcb-dri2-0-dev libxcb-glx0-dev libxcb-icccm4-dev libxcb-keysyms1-dev libxcb-randr0-dev libxrandr-dev libxxf86vm-dev mesa-common-dev

# to run cretain demos on https://gitlab.freedesktop.org/monado/demos, you may also need the following
sudo apt-get install libsdl2-dev
sudo apt-get install libglm-dev
sudo apt-get install glslang-tools
For more details watch the following video.
- Downloading the GDNative C++ Example | Watch Video
- Downloading Godot 3.5.2 | Watch Video
- Making an empty project | Watch Video
- Writing our own OpenCV code | Watch Video
- Creating the GDNative wrapper | Watch Video
- Compiling our code + wrapper with SConstruct | Watch Video
- Creating files necessary for using our code in Godot | Watch Video
- Using our code to access webcam in a 2D scene | Watch Video
P.S.: All above videos are without audio.