- Description
- Website Screenshots
- Technologies Used
- Running in development environment
- Production deployment with Kubernetes
- Production deployment with AWS
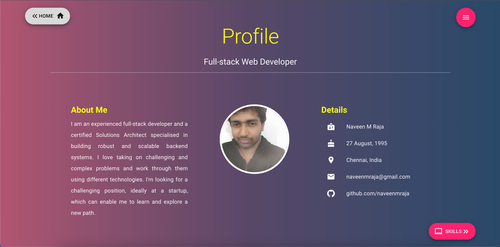
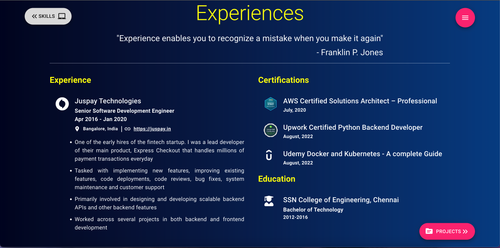
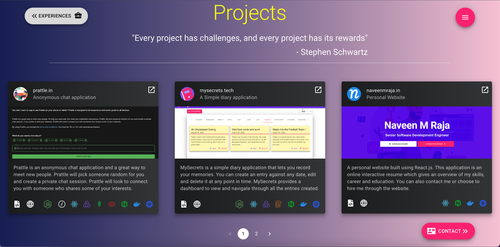
naveenmraja.in is a personal website built using React.js. This application is an online interactive resume which gives an overview of my skills, career and education. You can also contact me or choose to hire me through the website. The website is integrated with Google Analytics to collect key metrics.
 |
 |
|---|---|
 |
 |
 |
 |
Technologies Used:
- React.js
- Nginx
- Docker
- Kubernetes
- CloudFront
To run the app in development mode :
-
Upload the images in /images directory to S3 and setup Cloudfront with this S3 bucket as origin. Create a new file in the project root directory
.envwith paste the cloudfront domain :REACT_APP_CLOUDFRONT_DISTRIBUTION_URL="$YOUR_CLOUDFRONT_DISTRIBUTION_URL" -
Create an emailjs account and Google Analytics account. Create another file in the /src/utils directory
Config.jswith the following content :export const EMAILJS_SERVICE_ID = "YOUR_EMAILJS_SERVICE_ID" export const EMAILJS_PUBLIC_KEY = "YOUR_EMAILJS_PUBLIC_KEY" export const EMAILJS_FEEDBACK_TEMPLATE_ID = "YOUR_EMAILJS_FEEDBACK_TEMPLATE_ID" export const EMAILJS_CONTACT_ME_TEMPLATE_ID = "YOUR_EMAILJS_CONTACT_ME_TEMPLATE_ID" export const GA_TRACKING_ID = "YOUR_GA_TRACKING_ID"; export const CLOUDFRONT_DISTRIBUTION_URL = "YOUR_CLOUDFRONT_DISTRIBUTION_URL" -
Run the following command in the root directory to start up the development server :
npm run start
For Production build and deployment with Kubernetes:
-
Setup Cloudfront and Emailjs as mentioned above in development setup
-
Update the image name of
nginxservice indocker-compose.ymland build the images and push it to your docker repository using the following commandsdocker-compose build --pull docker-compose push -
Set your gcloud project id using the following command :
gcloud config set project $PROJECT_ID -
Generate kubectl config using the following command :
gcloud container clusters get-credentials $CLUSTER_NAME --zone $ZONE --project $PROJECT_ID -
Create cluster role binding to use ingress-nginx using the following command:
kubectl create clusterrolebinding cluster-admin-binding \ --clusterrole cluster-admin \ --user $(gcloud config get-value account) -
Install ingress-nginx :
kubectl apply -f https://raw.githubusercontent.com/kubernetes/ingress-nginx/controller-v1.3.0/deploy/static/provider/cloud/deploy.yaml -
Install cert-manager for SSL support :
kubectl apply -f https://github.com/cert-manager/cert-manager/releases/download/v1.9.1/cert-manager.yaml -
To deploy to gcloud, run the following command from root directory :
kubectl apply -f ./k8s -
You should see your resources created and the application running. To access the application, simply get the ingress service IP Address and use it in browser.
For Production build and deployment with AWS S3 and CloudFront:
-
Setup Cloudfront and Emailjs as mentioned above in development setup
-
Create a S3 bucket with static website hosting enabled and create a CloudFront distribution with this bucket as the origin and enable http to https redirection. Provide the default root object as
index.html. To use a custom domain, you can provide the custom domain name and the SSL certificate during the creation of your cloudfront distribution -
Create a file named
.envin the root directory with the following content :REACT_APP_CLOUDFRONT_DISTRIBUTION_URL="YOUR_CLOUDFRONT_DISTRIBUTION_URL" AWS_ACCESS_KEY_ID=YOUR_AWS_ACCESS_ID AWS_SECRET_ACCESS_KEY="YOUR_AWS_SECRET_ACCESS_KEY" AWS_DEFAULT_REGION=AWS_DEFAULT_REGION AWS_S3_BUCKET_URI="s3://YOUR_BUCKET_NAME" -
Run the following command to build the project and push the build artefacts to S3 bucket
docker-compose -f docker-compose-aws.yml build -
You should be able to visit the website using your cloudfront distribution url. If you had used custom domain name, you can create a A record in Route 53 to point your domain to your cloudfront distribution.