Building up Code
Assuming you have correctly setup
- Git
- Gradle
- Android Studio
Follow the steps below to get project up and running on the emulator or device.
1. Download Zip

2. Extract it to your preferred location

3. Open Android Studio
4. Click on Import Project Option

*If you don't get this screen you can also Import the Project from File --> Import
5. Browse to the directory where you cloned(extracted zip) android-client repo and Click OK

6. Let Android studio Import the project and Perform Gradle Initialisation, if any Error due to VCS Pops Up, click on Ignore Option

7. After gradle tasks finish you will something like this (You might need to Sync Gradle Files and Build the project manually. For that Click Build -> Rebuild the Project

8. Now Connect your Android Phone and Run the Project by clicking on this play button or (Ctrl + R - on Windows & ^R on Mac)

9. Now Choose your device to run the project on. (Click on Use same device for future launches)

10. Wait for a few seconds and app should start on your device
We are using ButterKnife Library for View Injection, this requires Support for Annotations enabled on Android Studio, Here is how you do it.
- Open Android Studio's preference and navigate to Compiler → Annotation Processors. Check "Enable annotation processing".
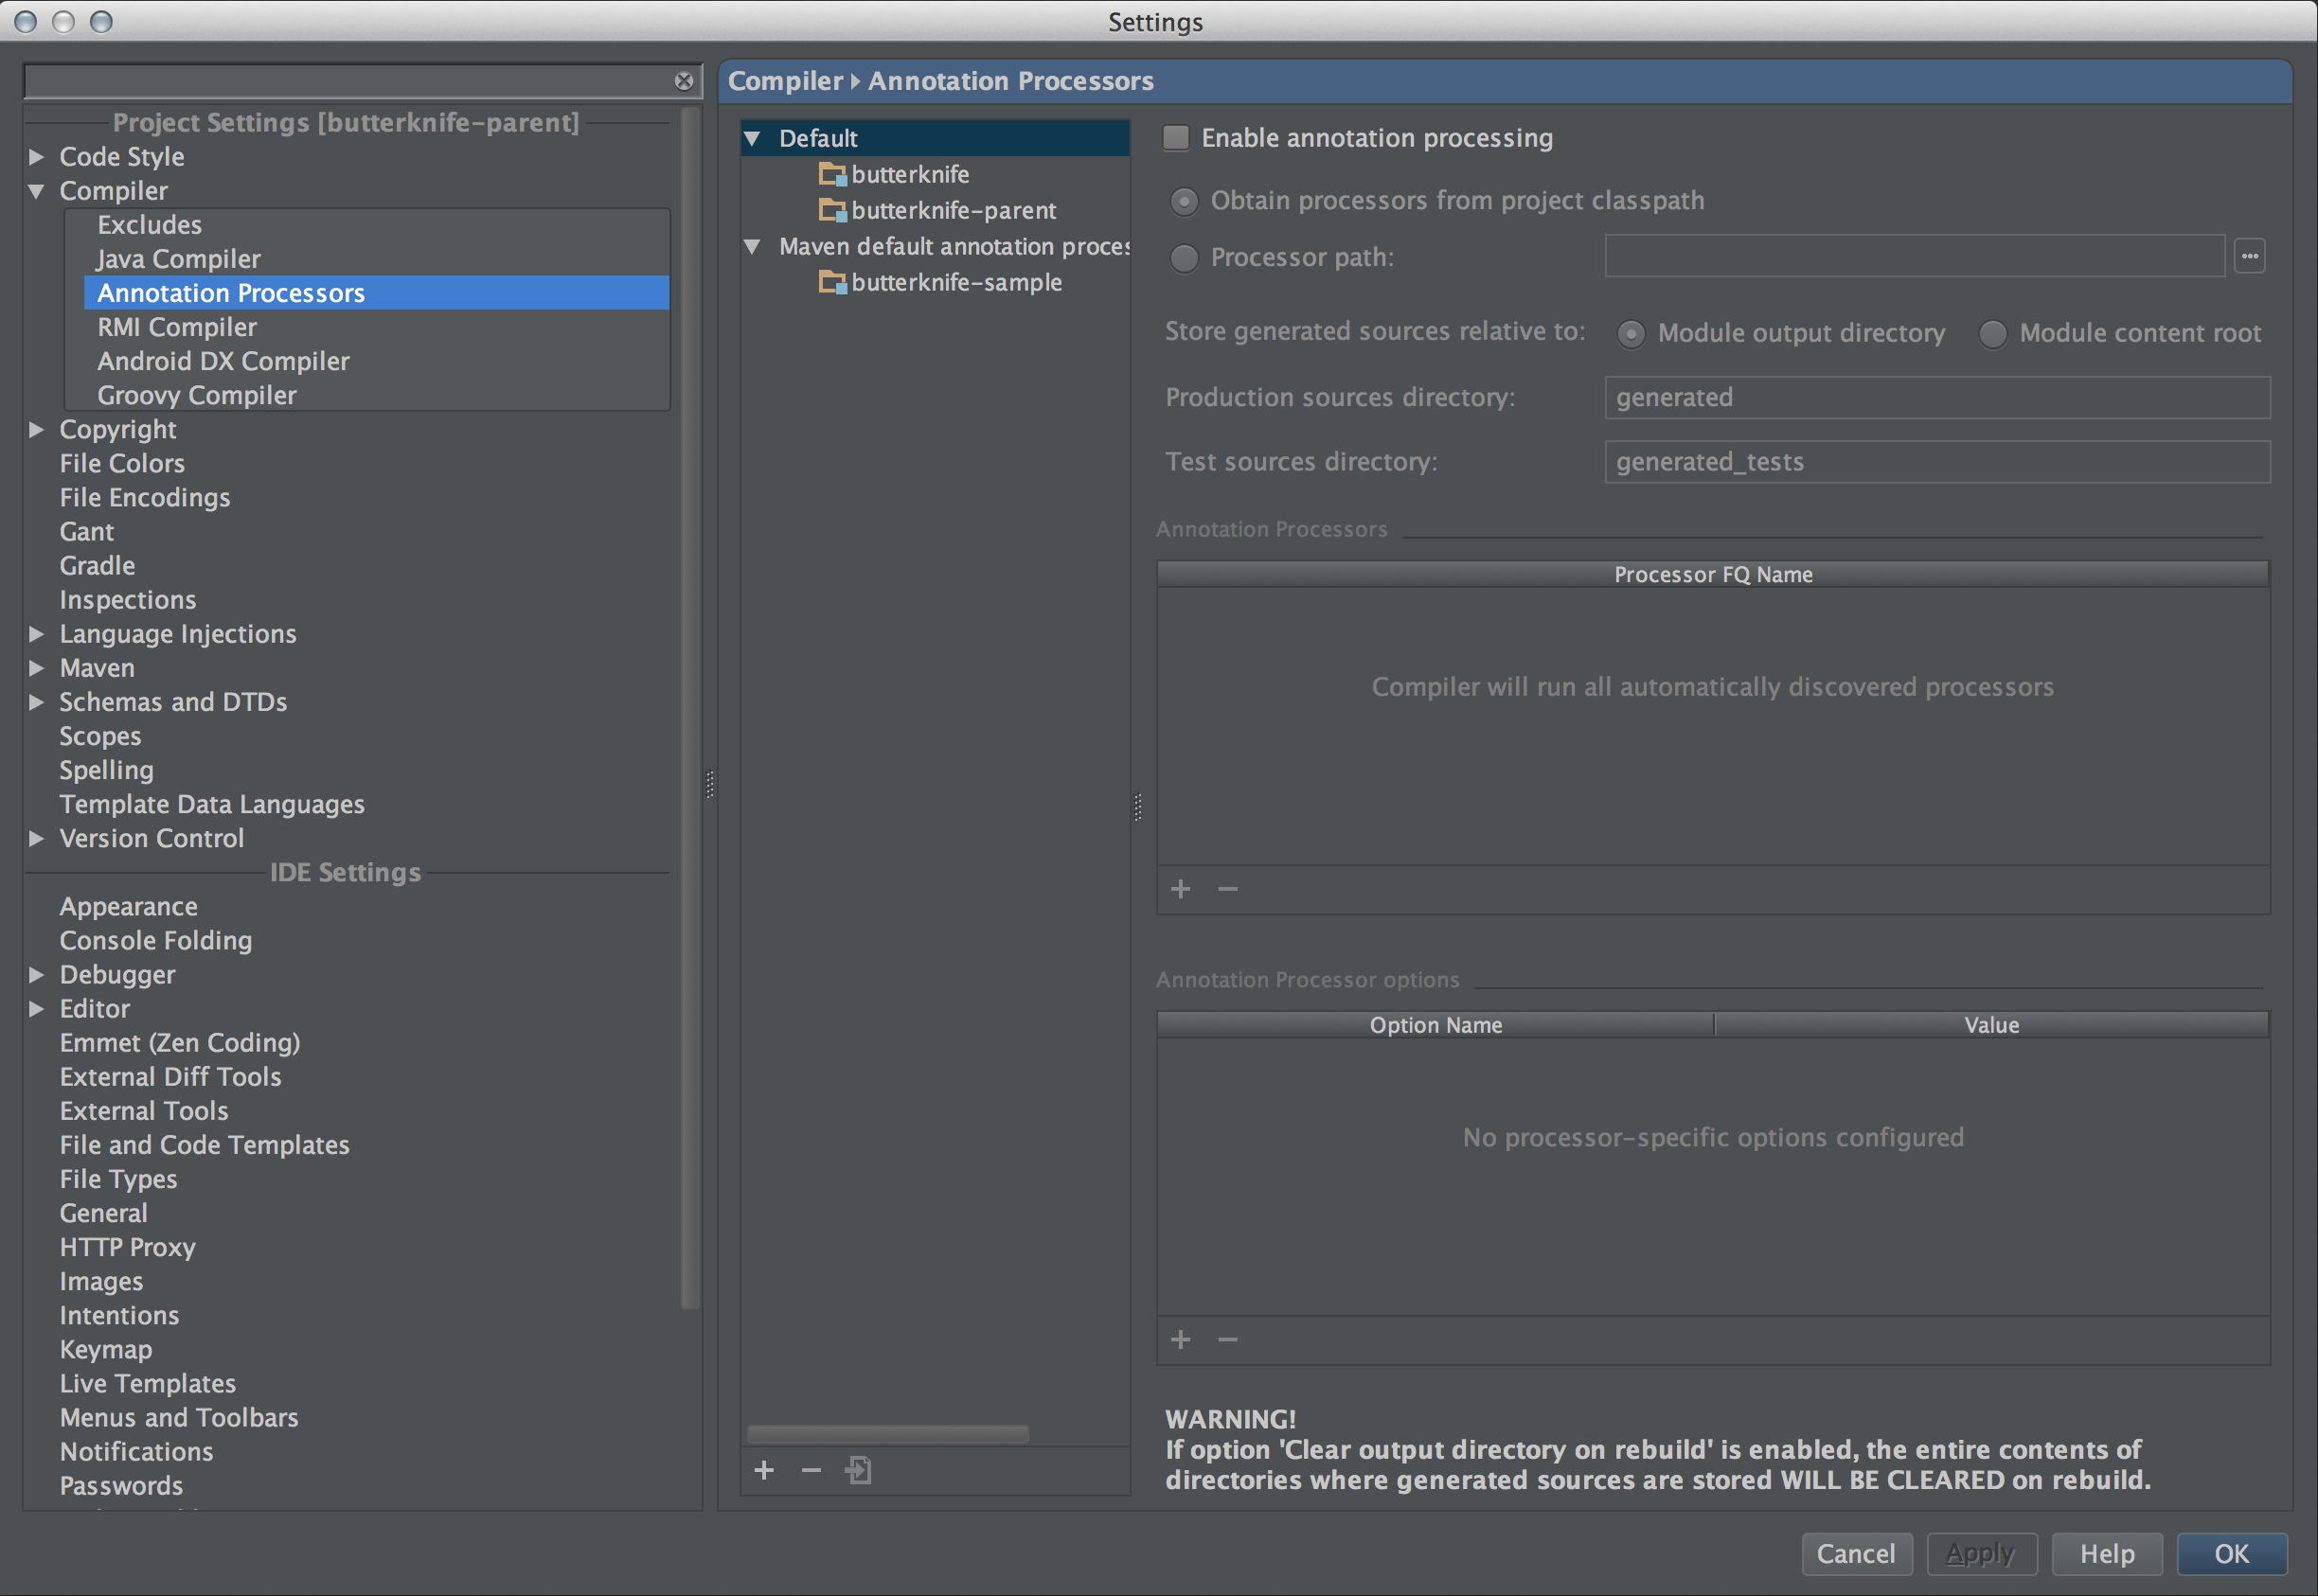
Once this is done you can compile and run the code on your emulator or device.
I prefer Genymotion - Android Emulator it is faster than the emulator Shipped with ADT Bundle.
- Close current Project (File->Close project)
You'll get a Welcome to Android Studio Dialog. In that:
-
Click on Configure -> Project Defaults -> Project Structure
-
Click on SDKs in the left column
-
In the middle column Click on Android SDK (with Android icon) OR click + on the top if you don't see an entry with Android icon.
-
Change SDK Home Path and select valid Target
Android Studio - How to Change Android SDK Path - Stack Overflow
This means we have to install or update "Google Repository"
-
Go to SDK Manager
-
Find "Google Repository" and Install it
-
Restart Android Studio!!
To Export an APK use default_key_store.jks with Password : mifos1234