-
Notifications
You must be signed in to change notification settings - Fork 66
UART Connection
Open the camera case.
Get a USB to TTL UART adapter.
Before you connect that adapter to you camera, make sure that it's working voltage is set to 3.3 volt!
Connect ground (GND) contact on the adapter to ground contact on the camera.
Connect RX contact of the adapter to TX contact of the camera.
Connect TX contact of the adapter to RX contact of the camera.
Do not connect VCC contact! Power the camera with its standard power adapter.
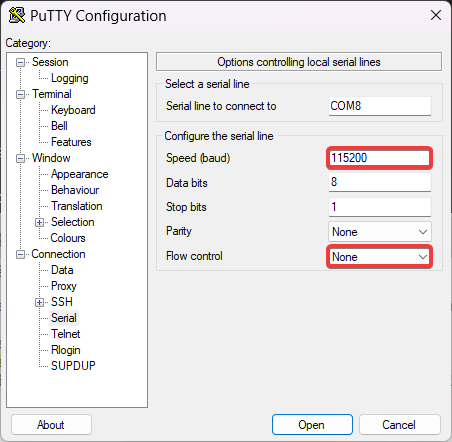
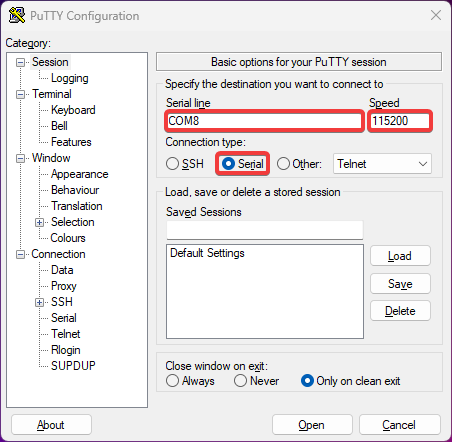
Set your terminal settings to 115,200 bps baudrate, 8 bits, no parity, 1 stopbit, no flow control. You should start seeing booting log in your terminal window.
screen -L -Logfile ipcam-$(date +%s).log /dev/ttyUSB0 115200Use Ctrl-a followed by \ to exit the session.
minicom -b 115200 -8 --capturefile=ipcam-$(date +%s).log --color=on -D /dev/ttyUSB0Use Ctrl-a followed by x to exit the session.
picocom -b 115200 --databits 8 --parity n --stopbits 1 --flow n --logfile=ipcam-$(date +%s).log /dev/ttyUSB0Use Ctrl-a followed by Ctrl-x to exit the session.
If you opt for a GUI terminal, namely PuTTY, this is how it should look like:


Jooan A6M TX-RX Pinout:

