A collection of simple Arduino examples for using the NodeMCU (ESP8266) within the Arduino programming environment (IDE).
The code examples were created for an »Introduction to NodeMCU« Workshop, at the Retune Festival in 2018 (https://retunefestival.de).
If you are about to start with NodeMCU, we recommend you to start with the first example and go through them step by step, as the examples will become more advanced.
We also recommend checking out the following links to get you into it:
-
Quick Start to NodeMCU (ESP8266) on Arduino IDE https://www.instructables.com/id/Quick-Start-to-Nodemcu-ESP8266-on-Arduino-IDE/
-
ESP8266 Arduino Core’s documentation https://arduino-esp8266.readthedocs.io
-
ESP8266 Arduino setup guid by easyIOT https://iot-playground.com/blog/2-uncategorised/67-arduino-esp8266-ide
Node MCU driver: https://www.silabs.com/products/development-tools/software/usb-to-uart-bridge-vcp-drivers
Add ESP8266 as Additional Boards to your Arduino IDE
http://arduino.esp8266.com/stable/package_esp8266com_index.json
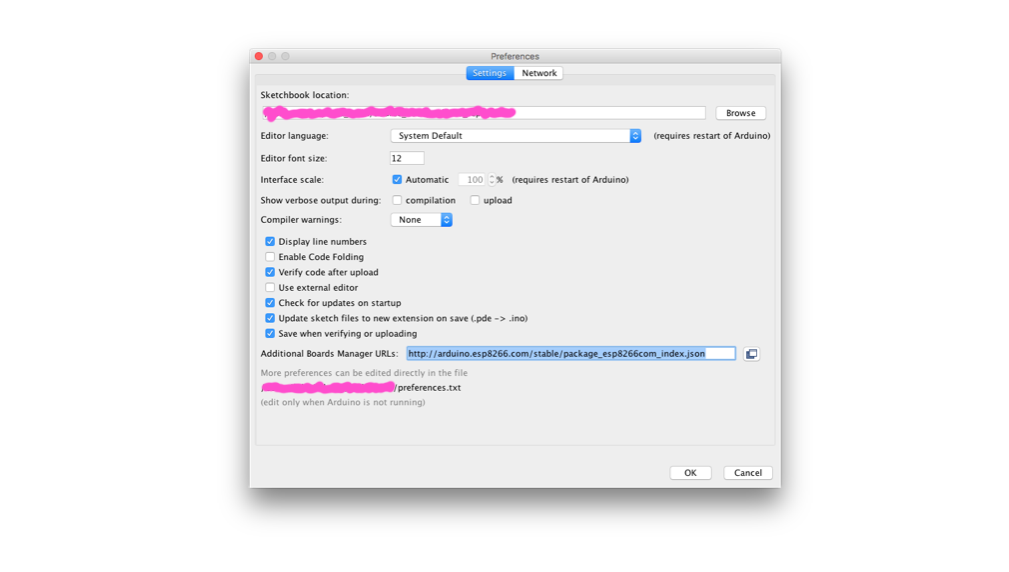
Arduino Settings for NodeMCU
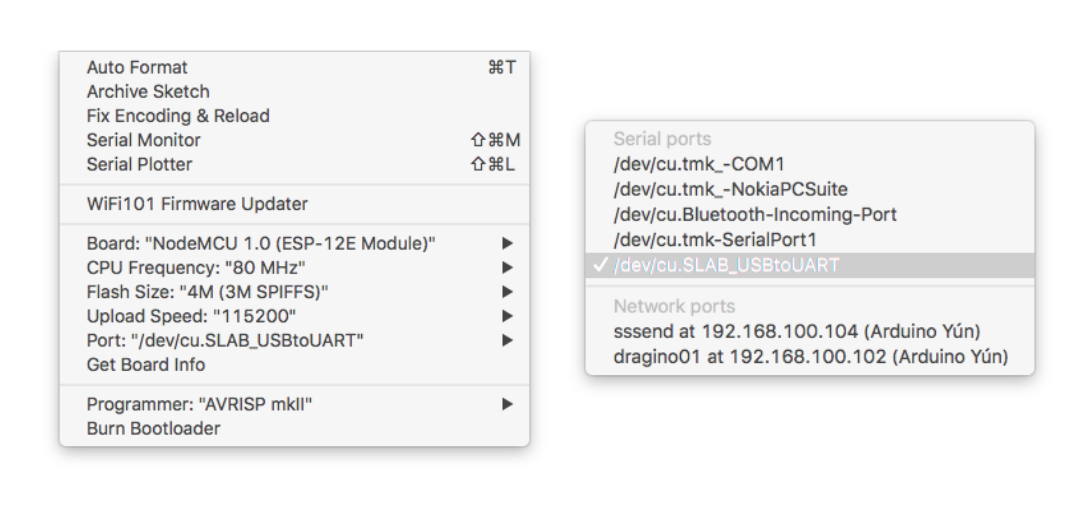
NodeMCU Pin Map

examples using the NodeMCU (ESP8622) as a local server to interact or display sensor data via basic html pages
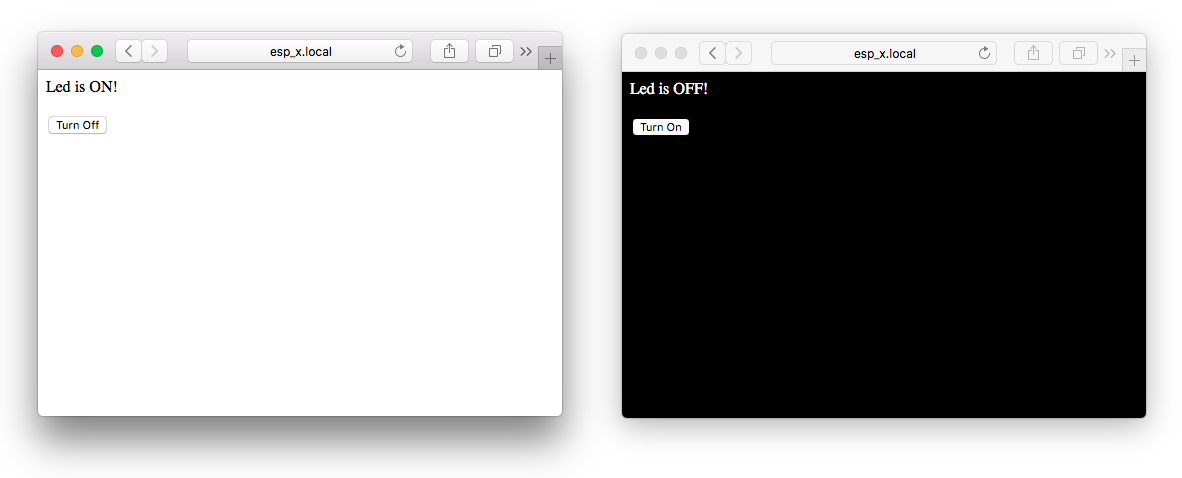
LED controlled by local Webpage (served by the ESP-Module itself)
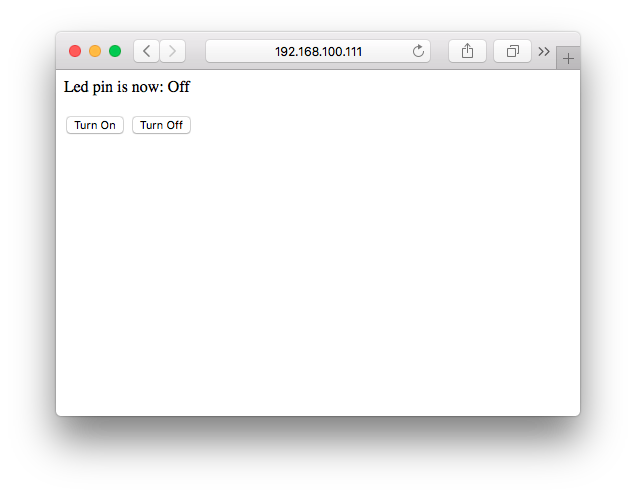
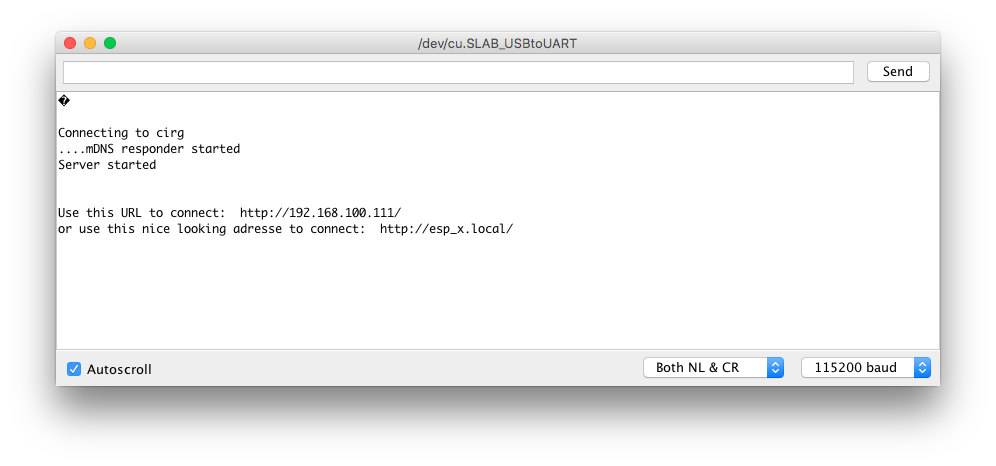
LED controlled by local Webpage (served by the ESP-Module itself) + create hostname using mDNS (Multicast DNS)
more advanced local web server running on the NodeMCU (ESP8266), still turning on the on-board LED, but the website looks better
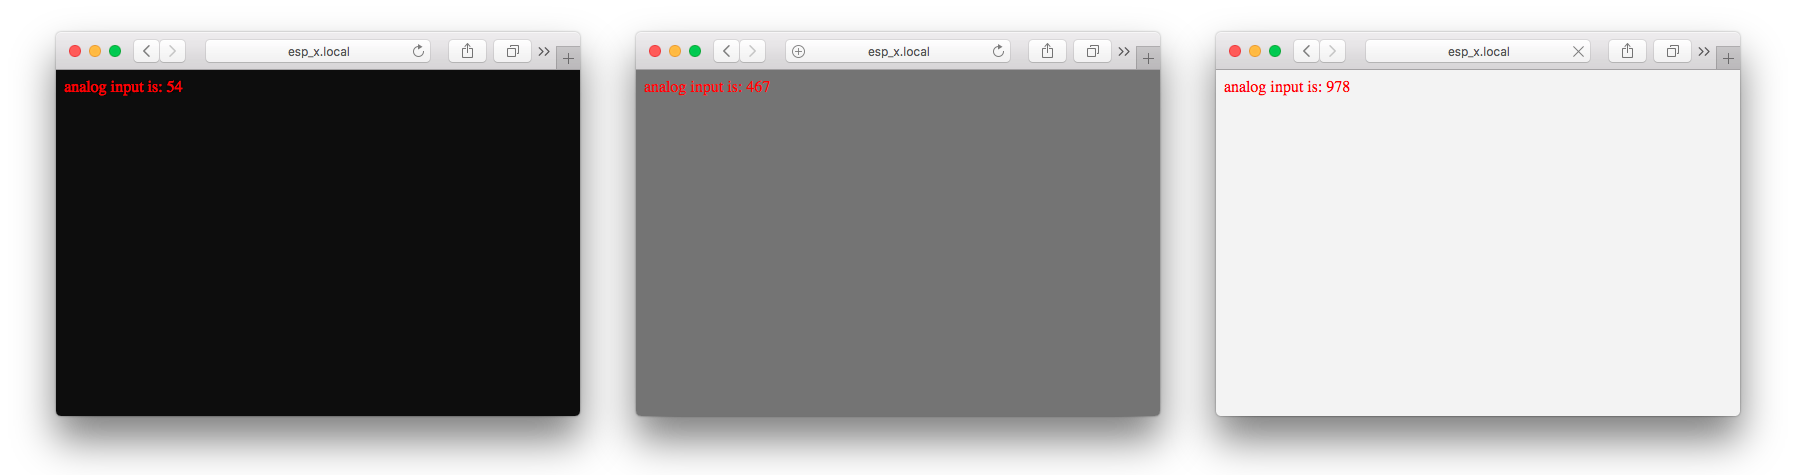
reading a light sensor (LDR) and displaying the value on a local Webpage (served by the ESP-Module it self).
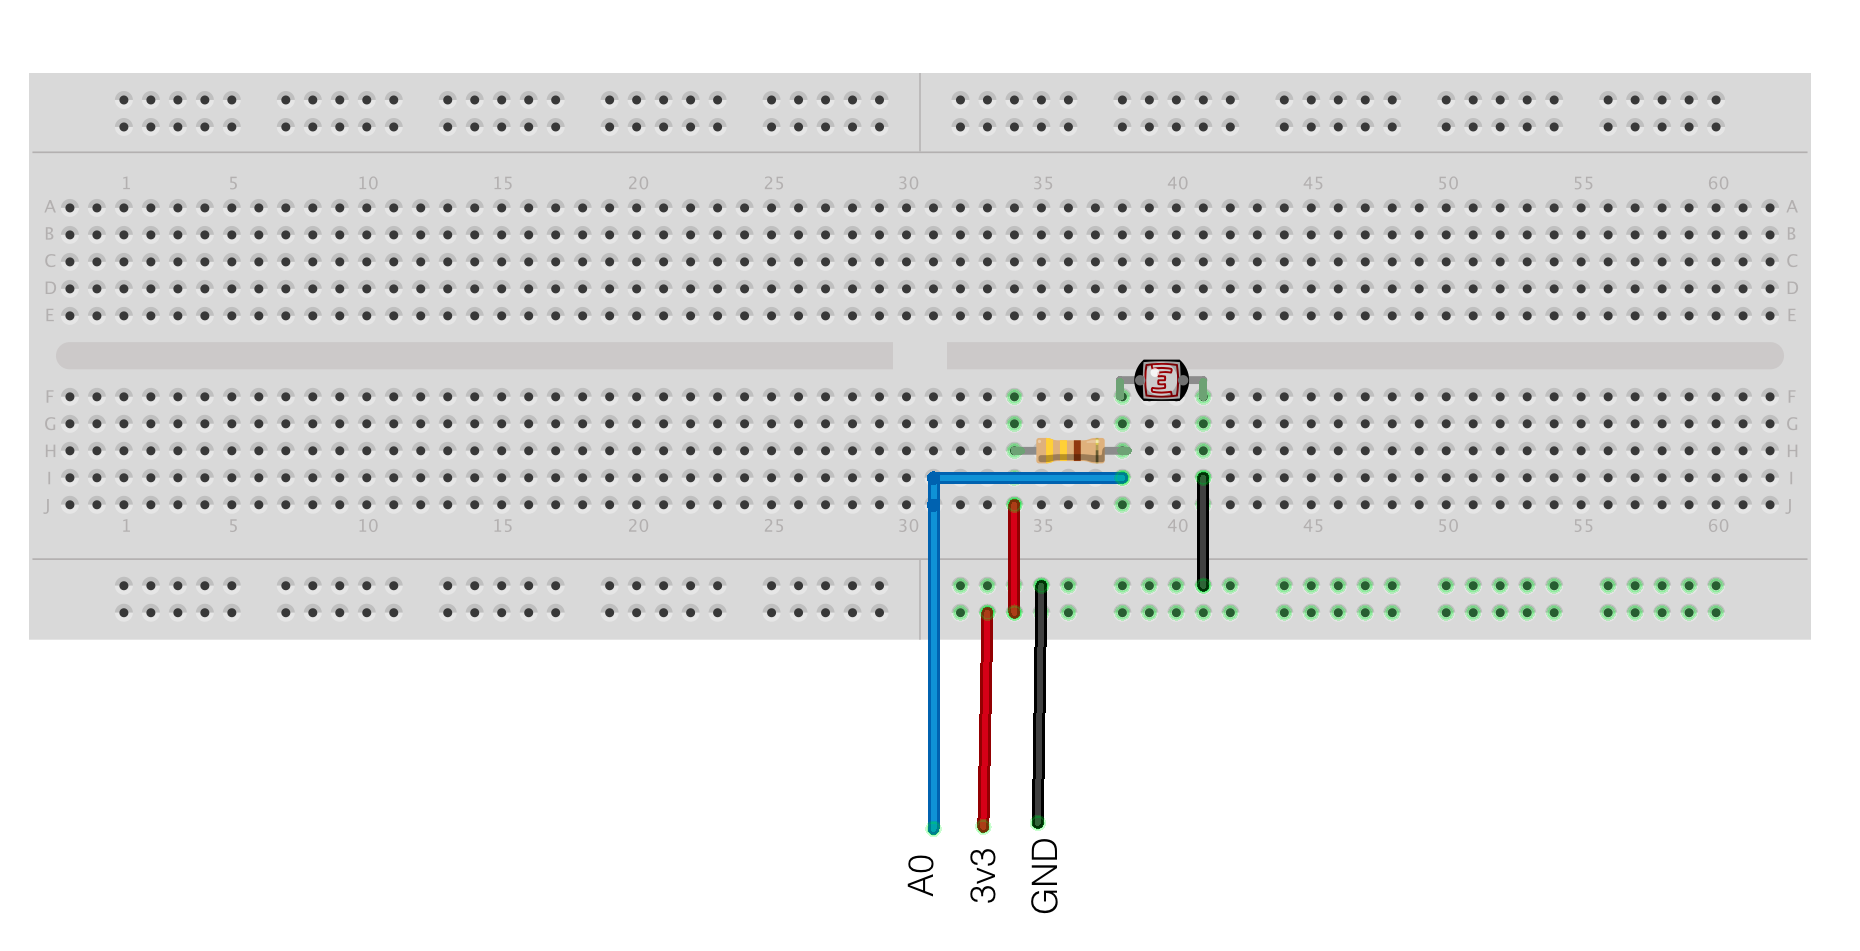
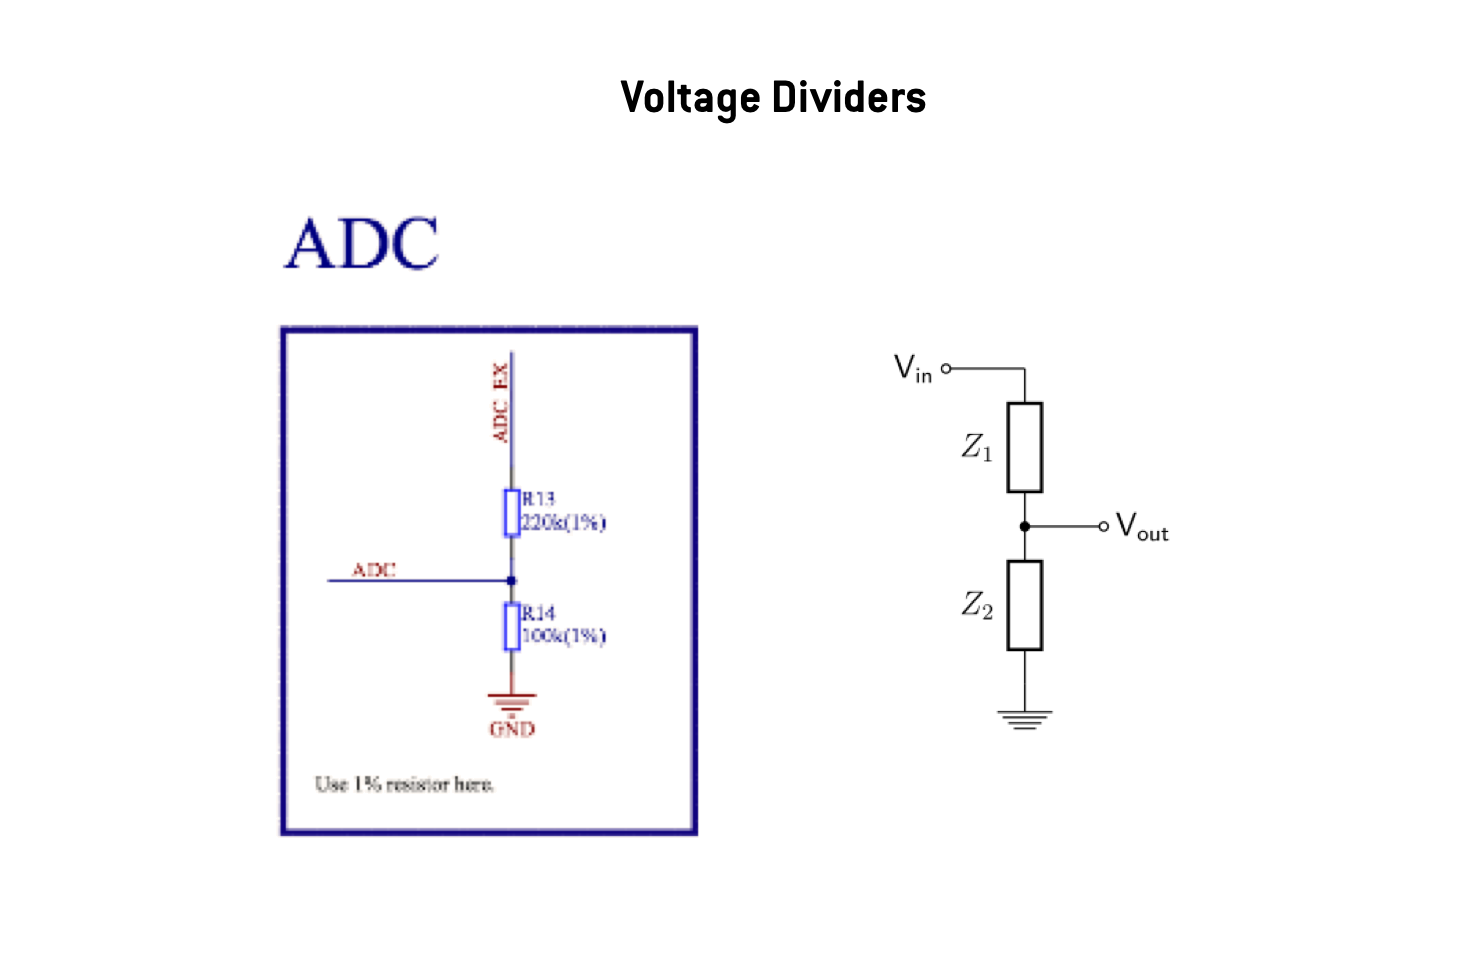
Be aware: Input voltage range of bare ESP8266 is 0—1.0V. The operating Voltage is 3.3V. Therefore the NodeMCU (v1.0) has a voltage-divider circuit at Pin A0. If you have a different Board-Setup please check if you need to add the voltage divider circuit to your setup.
EasyIotCloud https://easyiot-cloud.com/ is a free of charge IOT online plattform, offering an Arudino library to send and receive data tru an RestApi. EasyIOT-Could is very convenient for storing and displaying data, Remote controlling outputs,or being used as a bridge between an input and an output device.
Further tutorials and guidance can be found here: https://iot-playground.com/build
You can dowload the arduino library here: https://iot-playground.com/blog/2-uncategorised/67-arduino-esp8266-ide
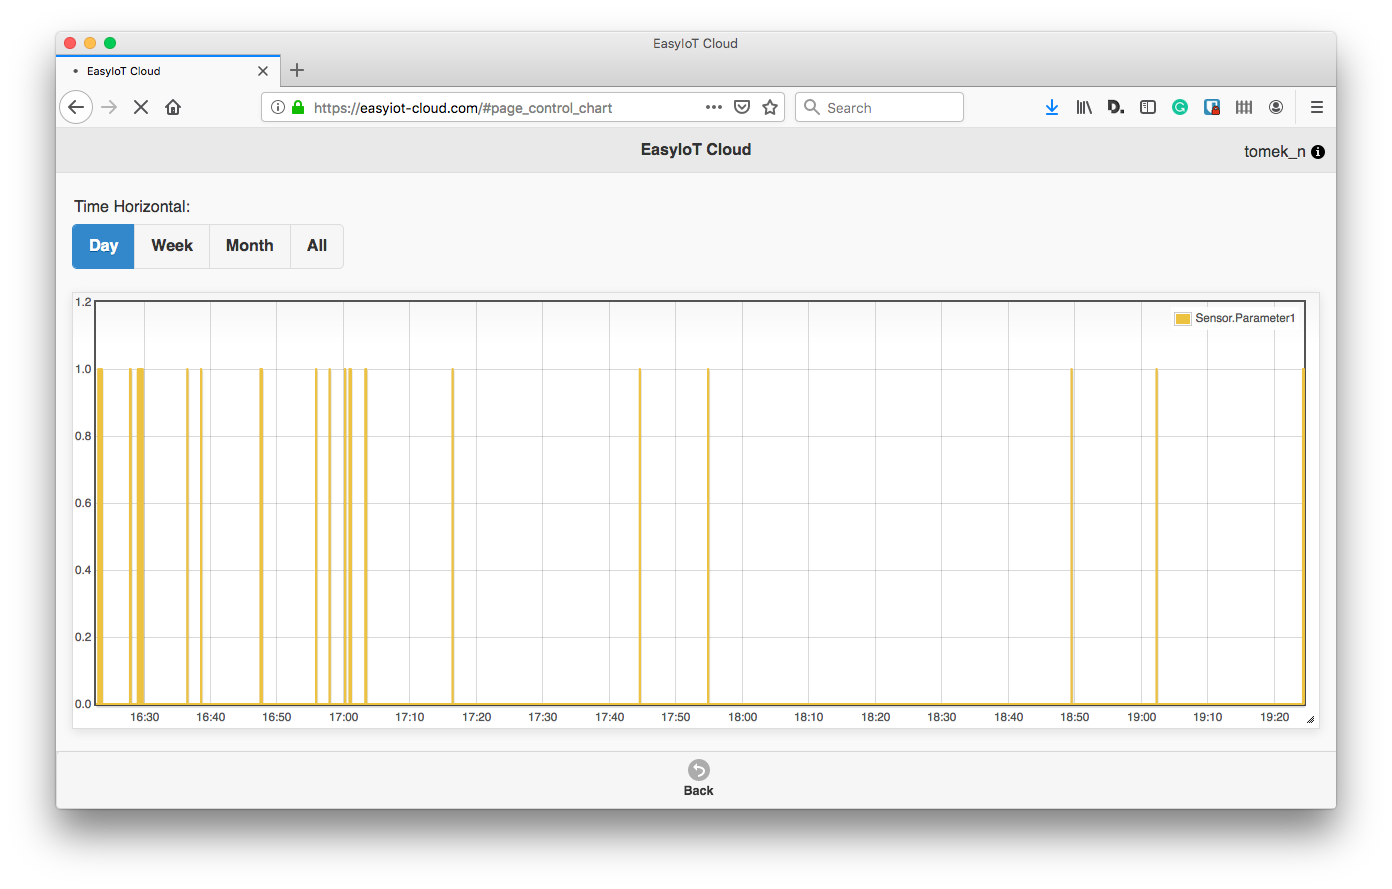
reading the onboard button input (D3 / GPIO 0) and sending »button pressed« to EasyIotCloud https://easyiot-cloud.com/
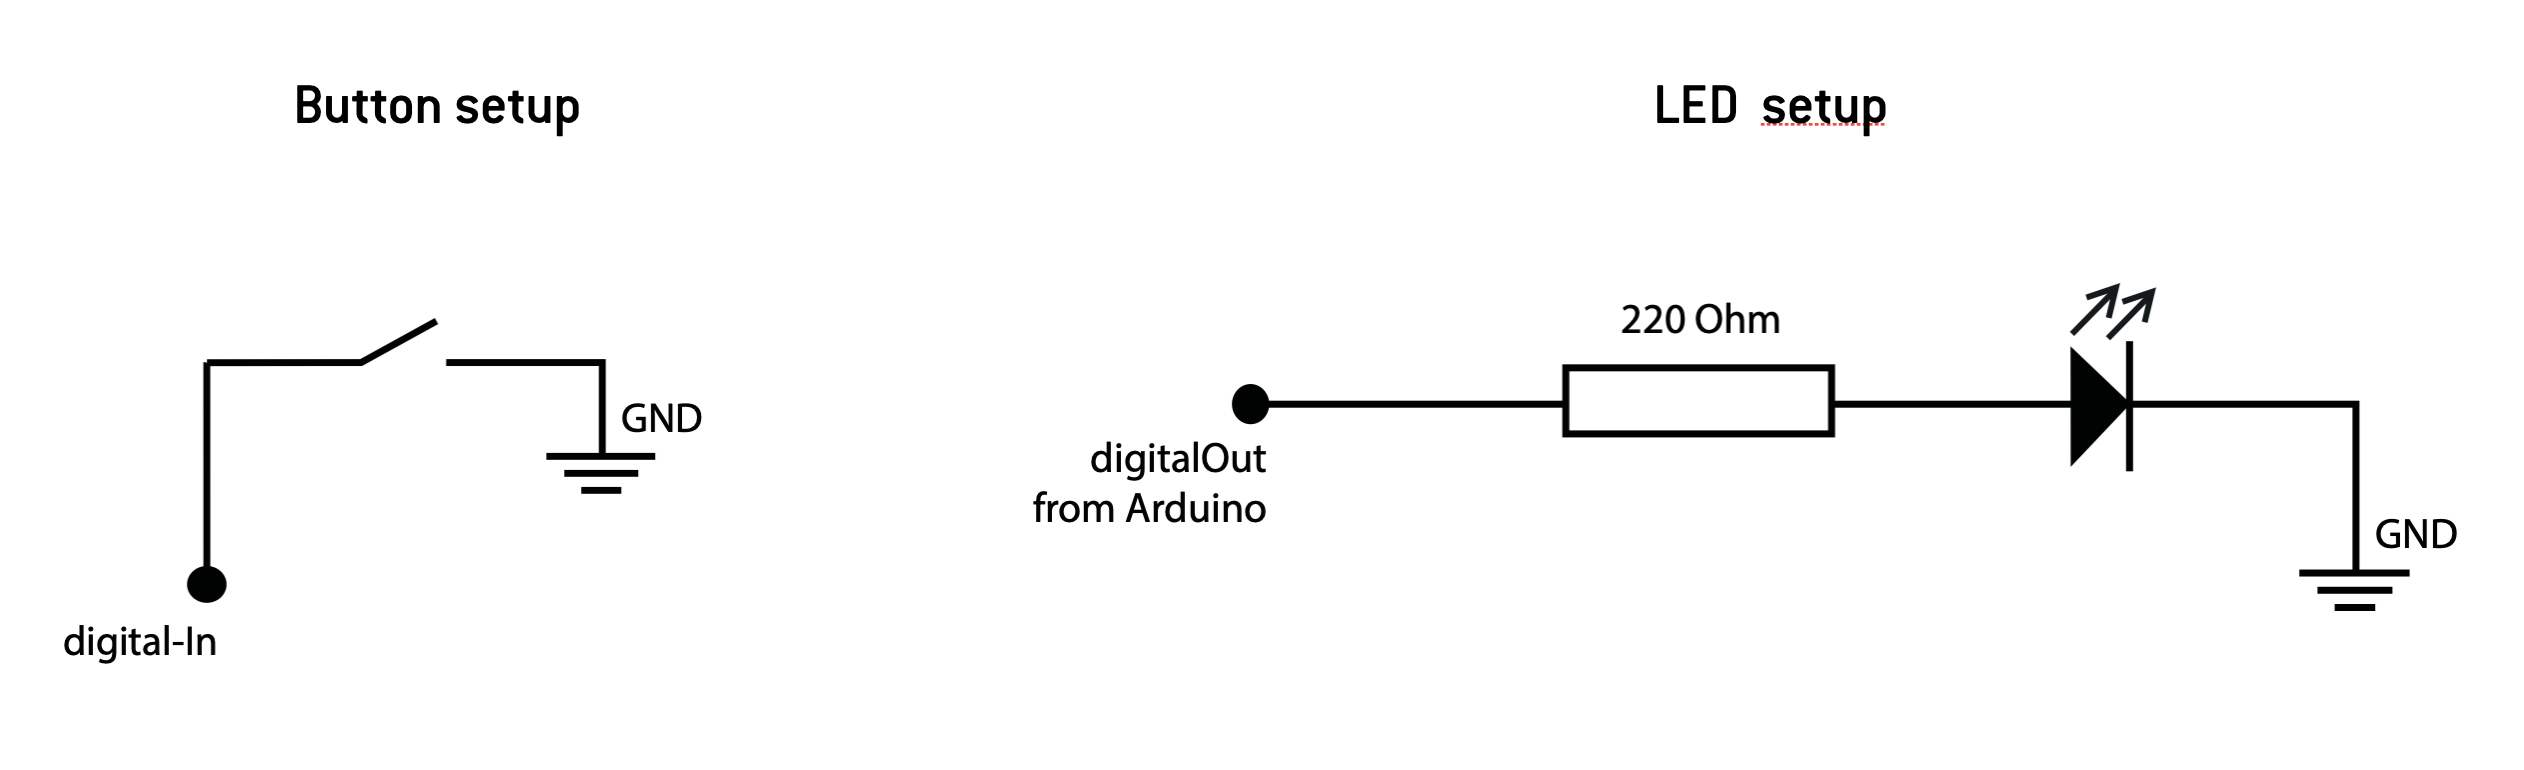
if you want to use an external button and led you can set it up as following:

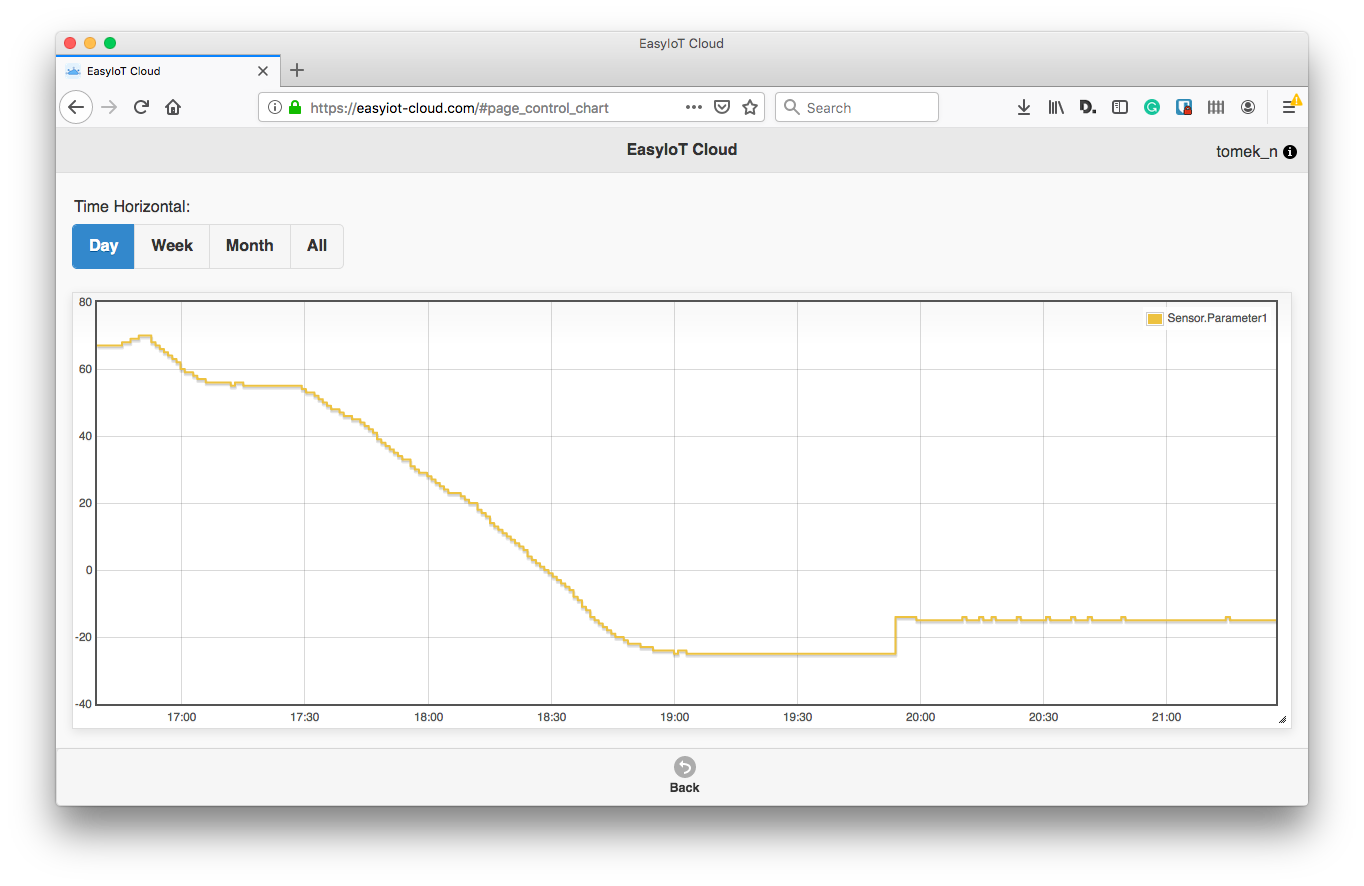
Sending value of the analogInput pin (ADC / A0) to EasyIotCloud https://easyiot-cloud.com/--> sending LDR sensor value to a web server
The examples are based on several different sources. Please see the individual example files for references.
Licensed under the GNU Lesser General Public License. See license.txt for further details.