-
Notifications
You must be signed in to change notification settings - Fork 377
Fully scalable HiDPI desktop
BetterDisplay gives you both HiDPI resolutions when it is unavailable and flexible scaling for your displays (so you are not constrained to the 3-6 default resolution option macOS typically offers by default).
Note
The article reflects app version v2.2.3 (some screenshots are from older versions)
Warning
Some of the features described in this entry require a Pro license.
Some Macs have issues with custom resolutions. Apple Silicon Macs notoriously don't allow sub-4K resolution displays to have HiDPI ("Retina") resolutions even though some 1440p display would greatly benefit from having a HiDPI "Retina" mode (Update: app version v1.4.6 or newer enables some HiDPI resolution by default on these displays on Ventura 13.2 or later without any special configuration). On other Macs the resolution options for wide displays are too constrained.
BetterDisplay solves the problem by unlocking your screens making them fully scalable natively while providing a nice HiDPI resolution slider to freely scale the desktop size. Also available is the option to create a flexible virtual screen that support an unprecedented range of Retina resolutions. You can then utilize this virtual screen as a mirror source for your display achieving any HiDPI resolution or for other purposes.
Note
"Flexible scaling" was called "native smooth scaling" in older BetterDisplay versions. The terminology was changed to clarify the nature of the feature.
To enable the flexible scaling feature:
- Start the app and open the app menu (locate the BetterDisplay icon in the menu bar).
- Open
Settings(the gear icon at the bottom of the menu). - Navigate to the
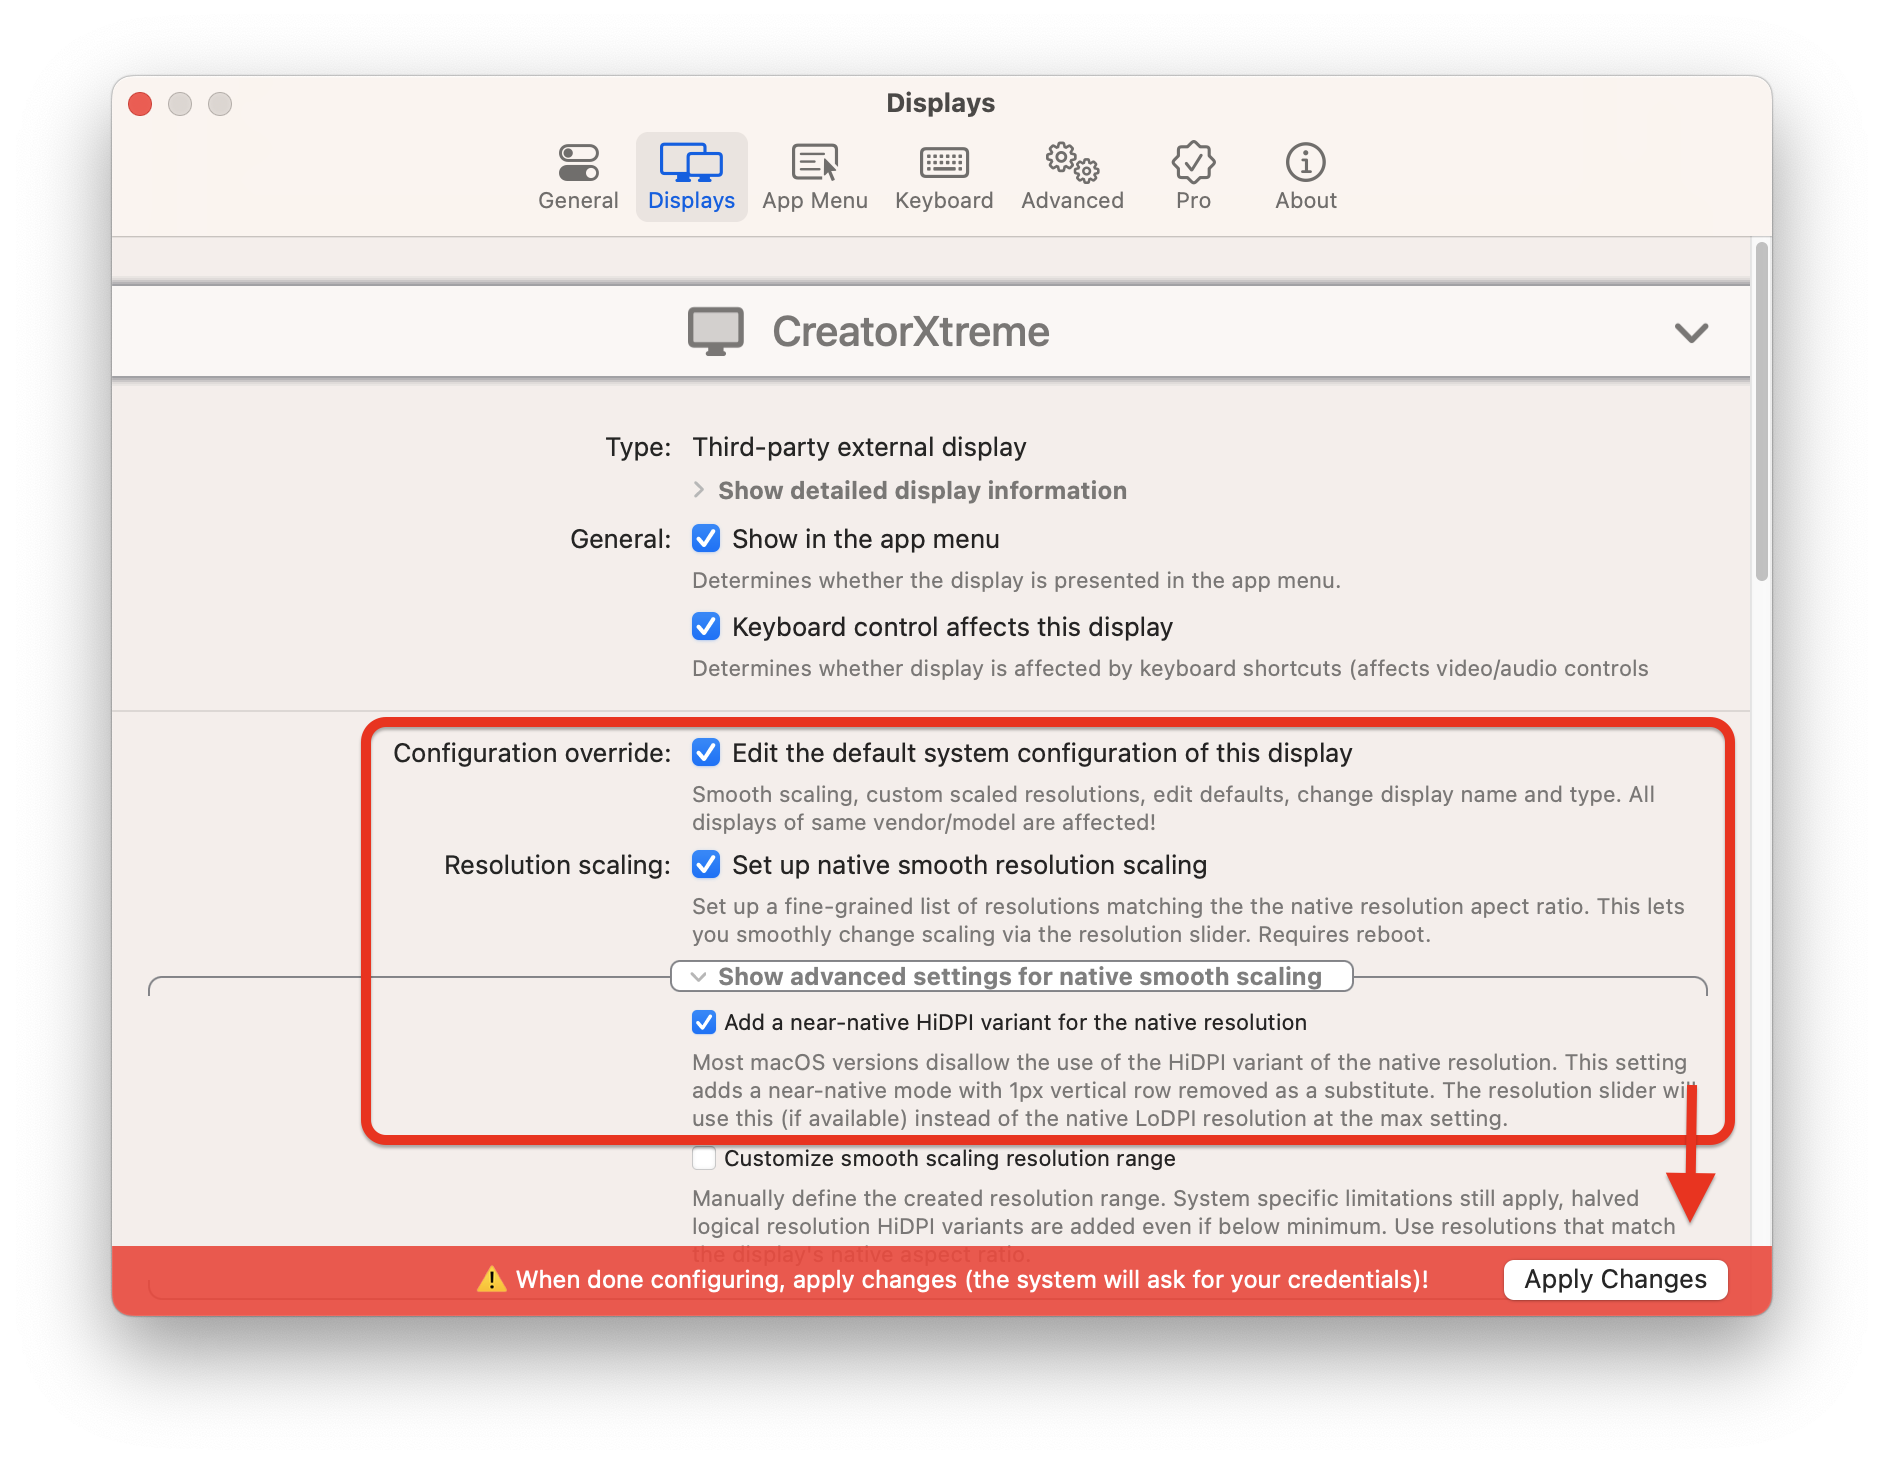
Displayssection and select the desired display, - Enable the
Edit the default system configuration of this display modelfeature under the display you want to make scalable, - Enable the
Enable flexible scalingoption just below it as it appears. - If you did this for all the relevant displays, click on the
Applybutton in the red area that appears when the changes are made. - Enter your administrator level credentials and then reboot.
- After reboot, use the resolution sliders in the app menu to scale the desktop.

The interface looks differently in older (v1.x) app versions

After setting the feature up, you should be able to flexibely scale the resolution like this:
scaling.mov
- The flexible scaling option can be enabled on a per display basis, so if you want more of your displays to have this feature, don't forget to scroll down in the app
Settings>Displaystab and make the setting for each of your displays! :) - The feature is compatible with macOS Monterey 12.4+, macOS Ventura and works on natively connected (USB-C, DisplayPort, HDMI) and built-in displays. The maximum allowed scaled (HiDPI) desktop size can't exceed the native display resolution. You'll also need the latest BetterDisplay version.
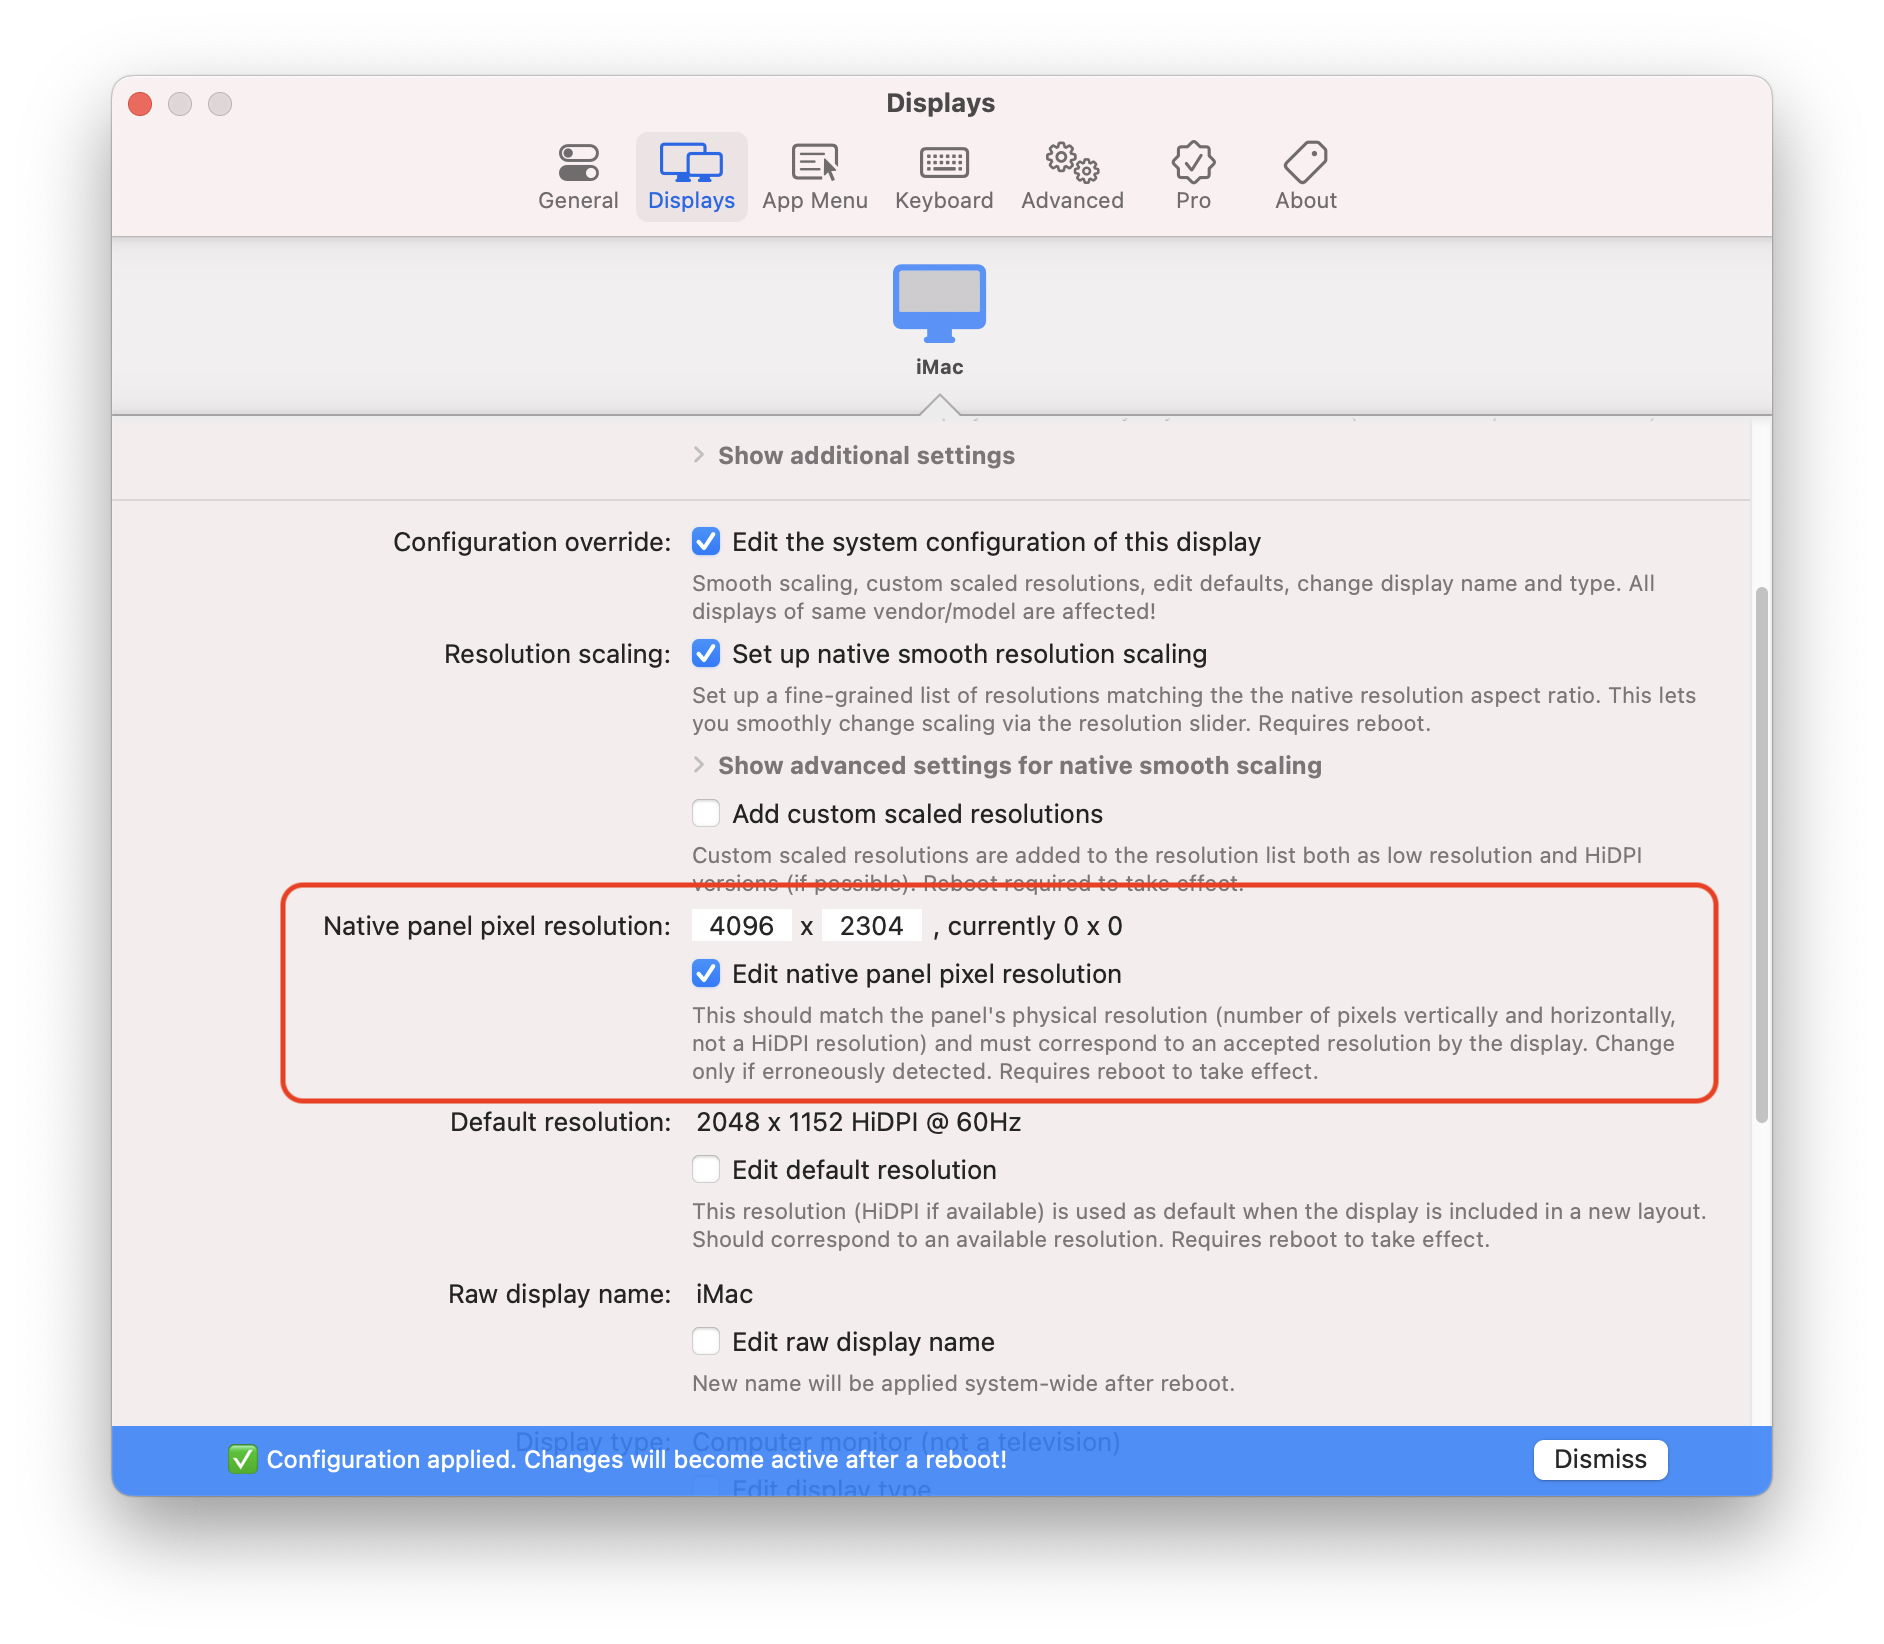
- The feature works if the system properly detects the
Native panel pixel resolution. If this is not correctly shown for your display underSettings>Displays, please select theEdit native panel pixel resolutionoption and enter the correct values! - The slider 100% will be the
Default resolution(on normally LoDPI display this tends to be the native resoltuion - which will mean the slider maxes out at 100%, on HiDPI display half of the native resolution - which will make the resolution slider max out at 200%). If you want to rescale the resolution slider, change theDefault resolutionto an accessible different resolution than it is set. - The maximum resolution that can be set for low PPI displays corresponds to the
Native panel pixel resolutionwhich is available only as normal resolution (not HiDPI). Converting the native resolution to HIDPI would not make sense (except for some special use cases like screenshot and accessibility zooming quality improvement) - for this or to achieve a higher-than-native-resolution scaling (for extra screen real estate) you can continue to use virtual screen mirroring. - The maximum horizontal pixel count is constrained on the entry-level M1/M2 configurations to 6K (meaning 6144px or 3072px HiDPI). On M1/M2 Pro/Max/Ultra the max horizontal pixel count is 8K (meaning 7680px, which translates to max 3840px horizontal HiDPI resolution). These limits might pose an issue to ultra-wide display users trying to go beyond a certain horizontal resolution.
- On some displays the native resolution is not reported properly by the OS. This causes issues with flexible scaling. In order to make the feature work, you need to manually set the native panel pixel resolution.

The interface looks differently in older (v1.x) app versions

Sadly macOS Sonoma has a serious bug that's not been fixed so far by Apple. Upon connecting a display or wake sometimes the custom display configuration is not loaded by the system.
- A partial fix was introduced in BetterDisplay v2.1.x - if you are on macOS Sonoma, please make sure you update to the latest BetterDisplay version.
Recommended way to deal with the issue when flexible scaling is used:
- If you are still experiencing the issue and use flexible scaling, you can enable the
Reinitialize external displays with flexible scaling enabled if neededfeature underSettings>Displays>Overview>Advanced displays settings. With this enabled, the app will check for flexible resolutions for displays where the feature is enabled and if it does not find them (which might indicate that the display configuration was not properly loaded), it will perform a reinitialization:

If you are not using flexible scaling but only added custom resolutions or performed other system configuration changes:
- You can manually reinitialize the displays to fix the issue as well when needed. This helps with custom resolutions as well (when you are not using flexible scaling).

- You can also assign a keyboard shortcut to reinitialization to simplify the manual process.

- If you regularly experience this issue with a display, you can configure reinitialization on wake or unlock under the
Additional settingssection of the display underSettings>Displays.

An alternative (for some scenarios the only valid) approach is to create a virtual screen and mirror or stream it to your real display in order to get custom resolutions. This works for Sidecar and other non-native devices (like DisplayLink) and also enables scaling beyond the native resolution of the display panel on Apple Silicon (for added screen real estate).
You should only this method only if flexible scaling does not work with your configuration as both virtual screen mirroring and streaming has some drawbacks.
Follow these steps to do this:
- Under
Settings>Displays>OverviewchooseCreate New Virtual Screen... - Select the
Match aspect ratio of and associate to a displayoption and choose eitherConfigure full screen stream to this displayorConfigure virtual screen mirroringdepending on whether you want to stream the contents of the virtual screen or mirror it to your real display.

In older (v1.x) app versions the procedure is different
For v1.x follow these steps:
- Start the app and locate the app menu (you'll see a BetterDisplay icon in the menu bar).
- In the app menu's Tools section locate the
Create New Dummyin older app versions). - Click on the
Create and Associate to...option at the bottom that matches your display. - Connect the created virtual screen and mirror it to the display.
Afterwards you should see your virtual screen streamed or mirrored to your display where you can use the slider to change the resolution quickly.
Please note that the virtual screen mirroring method is a workaround and have some drawbacks compared to flexible scaling - there might be sleep issues, color issues (flickering on some setups), mouse cursor related problems on Monterey 12.5 and beyond. Whenever possible, it is advised to use the flexible scaling method.
For some ultra-wide displays to get an ideal GUI size you need a horizontal resolution that goes beyond the maximum allowed width of 3840px HiDPI (8K framebuffer width) for the virtual screen when using mirroring or streaming (note: the maximum width limit is 3072px HiDPI for entry level Apple Silicon Macs - for Intel Macs it is model/GPU dependent). To achieve this, you need to enable the following setting:

Please note that some apps (mostly those that use Apple's Mac Catalyst technology, including some first party apps) might crash or not rendered properly when the framebuffer resolution exceeds 8K!
- Due to the finnicky nature of macOS display and mirror management, sometimes setting up the mirror fails or the mirror reverts to work 'the other way around' (namely instead of the virtual screen being mirrored to the display, the display is being mirrored to the virtual screen). In this case you should stop the mirroring (select
Mirror Target>Stop Mirroring) and reconfigure the mirror under the virtual screen in the display listMirror Target>Display Name. - Sometimes the created mirror might not be the main display (the display with the menu bar and the one where windows are located by default) or a created but invisible virtual screen becomes the main display which makes moving forward difficult. You can easily change any display or mirror set to be main by simply choosing
Settings>Set as mainunder the display in the app menu. - If you find that your new virtual screen or virtual screen mirror is not located where you actually want it to be relative to your other displays, you can easily move around a display using
Settings>Move Next to ...from the app menu. - You can configure both mirroring, main status, resolution and everything else in System Settings the old fashioned way as well. If you are not using Pro, you need to use System Settings to set up mirroring.
For a detailed explanation on how resolutions and resolution scaling works on macOS and why do some people have issues with text clarity, read this entry: