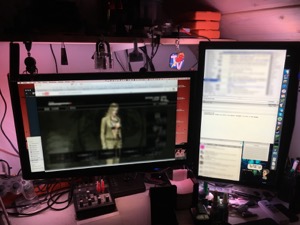
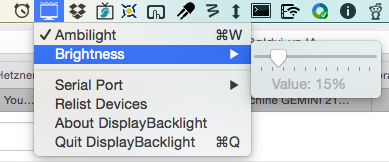
DisplayBacklight is an Ambilight-clone made with an Arduino controlled by a macOS machine.
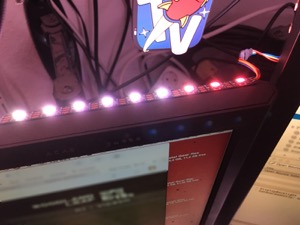
The software currently only supports driving RGB-LEDs with the colors from the edge of a screen, so you have to place an RGB LED strip on the outer edges of your computer monitors. Multiple screens are supported using a single LED strip for all of them.
You need an LED strip with individually addressable LEDs like the popular WS2812 RGB LED strips. The data line is connected to pin 2 of the Arduino. The Adafruit Neo-Pixel library is used to control the LEDs.
The color data is transmitted using the serial port and the USB-UART converter built into most Arduinos. Communication happens at 115200bps, the LED count is hardcoded in both firmware and host software. First, a magic string, also hardcoded, is sent, followed by 3 bytes containing Red, Green and Blue, for each LED. When the last byte has been received the whole strip is refreshed at once.
The macOS host software is opening the connection to the serial port, grabbing a screenshot, processing the edges to calculate each LED color and finally sending it to the device.
At first you must know LED, that you LED strip and Arduino work properly together. If that's confirmed you can step further.
Configure DisplayBacklight.ino:
- set your
LED_PIN 2 - and your LED count
# define LED_COUNT 156 - change your Chipset in
FastLED.addLeds<WS2812B, LED_PIN, RBG>(leds, LED_COUNT);Your models can be found here: https://github.com/FastLED/FastLED/#supported-led-chipsets - If you use RGBW-Leds you have to adpot your code a bit. But that's quite easy: https://github.com/sosiskus/FastLED-with-RGBW-leds
There is a script added to test the setup between Mac and Arduino:
Run ./serialHelper115200 FF 00 00 which should be red 00 FF 00 should be green and 00 00 FF should be blue.
You have to setup a few parameters for the MacOS app:
- Screen Sizes
- Your alignment and amount of LEDs
- you will find everything well documented it in the
AppDelegate
Depending on your type of Arduino you may have to change the /dev/cu.usbmodem******** in the AppDelegate file.
MacOS App set:
LED_COUNTsum of your LEDs (must correspond in Arduino)struct DisplayAssignment displayswhich monitors you are usingRETINA_DIVIDERif your RETINA_DIVIDER is not set correclty nothing will be output.(HowTo in Debug section)struct LEDStrand strands[]DISPLAY_DELAYAVERAGE_PIXEL_SKIP
To debug the MacOS app, there are different flags to enable:
enable DEBUG_TEXT or DEBUG_DATA
Enable DEBUG_SIZES to compare if your Screencapture size matches the screensize. Retina displays count pixel differently. it could be 2 or 3 times higher than the screenpixel. Adjust via RETINA_DIVIDER
Only if you had compared Arduino is working and you've setup correctly your AppDelegate you can
enable DEBUG_SIZES to save the screenshots in ~/Documents folder. CMD+i for screensize.
DisplayBacklight itself is made by Thomas Buck xythobuz@xythobuz.de and released under a BSD 2-Clause License. See the accompanying COPYING file.


