In this article, I will explain the basics of Wit.ai while walking you through the steps needed to set up a Wit.ai app and also show you how to integrate it with an Android App.
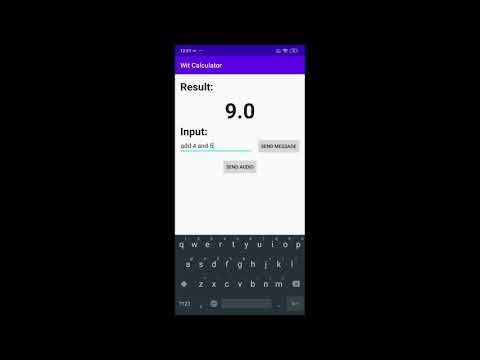
As building a project is one of the best ways to learn something new, we will make a simple conversational calculator which works with both text and audio inputs. (Click the image below to see the finished app)
Let's Start.
While I have tried to make the steps as descriptive as possible, you need to know a little bit about building an Android App and using Retrofit.
If you are new to Android development, don't worry you should be able to follow along. Just copy and paste the code snippets that I have shared and try to understand bit by bit. (I have also linked to source code of the finished project at the end of this article)
If you don't know Android development, you still read the first half of this article to know about Wit.ai and use any of the available client libraries (Node.js, Python, Ruby, Go) to make a client instead of making an Android App.
Wit.ai is a Natural language processing (NLP) Engine that can extract structured data from complex voice or text messages.
This allows us to build apps that can understand what the user is saying and take appropriate action.
We will start by first creating a Wit.ai App. To do this
- Go to Wit.ai and log in with your Facebook ID
- Click on New App Button
- Give your Application a name
- Click on Create Button

Intent represents the intention of the message. It is the action that the user wants to perform.
Wit.ai will parse the message we give to it and deliver us the intent.
Consider this example Say today is 4 October 2020 (Sunday) and you want to ask tomorrow's weather.
There are multiple ways you express this
- What's the weather tomorrow?
- What's the weather like on Monday?
- What's the weather on 5 October?
But the intent remains the same.
As we are building a calculator, there are 4 intents (or actions) we will support.
- add_num : To add 2 numbers
- sub_num : To subtract 2 numbers
- mul_num : To multiply 2 numbers
- div_num : To divide 2 numbers
Follow these steps for all Intents to add them to your Wit.ai Application
- Click on Intents under Management in the sidebar.
- Click on "+ Intent" Button
- Give the Intent a name
- Click Next button

Entity represents the data provided in the message. It is the data the user wants the action to be performed on.
Consider this example In the message "What is 47℉ in Celsius?", the intent is "convert to celsius" and the 47℉ is a temperature entity which we need to convert.
To make development easier, Wit.ai provides many built-in entities that cover most use cases. But in case there is no built-in entity that we can use, we can also create custom entities.
Remember whenever it's possible, use the built-in entities over your own custom entities to get better results.
For our calculator, we can use wit/number
Follow these steps to add an entity
- Click on Entities under Management in the sidebar.
- Click on "+ Entity" Button
- Select "Add built-in entity"
- Select the entities you want (wit/number in this case)
- Click Next button

Entity Roles help us differentiate multiple entities of the same type in a message.
Consider this example In the message "Find me a ticket from India to Canada", the intent is "find a ticket" and the India and Canada are location entities. But we can't tell which is the origin and which is the destination.
Entity roles are made to solve this problem.
For our calculator, when subtracting and dividing numbers the role of a number is important. (as 3-2 ≠ 2-3 and 3/2 ≠ 2/3)
To keep it simple, we will create two roles for numbers first and second, and do first - second when subtracting and first / second when dividing.
Follow these steps for both roles to add them to wit/number entity
- Click on Entities under Management in the sidebar
- Click on an entity to add a role to. (Here wit/number)
- Click Add a new role button
- Give the role a name
- Click on Save button
- Delete default roles

Now we need to train Wit.ai to understand our messages by giving it sample messages and labelling in them the intent and entities we create earlier.
Follow these steps to label and train a sample message
- Click on Understanding in the sidebar.
- Give a sample message in Utterance field
- Make sure the correct intent is selected. If not, select the correct one.
- Make sure the entities are selected. If not, highlight the entity that should be selected and select the correct option from the dropdown that is shown.
- Make sure the correct role is selected for an entity. If not, select the correct one.
- Click on Train and Validate button.

We only need to give a few examples for each intent but the more you give the better Wit.ai will understand your messages and extract the correct data from them.
Btw, you can also see the messages you have trained by clicking on Utterances under Management in the sidebar
We have now made our Wit.ai application and can start working on our Android App but before we do so. We need a Client Access Token so that our Android App can talk to our Wit.ai App.
Follow these steps to get a Client Access Token for your app
- Click on Settings under Management in the sidebar
- Generate a new Client Access Token or you can use an existing token if it is present
- Copy your Token
Store this token somewhere we will need it later
Alright, Let's start making our Android App. We will first make a new project. Follow these steps
- Open Android Studio
- Click on Start a new Android Studio Project
- Choose Empty Activity as a Template
- Click Next button
- Give your app a Name (I will call it Wit Calculator)
- Choose Kotlin as the Language
- Choose API 21 as the minimum SDK
- Click Finish Button

Unfortunately, there is no official Android SDK for Wit.ai but they do have a HTTP API which we can access with Retrofit.
To use Retrofit in our app we need to add the following dependencies to our app-level build.gradle file.
// use the latest version
implementation "com.squareup.retrofit2:retrofit:2.9.0"
Remember to click on Sync Now button after you make changes to your gradle file.

Retrofit uses OkHttp to make Http Requests which requires us to target Java 8. So to make sure everything works properly, just add the following lines to the app-level build.gradle file (same file as above).
android {
    // truncated

    // add this
    compileOptions {
        sourceCompatibility JavaVersion.VERSION_1_8
        targetCompatibility JavaVersion.VERSION_1_8
    }

    // and also this
    kotlinOptions {
        jvmTarget = "1.8"
    }
}

dependencies {
    // truncated
}Our app needs the following permissions so add them to your AndroidManifest.xml
    <uses-permission android:name="android.permission.INTERNET" />
    <uses-permission android:name="android.permission.RECORD_AUDIO"/>
android.permission.INTERNET is needed to talk to our Wit.ai App. android.permission.RECORD_AUDIO is needed to record voice messages which we will send to our Wit.ai App

While android.permission.INTERNET is a normal permission, android.permission.RECORD_AUDIO is marked as a dangerous permission because of privacy concerns so we will need to prompt the user at runtime to grant it.
To do this, we will define two functions checkPermissions() and requestPermissions(). They do exactly what their name suggests.
You should check for permissions in onCreate every time the app runs and if they are not granted or revoked, you must ask for them.
class MainActivity : AppCompatActivity() {
    override fun onCreate(savedInstanceState: Bundle?) {
     	/* truncated code */
        if (!checkPermissions()) requestPermissions()

    }

    private fun checkPermissions(): Boolean {
        val recordAudioResult = ContextCompat.checkSelfPermission(this, Manifest.permission.RECORD_AUDIO)
        val internetResult = ContextCompat.checkSelfPermission(this, Manifest.permission.INTERNET)

        return (recordAudioResult == PackageManager.PERMISSION_GRANTED && internetResult == PackageManager.PERMISSION_GRANTED)
    }

    private fun requestPermissions() {
        ActivityCompat.requestPermissions(
            this, arrayOf(
                Manifest.permission.INTERNET,
                Manifest.permission.RECORD_AUDIO
            ), 1000
        )
    }

}
You can read more about normal and dangerous permissions here
We will make this UI.

In this, we have:
- A TextView (result) to show result
- An EditText (textMessageInput) to get text messages
- A Button (sendTextMessageButton) to send the text message to Wit.ai
- A Button (sendAudioMessageButton) to capture audio and send it to Wit.ai
To make the UI, do the following steps:
Go to activity_main.xml and delete everything inside it. You can find it here.

Copy the code below and paste it inside your activity_main.xml file.
<?xml version="1.0" encoding="utf-8"?>
<androidx.constraintlayout.widget.ConstraintLayout xmlns:android="http://schemas.android.com/apk/res/android"
    xmlns:app="http://schemas.android.com/apk/res-auto"
    xmlns:tools="http://schemas.android.com/tools"
    android:layout_width="match_parent"
    android:layout_height="match_parent"
    tools:context=".MainActivity">

    <TextView
        android:id="@+id/result"
        style="@style/Widget.AppCompat.TextView"
        android:layout_width="wrap_content"
        android:layout_height="wrap_content"
        android:layout_marginTop="8dp"
        android:textColor="?android:attr/textColorPrimary"
        android:textSize="64dp"
        android:textStyle="bold"
        app:layout_constraintEnd_toEndOf="parent"
        app:layout_constraintLeft_toLeftOf="parent"
        app:layout_constraintStart_toStartOf="parent"
        app:layout_constraintTop_toBottomOf="@+id/textView"
        tools:text="100" />

    <EditText
        android:id="@+id/textMessageInput"
        android:layout_width="wrap_content"
        android:layout_height="wrap_content"
        android:ems="10"
        android:hint="Message to send"
        app:layout_constraintEnd_toStartOf="@+id/sendTextMessageButton"
        app:layout_constraintHorizontal_bias="0.5"
        app:layout_constraintHorizontal_chainStyle="spread"
        app:layout_constraintStart_toStartOf="parent"
        app:layout_constraintTop_toBottomOf="@+id/textView2" />

    <Button
        android:id="@+id/sendTextMessageButton"
        android:layout_width="wrap_content"
        android:layout_height="wrap_content"
        android:text="Send Message"
        app:layout_constraintBaseline_toBaselineOf="@+id/textMessageInput"
        app:layout_constraintEnd_toEndOf="parent"
        app:layout_constraintHorizontal_bias="0.5"
        app:layout_constraintStart_toEndOf="@+id/textMessageInput" />

    <Button
        android:id="@+id/sendAudioMessageButton"
        android:layout_width="wrap_content"
        android:layout_height="wrap_content"
        android:layout_marginTop="16dp"
        android:text="Send Audio"
        app:layout_constraintEnd_toEndOf="@+id/sendTextMessageButton"
        app:layout_constraintStart_toStartOf="@+id/textMessageInput"
        app:layout_constraintTop_toBottomOf="@+id/textMessageInput" />

    <TextView
        android:id="@+id/textView"
        android:layout_width="wrap_content"
        android:layout_height="wrap_content"
        android:layout_marginStart="16dp"
        android:layout_marginTop="16dp"
        android:text="Result:"
        android:textColor="?android:attr/textColorPrimary"
        android:textSize="30sp"
        android:textStyle="bold"
        app:layout_constraintStart_toStartOf="parent"
        app:layout_constraintTop_toTopOf="parent" />

    <TextView
        android:id="@+id/textView2"
        android:layout_width="wrap_content"
        android:layout_height="wrap_content"
        android:layout_marginStart="16dp"
        android:text="Input:"
        android:textColor="?android:attr/textColorPrimary"
        android:textSize="30sp"
        android:textStyle="bold"
        app:layout_constraintStart_toStartOf="parent"
        app:layout_constraintTop_toBottomOf="@+id/result" />

</androidx.constraintlayout.widget.ConstraintLayout>
This UI is pretty basic. You can customise it how you want or make something entirely different. Just remember to make changes to the Kotlin code below if needed.
We will first make an interface for Wit.ai network calls based on GET /message and POST /speech api endpoints.
Then with Retrofit Builder, we will create an object of the interface and use it to make API calls later.
Don't forget to initialize CLIENT_ACCESS_TOKEN with the client access token you got earlier.
class MainActivity : AppCompatActivity() {

    companion object {
        private const val CLIENT_ACCESS_TOKEN = "your client access token"
    }

    private lateinit var witInterface: WitInterface

    override fun onCreate(savedInstanceState: Bundle?) {
        /* truncated code */

        witInterface = with(Retrofit.Builder()) {
            baseUrl("https://api.wit.ai/")
            with(build()) {
                create(WitInterface::class.java)
            }
        }

    }

    /* truncated code */

    interface WitInterface {
        @Headers("Authorization: Bearer $CLIENT_ACCESS_TOKEN")
        @GET("/message")
        fun forTextMessage(
            @Query(value = "q") message: String,
            @Query(value = "v") version: String = "20200513"
        ): Call<ResponseBody>

        @Headers(
            "Authorization: Bearer $CLIENT_ACCESS_TOKEN",
            "Content-Type: audio/raw;encoding=signed-integer;bits=16;rate=8000;endian=little",
            "Transfer-encoding: chunked"
        )
        @POST("/speech")
        fun forAudioMessage(
            @Body body: RequestBody,
            @Query(value = "v") version: String = "20200513"
        ): Call<ResponseBody>
    }
}If you see the message signature of the two functions I defined in WitInterface, you will notice I have given a default value for the API version (20200513 to be clear) and I will show you how to handle the results from this API version.
If a newer version of the API is available when you are reading this tutorial and you are using that, you may need to make some changes in the code below as the response format may have been changed.
For API version 20200513, GET /message and POST /speech API endpoints return the same response object.
As it is common to both, I will first show you how to handle it and then how to make a request to either endpoint.
When you make an API call. You will get a response similar to this.
{
   "text":"6 x 10",
   "intents":[
      {
         "id":"340244130753464",
         "name":"mul_num",
         "confidence":0.5496
      }
   ],
   "entities":{
      "wit$number:second":[
         {
            "id":"1038457556583232",
            "name":"wit$number",
            "role":"second",
            "start":4,
            "end":6,
            "body":"10",
            "confidence":0.8573,
            "entities":[

            ],
            "type":"value",
            "value":10
         }
      ],
      "wit$number:first":[
         {
            "id":"379016550170424",
            "name":"wit$number",
            "role":"first",
            "start":0,
            "end":1,
            "body":"6",
            "confidence":0.8278,
            "entities":[

            ],
            "type":"value",
            "value":6
         }
      ]
   },
   "traits":{

   }
}
The Response has:
- text: Text message or the transcript of the audio message we sent. (Use it for debugging)
- intents: Array of intents sorted by decreasing order of confidence. Generally speaking, you should use the one with the highest value.
- entities: Object of entities. Each entity will contain an array of possible objects with their confidence. Notice that the roles we defined for wit/number appear as distinct entities
- traits: Object of traits. We are not using traits in this tutorial so just ignore it for now.
We need an object of a class that implements Callback<ResponseBody> when making an asynchronous HTTP call with Retrofit so implement Callback<ResponseBody> interface in MainActivity so that we can just pass a reference to MainActivity ( with this) whenever we need this object.
Now when we get a valid repsonse (in onResponse), we will get most confident first and second number (entities we defined earlier) and then depending on the most confident intent we will put the result of the calculation in result textView.
If we get an error, we will just log it.
class MainActivity : AppCompatActivity(), Callback<ResponseBody> {

    override fun onCreate(savedInstanceState: Bundle?) {
        /* truncated code */
    }

    /* truncated code */

    override fun onResponse(call: Call<ResponseBody>, response: Response<ResponseBody>) {
        if (response.body() == null) return
        val data = JSONObject(response.body()!!.string())

        try {
            // get most confident Intent
            val intent = data.getJSONArray("intents").mostConfident() ?: return

            // get most confident wit$number:first Entity
            val number1 = data.getJSONObject("entities")
                .getJSONArray("wit\$number:first").mostConfident()?.get("value")?.toString()
                ?.toDoubleOrNull() ?: return

            // get most confident wit$number:second Entity
            val number2 = data.getJSONObject("entities")
                .getJSONArray("wit\$number:second").mostConfident()?.get("value")?.toString()
                ?.toDoubleOrNull() ?: return

            // based on Intent set text in result TextView
            result.text = when (intent.getString("name")) {
                "add_num" -> number1 + number2
                "sub_num" -> number1 - number2
                "mul_num" -> number1 * number2
                "div_num" -> number1 / number2
                else -> ""
            }.toString()
        }
        catch (e:Exception){
            Log.e("OnResponse","Error getting Entities or Intent", e)
        }

    }

    // JSONArray Extension function to get most confident object
    private fun JSONArray.mostConfident(): JSONObject? {
        var confidentObject: JSONObject? = null
        var maxConfidence = 0.0
        for (i in 0 until length()) {
            try {
                val obj = getJSONObject(i)
                val currConfidence = obj.getDouble("confidence")
                if (currConfidence > maxConfidence) {
                    maxConfidence = currConfidence
                    confidentObject = obj
                }
            } catch (e: JSONException) {
                Log.e("MainActivity", "mostConfident: ", e)
            }
        }
        return confidentObject
    }

    // On failure just log it
    override fun onFailure(call: Call<ResponseBody>, t: Throwable) {
        Log.e("MainActivity", "API call failed")
    }

}Working with text messages is very simple.
Whenever sendTextMessageButton is pressed, we will get the text from textMessageInput and make an API call (Here we are making an asynchronous call with enqueue).
class MainActivity : AppCompatActivity(), Callback<ResponseBody> {

    /* truncated code */

    override fun onCreate(savedInstanceState: Bundle?) {
        /* truncated code */

        sendTextMessageButton.setOnClickListener {
            witInterface.forTextMessage(textMessageInput.text.toString()).enqueue(this)
        }

    }

    /* truncated code */
}
Wit.ai only accepts the following MIME types:
- audio/wav
- audio/mpeg3
- audio/ogg
- audio/ulaw
- audio/raw
We can send a file or stream the audio directly.
Here, I will only show you how to stream raw audio as we need realtime input.
We will use AudioRecord to read the audio from the mic and write it to RequestBody on a background thread
class MainActivity : AppCompatActivity(), Callback<ResponseBody> {

    companion object {
        private const val CLIENT_ACCESS_TOKEN = "your access token"
        private const val SAMPLE_RATE = 8000
        private const val CHANNEL: Int = AudioFormat.CHANNEL_IN_MONO
        private const val AUDIO_FORMAT: Int = AudioFormat.ENCODING_PCM_16BIT
        private val BUFFER_SIZE =
            AudioRecord.getMinBufferSize(SAMPLE_RATE, CHANNEL, AUDIO_FORMAT) * 10
    }

    private val streamRunnable = Runnable {
        val buffer = ByteBuffer.allocateDirect(BUFFER_SIZE)
        val requestBody: RequestBody = object : RequestBody() {
            override fun contentType(): MediaType? {
                return MediaType.parse("audio/raw;encoding=signed-integer;bits=16;rate=8000;endian=little")
            }

            override fun writeTo(bufferedSink: BufferedSink) {
                while (isRecording.get()) {
                    val result = recorder!!.read(buffer, BUFFER_SIZE)
                    if (result < 0) {
                        throw RuntimeException("Reading of audio buffer failed")
                    }
                    bufferedSink.write(buffer)
                    buffer.clear()
                }
            }
        }
        witInterface.forAudioMessage(requestBody).enqueue(this)

    }

    private var isRecording = AtomicBoolean(false)
    private var recorder: AudioRecord? = null

    /* truncated code */

    override fun onCreate(savedInstanceState: Bundle?) {

	/* truncated code */

        sendAudioMessageButton.setOnClickListener {
            if (isRecording.get()) {
                sendAudioMessageButton.text = "Send Audio"
                isRecording.set(false)
                recorder!!.stop()
                recorder!!.release()
                recorder = null
            } else {
                sendAudioMessageButton.text = "Stop Recording"
                isRecording.set(true)
                recorder = AudioRecord(
                    MediaRecorder.AudioSource.MIC,
                    SAMPLE_RATE,
                    CHANNEL,
                    AUDIO_FORMAT,
                    BUFFER_SIZE
                )
                recorder!!.startRecording()
                Thread(streamRunnable).start()
            }
        }

    }
	/* truncated code */
}We have now completed this project. I hope you now have a working knowledge about how Wit.ai works and how to integrate it with your Android App.
Before you go, I would like to suggest you read the recepies on the Wit.ai to get to know more about Wit's capabilities and also to check out the sample android project given by the Wit.ai team on which this tutorial was based.
Android Project: You can find the complete project here. I have added more comments to it so do have a look if you are having trouble understanding the code.