For the tutorial, we will be adding 2 new components to the project:
- Stripe: a service for monetization, product and subscription management, and billing.
- Supa-API site: a simple web app where users can sign in and subscribe to the API.
This is in addition to the existing:
- Supabase: the database and auth for the client app and the documentation
- Zuplo: the API Gateway to which your Supabase data is exposed and secured
The type of billing we have created for this tutorial follows a "Pay-as-you-go" model of 0.01$/request (you can be less generous), which charges customers based only on the number of requests they've made, no more and no less. This is a pretty flexible billing type that most APIs (like OpenAI's) use and allows users to not pay much when their use is small, but then scale their usage (and billing) of your API progressively over time.
The billing model is just an example though, and you can build any billing model (monthly fixed number of requests or time-based rate limits to name a few), following the same principles as this sample.
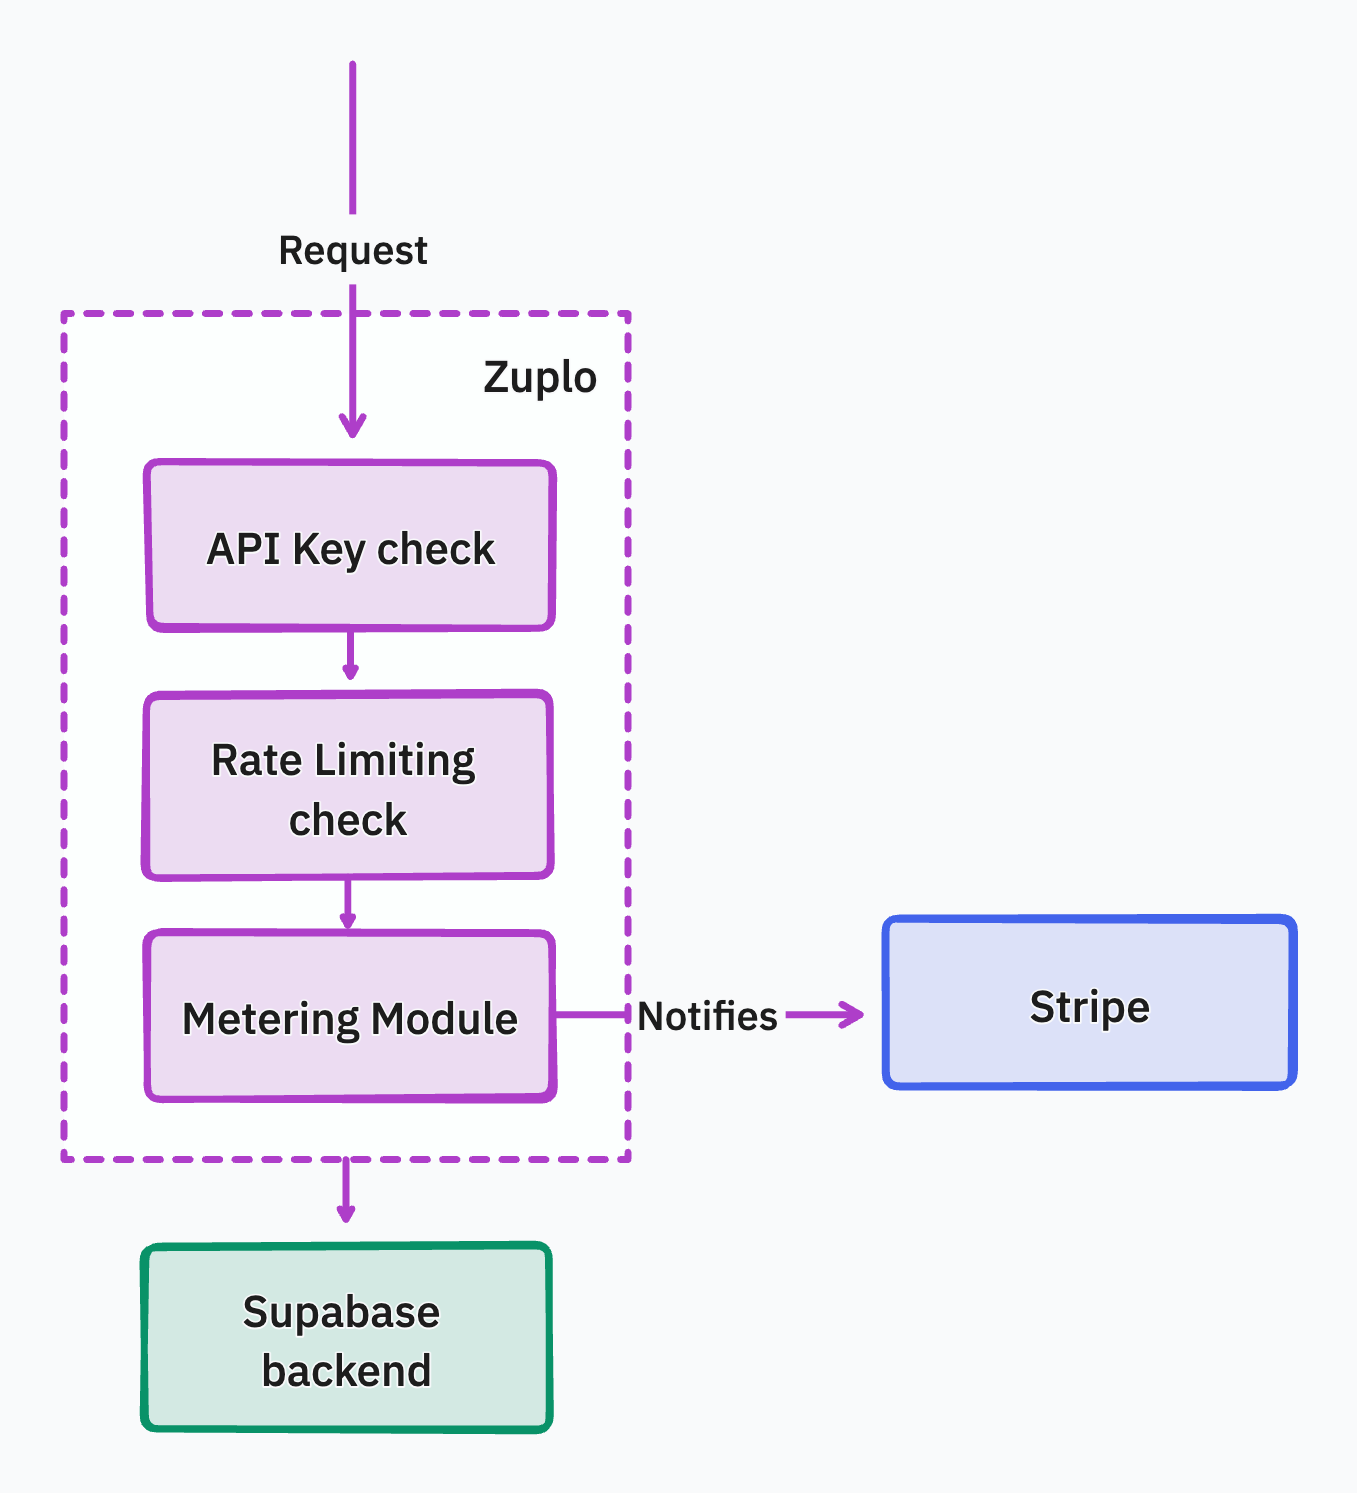
The life of a request coming to your API will be like the following diagram below, where you can see that Zuplo reports to Stripe how many requests your API's subscribers have made.
At the end of the billing period, Stripe will calculate the number of requests the subscriber has made for the month and will send them an invoice with the total amount.
1. Create a Stripe account
You'll need a Stripe account to accept payments. You can create one here.
2. Create a metered product in Stripe
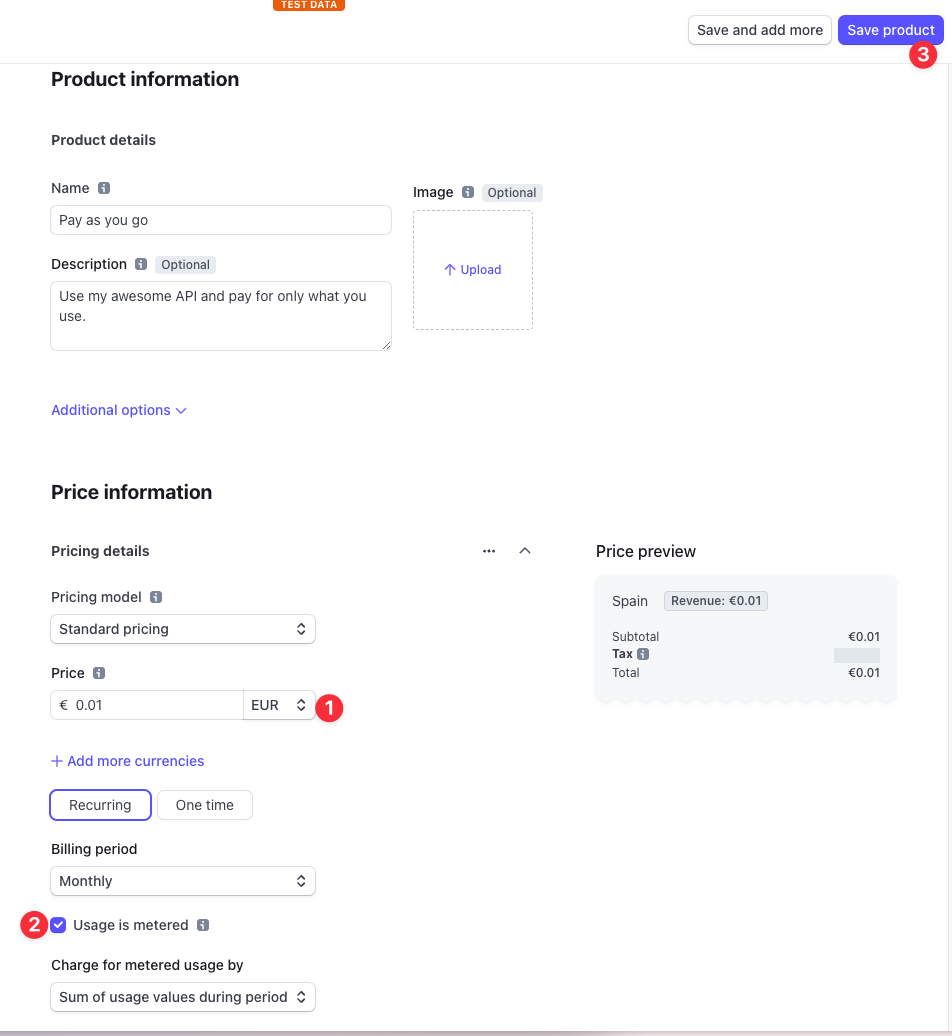
To enable metered billing so that you can charge users based on their API usage, you'll need to create a metered product in Stripe.
Ensuring you are in Test mode (you'll see a toggle at the top right of the console), go to Products and click Add a product.
Now create a product with the following details:
For the purposes of this demo, we'll be using the SupaAPI as our API which will be monetized.
It exposes one endpoint /v1/blogs which can either POST to create a new blogpost using OpenAI, or GET to retrieve a list of blogposts.
Click the button below to deploy the API to Zuplo:

Remember to set the environment variables in Settings > Environment Variables with the same values from your previous project:
-
OPENAI_API_KEY: Your OpenAPI API Key which you can get from the OpenAI account dashboard. -
STRIPE_SECRET_KEY: This key is your Stripe Secret Key. You can get this in Stripe dashboard by clicking on Developers > API Keys. Again, be sure you're in test mode. -
SUPABASE_URL: in Supabase, go to the Settings > API tab and copy the URL. -
SUPABASE_SERVICE_ROLE_KEY: from the same page, copy the Service Role Key.
You will deploy and configure the web app with environment variables and the Stripe subscription table, for that, deploy the web app (you can check the repository here) using Vercel.
-
STRIPE_SECRET_KEY: This key is the Stripe Secret Key that you got in step 1. -
NEXT_PUBLIC_SUPABASE_URL: in Supabase, go to the Settings > API tab and copy the URL. -
NEXT_PUBLIC_SUPABASE_ANON_KEY: from the same page, copy the anon key. -
NEXT_PUBLIC_ZUPLO_API_URL: in Zuplo, go to the Settings > Project Information tab and copy the URL. -
ZUPLO_BUCKET_URL: from the same page, copy the API Key Bucket URL. -
ZUPLO_API_KEY: in Zuplo, go to the Settings > Zuplo API Keys tab and copy the available key.
Once deployed, take note of the deployment URL as you'll need it in the next step.
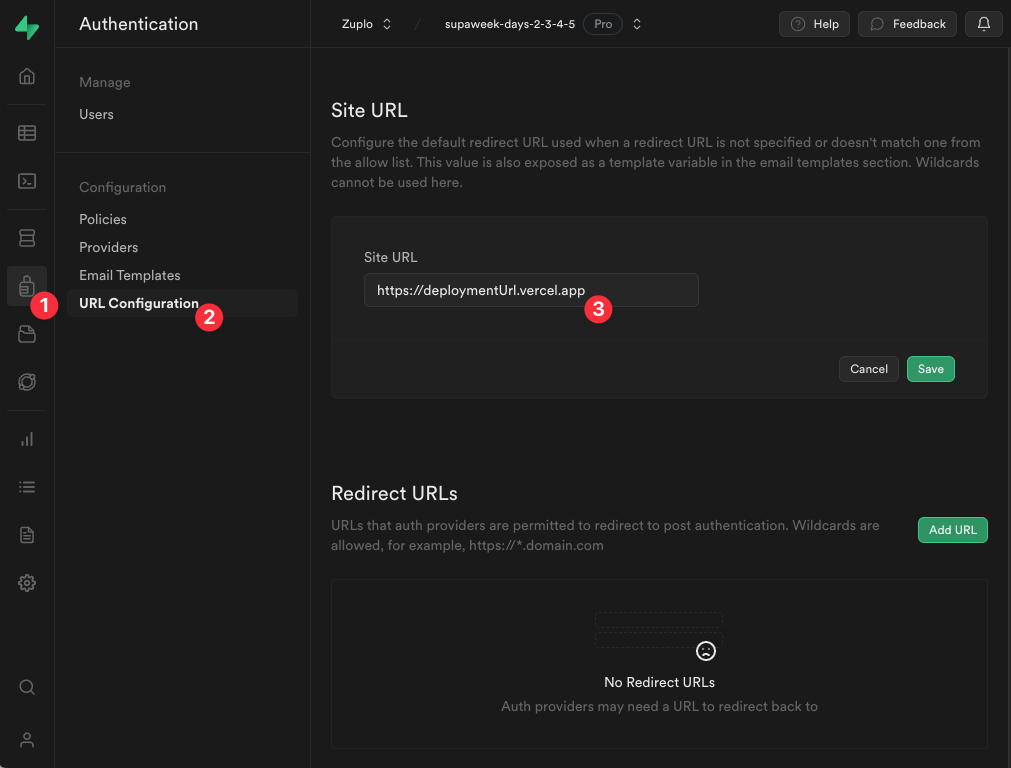
Now that the frontend app is deployed, you'll need to configure Supabase Auth to enable redirects to your web app when users sign up or sign in.
Go to Authentication > URL Configuration and add the URL of your Vercel deployment to the Site URL field.
Copy the URL of your Vercel deployment and open it in your browser, sign up to the website, which will then prompt you to subscribe to the API. This will take you through Stripe's payment page to add your credit card details (for the demo, you can use Stripe's test cards).
Once you're done, you will automatically be redirected back to the website, and
an API Key Consumer will be created programmatically using the Zuplo API, you
can check how it works here
here.
This will also add the stripeCustomerId to the metadata of the API Key
Consumer, which will be used by the billing module from the previous step.
You will then use your API's Developer Portal to login with your account and use your API Key to make authenticated requests to the API.
That quick!


