This repository introduces a simple Cyphal application written for the UAV Lights node. Based on this project you can write your custom application if the original application doesn't suit your requirements.
| View | Top view | Bot view |
|---|---|---|
 |
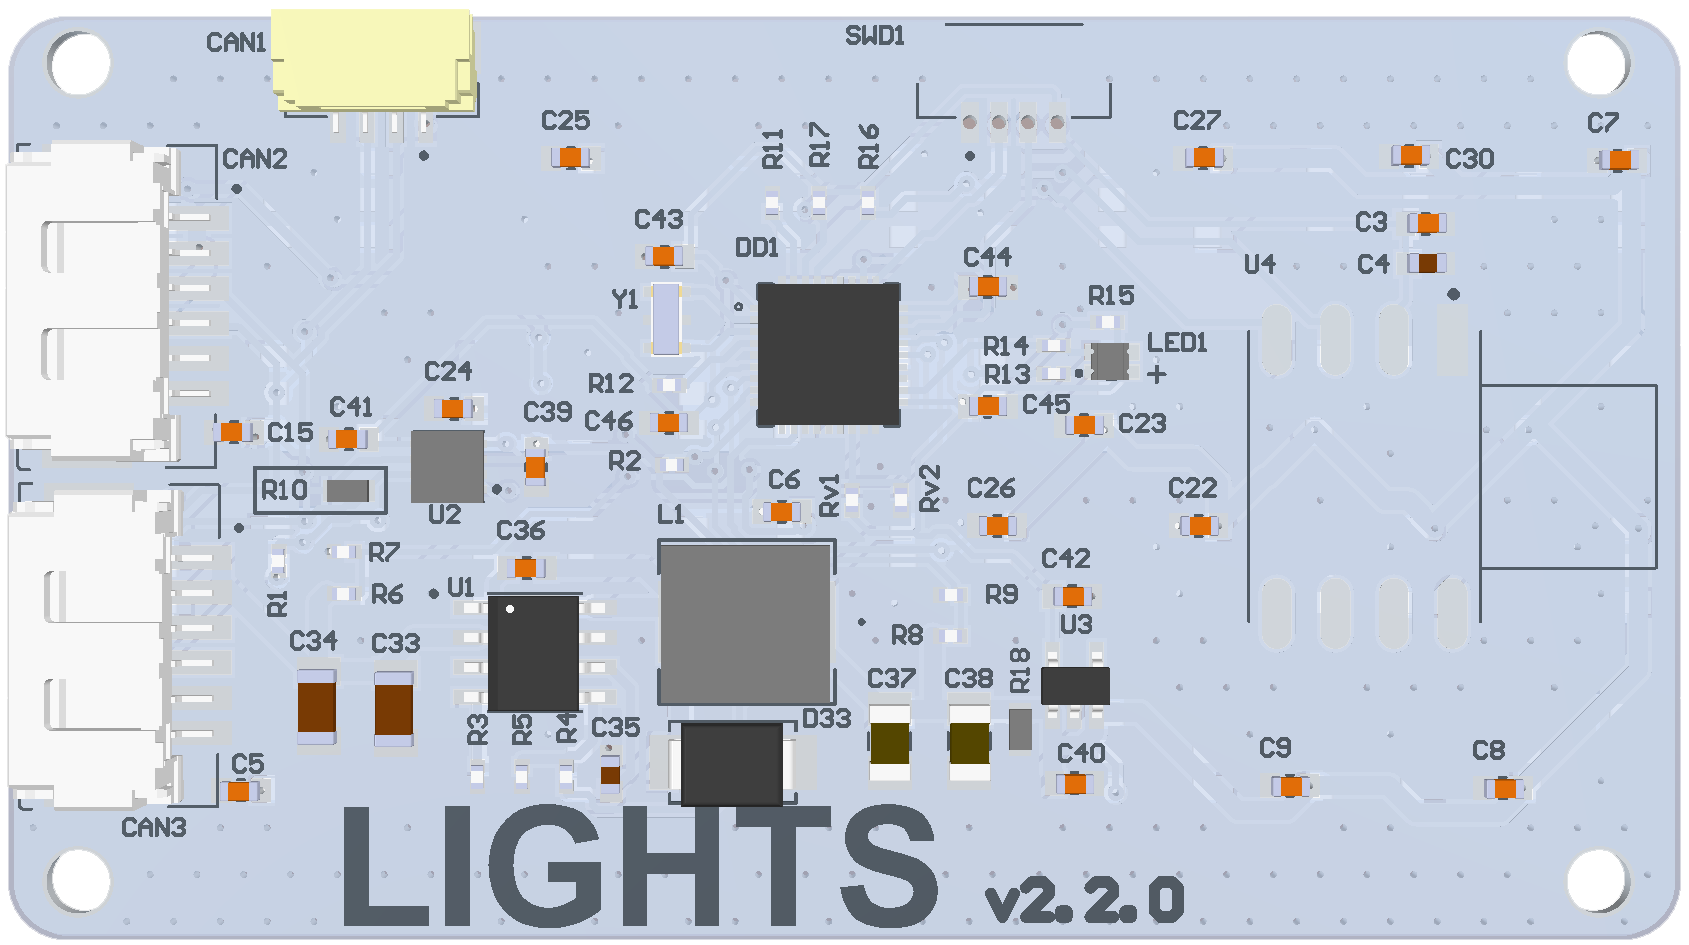 |
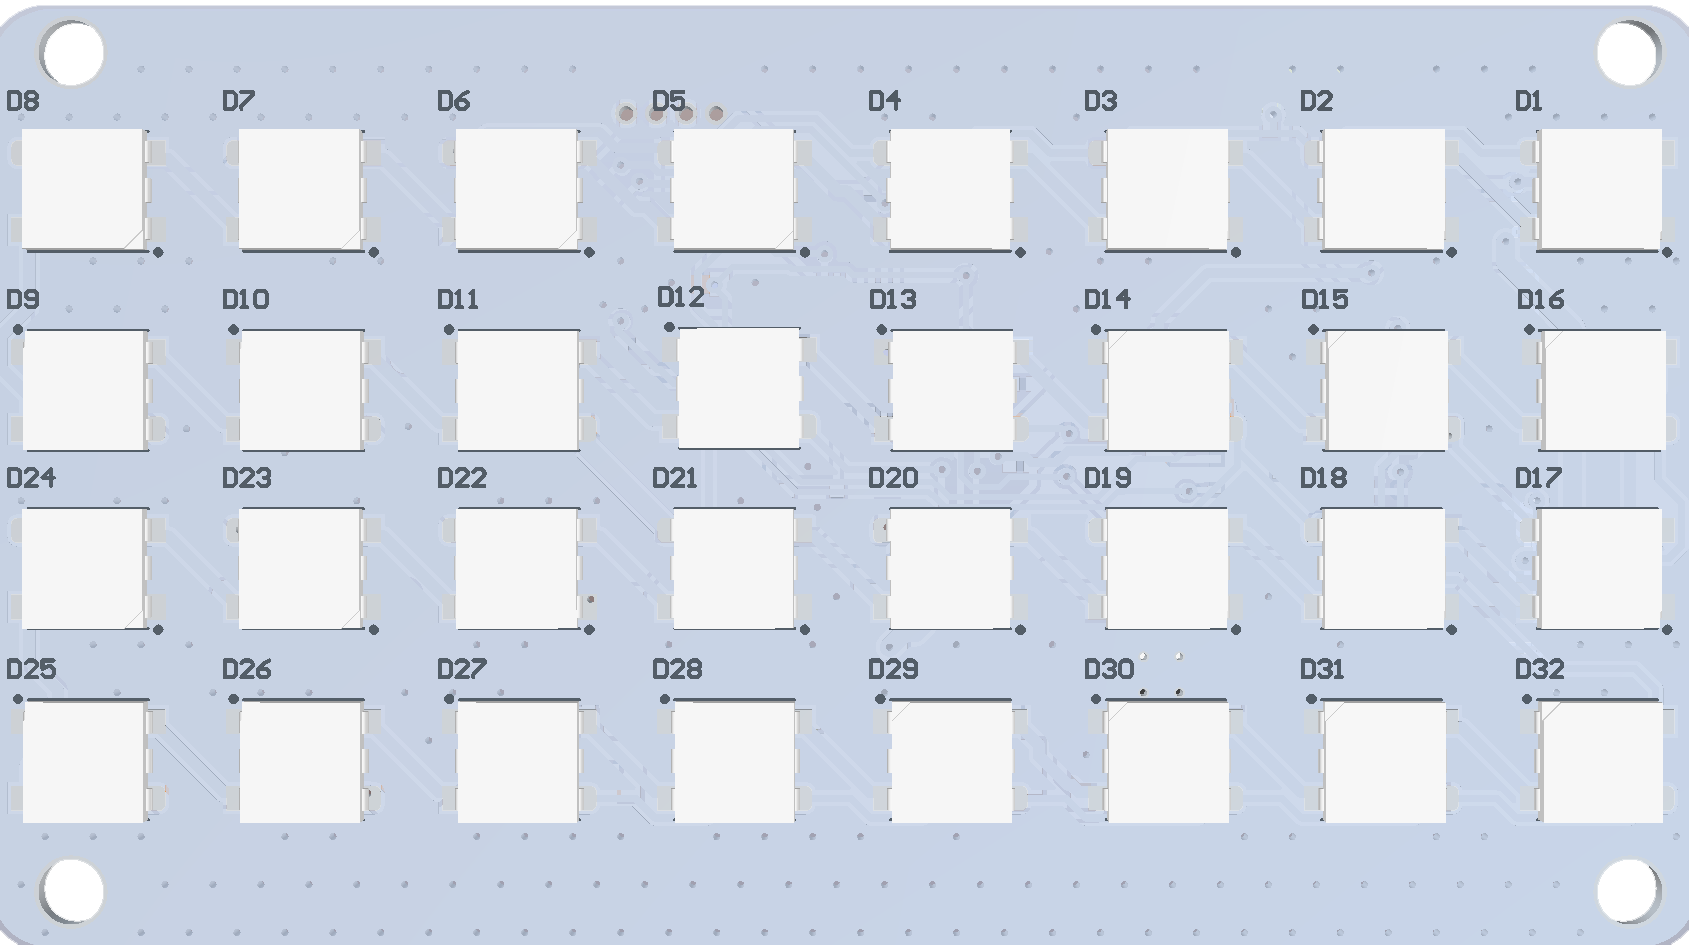 |
The default capabilities of the node are shown on the picture below:


The node has 6 user pins. By default 4 of them are configured as PWM and 2 of them as UART RX, but you can change the configuration to support I2C, ADC, GPIO or something else.
Please, refer to the UAV Lights hardware page for the details.
Below you can see a brief description of hardware capabilities:
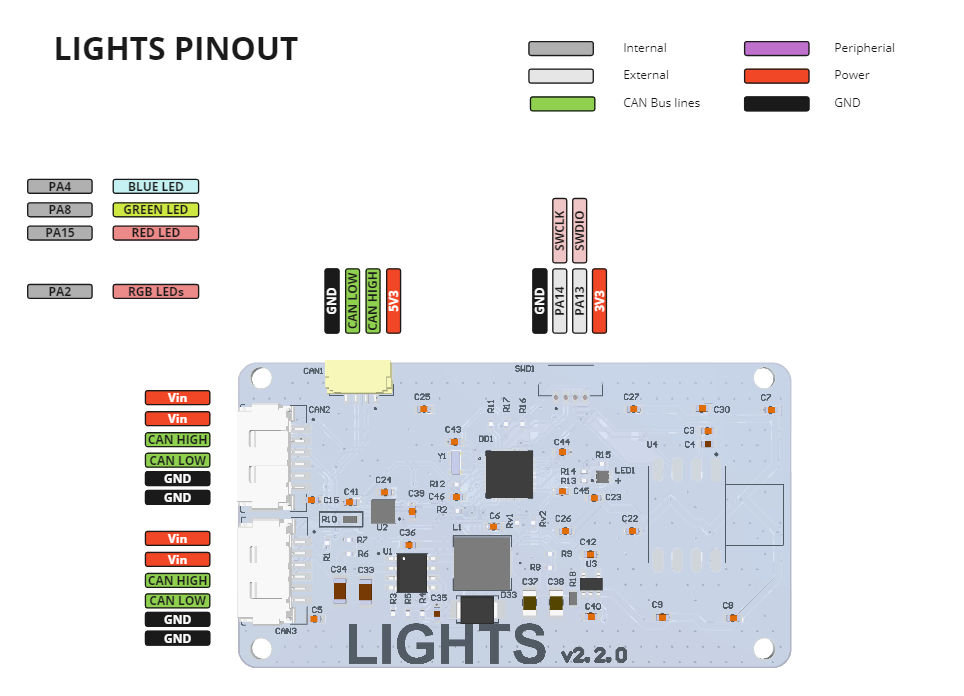
The pinout configuration is based on the STM32CubeMX generated project: Libs/stm32-cube-project with the following configuration:

If you need to use custom pinout configuration, it is recommended to use either STM32CubeMX or STM32CubeIDE to modify .ioc file and regenerate your custom project.
You are expected to use the following software:
- (optional) STM32CubeMX or STM32CubeIDE,
- Yukon GUI and Yakut CLI for Cyphal,
- gui_tool for DroneCAN.
Hardware requirements:
- UAV Lights node
- STM32 programmer and CAN-sniffer (for example RL sniffer and programmer)
The project is based on the CMake build system, but it is suggested to interract with Makefile. This is just a wrapper under CMake, useful for its target autocompletion.
Step 1. Clone the repository with submodules
git clone https://github.com/RaccoonlabDev/uav_lights_node --recursive
cd uav_lights_node
git submodule update --init --recursive
Step 2. Connect Sniffer and Programmer to UAV Lights node.
An example of connection scheme suitable for bench test for UAV Lights node and RL Programmer-Sniffer is shown below:
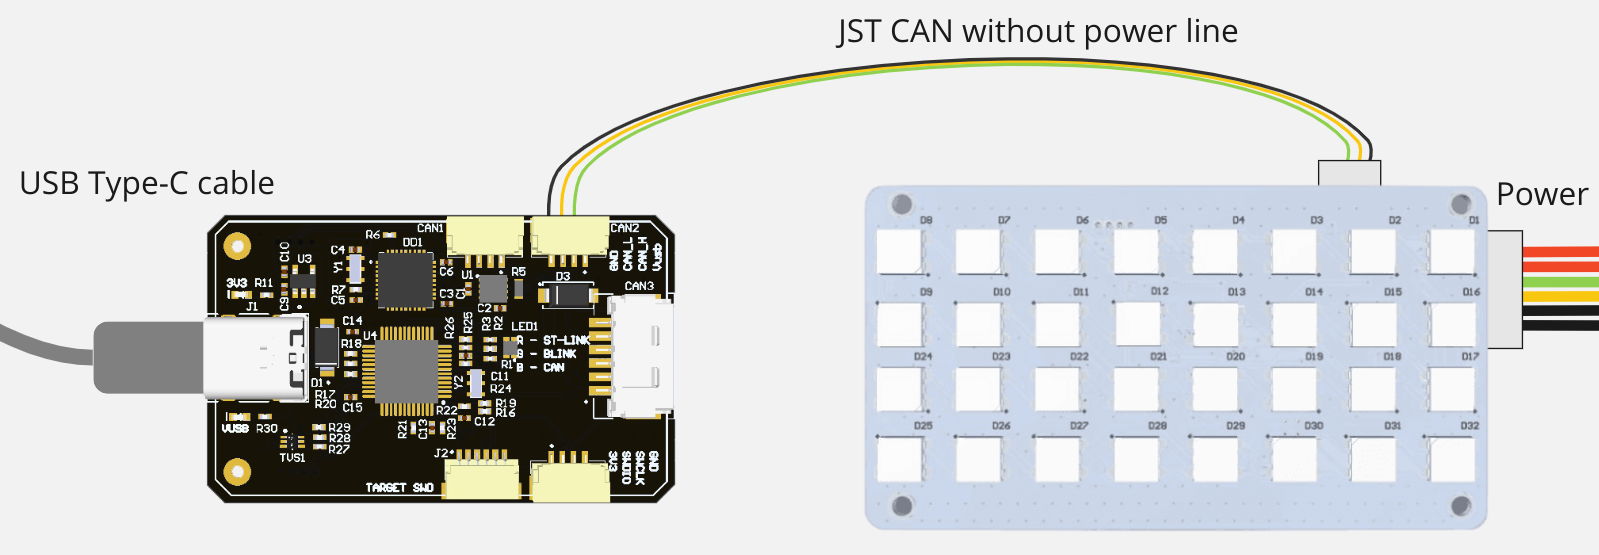
You can also use other sniffer and programmers. For details refer to: Programmer usage and Sniffer usage pages.
Step 3. Build the project and upload the firmware
make generate_dsdl  # you need to call it only before the first build
make cyphal
make upload         # it works only with RaccoonLab sniffer-programmer yet
As a short form, you can build and upload the firmware with a single command:
make cyphal uploadA few details about how the build process works:
make generate_dsdlcalls the script to generate C++ headers for Cyphal data types serialization using nunavut. The output goes into build/compile_output and build/nunavut_out folders. It is expected that you doesn't often change DSDL, so you typically need to call it only once.make cyphalbefore the actual build process generates a few files as well. Specifically, it generates:- build/src/git_software_version.h that has info about the software version based on latest git tag,
- build/src/git_hash.h with info about the current commit,
- C++ source and header files with parameters array and enums based on all associated yaml files with registers (you can find generated files in the same folder: build/src),
- Src/cyphal_application/README.md with info about the supported interface and not port-related registers.
Step 4. Setup the environment and run Yukon
Try the command below or use the official yukon/yakut instructions.
source scripts/init.sh
~/Download/Yukon
Please, refer to the UAV Lights docs. It has a detailed steps about how to perform bench testing of the node.
Q&A
If you are strugguling with the software building, please refer to the build workflow .github/workflows/build.yml for a hint. If it doesn't help, you can open an issue.
The peripherals are initialised in Libs/stm32-cube-project/Core/Src/main.c, which are automatically generated based on the configuratation file project.ioc file. If you want to use a different peripheral configuration, you should update can_pwm_v2.ioc with STM32CubeIDE or STM32CubeMX.
The main application is started in Src/cyphal_application/application.cpp. By default it just blinks the RGB LED, subscribes to the setpoint topic to control PWM1 and publishes a feedback with the latest applied setpoint. Note, that the application is as simple as possible: it controls only a single PWM and doesn't have safety features like TTL, but you are free to extend it as you want.
You may consider Src/cyphal_application/setpoint and Src/cyphal_application/feedback as examples of Cyphal-subscriber and Cyphal-publisher. If you create subjects by inhereting from CyphalPublisher and CyphalSubscriber, it will automatically add all topics to the port.List array, so the node is able to advertise its capabilities. This approach doesn't automatically create registers, so you need to add them in yaml file as shown in the examples.
When you add your custom module, don't forget to add source file and path to the file with registers to Src/cyphal_application/CMakeLists.txt.
You can also easily create custom Integer and String registers. An example is shown in Src/cyphal_application/params.yaml.
The project has a few dependencies which are attached to the repository as submodules. They are:
- Libs/stm32-cube-project is a project generated with the STM32CubeMX. It is based on .ioc file corresponded to the default firmware of the UAV Lights node. You may only need to change it if you want to use an a different peripheral configuration.
- Libs/Cyphal is a general-purpose application based on the Cyphal libcanard, o1heap and other libraries with minimal required features to start and some features related to UDRAL/DS015.
- Src/libparams is a simple library with ROM driver implementation that allows to store configuration parameters in persistent memory.