-
Notifications
You must be signed in to change notification settings - Fork 11
SymbolPage
First we'll make a new notebook and set its stylesheet to BTools › DocGen .

We can then go to the Template › Symbol Page in the docked menu and get a sample template page to build off of.
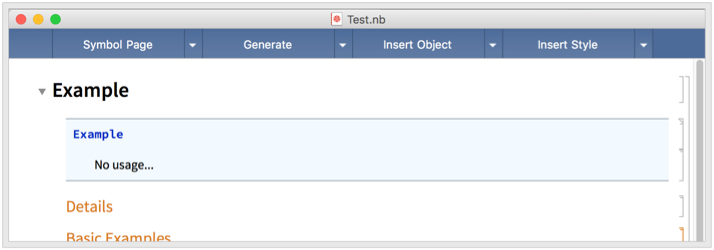
Then we can edit this in pieces
We can simply edit these cells however we like. The usage cell is split into a call signature cell (top) and a usage text (bottom):

We can see how we're doing here by selecting the cell-brack on this entire Example section and going up to Generate › Ref Page in the top-menu. After we select this, we can simply click the button on the left to get a regenerated page.
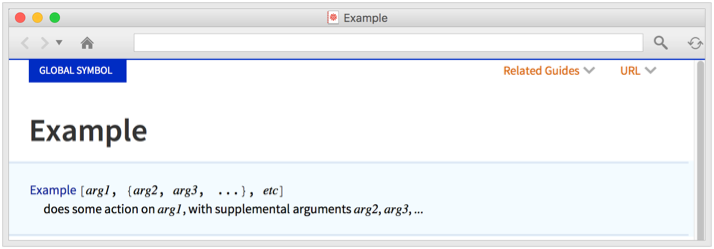
We can see how this formats nicely and the Example gets a ref-link attached to it. If we had another function in there it would get that too. Or if we put it in the text in an inline cell (made with Command-9) that would also get a ref-link. Here's an example of that:

That link is fully functional and will open up the ExampleData ref page when clicked.
We can add more usage templates by either copying and pasting or going to Insert Style › UsageInput and Insert Style › UsageText .
Alternately, the default cell style after a "DocSection" style cell is "UsageInput" and pressing "Enter" in a "UsageInput" cell makes a new "UsageText" cell. Many parts of the stylesheet work like this to try to streamline the documentation writing process.
There is nothing preventing one from putting usages for multiple functions in a single page for compactness. e.g.:

Note that I had to give a definition to Example2 (which I just did with a DownValue ) before it would get the ref-link.
The "Details" in the final page are anything with the right styles. Generally these will come after the "DetailsSection" cell for streamlined usage. The supported styles are:
-
"DetailsItem" -
"DetailsRow" -
"DetailsColumn"
These will come naturally if you start typing beneath a "DetailsSection" cell (which is provided in the template).
The "DetailsItem" cell is the default. Pressing "*" in an space under a "DetailsSection" cell will make a "DetailsRow" cell. Pressing "Enter" in a "DetailsRow" cell makes a "DetailsColumn" and pressing "Enter" in a "DetailsColumn" makes a new "DetailsColumn" . Pressing "Backspace" in any of these will go back up the chain.
The "DetailsRow" and "DetailsColumn" cells get turned into tables in the "Details" section of the page. Here's an example:
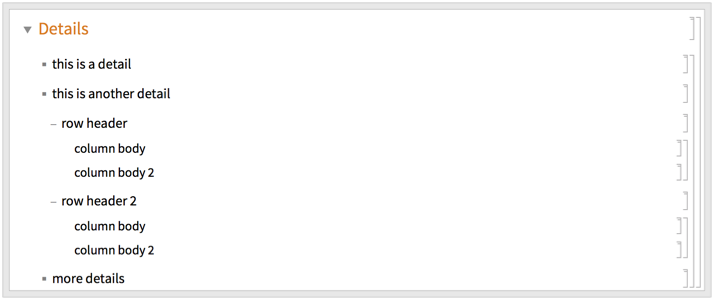
This turns into these:


Up to 2 columns are supported by the documentation stylesheet.
As with the usage text, any functions supplied in an inline cell will have ref-links made automatically
Custom examples are easy to add, but with a few mild tricks to them. Examples start after an "ExampleSection" cell. Generally the first cell is the Basic Examples . They more or less get added as they appear, but only those with the "ExampleText" , "ExamplesInput" , or "ExamplesOutput" styles.
Starting with an "ExampleSection" cell, such as the one that's seeded as a default, we can simply start typing and an "ExampleText" cell will be made. Pressing "Enter" in this cell will make a new "ExamplesInput" cell and simply running code in that will make a corresponding "ExamplesOutput" cell.
Here's an example of that:

The In-Out labels can be changed with the Insert Object › Input Label and Insert Object › Output Label menu items. When adding an output label the counter for that, $DocGenLine gets incremented. Here the labels have been reassigned:

Labels can be set at will by changing $DocGenLine .
Nested examples can be done with "ExampleSubsection" cells. Here's that in action:


Delimiters may be added between examples via Insert Object › Example Delimiter .
Pages can have "SeeAlso" links, "RelatedGuide" links, "RelatedTutorial" links, and "RelatedLinks" . These sections each have their own dedicated section cell and item cell.
For the "SeeAlso" functions we need only make a "SeeAlsoSection" and every new cell made will be a "SeeAlso" item. Just type the function name there.
For the others we just provide the link name, then a separator bar, and finally the link path. For guides and tutorials this will be a path that is used when looking things up.
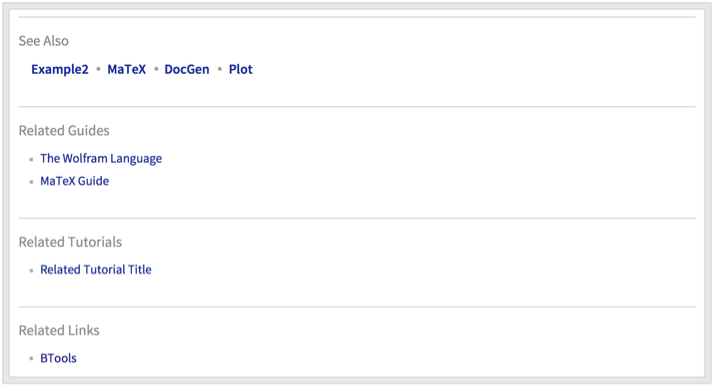
Here is an example of all this in action:
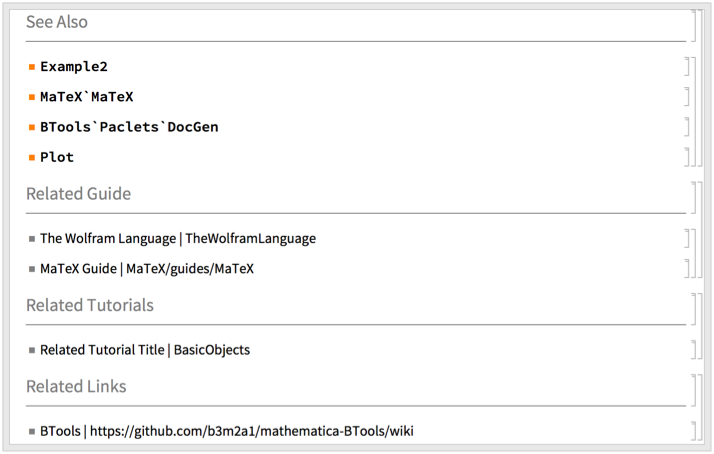
And here's the output:
The footer at the bottom cannot be directly configured in the template, but it can be accessed via the $DocGenSettings . Setting $DocGenSettings["Footer"] will cause that footer to be used. The default of Automatic simply looks like this:

With the page customized, one can use DocGen to save it wherever one likes. Multiple ref pages can be provided in a single notebook and will be split by "DocSection" . If nothing is selected, DocGen (or the buttons in the docked menu) will generate all of the pages at once.