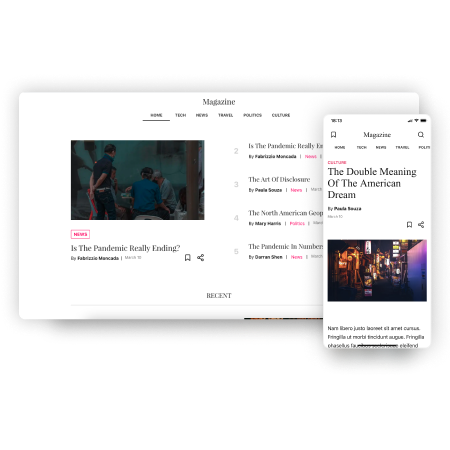
Live demo: https://magazine-starter.vercel.app
This starter allows you to clone and deploy a fully customizable Digital Magazine in just a few clicks.
- Great performance and Accessibility
- SEO and Social Media friendly (Open Graph and JSON-LD)
- Responsive
- UI Components
- Dark and light theme
- Offline support
- Save articles to read offline
- PWA Optimized (installable)
- Preview unpublished content.
- Search module and hooks.
- Static Site Generated with Next.js
- Dynamically generated sitemap
- Content creation and managment from Strapi CMS (No code necessary).
- Google Analytics
- Framework: Next.js
- CMS: Strapi
- Other features
- Service Worker for offline support.
- IndexedDB for save articles.
This project integrates out-of-the-box with Magazine Strapi CMS.
Create your own copy of this project by clicking the "Use this template" button and filling the form.
First, you'll need to have the Magazine Strapi CMS running at http://localhost:1337. You can follow the instructions on that repo to set it up and get it running.
Then, create a folder and git clone from your copy of this repository.
Install the dependencies and start the dev server.
  yarn install
  yarn dev
The dev server will run on http://localhost:3000. If it doesn't work make shure that:
- You've added sample data to Strapi (Contributors, categories and articles are necessary)
- You've set the Roles & Permissions to
findon Contributors, Categories, articles and pages. (More info on Magazine Strapi CMS running locally instructions.) - You've set the
statusof each article and page to bepublished
To try it, create another post but before you set the status to published:
- Set each variable from the
.env.exampleinto a new file called.env.local:PREVIEW_SECRET: can be any string (avoiding spaces). You're are gonna use it later on your CMS too.API_URL: should be set ashttp://localhost:1337(no trailing slash).
- On your Strapi admin panel go to "Settings" > "Preview Content"
- Fill the input with your info, the URL should look like this.
http://localhost:1337/api/:contentType-preview?secret=<your-secret>&id=:id - Last, go to any article or page and click the "Preview" button
The projects is pre-configured to track the page views with google analytics. Read more on Page views | Google Analytics
You only need to set the GA_MEASUREMENT_ID env variable with your measurement ID.
- Sing in to your Analytics Account
- Go to Admin and select the property you want to track from the property column.
- Under Property click on Streams
- Select or create a new stream
- Your measurement id will be displayed at the top of the page.
If you prefer not to use Google Analytics, you can easily remove it.
The tracker consist on two main sections, the initial loading of the scripts on _document.tsx and the onRouterChange handler on `_app.tsx.
In _document.tsx, remove the two scripts inside the HEAD component. Make sure not to remove the entire component. The code after removing them should look like this.
class MyDocument extends Document {
  // ...
  render() {
    return (
      <Html lang="en">
        <Head />
        <body>
          <Main />
          <NextScript />
        </body>
      </Html>
    )
  }
}In _app.tsx you can comment or remove all the code before the return. Remember to remove the useEffect and useRouter imports as well.
The component after removing it should look like this.
function MyApp({ Component, pageProps }: AppProps) {
  return (
    <UIProvider>
      <ListProvider>
        <Head />
        <Component {...pageProps} />
      </ListProvider>
    </UIProvider>
  )
}
NOTE
If you're trying to deploy to vercel the GA_MEASUREMENT_ID variable will still be needed, but since you have removed all the code that will use it, you can simply fill the field with dummy text.
You'll need to deploy your Strapi CMS first and have your api URL.
Click this button below to clone and deploy this project on vercel.
Or you can take a look at the docs to deploy Next.js.
Don't forget to update your environment variables:
PREVIEW_SECRET: Can be any string (avoiding spaces). It must be same as on your CMS.API_URL: URL of your strapi backend. (No trailing slash).
lib/constants.ts contains a list of variables you should customize
public/static/favicon contains all the icons and favicons. I generated the icons on https://realfavicongenerator.net. Generate your own and replace the old ones.
You need to generate the dark mode icons too and name them as dark-16x16.png and dark-32x32.png
The sitemap will be generated dynamically using the lib/constants info but you need to also configure the site URL on public/robots.txt
Due heroku sleep problem the search hook is really slow. If you're gonna deploy the strapi cms to any platform other than heroku you can uncomment the seach hook and it should work fine. Otherwise, to prevent a slow search, the page will be statically genarated with ALL the published articles and run a local search instead.
