-
Notifications
You must be signed in to change notification settings - Fork 514
Physically based rendering
| Getting Started |
|---|
In this lesson we learn the basics of Physically-Based Rendering (PBR) as supported by the DirectX Tool Kit.
A full discussion of Physically-Based Rendering (PBR) is beyond the scope of this lesson, so see the references at the end of the page. Instead I'll provide a short motivation of why PBR is useful. The first thing to acknowledge is that traditional computer graphics lighting algorithms are inspired hacks. They work well at providing many useful lighting clues, and have been inexpensive enough to compute on consumer level hardware for decades. These algorithms, however, all have drawbacks. For example, basically anything you render using Phong shading ends up looking like it's made of smooth plastic. Another challenge is that textures, models, and other assets that look great in some lighting conditions and lighting algorithms don't work at all when moved to a new engine or solution which makes it harder to reuse expensive artwork.
The proponents of PBR rendering have gone back to the foundational rendering equation and built new algorithms that in some way better mimic laws of physics (such as the law of conservation of energy). While there are many ways to formulate a PBR materials & lighting system, the industry has converged on a few workflows. DirectX Tool Kit implements the "Disney-style Roughness/Metalness" workflow as it's well-understood, has reasonably good tooling support, and is the one that was chosen for Khronos' glTF2 asset format and many modern game engines.
PBR rendering essentially requires HDR rendering as there's no physical process that clamps light into a 0 to 1 range. As such, be sure you have worked through the Using HDR rendering tutorial before this one.
Another important aspect of PBR is that real world lighting is not well modeled by trivial point, directional, or spot light sources. Area lighting or other global illumination systems are expensive and/or complex to implement in real-time systems, so for the purposes of DirectX Tool Kit's PBR implementation we make use of image-based lighting. Specifically the ambient lighting environment consists of two specially formulated cubemaps, in addition to direct lighting from up to 3 directional lights.
First create a new project using the instructions from the previous lessons: Using DeviceResources and Adding the DirectX Tool Kit which we will use for this lesson.
Save the files RenderTexture.h, RenderTexture.cpp, SunSubMixer_diffuseIBL.dds, and SunSubMixer_specularIBL.dds to your new project's folder. Using to the top menu and select Project / Add Existing Item.... Select "RenderTexture.h" and hit "OK". Repeat for the other files.
Add to the Game.h file to the #include section:
#include "RenderTexture.h"In the Game.h file, add the following variable to the bottom of the Game class's private declarations:
DirectX::SimpleMath::Matrix m_world;
DirectX::SimpleMath::Matrix m_view;
DirectX::SimpleMath::Matrix m_proj;

std::unique_ptr<DirectX::CommonStates> m_states;
std::unique_ptr<DirectX::GeometricPrimitive> m_shape;
std::unique_ptr<DirectX::PBREffect> m_effect;

Microsoft::WRL::ComPtr<ID3D11InputLayout> m_inputLayout;

Microsoft::WRL::ComPtr<ID3D11ShaderResourceView> m_radiance;
Microsoft::WRL::ComPtr<ID3D11ShaderResourceView> m_irradiance;

std::unique_ptr<DX::RenderTexture> m_hdrScene;
std::unique_ptr<DirectX::ToneMapPostProcess> m_toneMap;
In the Game.cpp file, modify the Game class constructor:
m_deviceResources = std::make_unique<DX::DeviceResources>(
    DXGI_FORMAT_R10G10B10A2_UNORM,
    DXGI_FORMAT_D32_FLOAT, 2, D3D_FEATURE_LEVEL_10_0);
m_deviceResources->RegisterDeviceNotify(this);

m_hdrScene = std::make_unique<DX::RenderTexture>(DXGI_FORMAT_R16G16B16A16_FLOAT);
This tutorial requires Direct3D Hardware Feature Level 10.0 or better since that's required to used PBREffect.
In Game.cpp, add to the TODO of CreateDeviceDependentResources:
m_states = std::make_unique<CommonStates>(device);
m_effect = std::make_unique<PBREffect>(device);
m_effect->EnableDefaultLighting();

auto context = m_deviceResources->GetD3DDeviceContext();
m_shape = GeometricPrimitive::CreateSphere(context);
m_shape->CreateInputLayout(m_effect.get(),
    m_inputLayout.ReleaseAndGetAddressOf());

// Image-based lighting cubemaps.
DX::ThrowIfFailed(
    CreateDDSTextureFromFile(device, L"SunSubMixer_diffuseIBL.dds",
        nullptr,
        m_radiance.ReleaseAndGetAddressOf()));

D3D11_SHADER_RESOURCE_VIEW_DESC desc = {};
m_radiance->GetDesc(&desc);

DX::ThrowIfFailed(
    CreateDDSTextureFromFile(device, L"SunSubMixer_specularIBL.dds",
        nullptr,
        m_irradiance.ReleaseAndGetAddressOf()));

m_effect->SetIBLTextures(m_radiance.Get(),
    static_cast<int>(desc.TextureCube.MipLevels),
    m_irradiance.Get());

m_hdrScene->SetDevice(device);

m_toneMap = std::make_unique<ToneMapPostProcess>(device);
m_toneMap->SetOperator(ToneMapPostProcess::Reinhard);
m_toneMap->SetTransferFunction(ToneMapPostProcess::SRGB);

m_world = Matrix::Identity;
In Game.cpp, add to the TODO of CreateWindowSizeDependentResources:
auto size = m_deviceResources->GetOutputSize();
m_view = Matrix::CreateLookAt(Vector3(2.f, 2.f, 2.f),
    Vector3::Zero, Vector3::UnitY);
m_proj = Matrix::CreatePerspectiveFieldOfView(XM_PI / 4.f,
    float(size.right) / float(size.bottom), 0.1f, 10.f);

m_effect->SetView(m_view);
m_effect->SetProjection(m_proj);

m_hdrScene->SetWindow(size);
m_toneMap->SetHDRSourceTexture(m_hdrScene->GetShaderResourceView());
In Game.cpp, add to the TODO of OnDeviceLost:
m_states.reset();
m_shape.reset();
m_effect.reset();
m_inputLayout.Reset();
m_radiance.Reset();
m_irradiance.Reset();
m_hdrScene->ReleaseDevice();
m_toneMap.reset();
In Game.cpp, modify Clear as follows:
// Clear the views.
auto context = m_deviceResources->GetD3DDeviceContext();

auto renderTarget = m_hdrScene->GetRenderTargetView();
auto depthStencil = m_deviceResources->GetDepthStencilView();

XMVECTORF32 color;
color.v = XMColorSRGBToRGB(Colors::CornflowerBlue);
context->ClearRenderTargetView(renderTarget, color);
...
In Game.cpp, modify Render as follows:
// Don't try to render anything before the first Update.
if (m_timer.GetFrameCount() == 0)
{
    return;
}

Clear();

auto context = m_deviceResources->GetD3DDeviceContext();

// TODO: Add your rendering code here.
m_effect->SetWorld(m_world);
m_shape->Draw(m_effect.get(), m_inputLayout.Get(), false, false, [=] {
    ID3D11SamplerState* samplers[] =
    {
        m_states->AnisotropicClamp(),
        m_states->LinearWrap(),
    };
    context->PSSetSamplers(0, 2, samplers);
    });

// Tonemap
auto renderTarget = m_deviceResources->GetRenderTargetView();
context->OMSetRenderTargets(1, &renderTarget, nullptr);

m_toneMap->Process(context);

ID3D11ShaderResourceView* nullsrv[] = { nullptr };
context->PSSetShaderResources(0, 1, nullsrv);

// Show the new frame.
m_deviceResources->Present();
In Game.cpp, add to the TODO of Update:
auto time = static_cast<float>(timer.GetTotalSeconds());

m_world = Matrix::CreateRotationY(cosf(time) * 2.f);
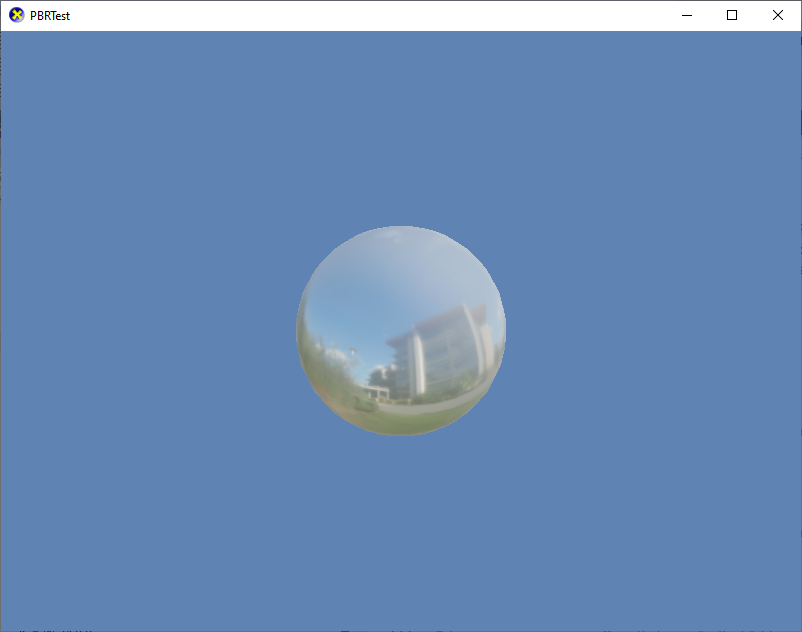
Build and run to see the sphere rendered with a reflective metal appearance:
While PBREffect does have a basic 'constant' shader, the real impact of PBR materials requires the use of texture maps. Save the files Sphere2Mat_baseColor.png, Sphere2Mat_normal.png, Sphere2Mat_occlusionRoughnessMetallic.png, and Sphere2Mat_emissive.png to your project directory and add them to your project.
In the Game.h file, add the following variable to the bottom of the Game class's private declarations:
Microsoft::WRL::ComPtr<ID3D11ShaderResourceView> m_albedoMap;
Microsoft::WRL::ComPtr<ID3D11ShaderResourceView> m_normalMap;
Microsoft::WRL::ComPtr<ID3D11ShaderResourceView> m_rmaMap;
Microsoft::WRL::ComPtr<ID3D11ShaderResourceView> m_emissiveMap;
In Game.cpp, add to the TODO of CreateDeviceDependentResources:
DX::ThrowIfFailed(
    CreateWICTextureFromFile(device, L"Sphere2Mat_baseColor.png",
        nullptr,
        m_albedoMap.ReleaseAndGetAddressOf()));

DX::ThrowIfFailed(
    CreateWICTextureFromFile(device, L"Sphere2Mat_normal.png",
        nullptr,
        m_normalMap.ReleaseAndGetAddressOf()));

DX::ThrowIfFailed(
    CreateWICTextureFromFile(device, L"Sphere2Mat_occlusionRoughnessMetallic.png",
        nullptr,
        m_rmaMap.ReleaseAndGetAddressOf()));

DX::ThrowIfFailed(
    CreateWICTextureFromFile(device, L"Sphere2Mat_emissive.png",
        nullptr,
        m_emissiveMap.ReleaseAndGetAddressOf()));

m_effect->SetSurfaceTextures(m_albedoMap.Get(), m_normalMap.Get(), m_rmaMap.Get());
m_effect->SetEmissiveTexture(m_emissiveMap.Get());
In Game.cpp, add to the TODO of OnDeviceLost:
m_albedoMap.Reset();
m_normalMap.Reset();
m_rmaMap.Reset();
m_emissiveMap.Reset();
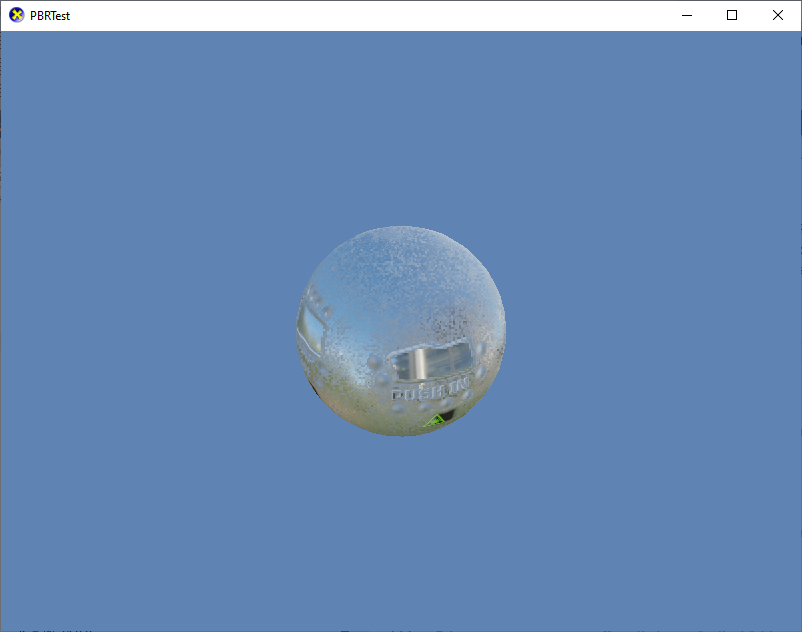
Build and run to see the sphere rendered a more complex material.
The use of the emissive texture is optional. Any textured use of PBREffect requires albedo, normal, and roughness/metalness/ambient-occlusion maps.
PBR typically refers to the 'base colors' as albedo rather than the traditional-lighting texture name 'diffuse'.
DirectX Tool Kit supports "SDKMESH version 2", which is the venerable DirectX SDK sample mesh file format updated with PBR-style materials information. Follow the instructions from Rendering a model with these differences:
-
The meshconvert and DirectX SDK Samples Content Exporter utilities both support a
-sdkmesh2command-line switch to export PBR materials information. -
You need an HDR render setup per Using HDR rendering.
-
Make use of PBREffectFactory instead of
EffectFactorywhich will createPBREffectorSkinnedPBREffectinstances. -
Be sure to set the IBL textures before rendering:
model->UpdateEffects([&](IEffect* effect)
{
    auto pbr = dynamic_cast<PBREffect*>(effect);
    if (pbr)
    {
        pbr->SetIBLTextures(m_radiance.Get(),
            static_cast<int>(desc.TextureCube.MipLevels),
            m_irradiance.Get());
        }
});- PBREffect supports GPU Instancing.
Next lessons: Game controller input, Using the SimpleMath library, Adding the DirectX Tool Kit for Audio
DirectX Tool Kit docs PBREffect
Physically-Based Rendering wikipedia
Basic Theory of Physically-Based Rendering
Burley et al. "Physically-Based Shading at Disney", SIGGRAPH 2012 Course: Practical Physically Based Shading in Film and Game Production. Slides
All content and source code for this package are subject to the terms of the MIT License.
This project has adopted the Microsoft Open Source Code of Conduct. For more information see the Code of Conduct FAQ or contact opencode@microsoft.com with any additional questions or comments.
- Universal Windows Platform apps
- Windows desktop apps
- Windows 11
- Windows 10
- Windows 8.1
- Xbox One
- x86
- x64
- ARM64
- Visual Studio 2022
- Visual Studio 2019 (16.11)
- clang/LLVM v12 - v18
- MinGW 12.2, 13.2
- CMake 3.20

