-
Notifications
You must be signed in to change notification settings - Fork 0
MapGenEditor
Basic use of the editor involves importing an image and then overlaying information on it.
Click the Import Image button to bring in a map image.

The Save and Load buttons do exactly what you think they do. You can save either a text-based (json) or binary file. Only json saves can be loaded back into the editor later.
Additionally, the editor's state will be autosaved whenever you close the program.

You can pan around the map by clicking and dragging the mouse wheel, and you can zoom in and out by scrolling. Hitting Enter resets the view.
Click on the map to add locations. It's usually a good idea to give them a name.
By default locations will be locked so that you don't accidentally click and drag them around. If you do want to adjust the position of a location, you can unlock it with F2 or by unchecking the box. The Delete key will delete a location.

The "more" button will bring up a little dialog box where you can enter some metadata, such as a location description or a category. This is for your use and not something the editor has any strong opinions about.

Some editor settings. I'll describe the ones related to exporting at the bottom. The others are just for visuals. You can also find some of the credits here.
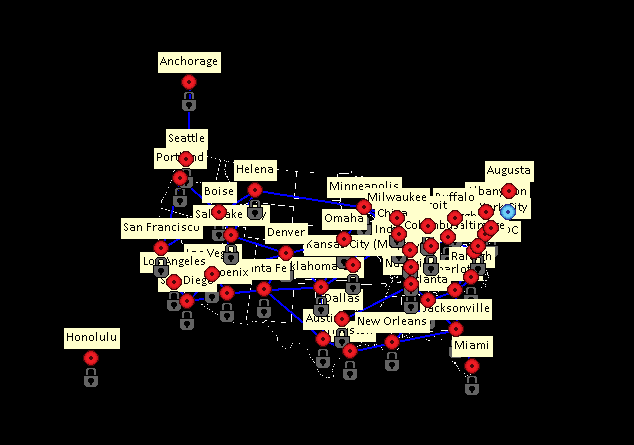
Enabling location labels and zooming all the way out can be somewhat unintentionally funny.

Connecting locations in interesting ways is kind of the main point of the tool.
The Node Placement editing mode is for placing locations. You can connect two locations by selecting one and control-clicking on another. You can disconnect two connected locations by doing the same.
Navmesh editing mode is for dealing with navmeshes. Navmeshes are handy things for pathfinding across a triangular surface. TheSnidr has a very helpful GameMaker extension for this.

You can't place locations themselves in Navmesh mode, but you can click on locations to join them into a triangle. In order to connect three locations as a triangle, each must have a connection to the other two. This should not come as a surprise. Once formed, you can click on a triangle to select it. The Delete key will delete a triangle. The Escape key will deselect the currently selected triangle, or cancel one that's in progress. Control-clicking in the middle of an existing triangle will subdivide it by creating a new location.
Left-click on a the map to place Juju on it. Left click again to have him navigate, following the navmesh. There must be a continuous path along a triangle in order for a path to be found (ie there has to exist a route from the source to the destination where each triangle shares at least one vertex with the next triangle). The time it takes to build the navmesh and the time it takes to plot the route will be shown on the bottom of the map.
Aquila mode is similar to the Navmesh navigation feature, in that it will let you plot a route from one location to another. There isn't anything you can edit here, but you can click on nodes to have the freedom birb find the path. My A* pathfinding extension for GameMaker can be found here.
Unlike with navmeshes, there are no constraints on the path other than that one has to exist. Connections will have costs based on their physical lengths, and the algorithm will seek out the shortest path from beginning to end. In the future I might add the ability for users to set their own edge costs.

You can save either a text-based (json) or binary file. Only json saves can be loaded back into the editor later. There are a few different export settings which you can use to change what information is actually saved.
See MapGenAPI for what you can use these files for.
- Export relative coordinates: by default locations on the map will have their coordinates saved exactly. Checking this will instead cause coordinates to be saved relative to the size of the map, where (0, 0) is the upper left and (1, 1) is the lower right. Locations which are beyond the map image will sill fall outside that range. This can be useful if the size of the map image in the editor is not the size of the corresponding map in the game, or if the game might feature maps of multiple sizes.
- Export names: disabling this will prevent location names from being written to the file. Usually you want that information, but if the names each location aren't important (eg you only care about the pathfinding data), this can be used to make the output file size slightly smaller and speed up loading it into the game.
- Export summaries: disabling this will prevent location summaries from being written to the file.
- Export categories: disabling this will prevent location categories from being written to the file.
- Export locations: disabling this will prevent all location information from being written to the file. If you only need the navmesh data, disabling this entirely can shrink the file size and speed up loading it into the game by quite a bit. This only applies to exporting a binary file.
- Export navmesh: disabling this will prevent all navmesh information from being written to the file.