-
Notifications
You must be signed in to change notification settings - Fork 0
Module 6 – My First DApp with React (50 minutes)
The idea is to create a simple DApp for parents.
They give some money to their children and wish that it can only be spent in some known and allowed places.
Take a look at the smart contract:
pragma solidity ^0.4.4;

contract ChildrenWallet {
  WalletAllowed[] public allowed;
  address parents;

  struct WalletAllowed {
    bytes32 name;
    address account;
  }

  function ChildrenWallet() {
    parents = msg.sender;
  }

  function addAllowed(bytes32 _name, address _account) returns (bool _success) {

    WalletAllowed memory newAllowed;
    newAllowed.name = _name;
    newAllowed.account = _account;

    allowed.push(newAllowed);
    return true;
  }

  function getAllowedNames() constant returns (bytes32[]) {
      uint length = allowed.length;
      bytes32[] memory names = new bytes32[](length);

      for (uint i = 0; i < length; i++) {
          names[i] = allowed[i].name;
      }

      return names;
  }

  function getAllowedAddresses() constant returns (address[]) {
      uint length = allowed.length;
      address[] memory addresses = new address[](length);

      for (uint i = 0; i < length; i++) {
          addresses[i] = allowed[i].account;
      }

      return addresses;
  }

  function buySomething(address _to) constant returns (string) {
      uint length = allowed.length;
      for (uint i = 0; i < length; i++) {
          if (_to == allowed[i].account) {
            return "You can buy here";
          }
      }
      return "You can not buy here";
  }
}
It has some interesting parts. Let's analyze them:
- The contract has 2 fields: an array of
WalletAllowed, to save the places where the children can use their money; and an address calledparents, to save the parents' address because later maybe we want to restrict some function for being used only for parents. - There's also one
structcalledWalletAllowed. It's like an object that represents an allowed place. - On the constructor function the parents' address is initialized (
msg.senderis the address which creates the contract).
The functions are:
- addAllowed: for the parents, to add an allowed place/wallet.
- getAllowedNames: to get all the allowed names.
- getAllowedAddresses: to get all the allowed addresses.
- buySomething: to know if it's possible to buy on a place, with a given address.
So, let's start:
- On a console run
testrpc - Create a new project with Truffle as we did before with
truffle init. - Open the project with any code editor (Visual Studio Code, Atom or the one you have).
- Create a new contract and call it ChildrenWallet (
truffle create contract ChildrenWallet). - Copy and paste the Solidity code that is on top inside the ChildrenWallet.sol file.
- Migrate (deploy) the contracts to the blockchain with
truffle migrate. - Let's add a wallet with the commands:
var childrenContract;
var anAccount = web3.eth.accounts[0];

ChildrenWallet.deployed().then(function(instance){ childrenContract = instance; })
childrenContract.addAllowed('Library', anAccount).then(console.log)
Now, let's check the wallet was added:
childrenContract.getAllowedNames.call().then(console.log)The result should be something similar to:
[ '0x4c69627261727900000000000000000000000000000000000000000000000000' ]and that is good, because the type of the field 'name' of WalletAllowed is not a string, it's a bytes32[].
So, if you want to see the string you should try with the command:
web3.toAscii('0x4c69627261727900000000000000000000000000000000000000000000000000')We have the smart contract. To integrate the smart contract with our app, we'll need 2 things:
-
The contract address (you can get it with the command
childrenContract.address) -
The ABI (you can get it from the
/build/contracts/ChildrenWallet.jsonfile)
The following section will teach you how you can get a frontend that will show the smart contract information on a web site.
You'll need Node JS, version >= 6.
- Open a console and run:
npm install -g create-react-appand:
create-react-app children-walletIt will create a directory called children-wallet inside the current folder.
2) Open this directory with any code editor
3) We need web3, that's a library to interact with the smart contracts. We will also add lodash, a library that will help iterating arrays. Open the package.json file and modify the dependencies:
...
 "dependencies": {
    "react": "^16.1.1",
    "react-dom": "^16.1.1",
    "react-scripts": "1.0.17",
    "lodash": "^4.17.4",
    "web3": "^1.0.0-beta.24"
  }
...- Now, type
npm installin the console, to install these dependencies. - We will write all our code in the
App.jsfile, that's the main file in the app. Add the imports for the libraries on the top of the file:
import Web3 from 'web3';
import _ from 'lodash';- Next to these lines, let's link the app to the smart contract we have deployed:
var client = new Web3(new Web3.providers.HttpProvider("http://localhost:8545"));
var contractAbi = ABI;
var contractAddress = 'ADDRESS';
var contract = new client.eth.Contract(contractAbi, contractAddress);
Replace ABI with your contract ABI, and ADDRESS with your contract address. Important! If you are not using testrpc, the port can be different (change it in http://localhost:8545)
- At this point, we have imported the libraries and we have a reference to the contract in the blockchain. Inside the App Component, copy and paste this code:
class App extends Component {
  constructor(props){
    super(props)
    this.state = {
      names: [],
      addresses: []
    }
  }
  componentWillMount(){
    contract.methods.getAllowedNames().call().then((promise) =>{
      console.log(promise)
      this.setState({
          names : promise
      });
    });

    contract.methods.getAllowedAddresses().call().then((promise) =>{
      console.log(promise)
      this.setState({
          addresses : promise
      });
    });
  }

  render() {
    var tableRows = [];
    _.each(this.state.names, (value, index) => {
      tableRows.push(<tr>
                        <td>{client.utils.toAscii(this.state.names[index]).replace(/\u0000/g, '')}</td>
                        <td>{this.state.addresses[index]}</td>
                       </tr>
                      )
    })
    return (
      <div className="App">
        <header className="App-header">
          <img src={logo} className="App-logo" alt="logo" />
          <h1 className="App-title">Welcome to Children Wallet DAPP</h1>
        </header>
        <div className="App-Content">
          <table>
            <thead>
              <tr>
                <th>Names</th>
                <th>Addresses</th>
              </tr>
            </thead>
            <tbody>
              {tableRows}
            </tbody>
          </table>
        </div>
      </div>
    );
  }
}
As you can see, there are calls to getAllowedAddresses and getAllowedNames, both are methods from the contract.
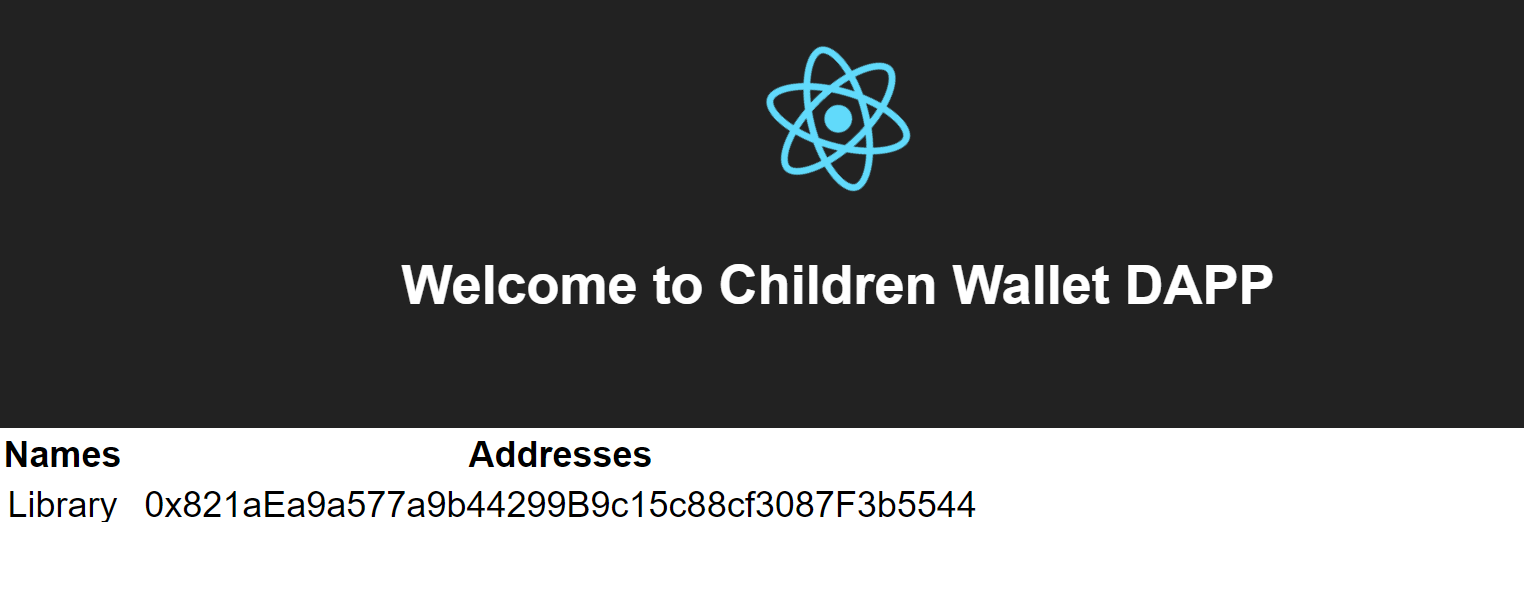
In the render section, there's a variable, called tableRows where we are creating rows for a table to see the allowed names and addresses.
You can run the code, typing npm start in the console.
The result is:

It's our first DApp! :) 🥇 We have read data from the smart contract.
Now is your turn.
Using the other methods (buySomething and addAllowed) you can interact with the smart contract.
It'll be interesting if you use a field on the web site, where you can type the parameters and a button to call the smart contract.
Good luck!