-
Notifications
You must be signed in to change notification settings - Fork 162
Getting Started꞉ Checkbox Item
Zach Kinstner edited this page Nov 7, 2016
·
3 revisions
On this page, you'll learn how to create a checkbox item and its renderer.
Please note that there are other item types available, such as selector and radio-button items. These instructions create a checkbox item, but different item types can be created by choosing a different option during the "Item Type" step.
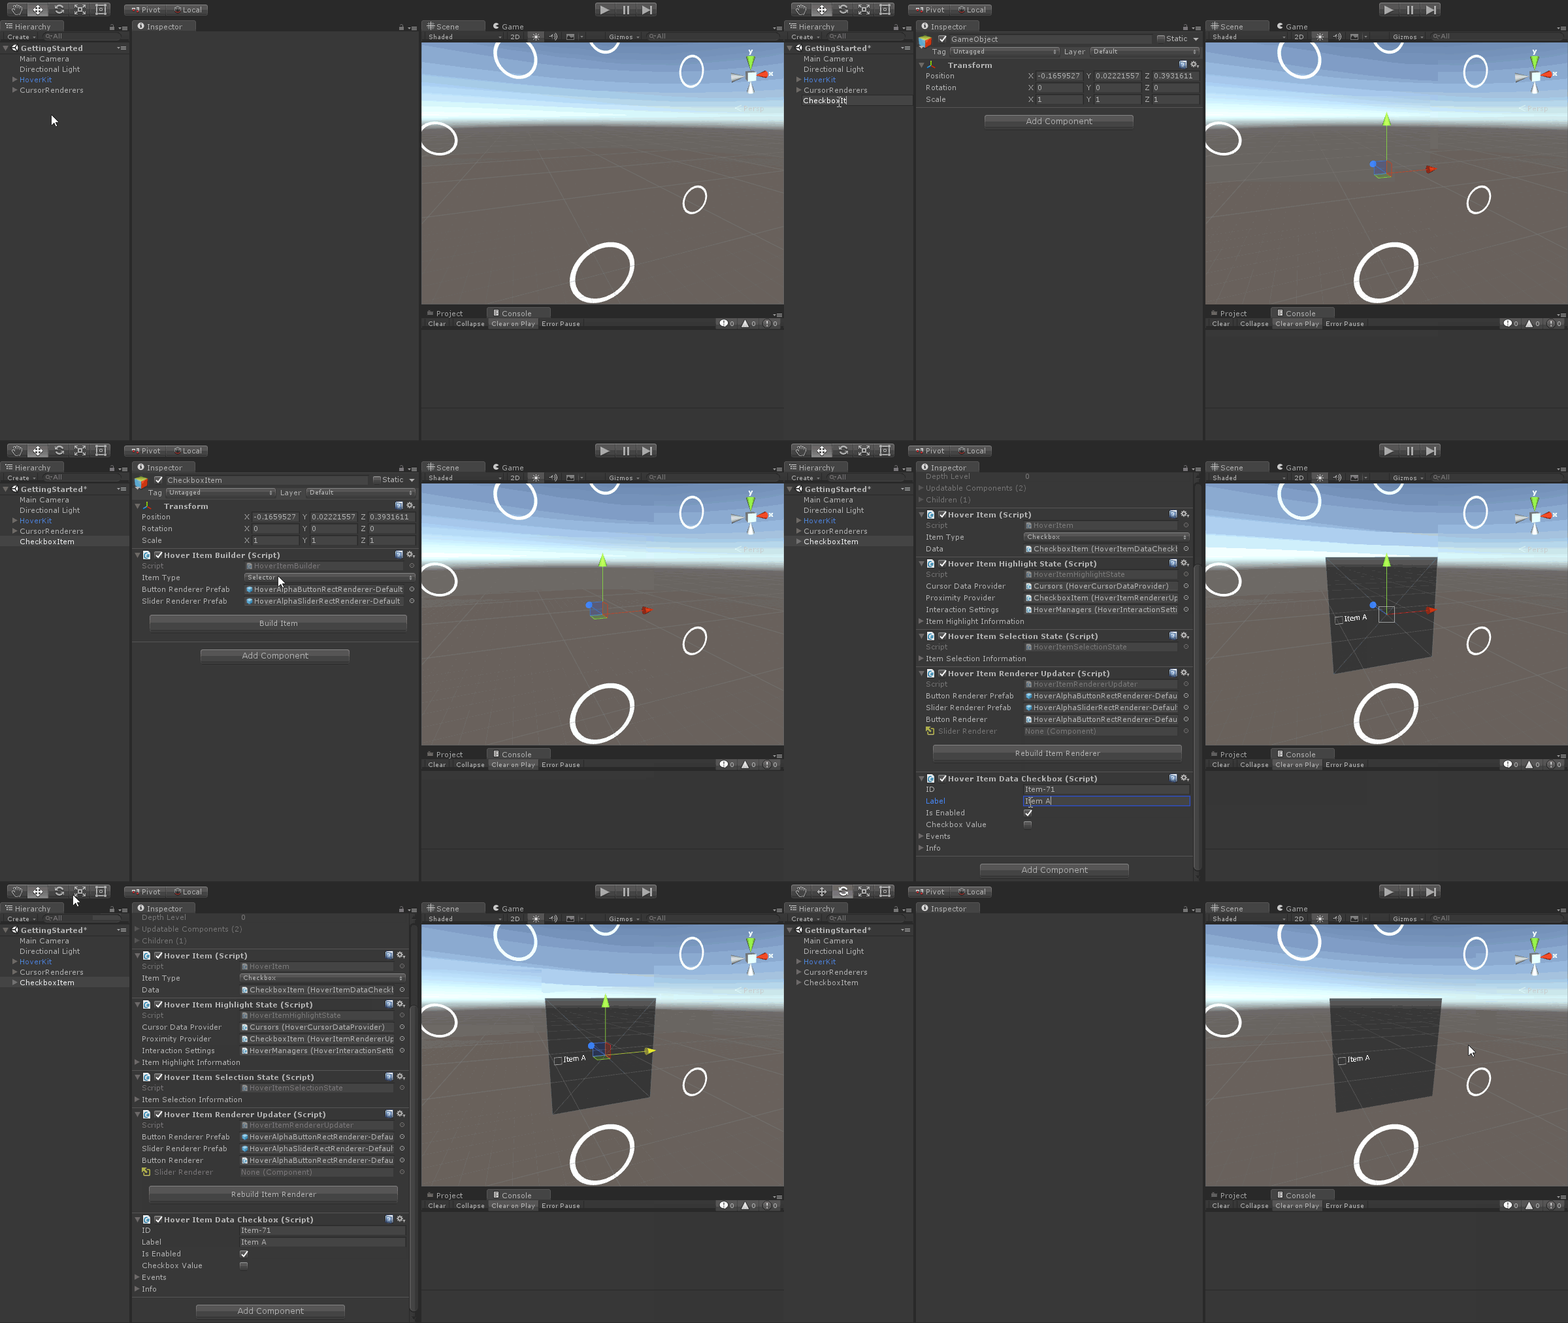
 📷 Building a new checkbox item
- Complete the Scene Setup steps.
- Create an empty GameObject named CheckboxItem.
- Add the
HoverItemBuildercomponent to CheckboxItem.- Change the "Item Type" property to "Checkbox". Note the other item types in this drop-down list.
- Click the "Build Item and Renderer" button.
- Find the
HoverItemDataCheckboxcomponent that on CheckboxItem.- Change the "Label" property to "Item A".
- Adjust the CheckboxItem transform to the desired position and rotation.
- Adjust the
HoverItemBuildercomponent's "Renderer Prefab" properties. The names of the renderer prefabs include "Rect" or "Arc", which describes the shape of the graphics. - Toggle the
HoverItemDataCheckboxcomponent's "Checkbox Value" property. - Change the
HoverItemcomponent's "Item Type" property. The item (and possibly its renderer) will automatically update to support the selected type.
- The Items page describes how to adjust the item's data, events, etc.
- The Renderers page describes how to adjust the item's appearance.
- See the GettingStarted-CheckboxAndSliderItems example scene.
General
Features
Modules
Other